As a website owner, accessibility should be one of your highest priorities. That’s because if a portion of your visitors can’t read your content, you’re likely missing out on an interested audience. By not making your site multilingual, your reach will be limited to visitors who are able to read your language.
Fortunately, WordPress makes it easy to add multilingual features to your website. To do this, you can install a multilingual plugin or use translation software to add material in other languages. This way, you can offer multilingual content to users all over the world.
In this post, we’ll explain what a multilingual website is and why you should consider creating one. Then, we’ll discuss how you can add multilingual features to your website. Let’s get started!
An Introduction to Multilingual WordPress Websites
Essentially, a multilingual website provides the same content in more than one language. This means, no matter how the original article is written, users can be redirected to their native language:
Rather than only using a single language, you can add multilingual features to your website. Whether you use a multilingual plugin, Google Translate, or manual translations, you can start sharing your content worldwide.
Multilingual Features in WordPress 6.0
WordPress 6.0 brought many updated features, including extended Full Site Editing and site-wide blocks. However, the core software doesn’t come with multilingual functionality. Although WordPress itself doesn’t yet support out-of-the-box bilingual or multilingual features, many plugins enable you to easily translate your posts and pages.
Fortunately, WordPress is consistently working on new features. Here is the development roadmap for WordPress’ multi-year Gutenberg Project:
- Easier Editing: Development of the Block Editor
- Customization: Full Site Editing, Block Patterns, Block Directory, and Block-based themes
- Collaboration: Multi-author collaboration
- Multi-lingual: Implementation of multilingual features
Currently, we are in phase two of the Gutenberg Project. Therefore, if you want to build a multilingual website with just core WordPress software, you’ll have to wait for a while, as there is no current timetable on when the project will reach phase four.
In the next few years, we should also see other Content Management Systems (CMS) become multilingual-ready. If you use a headless CMS, the future will likely bring support for multilingual content.
Benefits of Creating a Multilingual Website
No matter the type of content you produce, you can benefit from creating a multilingual website. Whether you run a business website or a small blog, translating your content can be an effective way to grow your audience.
By translating your website, you can significantly increase your organic traffic. Although English is the most common language on the internet, it only makes up 25.9% of online users. That means, if you don’t translate your English content into another language, you could fail to reach a larger, global audience.
Besides, creating a multilingual website can improve your Search Engine Optimization (SEO). If you’re trying to gain traction with English keywords, you may have noticed that these have a lot of competition. In other languages, the same keywords can be far less saturated.
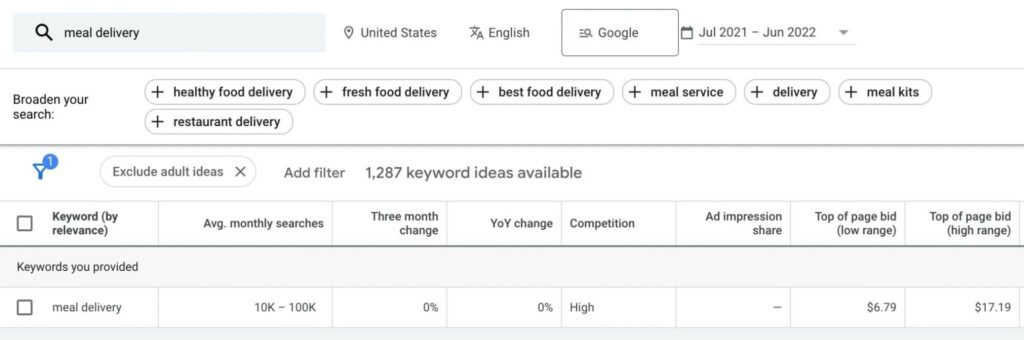
For example, the keyword ‘meal delivery’ has a high amount of searches and competition. With an expensive top-of-page bid, you may not want to use it:
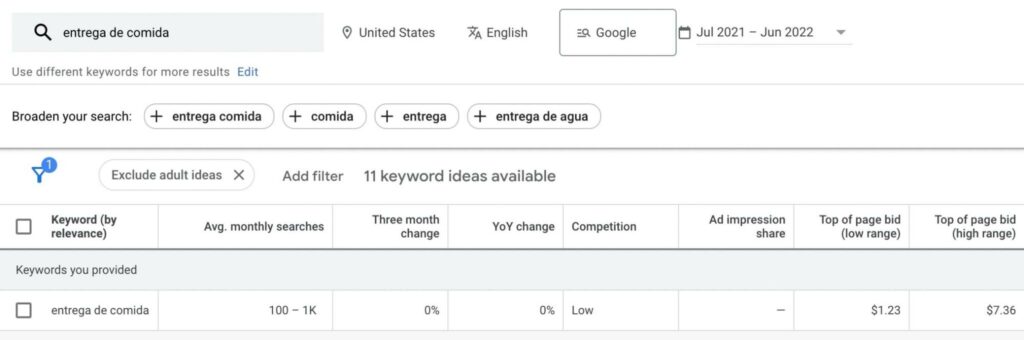
However, using ‘entrega de comida’ can improve your results. By simply translating your keyword into Spanish, you can run a cost-effective ad campaign without competing with other websites:
Additionally, offering content in a visitor’s native language can provide a better User Experience (UX). Instead of having to rely on Google Translate, users can immediately understand your website and find the information they’re looking for.
This can also make your website more credible and trustworthy. When you can remove a communication barrier, users from all over the world may be more likely to trust what you’re saying.
Types of Multilingual Plugins
Since WordPress isn’t multilingual-ready out of the box, one effective option is to install a multilingual plugin. With these plugins, you can start publishing content in other languages. However, some multilingual plugins can offer more in-depth translations than others. Let’s look at a few different types.
Comprehensive Multilingual Plugins
The best multilingual plugins will enable you to translate every part of your website, from your written content to your themes and plugins. When you want to make your entire website multilingual, these plugins can be effective tools.
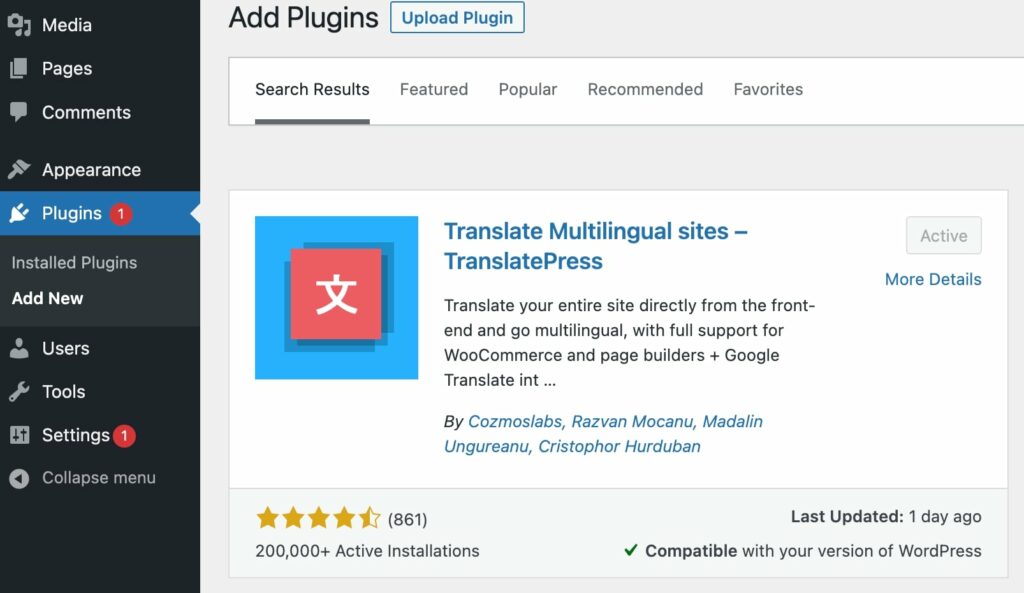
One of the most popular multilingual plugins is TranslatePress. After installation, you can use its front-end editor to translate everything you can see on your website:

Additionally, by integrating TranslatePress with Google Translate or DeepL, you can set up automatic translation for all of your content. Please note that relying on a service that leverages machine translations will not work as well as having someone who can natively understand the language you are translating your content to.
Fortunately, you can fix any mistakes that machine translations may make manually and see a live preview of these changes during the editing process.
Polylang is another powerful multilingual plugin that enables you to translate your posts, pages, media, categories, and tags. You can even create translations any custom post types, widgets, navigation menus, and URLs:

Plus, Polylang can improve your multilingual SEO. By setting up HTML hreflang tags, SEO-friendly URLs, and open graph tags, Polylang can help you to start showing up in global search results.
Both of these plugins are free to download. However, if you want to access advanced features and add-ons, you’ll likely need to purchase the premium versions.
Automated Translation Plugins
Alternatively, some multilingual plugins connect to automated translation services. This type of plugin can provide translations for certain parts of your website, but won’t be nearly as comprehensive.
For example, Translate WordPress with GTranslate can make your website multilingual using Google Translate. With this plugin, you can add different languages in a widget, allowing users to easily switch to their native language:
The free version of GTranslate includes statistical machine translations. With a premium version, you can access Google neural translations, which can be much more accurate. Also, the core software does not support manual revisions.
If you’re a software developer, you may benefit from using Loco Translate. Unlike the other options on this list, Loco Translate enables you to update the language files in your theme or plugins:
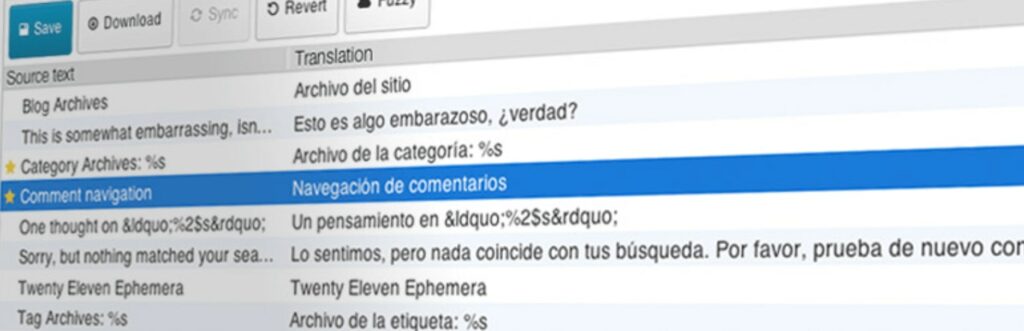
Using the built-in translation editor, you can modify WordPress translation files directly in your admin dashboard. This will contain integrated automatic translation services to help you design a multilingual-ready theme or plugin.
How to Create a Multilingual Website with WordPress (7 Methods)
Translation can be the key to driving global traffic to your website. To help you get started, we’ve compiled a few different ways you can make your content multilingual.
1. Choose a Multilingual Ready Theme
Often, picking a theme can be an important first step in improving your website’s appearance and functionality. When you’re trying to make multilingual content, you can consider installing a translation-ready theme.
In a translation-ready WordPress theme, the software will support translations into many languages. To achieve this, developers usually concentrate on a variety of factors including:
- Internationalization (i18n): Theme development that focuses on easy translation.
- Localization: The process of translating from the original language into a new language.
- Right to Left (RTL) text: Supports languages that read from right to left, including Arabic, Aramaic, and Hebrew.
It’s important to keep in mind that a translation-ready theme won’t automatically translate your content. It simply provides a solid infrastructure for your translated content.
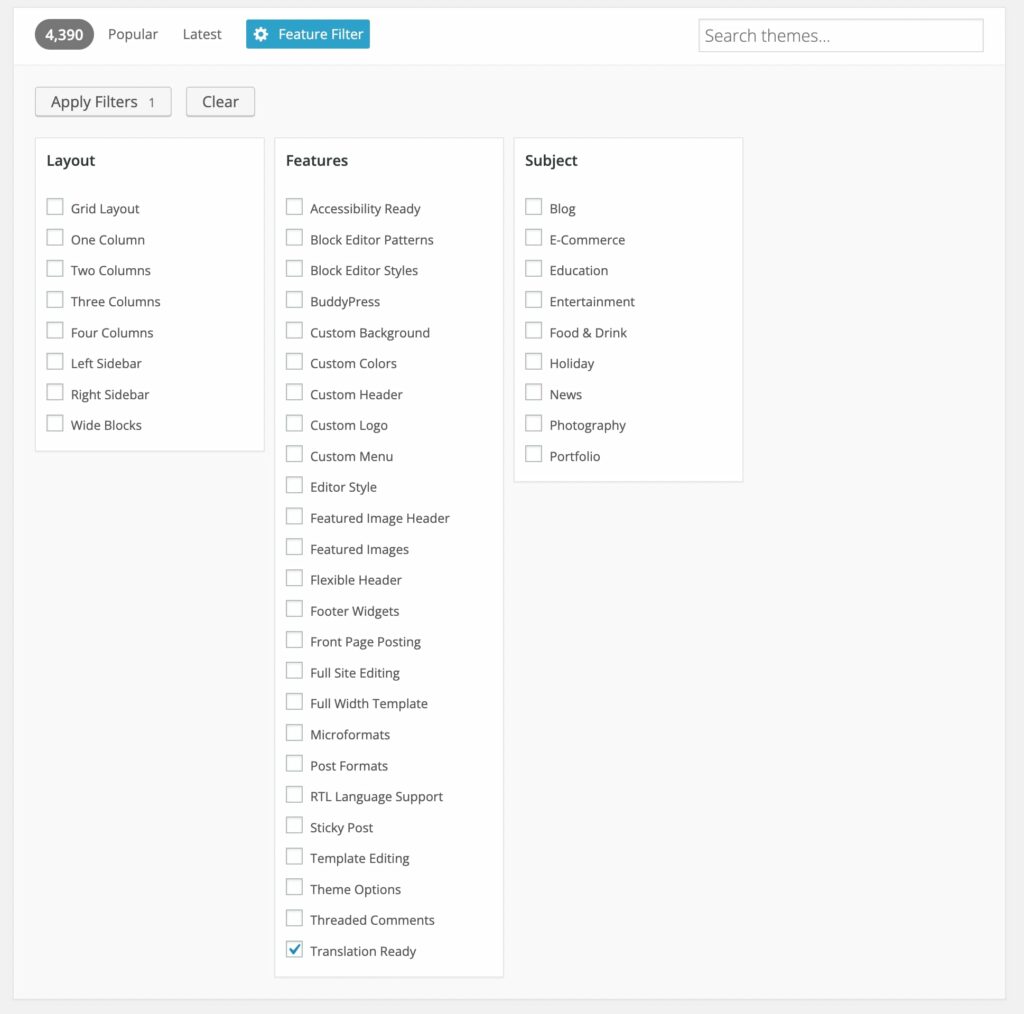
To find a multilingual theme, you can apply a filter in the WordPress Theme Directory. Here, click on Feature Filter and select the Translation Ready option:
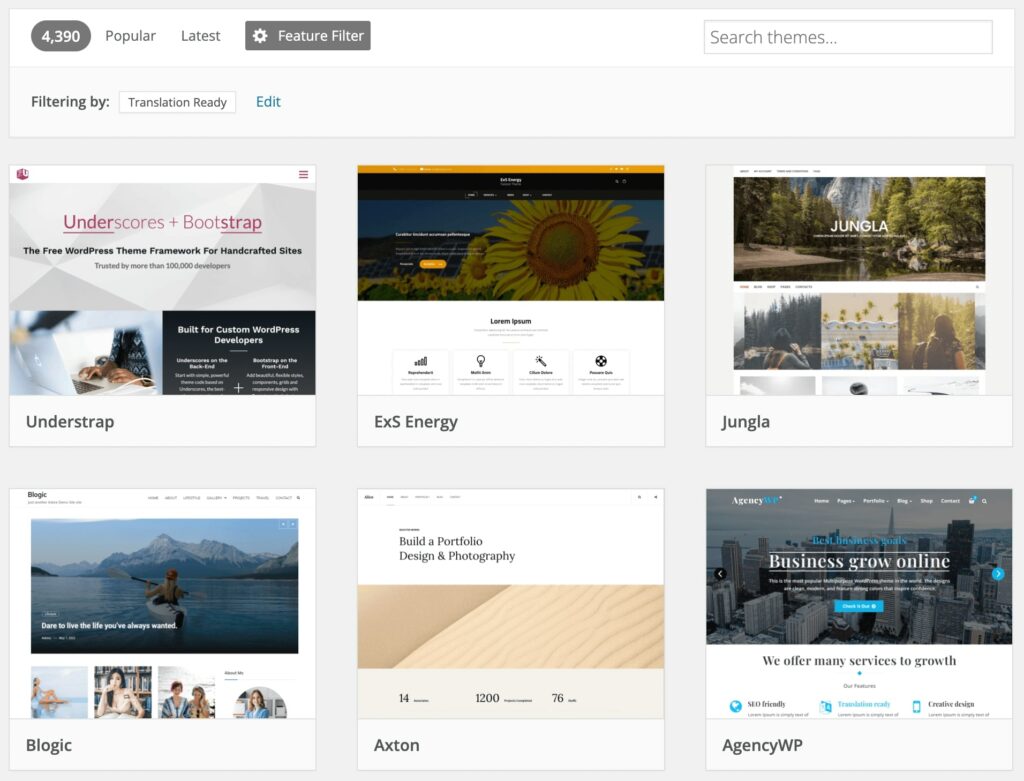
This will exclude any WordPress themes without multilingual support. After browsing these results, you can install and activate a translation-ready theme:
One of the most powerful translation-ready themes is Divi. It integrates with many multilingual plugins and supports full translation of its front-end interface:

Plus, Divi’s localization covers everything from form fields to descriptions. Moreover, after you enable a right-to-left language, this theme will automatically turn on RTL mode.
If you’re looking for a more affordable option, consider the Neve theme. Although it has a more minimalist design, it can adapt to almost any new language that you might need it to:
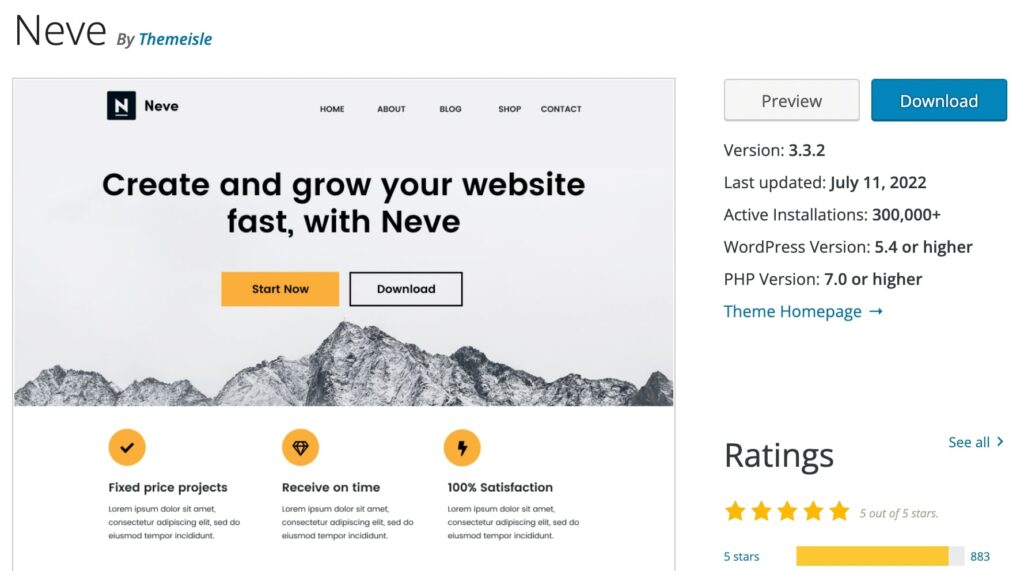
With Neve, every element of your theme can be translated, no matter which multilingual plugin you use. Like Divi, Neve is fully capable of using RTL text, so you’ll never have to worry about translations affecting your web design.
2. Add a Language Switcher
Once you find a translation-ready theme and a multilingual plugin, you can start translating your online content. To do this, you can create a language switcher. This is a dropdown menu or button that visitors can use to select a translated version of a page:
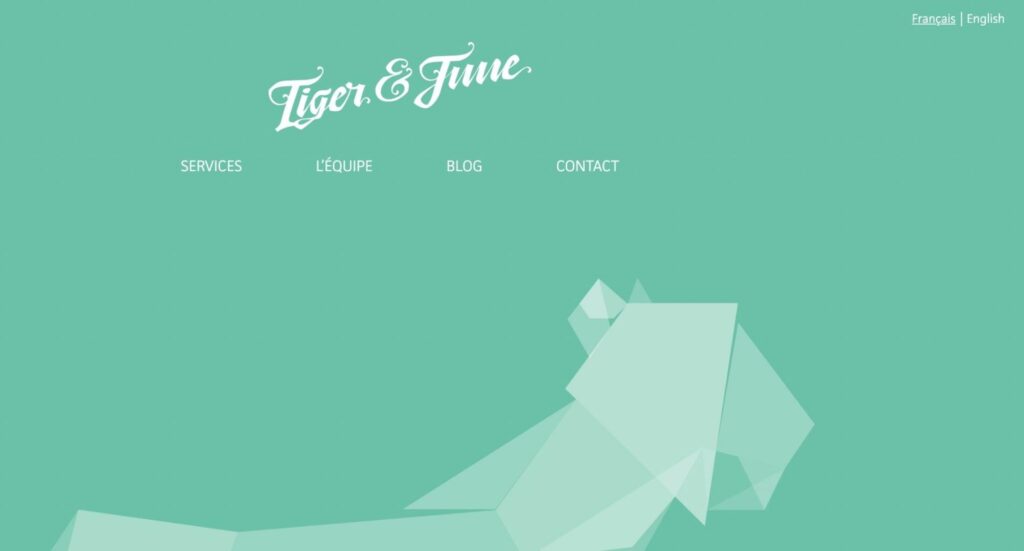
A language switcher can enable each visitor to your site to select their preferred language. This provides a quick, convenient way to translate your website without leaving the page.
With TranslatePress, you can add a language switcher to your site in just a few steps. First, install and activate the plugin:
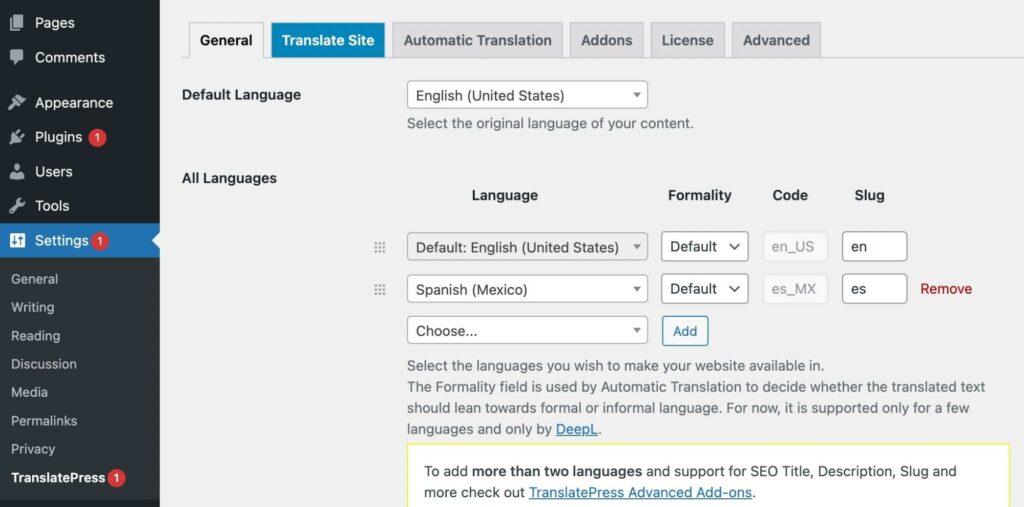
Then, go to Settings > TranslatePress > General. In the All Languages section, there will be a default language set for your website. Here, select some alternate languages:
Next, scroll down to the Language Switcher settings. With TranslatePress, you can display your language switcher with shortcodes, as a menu item, or with a floating language selection menu:
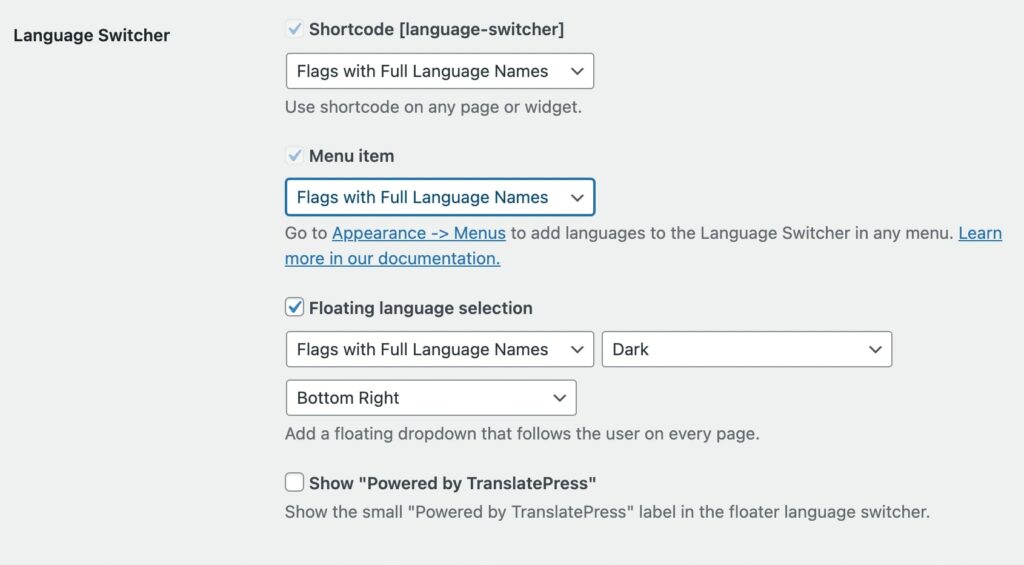
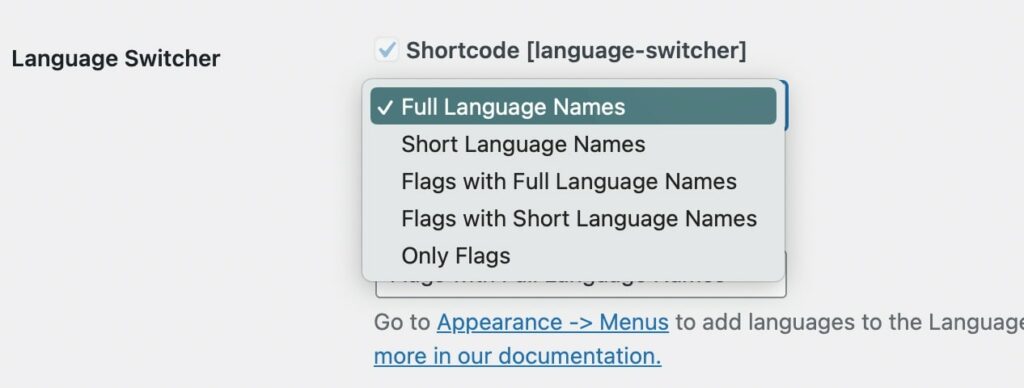
For any option, you can customize the appearance of the language switcher. Using the dropdown menu, you can choose to display the language names, flags, or both:
When you’re finished, save your changes. One way to add this feature to a page is with its shortcode. On any page or post, simply add a shortcode block:
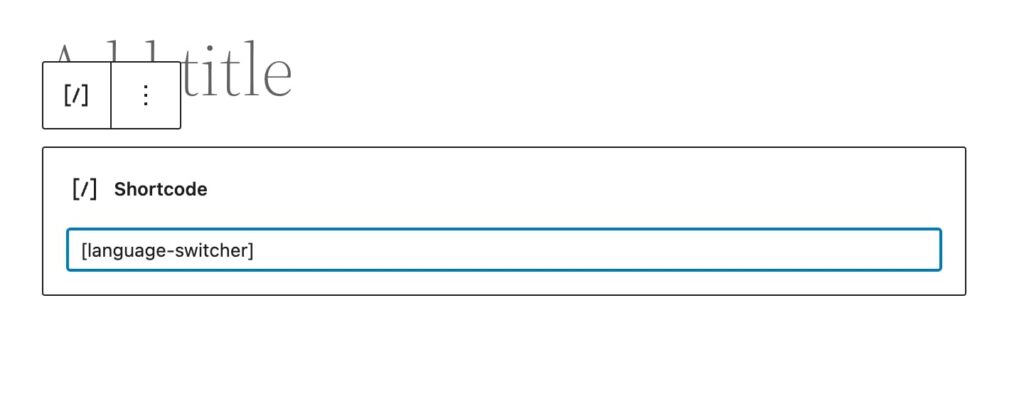
To display the language switcher, paste this shortcode: ‘[language-switcher]’. On the front end you’ll be able to see your list of available languages:
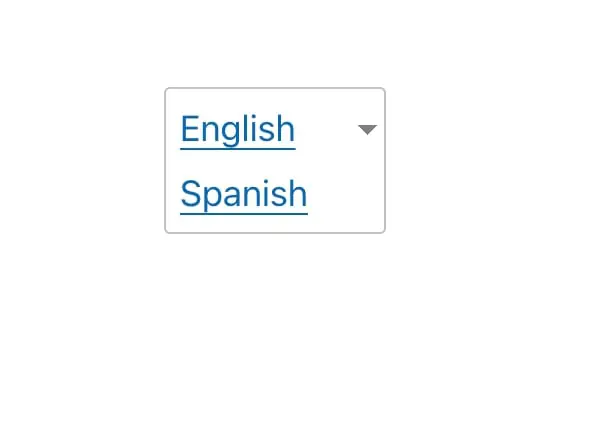
Now any visitor can easily read your website in their preferred language simply by selecting it!
3. Enable Automatic Translation
Another simple way to create a multilingual website is to set up automatic translation. This will translate every word of your content from one language into another. Although this may provide some awkward phrasing, it can be a quick and easy way to translate your website.
If you decide this option is right for you, you can use the TranslatePress plugin. It provides automatic translation using either Google Translate v2 or DeepL. However, the free version will only support Google Translate.
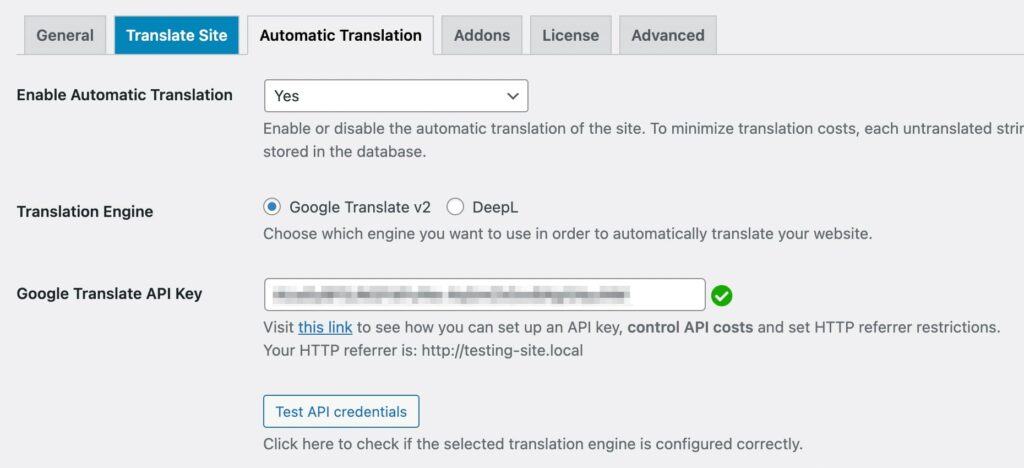
After you activate the plugin, navigate to Settings > TranslatePress and make sure to set your desired languages. Then, click on the Automatic Translation tab:

At the top of the page, select Yes next to Enable Automatic Translation. Then, choose the translation engine you want to use.
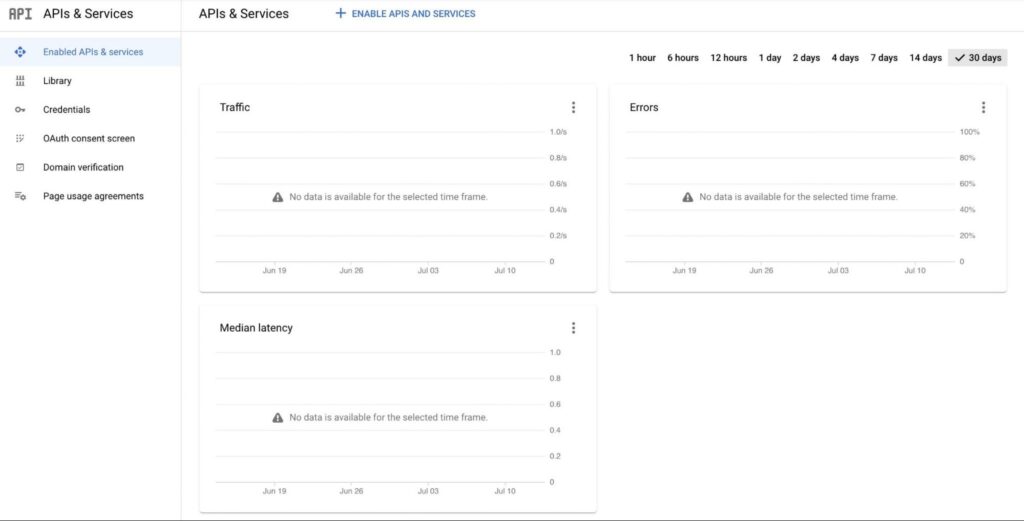
To continue setting up either Google Translate or DeepL, you’ll need to use an API key. For Google Translate, sign into your Google Cloud Console and create a project. Next, go to APIs & Services:
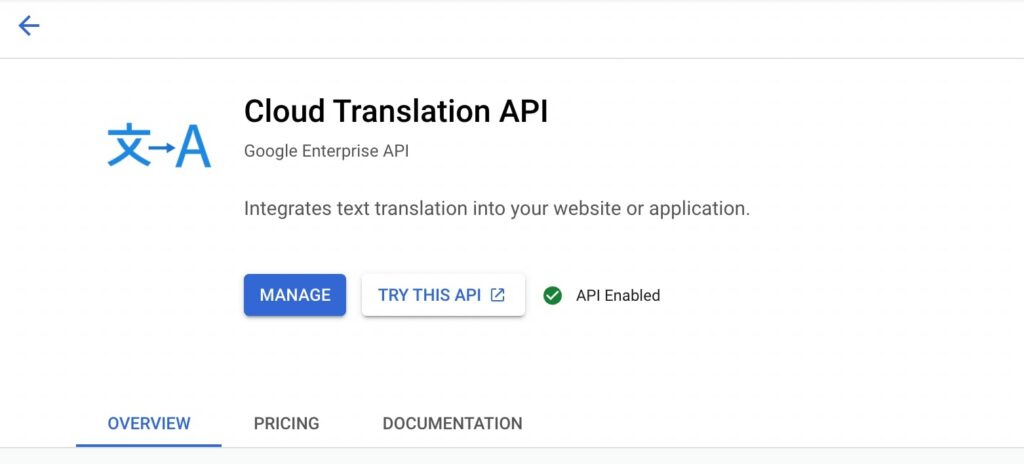
At the top of the page, click on Enable APIs and Services. Search for the Cloud Translation API and enable it:
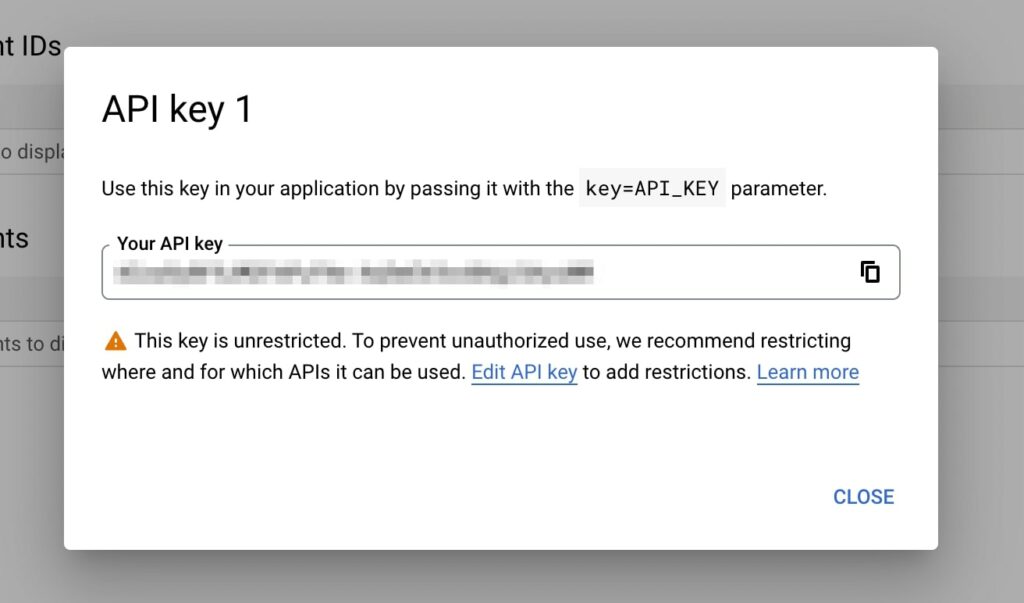
Find the Credentials page and select Create Credentials. Then, click on API key:

This will generate an API key for Google Translate:
Now you can go back to your WordPress dashboard and paste your API key into the Automatic Translation settings. If it’s working properly, you should see a green checkmark:
When you select the Translate Site button at the top of your dashboard, this will open the visual translation editor. Here, you can select the new language and you’ll see the automatic translation on the right:
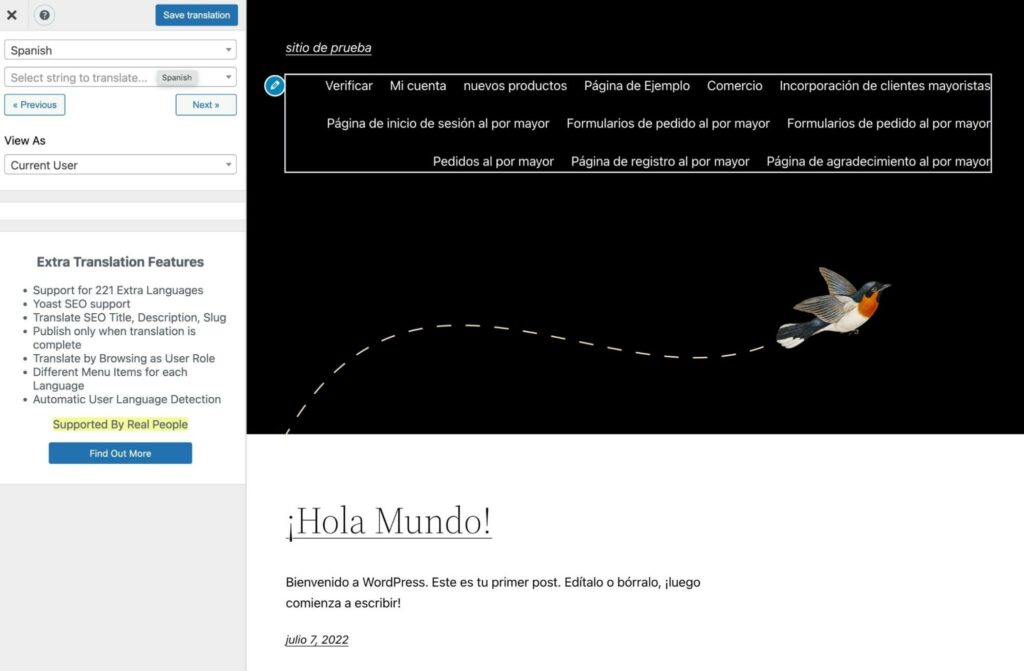
If you notice anything wrong with your translation, you can also make manual edits. This can ensure that native speakers understand your content.
4. Edit Your Site’s Translations
If you enable automatic translation, the result might not be perfect. Since it translates on a word-by-word basis, it can sound strange to native speakers. To solve this problem, you can manually edit your translations.
In the visual translation editor, you can click on the pen icon to view text in multiple languages. It will show the original content, as well as the new translation:
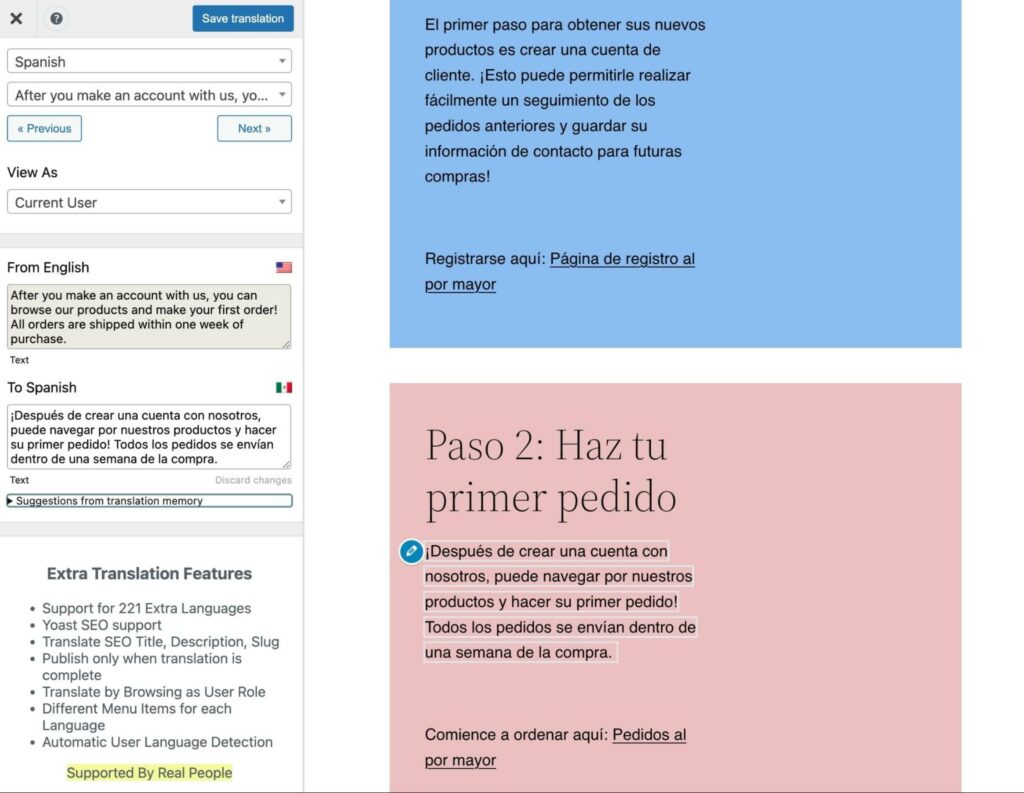
If you speak the translated language, you can change any awkward wording using the text box on the left. To help you even further, TranslatePress can provide translation suggestions:

By clicking on these suggestions, you can automatically update the translation. Then, click on Save translation to implement this in the front-end editor.
Now, when visitors switch your website into the secondary language, they’ll be able to see your new changes:
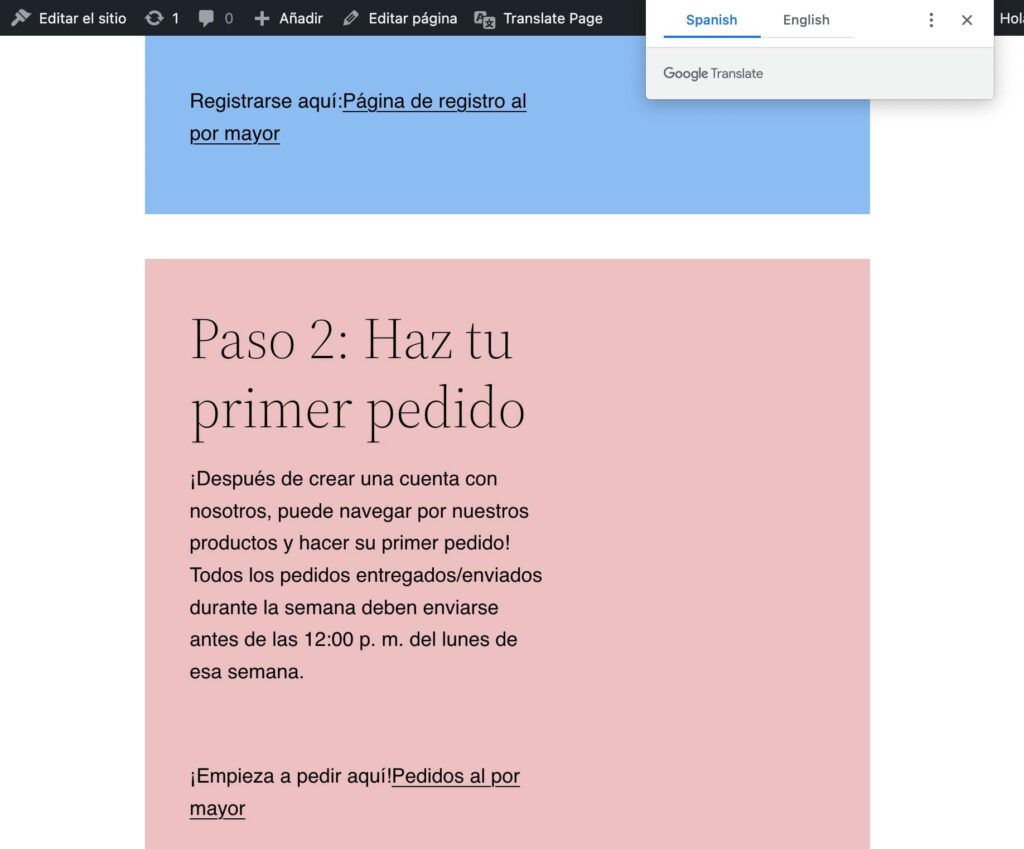
These edits can improve the quality of your translations. This can help make your content more relatable and understandable, rather than sounding like a stiff, automatic translation.
5. Change Your URLs
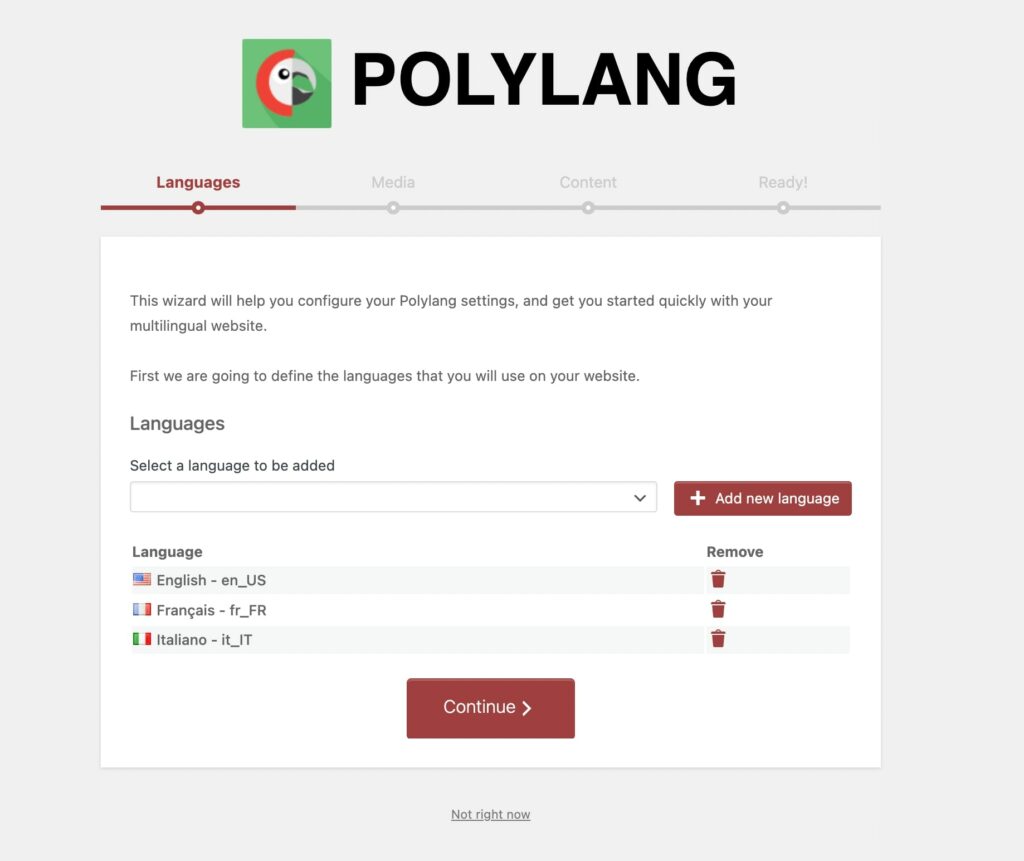
Along with translating your web pages, you may want to modify your URLs for your translated content. Using the Polylang plugin, you can change the language code in your links to align with the new translation.
First, be sure to install and activate Polylang. Using the setup wizard, select the languages you want to add to your website:
Continue through the setup process and return to the dashboard. Then, go to Languages > Settings and find URL modifications:
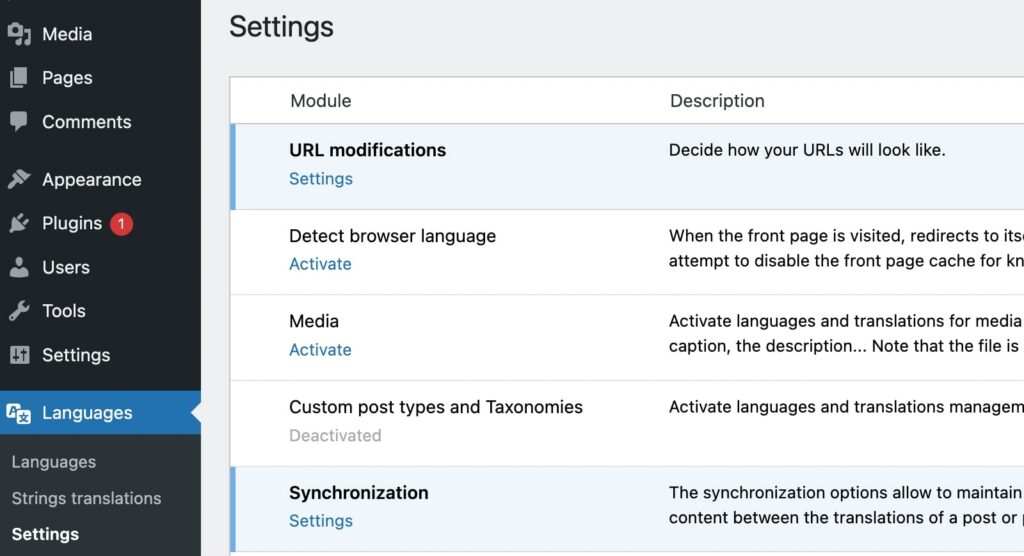
Open this section and enable Hide URL language information for default language. If you have English as your default language, this will remove the ‘/en/’ from your URL:

This will change all your links to a structure like this:
English URL: https://dreamhost.com/about-us/
Spanish URL: https://dreamhost.com/es/sobre-nosotros
Once you’re finished, save your changes.
6. Add Multilingual Content
If you don’t want to install a new plugin, there are other simple ways to include translations on your website. For instance, you can feature two different translations on the same post. Then, you can create an anchor link so readers can easily jump to the translated content.
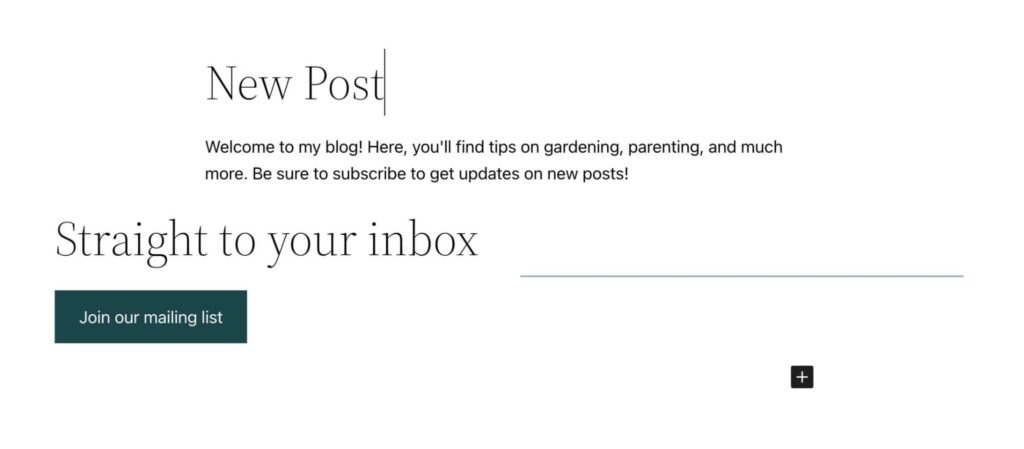
To do this, you’ll need to create a new post. You can start by writing the content in your native language:
Next, you’ll need to open a translator like Google Translate. After you choose which language to translate to, you can paste your content:
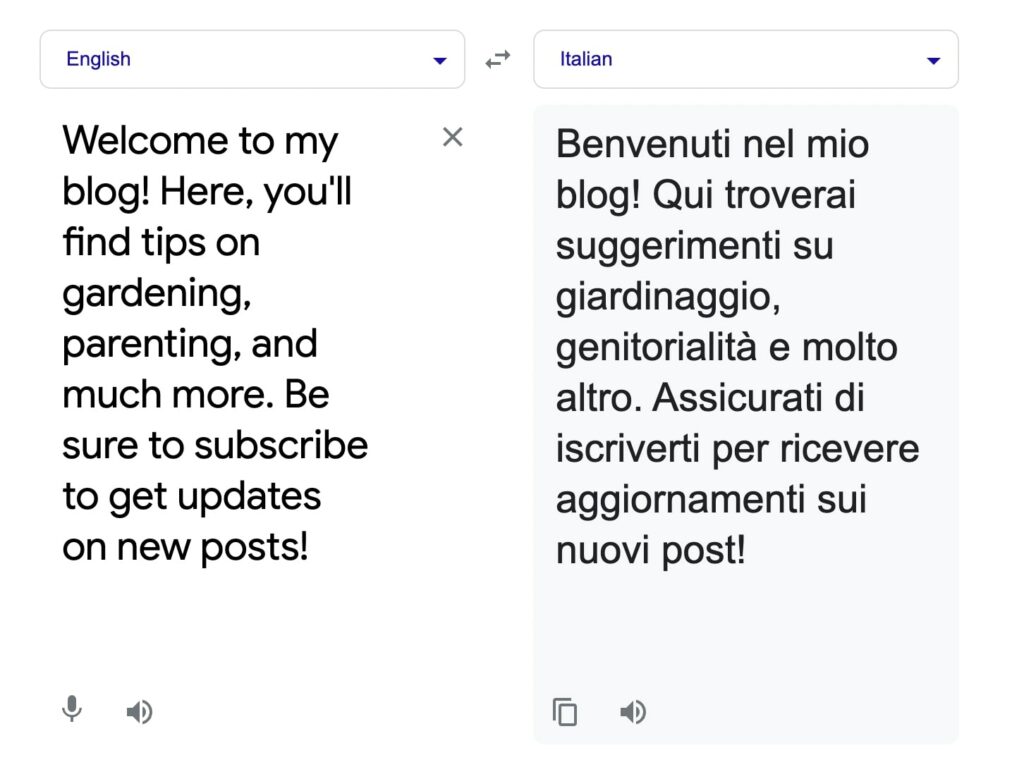
Then, copy your translations and paste them beneath the original text. Be sure to translate all the elements on the page:

Once you’re finished, click on the heading for the translated section. Open its Advanced settings and find the HTML anchor:
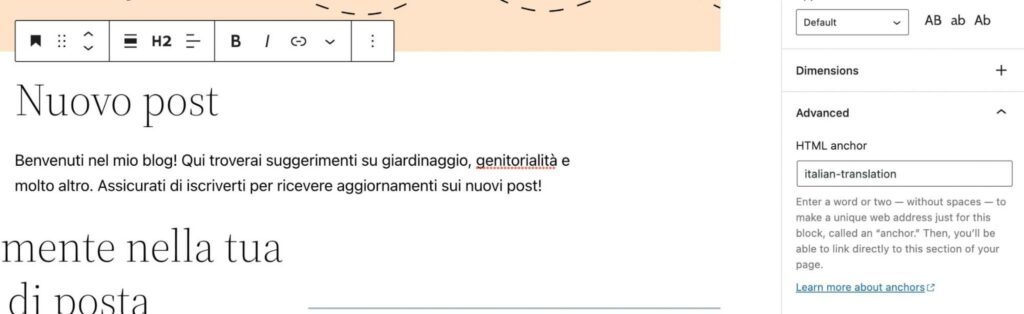
Here, create a unique identifier and copy it. Next, at the top of the post, add the name of the second language:
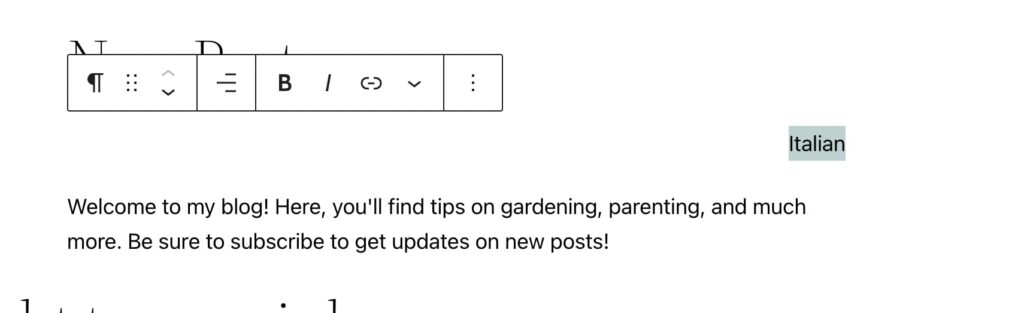
Click on the link button to add an internal jump. For the link text, include ‘#’ followed by your HTML anchor:
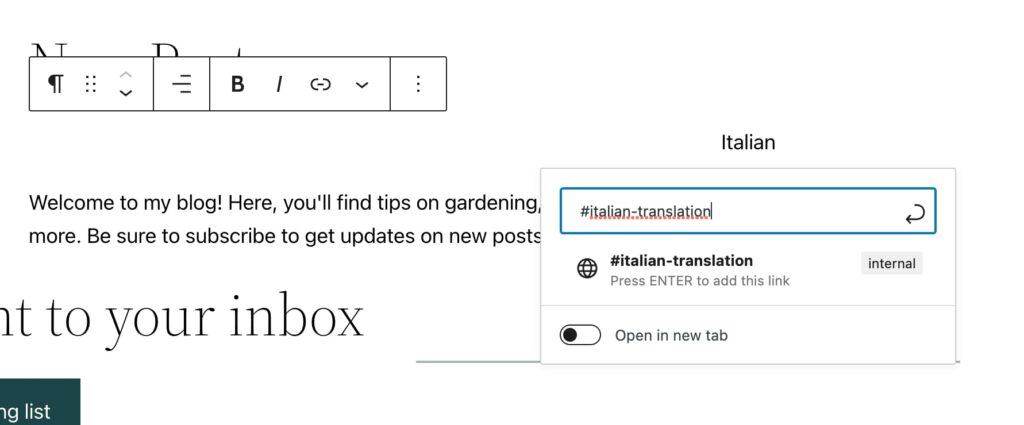
Now visitors can see that there is a translated version of that new post! Anyone who reads that language can click on the link, which will take them to the translation.
Alternatively, you can include the translation as a completely new post. In this case, the link will redirect them to another page rather than a single page jump.
If you decide to do this, you may want to create a new category for that language. This way, native speakers can find those posts all in one place.
7. Create a WordPress Multisite
Instead of creating multiple versions of your posts, you can create a WordPress multisite. Essentially, this can host different translated versions of your website on a single WordPress installation.
However, this involves customizing your database by editing site files. Since this can harm your data, be sure to backup your website beforehand.
Then, open your wp-config.php file. Right before the ‘/* That’s all stop editing! Happy blogging. */.’ line, add this code:
/* Multisite */
define( 'WP_ALLOW_MULTISITE', true );
Now you can go to your WordPress dashboard. Find Tools > Network Setup:
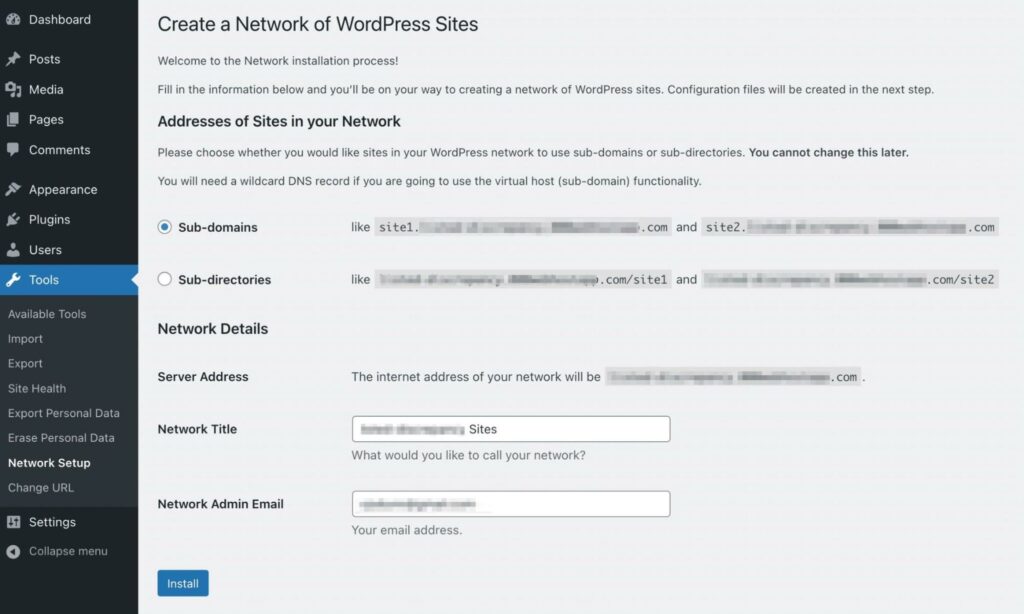
You’ll need to choose between subdomains and subdirectories. Here’s how your URLs will look with each option:
- Subdomain: site1.example.com
- Subdirectory: example.com/site1
Then, review your Network Details and click on Install.
To enable the network, you’ll need to add some information to your wp-config.php and .htaccess files. After you paste the given code, log back into your dashboard:
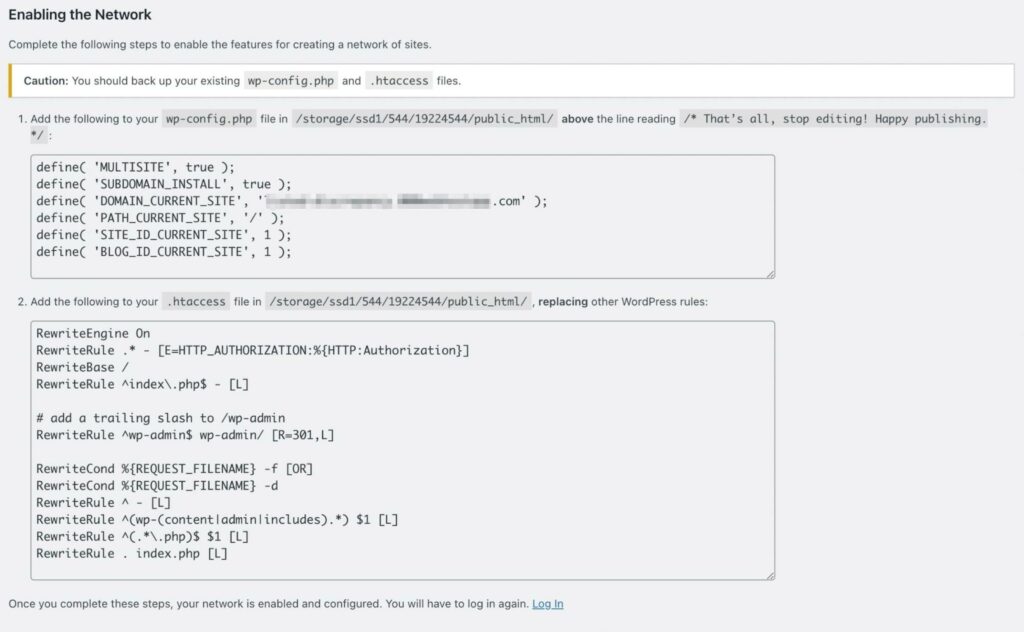
You should now see new icons for managing your network. When you click on My Sites, you’ll be able to create a new translated website:
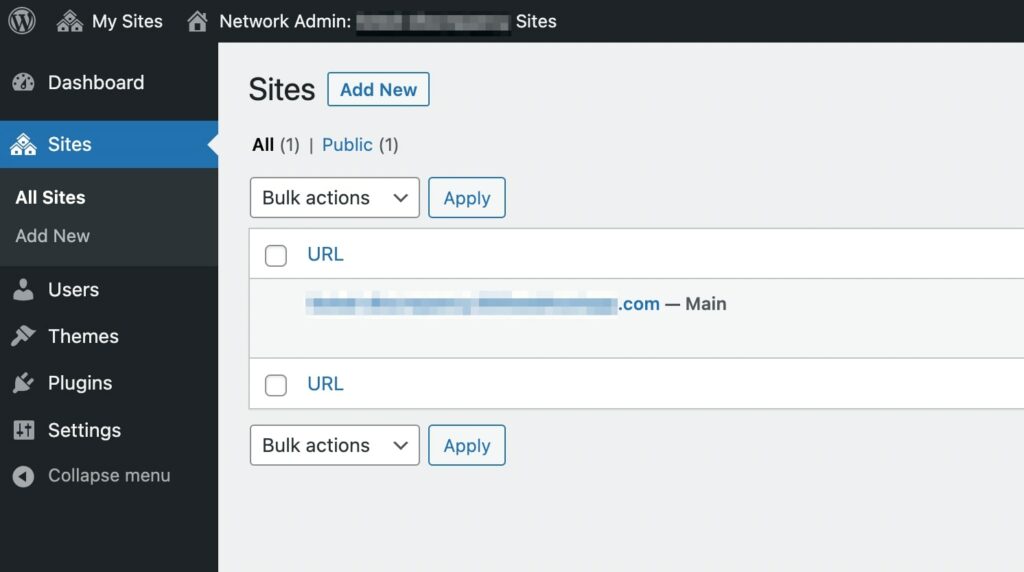
With this method, you can add new child sites for virtually any language!
Go Global with a Multilingual WordPress Site
Ultimately, having a multilingual site can improve your SEO and boost your organic traffic. When you provide well-translated content, you can expand your audience to multiple countries. Furthermore, since English keywords have a high level of competition, this may be the best time to go multilingual.
To do this, you can simply install a multilingual plugin. With TranslatePress, you can enable automatic translation, add a language switcher, and manually edit translations. Alternatively, you can use a service like Google Translate to create multilingual content.
If you decide to build a translated version of your website, you’ll want to make sure it’s fast and secure. With a DreamPress hosting plan, you can create a high-performing WordPress website that isn’t a hassle to manage!

Do More with DreamPress
DreamPress Plus and Pro users get access to Jetpack Professional (and 200+ premium themes) at no added cost!
Check Out Plans