Updating your plugins and themes regularly is essential to keep your site running as smoothly as silk. However, the fatal WordPress error “maximum execution time exceeded” can get in the way of updates and leave you sweating over your website’s performance.
But wait a second — No need to panic. There are actually several methods of removing the error or increasing the maximum execution time.
In this ever-so-simple guide, we’ll look at what the WordPress maximum execution time error is, and why it happens. Then we’ll walk you through six methods you can use to solve the problem and keep your site running like a well-oiled machine. Here’s the setlist:
- Uninstall problem software
- Use a plugin
- Adjust the wp-config.php file
- Update the php.ini file
- Edit the .htaccess file
- Contact your hosting provider
Ready to give it a go? Let’s get started!
What The WordPress Max Execution Time Error Is (And Why It Happens)
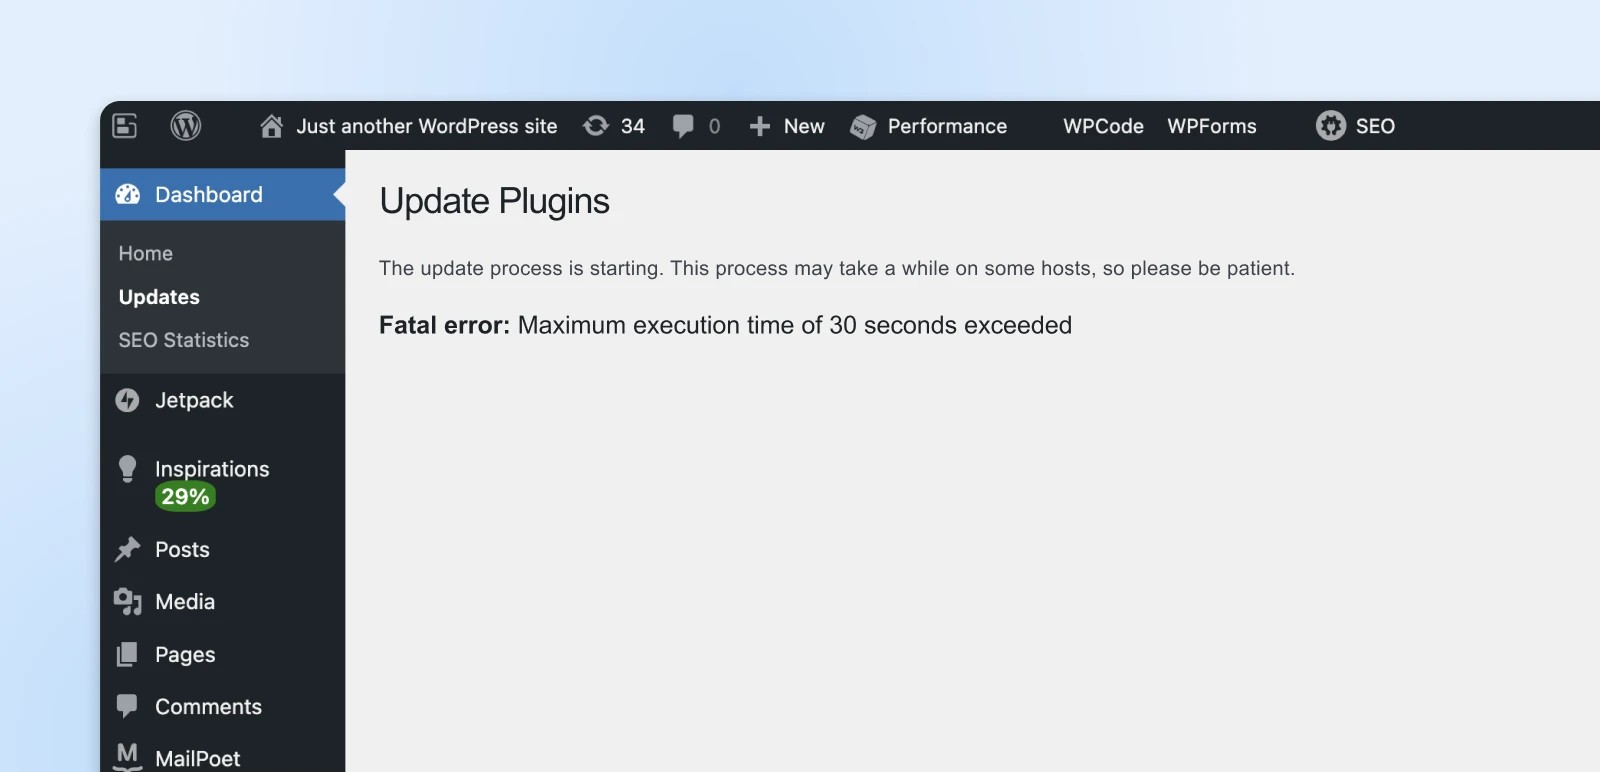
The maximum execution time error is one of the most common WordPress errors. It can pop up when you are trying to update your WordPress plugins or themes.
It warns you if your site can’t perform the updates you requested.
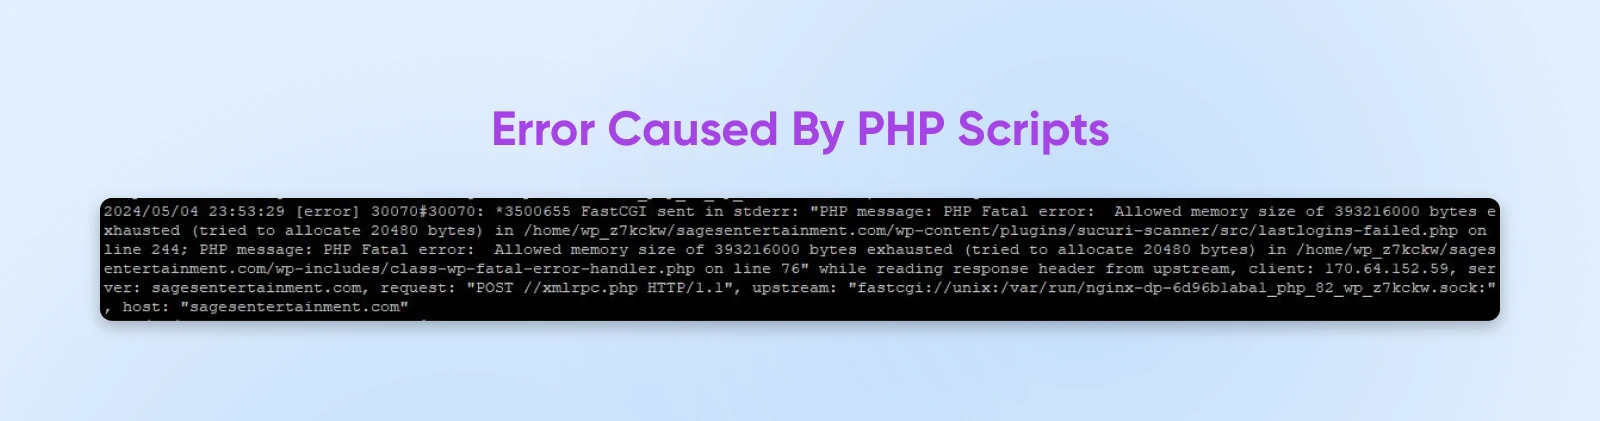
This error happens because of the PHP scripts on your website. Along with JavaScript, PHP is a language that is the foundation of WordPress sites. Basically, it’s the code that controls how a website runs and shows different elements to users. A PHP script’s maximum execution error has to do with how long it takes to run.
PHP scripts have a maximum execution time to keep your site functional and secure. If there were no limit, a hacker or malicious software could use never-ending scripts to dismantle your website’s hosting server and make your data vulnerable. It’s supervillain stuff, really.
PHP scripts that run for a long time can also divert resources from your server, racking up your bill and robbing you of computing power.
Plugins are most likely to trigger this error because they introduce a lot of code from external sources. Because WordPress is an open-source platform, any developer can design and upload plugins. So, if you install content from lesser-known developers, it may come with flawed code and cause issues in your site’s PHP scripts.
Themes and general WordPress updates can cause the problem as well — but this is less common.
What Is The Standard Max Execution Time?
At DreamHost, we set the maximum execution time at our end. As with most other hosting providers, the duration is usually set to 30 seconds.
This is typically enough time for most PHP scripts to run successfully. If you’re using a different hosting provider, you should be able to contact them directly to find out your site’s execution time limit.
For example, large websites with multiple resources might need slightly longer maximum execution times. Otherwise, they may not be able to complete their processes before the clock runs out.
Some developers use very long execution times of more than 300 seconds. However, we don’t recommend this for most websites, primarily because of the performance issues.
How To Figure Out If The Error Has Occurred
It’s usually pretty obvious when maximum execution time errors happen because you’ll see a notification from WordPress.
The wording does vary. For example, it may read as Fatal error or Critical error. In some cases, the notification might not mention the maximum execution time. All of the warnings, however, have similar components that can help you identify the cause.
Front-end users may also be able to see the error. If they visit the site when the update process has failed, they might see a message telling them that the website is experiencing technical difficulties.
Be aware that you don’t just get this error message if you’ve exceeded your maximum execution time. So, you’ll need to check and see if it shows up in your WordPress dashboard as well.
Finally, you may receive an email from WordPress alerting you that the maximum execution time has been exceeded.
This is thanks to the WordPress 5.2 update, which introduced PHP error protection that automatically notifies you when your site has problems with its themes or plugins. Therefore, you will know almost immediately when there’s an issue with your updates.
How To Fix The Max Execution Time WordPress Error (6 Methods)
There are a few different methods you can use to eliminate the maximum execution time error or increase your site’s maximum execution time.
Consider your comfort level when editing your site’s files and adding new code. If you’re worried about diving in yourself, other nifty options are available.
1. Uninstall The Problem Software
One of the simplest ways to fix the maximum execution time error is to uninstall the software causing the issue. One of your plugins, or your site’s theme, is likely the culprit, so you can start there.
We recommend using this method if you have a hunch that a specific application is causing the problem. For example, you may have recently added a new plugin or updated an old one.
If the error locks you out of your site, you can access the dashboard via Recovery Mode (in WordPress 5.2 and above). If you receive an email from WordPress about the failed updates, it usually includes a link to Recovery Mode, and might even tell you which plugin caused the problem.
Then, navigate to Plugins > Installed Plugins and click on Deactivate underneath the relevant one. Click on Delete to remove it.
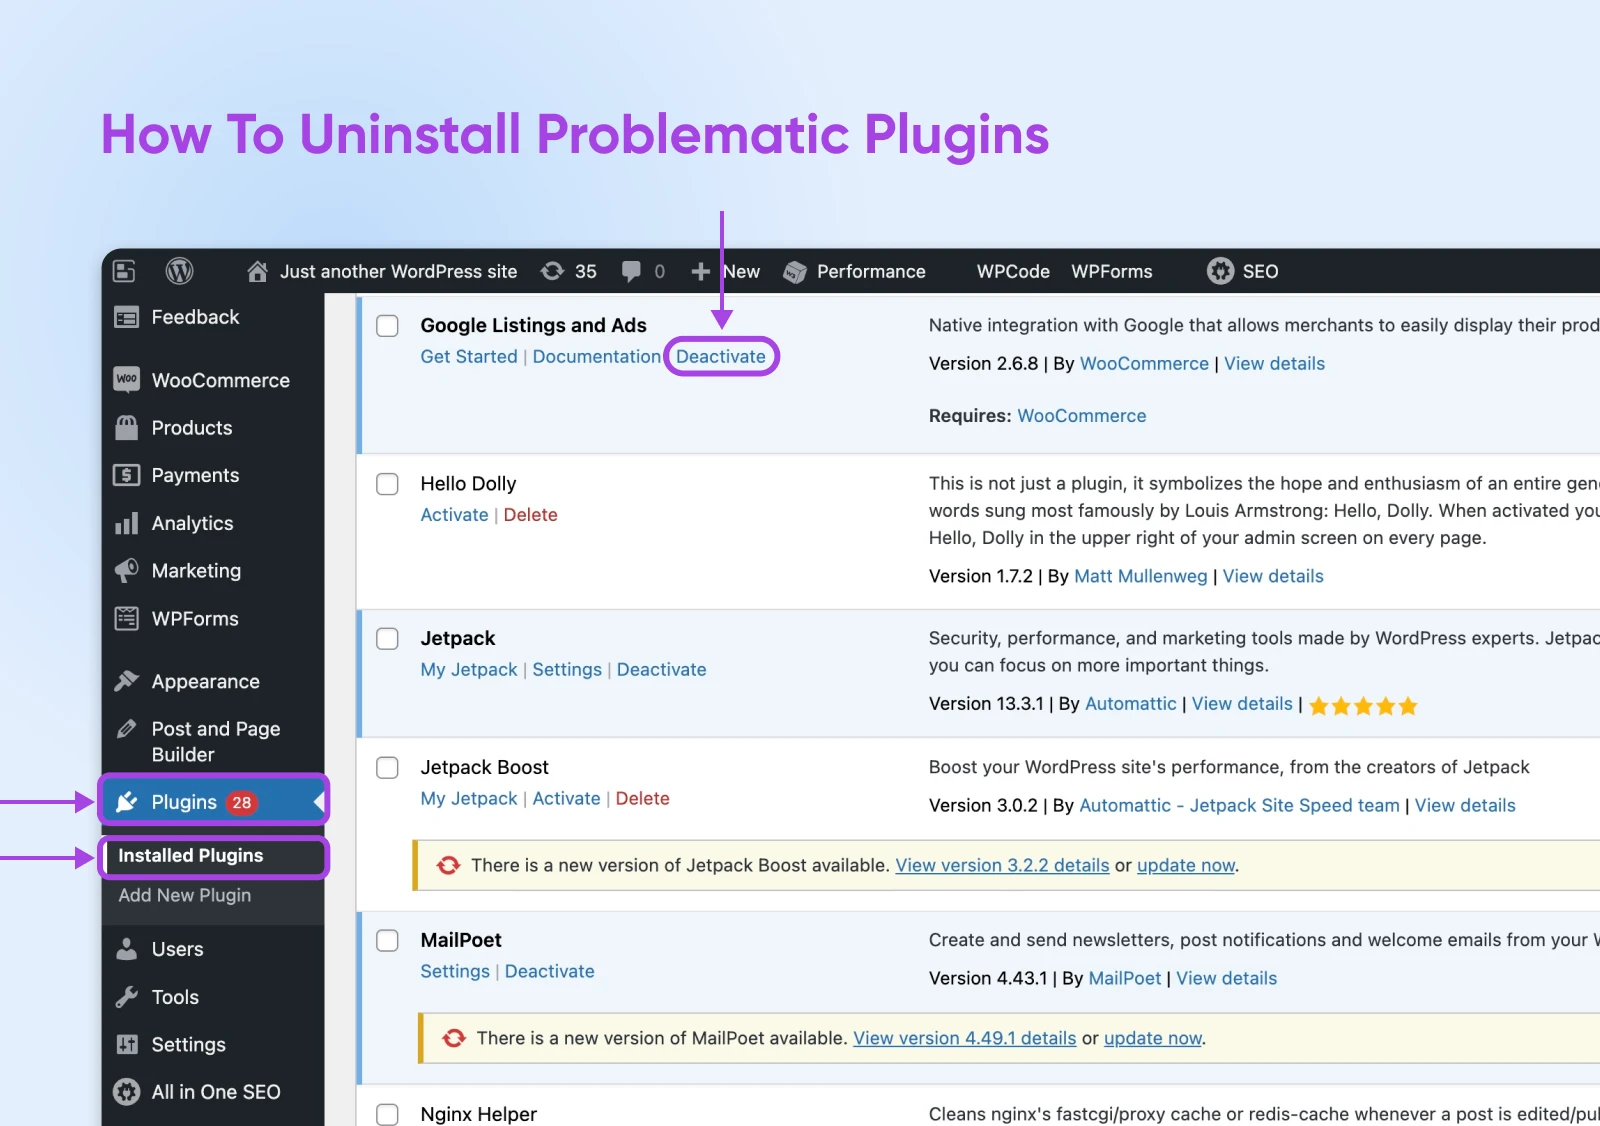
If you don’t know what’s causing the maximum execution time exceeded error, go ahead and deactivate all your plugins and reactivate them individually. Refresh each time to check if you can find the one causing all the fuss.
You can also use Secure File Transfer Protocol (SFTP) to remove your plugins or do it with the control panel file manager if you’ve got a fully hosted DreamHost account.
SFTP
Secure File Transfer Protocol (SFTP) is a safer version of the FTP protocol that uses a secure shell data stream.
Read MoreYou can find all your plugins under wp-content > plugins. Delete the plugin folders one by one to find the offender!
Hopefully, this should clear up the error. If not, let’s move on to some more options.
2. Use The WP Tools Plugin
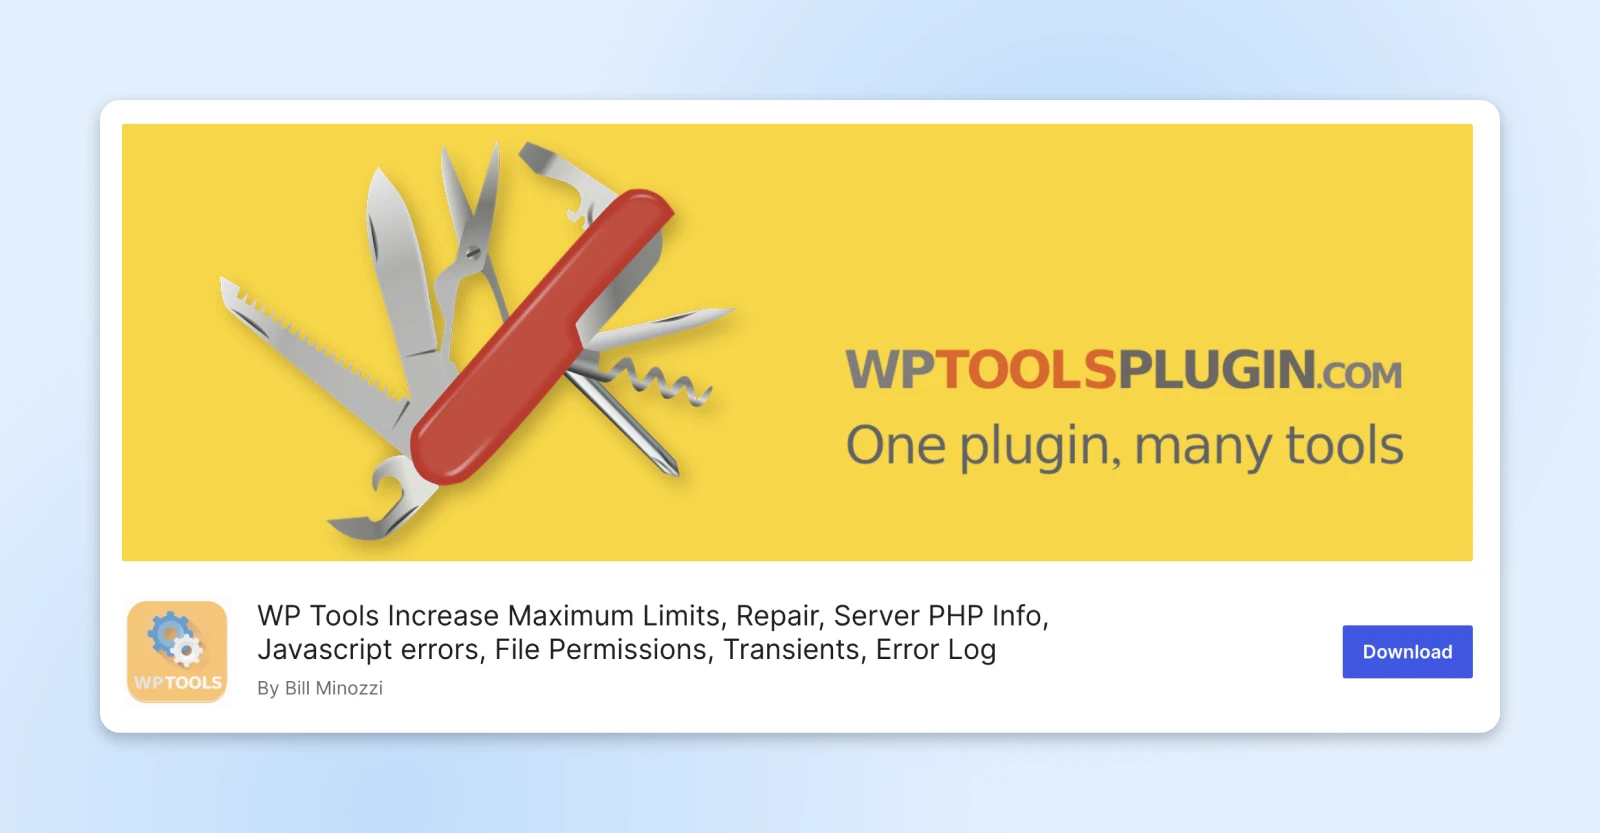
One of the easiest ways to increase the maximum execution time is by using the WP Tools plugin.
The tool allows you to increase the maximum execution time while it’s activated.
You may prefer the plugin route rather than using the previous method because it can increase your maximum execution time globally. This is particularly beneficial if you want to give functional plugins and themes a little extra time to complete their updates.
To get started, navigate to Plugins > Add New Plugin and search for “WP Tools by Bill Minozzi.” Scroll down until you see the plugin below.
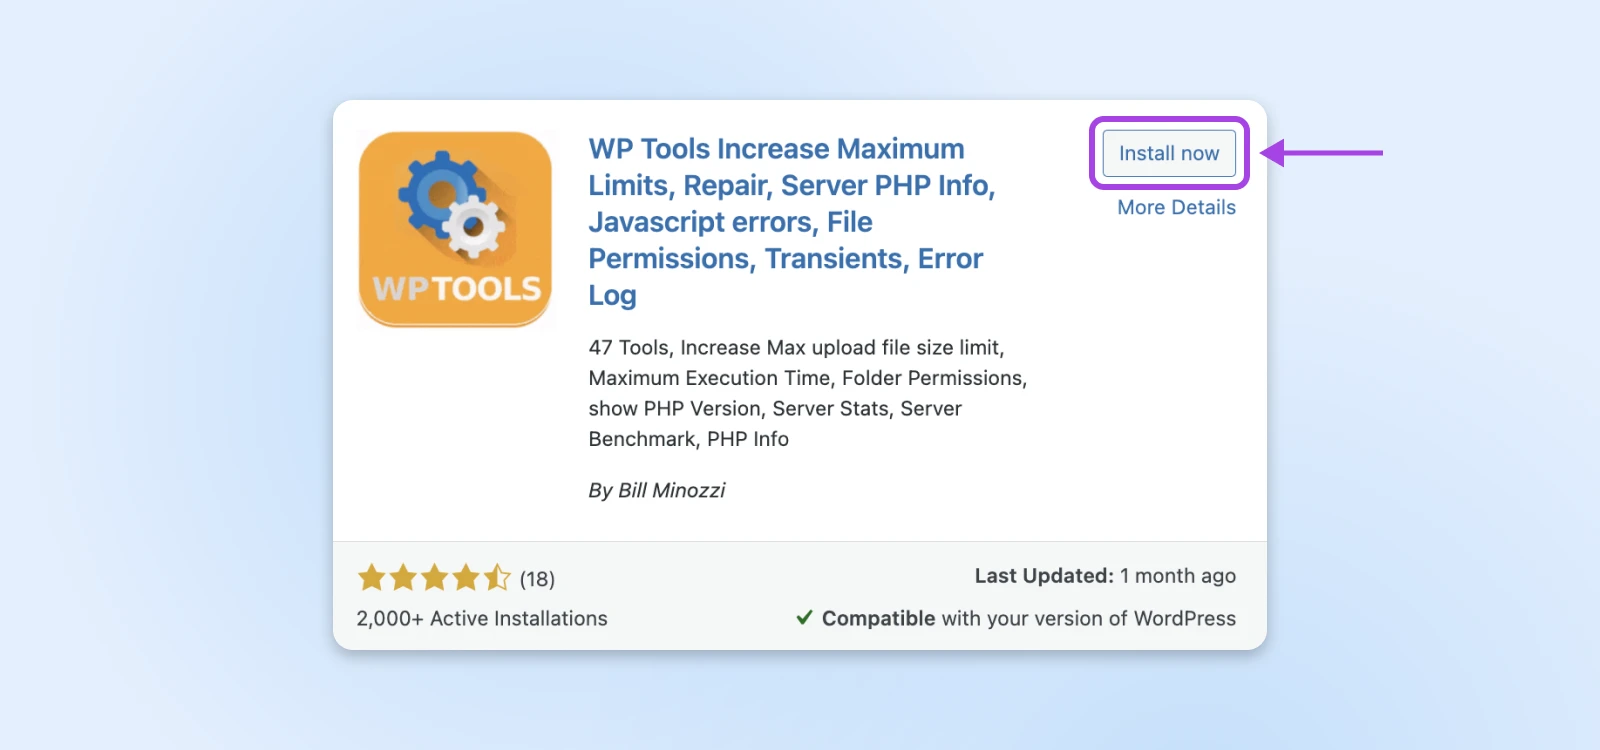
Click on Install now. Once the plugin is installed, select Activate.
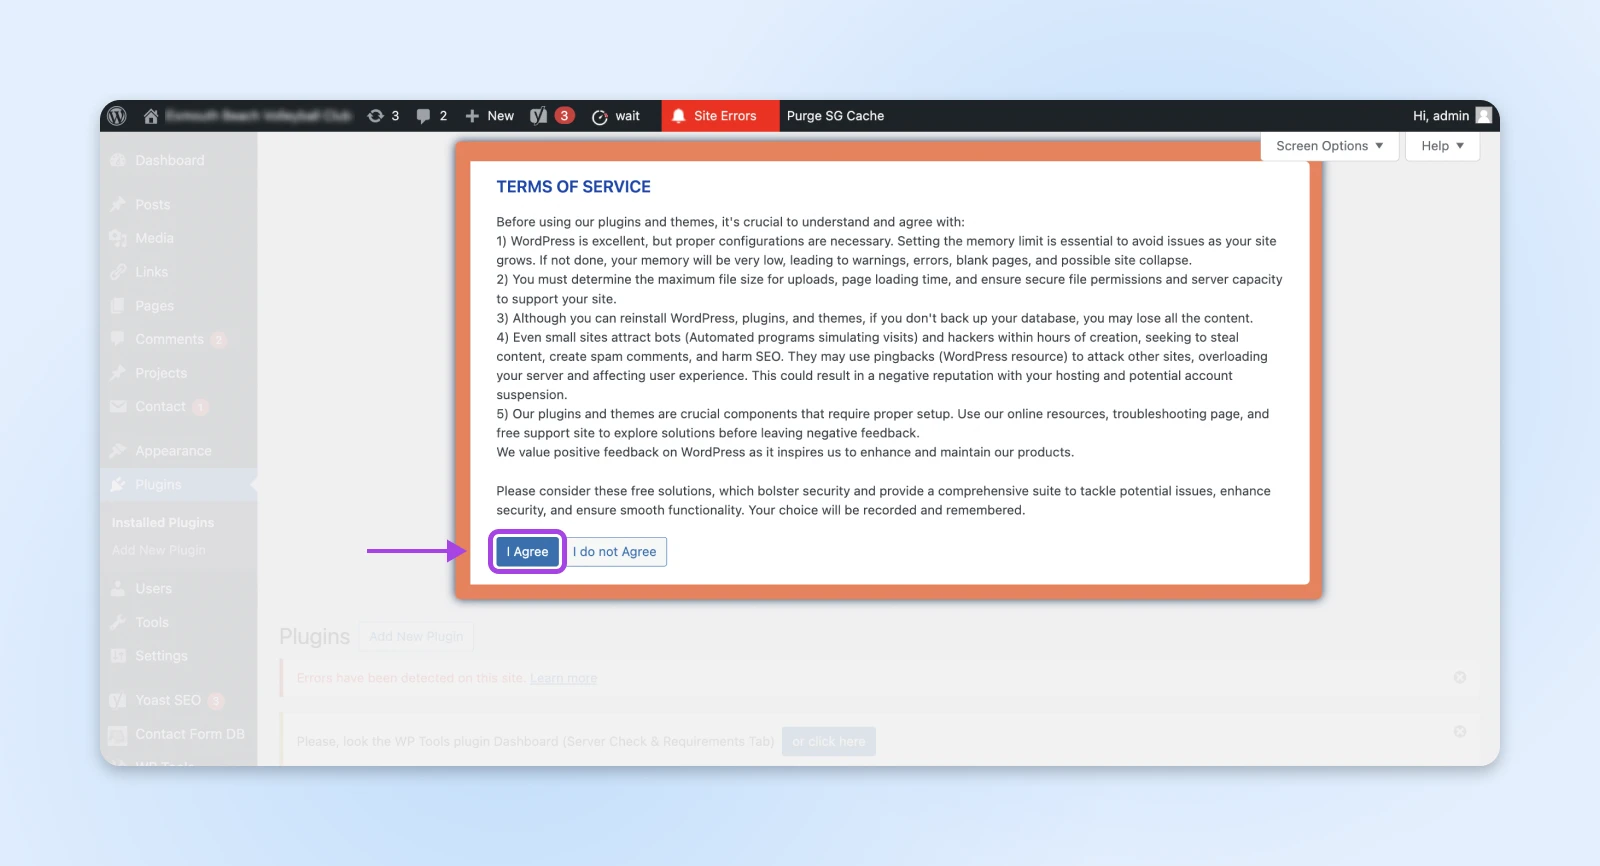
Next, visit WP Tools in the side menu. When you open the plugin for the first time, you will see some important instructions. Once you have read these, click I Agree.
Now, navigate to WP Tools > Settings and click on the General Settings tab. Here, you should find the option to Add Max Execution Time Limit.
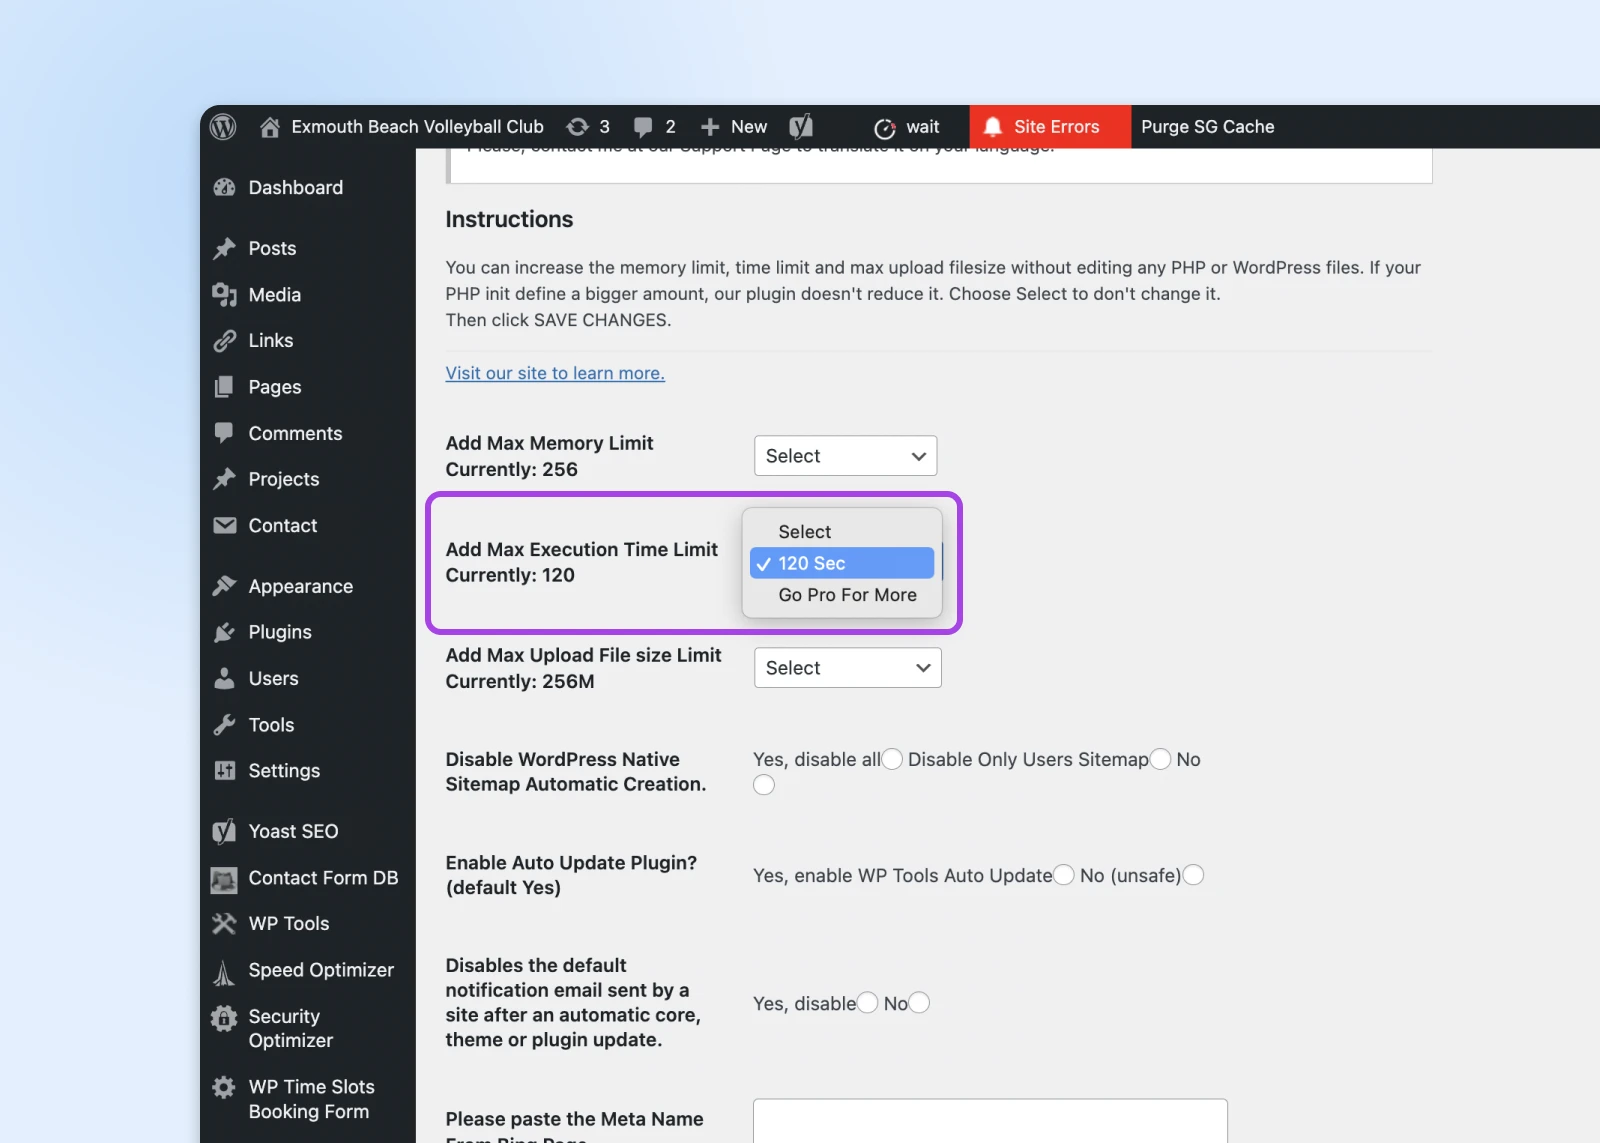
With the free version of this plugin, you can increase the limit up to 120 seconds. The license can be extended further, but you’ll need to buy the Premium version.
This plugin offers a straightforward fix for the maximum execution time exceeded error — but the free version might not always solve your problem. If you’d rather save some money, keep on reading.
Related: How To Pick The Right WordPress Theme For Your Website
3. Increase The Maximum Execution Time Via wp-config.php
You can increase the maximum execution time by editing your site’s wp-config.php file. This is a core file that contains a lot of important information about your site. For example, it contains your website’s name, host’s name, login username, and password.
If you would like to customize your maximum execution time, we recommend this method. It allows you to add code directly into your WordPress directory file. It’s also relatively quick and easy to do.
Before you start editing the file, we strongly advise you to back up your entire WordPress site. The wp-config.php file is essential for your website, so you don’t want to be making mistakes. With a backup handy, you can revert to your original settings if things go sideways.
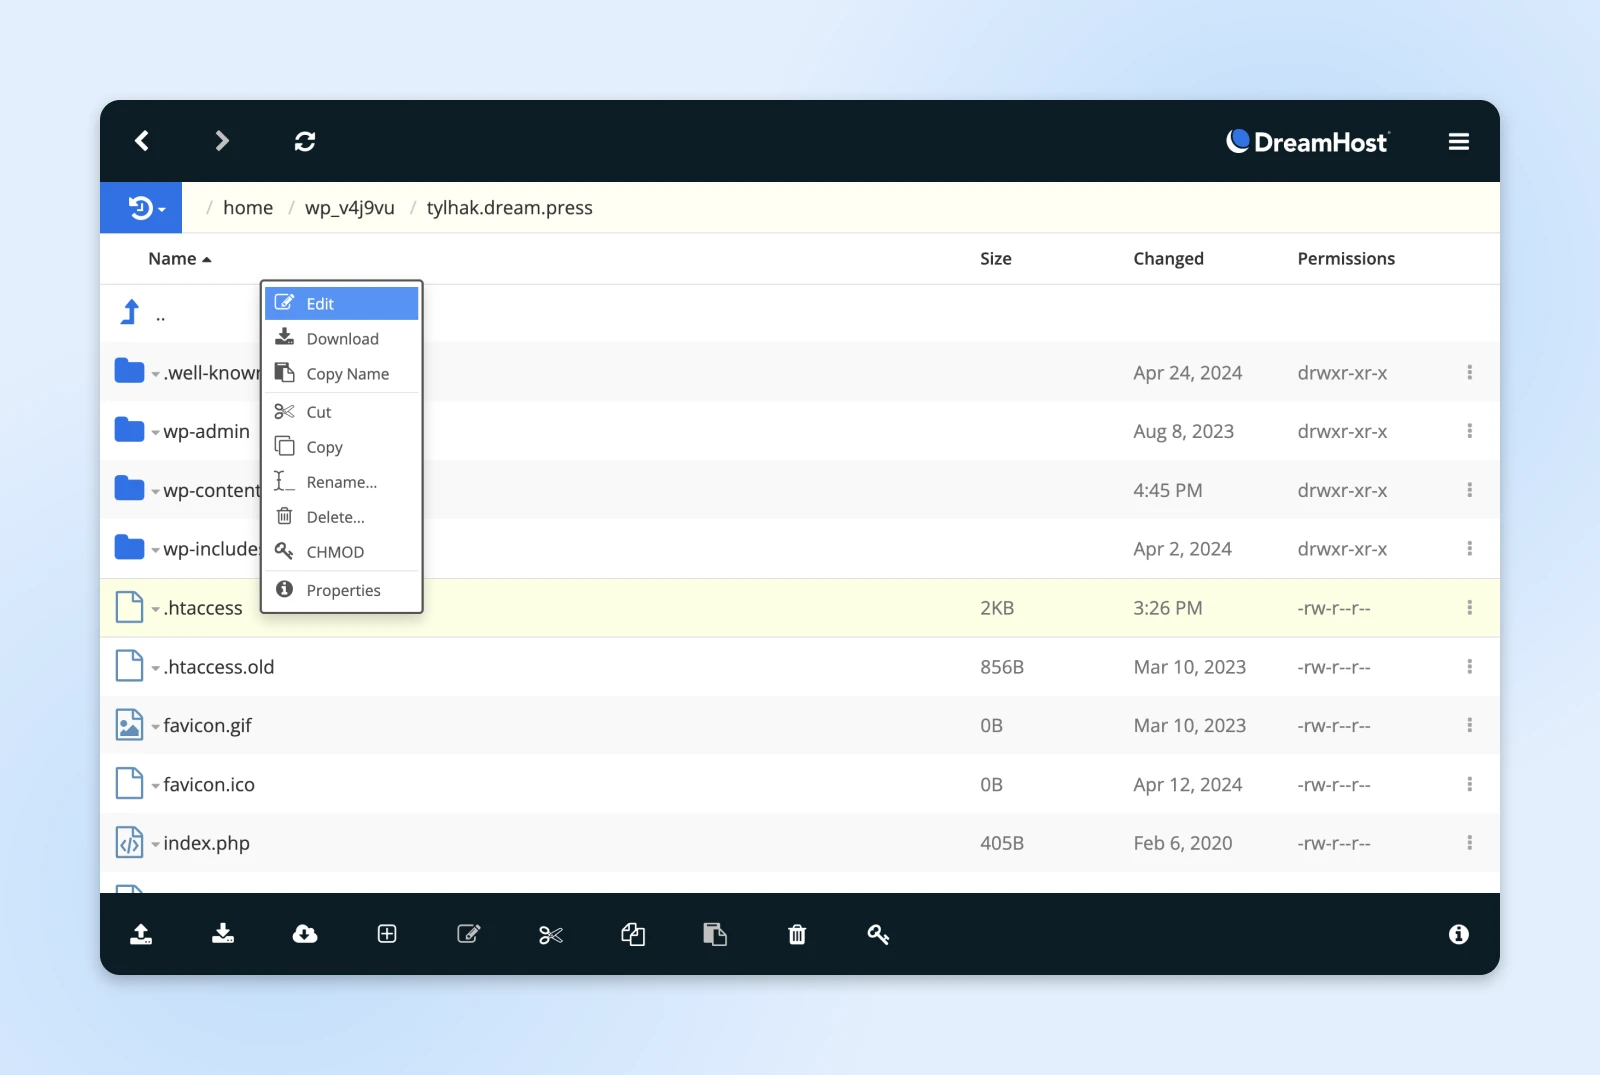
You can find the file by using the DreamPress file manager or your SFTP application and looking for wp-config.php. Right-click on it and select Edit from the drop-down menu.
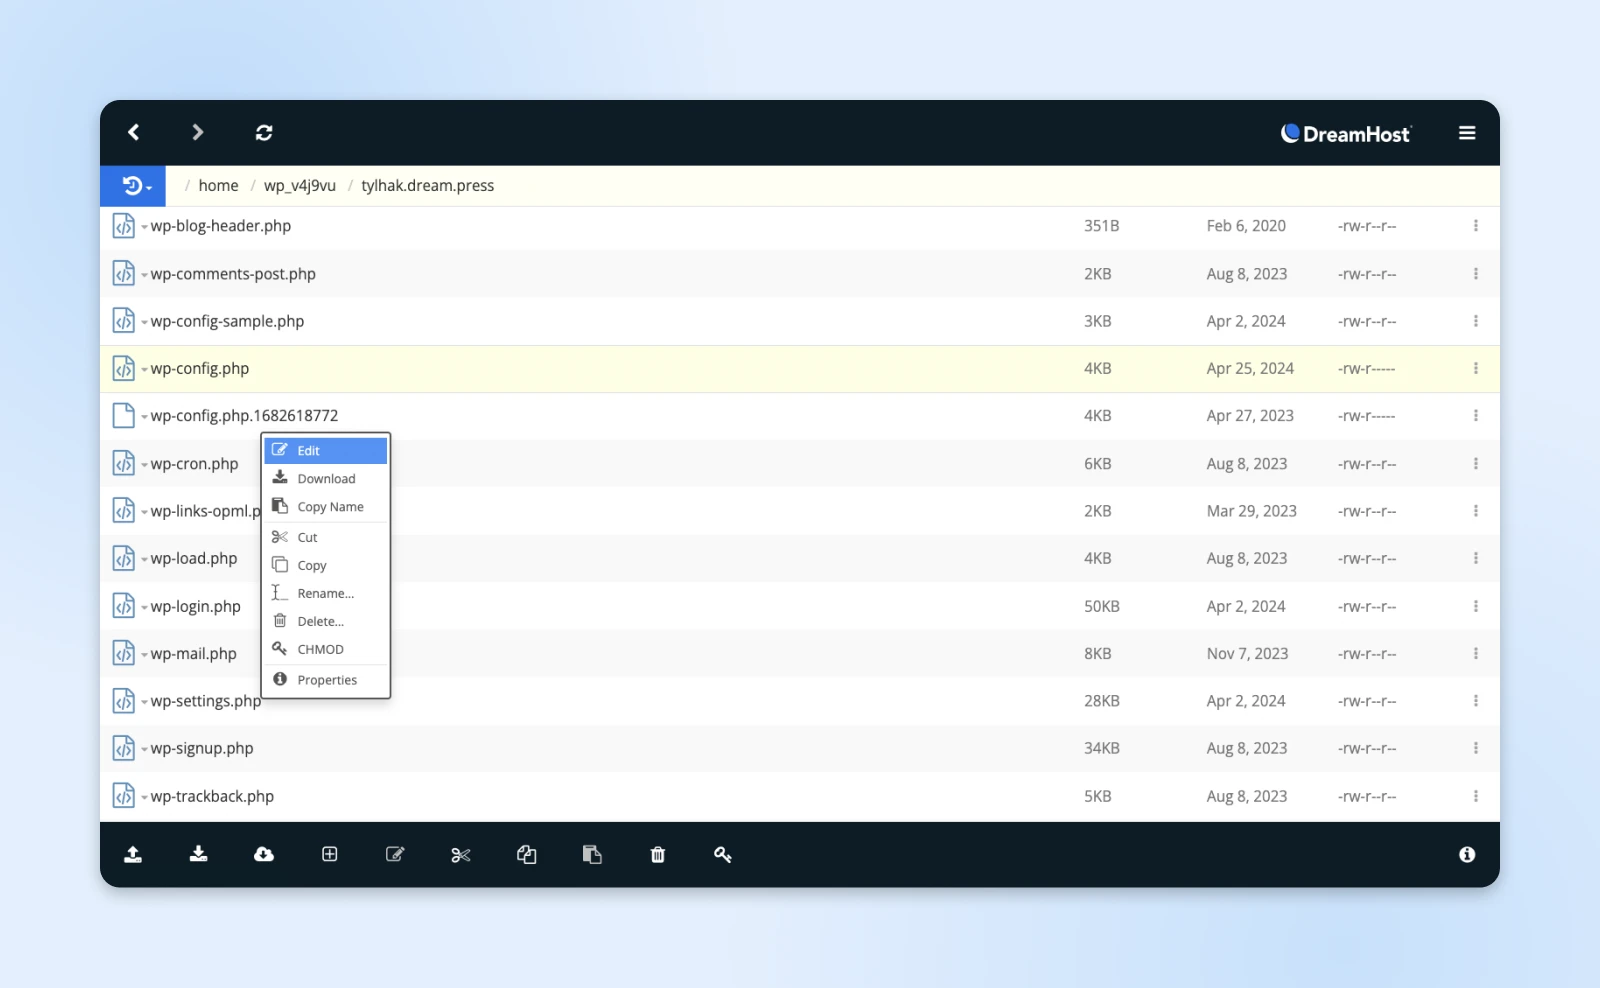
Alternatively, you can click on Download, and edit the file with a simple text editor like Notepad. Once you’re in the wp-config.php file, scroll to the bottom and insert the following code:
set_time_limit(X);“X” represents the maximum execution time in seconds. For example, you can replace it with “300” and it will extend the duration to five minutes.
Now you can save the file, and you’ve successfully changed the maximum execution time!
4. Increase The Maximum Execution Time In php.ini
You can also increase the maximum execution time by creating a new php.ini file.
This is a document that controls the PHP settings for your content management system (i.e. WordPress), such as resource limits, upload sizes, and file timeouts. Because php.ini affects all the scripts in your system, you won’t have to edit each one individually.
However, not all servers support php.ini files, so you’ll need to check first to make sure yours does. Then, you can increase the PHP execution time with this method.
In the DreamHost server, php.ini files are called phprc. First, you’ll need to create a new phprc file. Go to your SFTP dashboard and navigate to your user directory.
Locate the phprc file in your site’s version of PHP. Then right-click on it and select View/Edit to add your new code. You may see this warning:
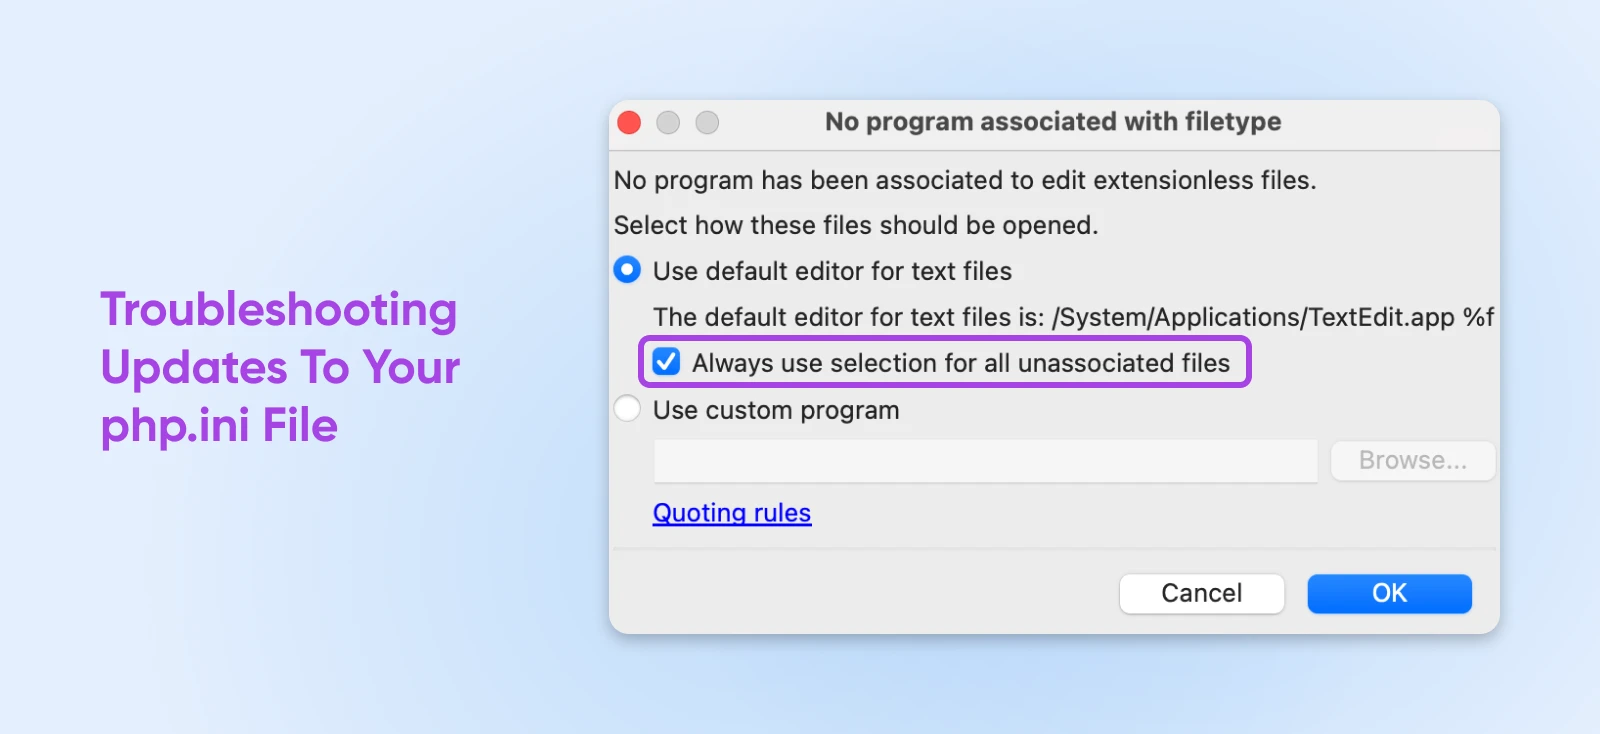
Click on the check box next to Always use selection for all unassociated files and select OK. This will then open the file with your text editor. Next, you can enter the following code to change the maximum execution time:
max_execution_time = 500This will give you 500 seconds to play with. To finish up, you will need to kill all existing PHP processes to update the phprc file and have the changes take effect.
5. Increase The Maximum Execution Time In .htaccess
.htaccess
“.htaccess” is a configuration file used by the Apache web server software. The .htaccess file contains directives (instructions) that tell Apache how to behave for a particular website or directory.
Read MoreThe .htaccess file is another place where you can adjust the maximum execution time. This file controls changes across the different directories of your WordPress site. Beware though, that the .htaccess file is an elusive beast — not all servers use it, and it’s most commonly found in Apache servers.
You may want to use this method if you don’t want to play around with the wp-config.php file and if your server doesn’t support php.ini files.
Before starting, we recommend backing up your .htaccess file. This will allow you to reinstate it if you make any major mistakes.
To back up your .htaccess file, simply open your SFTP client and navigate to your home directory. Make a copy of the .htaccess file, and save it somewhere on your computer.
Then, use your chosen SFTP client to locate and edit the original .htaccess file. If you’re using the DreamHost file manager, you can right-click on it and select Edit.
Otherwise, you can open it with your text editor. Enter this code to change the maximum execution time:
php_value max_execution_time 300You can substitute the “300” for any other value you decide on. Finally, save the changes, and the file will apply them to your site.
6. Contact Your Hosting Provider To Request An Increase In Maximum Execution Time
In case you don’t want to change the site’s files yourself, you have one more option: contact your hosting provider directly and they’ll increase the maximum execution time on your behalf.
This method could be helpful if you’re short on time, or have limited technical skills. You may have to pay extra depending on your hosting provider.
With a DreamHost account, you can contact our Professional Services team for them to make these changes for you. Navigate to the Contact Support page in your account dashboard and submit a ticket.
There, you can outline your desired changes and add any details about your site. We may ask for more details, and then we’ll start working on the changes!
Maximum Execution Time FAQs
We’ve covered all the major fixes for maximum execution time errors. Do you still have questions? Luckily, we have answers! Here are the all-important FAQs:
What is the difference between set_time_limit and max_execution_time?
The difference here is all about scope. The set_time_limit setting is designed to set the time limit on an individual PHP script, while max_execution_time sets the upper limit for all PHP scripts in your account.
How can I check my current maximum execution time value?
The easiest method is to install the phpinfo() WP plugin. This will reveal key information about your PHP setup, including your maximum execution time.
My hosting provider doesn’t allow maximum execution time changes.…what should I do?
You pretty much have three options here:
Explore alternative plugins: If the error comes from a plugin, see if there’s a more efficient alternative that does the same thing.
Contact your hosting provider: Politely explain the issue and explore whether there are temporary adjustments they can make, or if a different hosting plan is needed.
Upgrade to a better host: You could always switch to a host that lets you fix your site without getting in the way…just saying.
Bonus WordPress Error Articles
Need to resolve other technical issues on your website? We’ve got you covered! Our team has put together several guides to help you troubleshoot the most common WordPress errors:
- How To Fix Common WordPress Image Upload Issues
- How To Fix “The Site Ahead Contains Malware”
- How To Troubleshoot The WordPress “White Screen of Death”
- How To Fix The 500 Internal Server Error In WordPress
- How To Fix Syntax Errors In WordPress
- How To Fix The WordPress Not Sending Email Issue
- How To Fix The Error Establishing A Database Connection
- How To Fix WordPress Error 404 Not Found
- How To Fix White Text And Missing Buttons In WordPress Visual Editor
- How To Fix The Sidebar Below Content Error In WordPress
- What To Do When You’re Locked Out Of The WordPress Admin Area
And if you’d like a soup-to-nuts walkthrough on running a successful WordPress site, be sure to check out our WordPress Tutorials. We have over 150 guides written by our WordPress experts that will help you navigate the WordPress dashboard like a pro!
Fixing The Fatal Error: Maximum Execution Time Exceeded
The maximum execution time exceeded error in WordPress can get in the way of updating your plugins and themes. We know it can be frustrating when it happens, but there are several ways to solve the problem quickly.
Remember, you can fix the maximum execution time WordPress error with the following methods:
- Uninstall the problem item.
- Increase the maximum execution time with a plugin like WP Tools.
- Adjust the maximum execution time by editing the wp-config.php file.
- Increase the maximum execution time in the php.ini file.
- Edit the .htaccess file to increase the maximum execution time.
- Contact your hosting provider to change the file on your behalf.
Want a provider that handles all the technical issues? We’re here to help!
Our DreamPress packages come with automatic updates, daily backups, and 24/7 support from WordPress specialists.
Sign up today to try it for yourself and wave goodbye to troubleshooting!

Do More with DreamPress
DreamPress Plus and Pro users get access to Jetpack Professional (and 200+ premium themes) at no added cost!
Check Out Plans