Dealing with email issues can be a frustrating experience. Whether you’re not receiving important WordPress notifications or your contact form seems to be acting up, these problems can disrupt your day-to-day business.
Fortunately, there are multiple troubleshooting methods and tools you can use to fix your email issues. Most aren’t overly complicated, and you’ll still be able to decide what email addresses you’ll use to send and receive messages from WordPress.
In this article, we’ll explain some likely reasons WordPress isn’t sending emails. Then we’ll show you how to fix this issue and configure your contact forms so that they properly deliver emails as well. Let’s go!

Need to Fix WordPress Issues? We’ve Got You
Avoid troubleshooting when you partner with DreamHost. Our friendly WordPress experts are available 24/7 to help solve website problems — big or small.
Check Out PlansWhy You’re Not Receiving Emails From WordPress
By default, WordPress uses the PHP mail() function to send emails. Unfortunately, many hosting servers are not configured to use this function, making it impossible to process those emails.
Another reason emails from your site may not get delivered is unintended side effects from efforts to reduce spam. Most email providers attempt to verify that an email is coming from the address it claims.
However, the address used to send email from your website likely uses spoofing. Without spoofing, an email sent from your website might look like “admin@yourserver.yourwebhost.com”. Spoofing enables you to change that address to a more reasonable one, such as ‘“admin@yourwebsite.com”.
Unfortunately, spoofing can also serve nefarious purposes, and email providers can’t tell the difference. Therefore, it can sometimes cause your emails to end up in recipients’ spam folders.
How to Stop Email From Going to Spam
In addition to spoofing, there are a lot of other reasons why emails might go to spam. Some of the most common possibilities are:
- Your IP address is flagged as having been used for spam
- You’re using trigger words in your email newsletters
- You’re employing poor emailing practices
One way to keep your emails out of the spam bin is to use Simple Mail Transfer Protocol (SMTP) rather than PHP mail(). This protocol is the industry standard and uses proper authentication.
Put simply, emails sent via SMTP have a higher chance of being delivered than those sent using other protocols. You can use a few different methods to set up your WordPress site to send emails via SMTP.
How to Set Up WordPress to Send Emails Via SMTP (2 Ways)
Now that we’ve touched on a few reasons WordPress emails aren’t making it to their intended recipients, let’s look at two ways to fix the problem.
1. Send Email Using Your Hosting Account Address
Using your hosting account email is the simplest way to get your WordPress messages moving as expected. We’ll show you how to set this up, using our own DreamHost web hosting as an example.
Begin by downloading and installing the WP Mail SMTP plugin. From your WordPress dashboard, navigate to WP Mail SMTP > Settings.
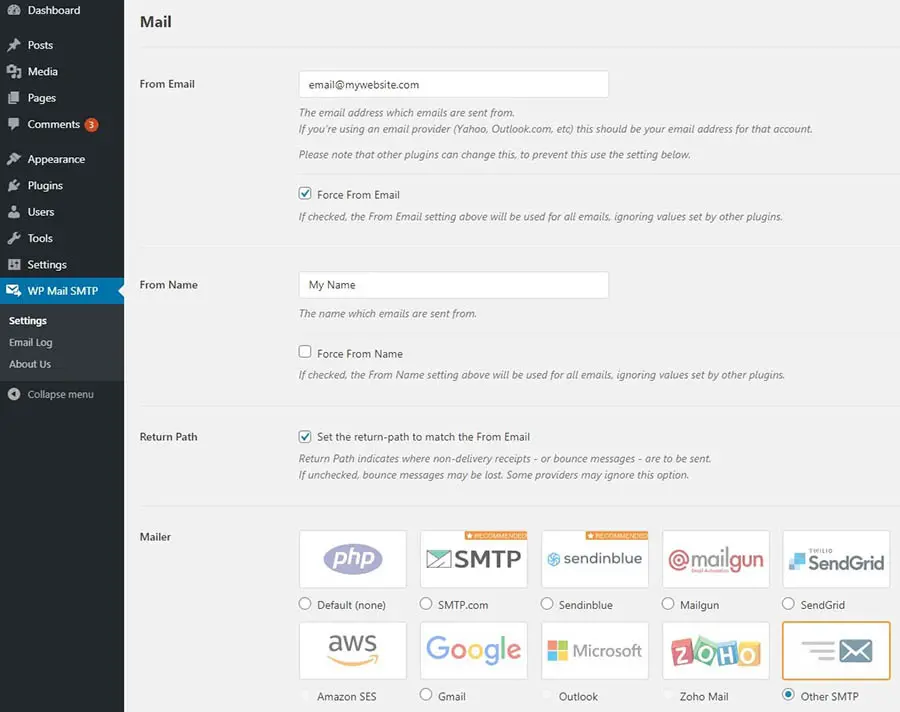
There are several fields you’ll need to fill in on this screen. From Email is the address from which you want your emails sent. You’ll also need to check the Force From Email box. The From Name field is the name you’d like the email to come from. You can check the Force From Name box if you’d like.
Finally, select Other SMTP as your mailer. Doing this will cause a Return Path section to appear. Be sure to click on the box in that section as well.
Now you can populate the other SMTP options. We’ll use DreamHost to demonstrate again, but the information should be similar if you use another web host.
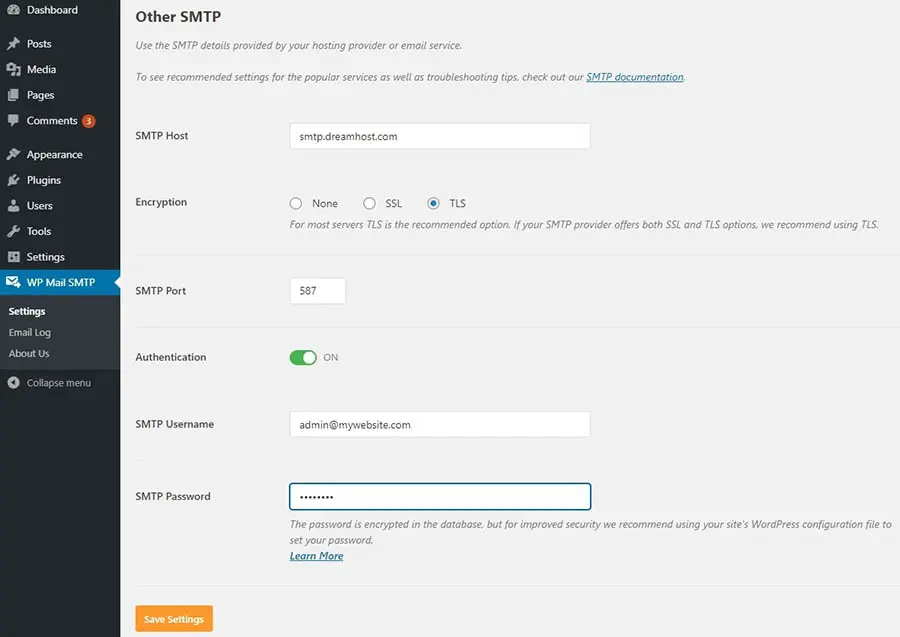
First, make sure to toggle on Authentication. For the SMTP Host, use “smtp.dreamhost.com”. When you select TLS encryption, the plugin should auto-populate the SMTP port as “587”.
Next, you can enter your DreamHost email address and password. Finally, click on the Save Settings button, and you should be ready to go. You can try sending a test email to be sure that everything is working properly.
2. Send Email Using Your Gmail Account
If you prefer, you can use your Gmail address to send mail. Note that while this method also uses the WP Mail SMTP plugin, it’s significantly more complicated. Also, you’ll have to perform these steps again if you ever change your Gmail address.
First, set up a Gmail account to use, if you don’t already have one. Next, download and install the WP Mail SMTP plugin, and navigate to WP Mail SMTP > Settings. You can fill out the fields as described above.
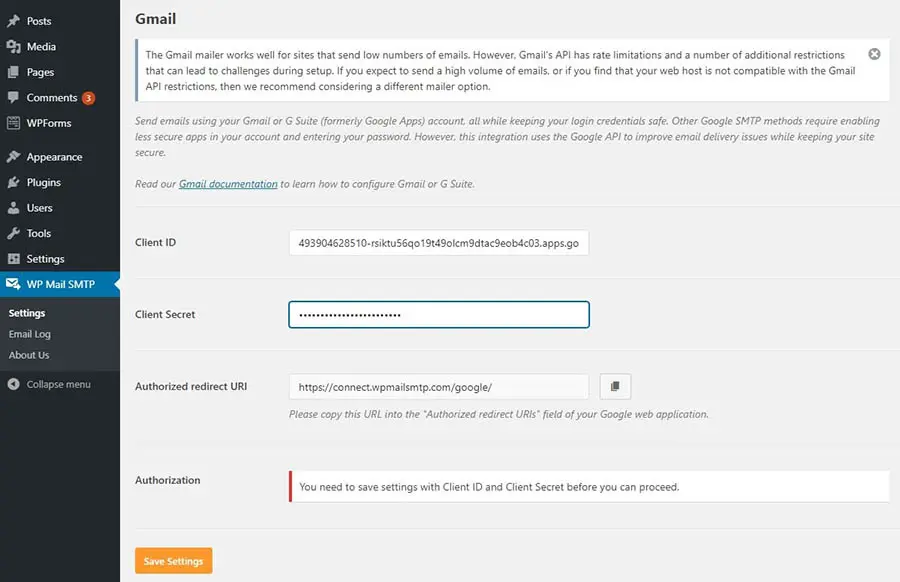
However, when it’s time to select your mailer, choose Gmail.
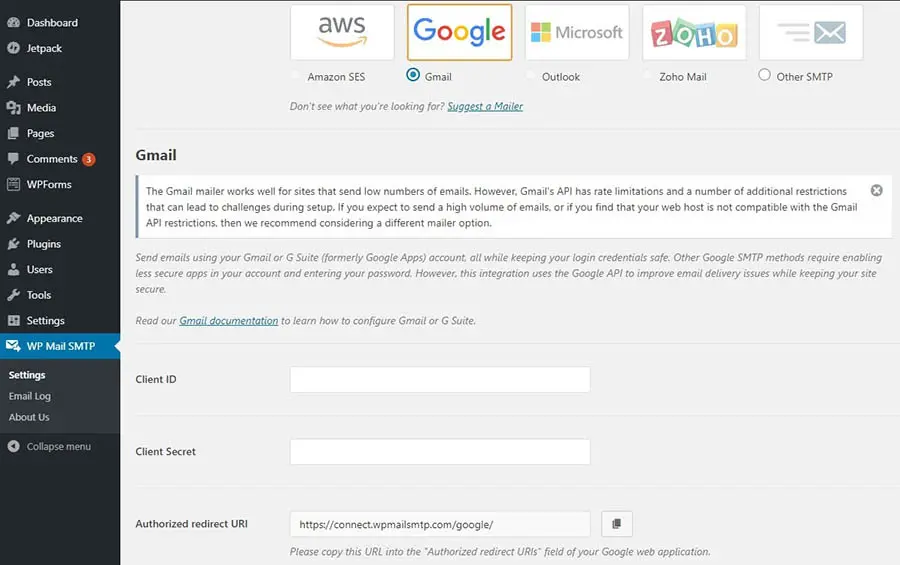
Please keep this tab handy, as we’ll need to return to it later. For now, you can create a set of secure credentials that will provide your WordPress installation with the required authorization to use Gmail’s servers.
To configure these credentials, head to the Google Developers Console and log in. Create a new project by clicking on Select a project at the top of the screen, followed by New Project in the pop-up that appears.

Give your project whatever name you’d like, and then click on the Create button. Once you do, you’ll be brought to the API Library. Find and click on the Gmail API in the G Suite section.
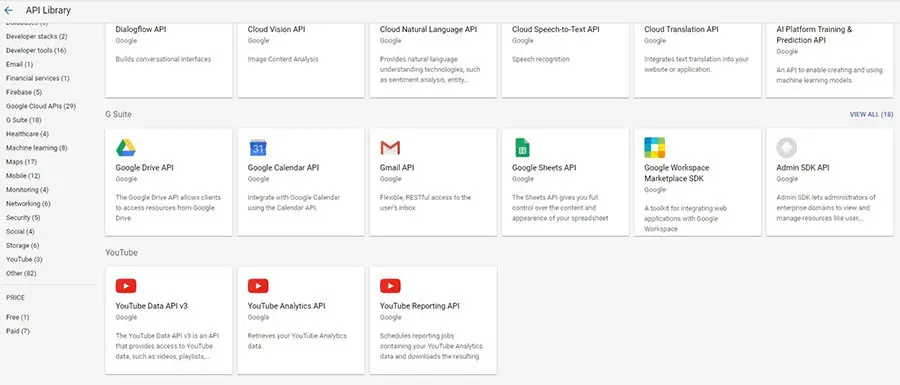
Select the Enable button. On the next screen, click on Create credentials to open the credentials wizard.

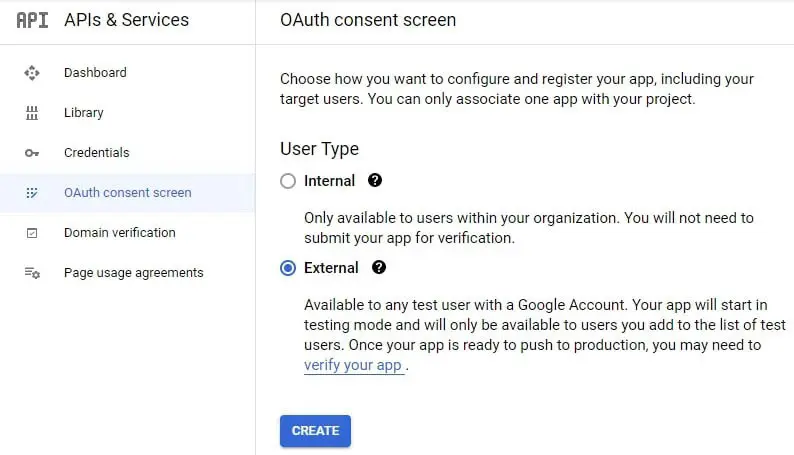
Next, select the Client ID link. You’ll see a pop-up asking you to set up a consent screen. Click on the Set Up Consent Screen button to proceed.
Here, you’ll select whether the application type is internal or external. If you’re not using a G Suite account, you’ll only be able to choose “external.”
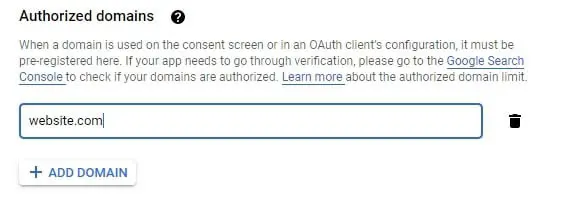
You can provide an application name and a contact email address. After you do, scroll down to the Authorized domains section, click on Add domain, and enter your website’s URL.
Finally, enter your email address again under Developer contact information. Click on the Save and Continue button. You can also hit Save and Continue to advance through the next two screens. Since you’re the only one who will ever see this page, you don’t need to worry about populating that information.
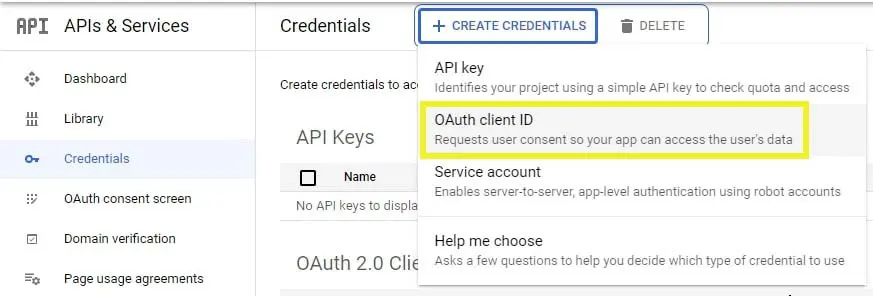
When you reach the end of this series of prompts, click on the Back to Dashboard button. Select the Credentials tab on the left, followed by Create Credentials > OAuth Client ID from the drop-down menu.
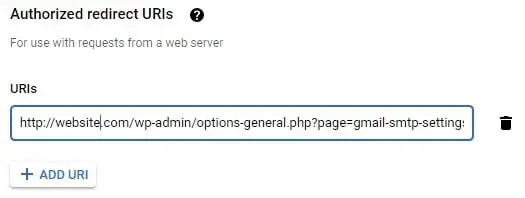
On the next page, select Web Application from the Application type drop-down menu. You’ll need to return to the WP Mail SMTP settings screen. Copy the Authorized Redirect URL, and paste it into the Authorized Redirect URL field on the Client ID for Web Application page.
When you’re done, click on the Create button. You’ll see a pop-up containing the Client ID and Client Secret. Paste these OAuth credentials into the appropriate fields in the WP Mail SMTP options.
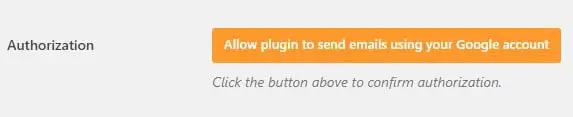
Once you click on the Save Settings button, the page will refresh. Scroll back down to the bottom and click on Allow plugin to send emails using your Gmail account.
Enter your Gmail credentials to finalize the connection. Your SMTP status should now be connected, and you can send a test email to make sure everything is working correctly.
How to Configure Your Contact Forms to Send Email Successfully
If your server is now sending emails correctly, but you are still having problems with your contact forms, the issue could be with a setting in the WordPress form plugin you use. Below, we’ll show you how to troubleshoot some of the most popular tools.
Contact Form 7
If Contact Form 7 isn’t working for you, you likely need to change the address from which emails are sent. Starting from the admin dashboard, navigate to Contact > Contact Forms. Next, click on the contact form you’d like to edit and select the Mail tab.
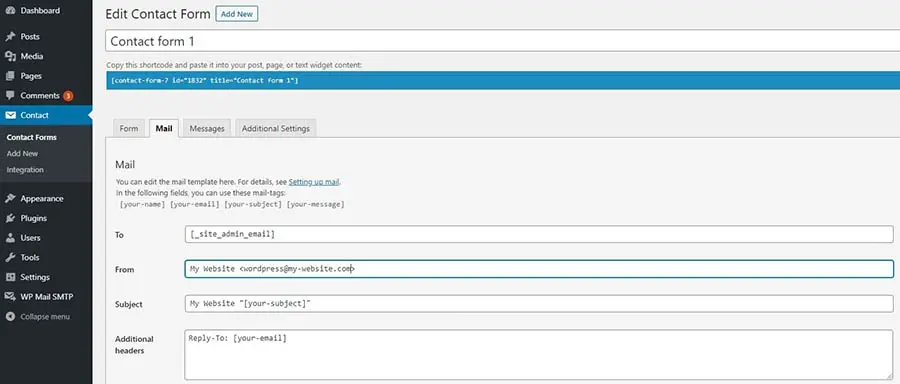
Ensure that the From field is using your website’s admin email address. Also, verify that the emails in the To and From fields are different. Once you’ve made the necessary changes, click on the Save button.
WPForms Lite
You can change the settings in WPForms Lite by navigating to WP Forms > All Forms. To open the editor, click on Edit under the form you want to change. Next, select Settings in the left-hand menu, followed by Notifications.
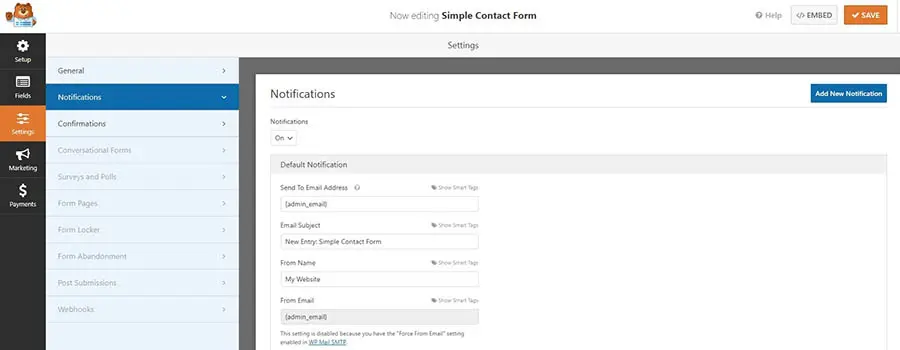
Here, you’ll be able to update the Send To Email Address and From Email fields. Click on the Save button when you’ve made your desired changes.
Jetpack
You’re less likely to run into problems using Jetpack’s contact form, as this plugin doesn’t give you as many configuration options. If there is an issue, it probably stems from having the same email address set as both To and From.
You can correct this by making one simple change. After you’ve added the form using the block, click on the pencil icon to edit the form options.
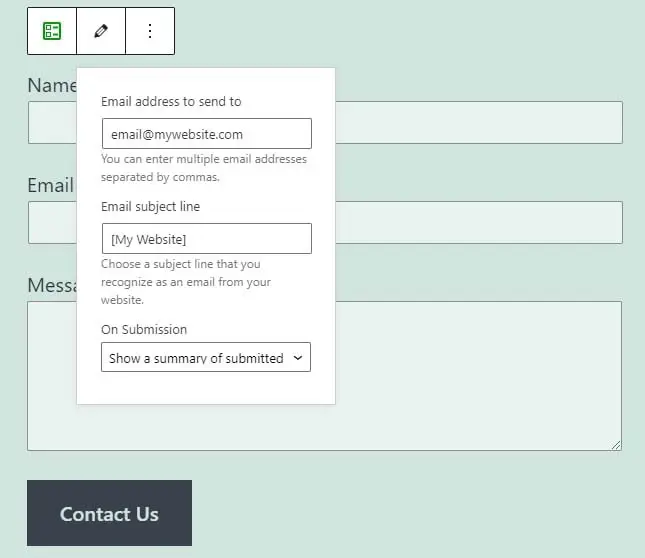
You can change the email address your form responses send to on this screen. Note that you won’t be able to change the address that forms are sent from, as Jetpack uses your website’s admin email for this.
More WordPress Error Guides
Want to learn how to fix other common WordPress errors? We’ve put together several tutorials to help you.
- How to Fix the 500 Internal Server Error in WordPress
- How to Fix Syntax Errors in WordPress
- How to Fix the Error Establishing Database Connection in WordPress
- How to Fix WordPress Error 404 Not Found
- How to Fix the Sidebar Below Content Error in WordPress (In 3 Steps)
Ready to Fix the WordPress Not Sending Email Issue?
There are few things as irritating as having to dig through your spam folder to look for a missing email. However, once you’ve fixed this common WordPress issue, your website’s emails should safely find their way to their intended destinations.
In this piece, we showed you how to leverage the WP Mail SMTP plugin, and use either your hosting or Gmail account to send emails. Once you’ve handled that task, you can move on to configuring the options in your contact form plugin, to ensure that those emails properly send as well.
If you’d like to make your experience with WordPress emails easier, you might want to consider checking out DreamPress, our managed hosting plan. You’ll have access to our premium support 24/7 to help you with any problems you may run into on your site!