
Your website’s navigation may be slipping away… So stick around to learn how to keep it fixed!
OK, bad puns aside, keeping your site’s navigation easily accessible is key to enhancing user experience. Enter the sticky header (also called a fixed header): a navigation bar that stays pinned to the top of the screen as visitors scroll, keeping your menu, logo, and calls-to-action visible on every part of the page.
This handy feature keeps menu items and calls-to-action within reach no matter how far users scroll —a game-changer for small business owners aiming to boost engagement and conversions.
In this tutorial, we’ll explore three simple ways to create a sticky header in WordPress, catering to all skill levels —from beginners to those comfortable with a bit of coding. Whether you prefer using a plugin, flipping the built-in switch in the Site Editor or your theme, or adding custom CSS, we’ve got you covered.
Why Sticky Headers Take Your Website Up a Notch
Before we dive into the how-to, let’s look at why you might want to use a sticky header in the first place.
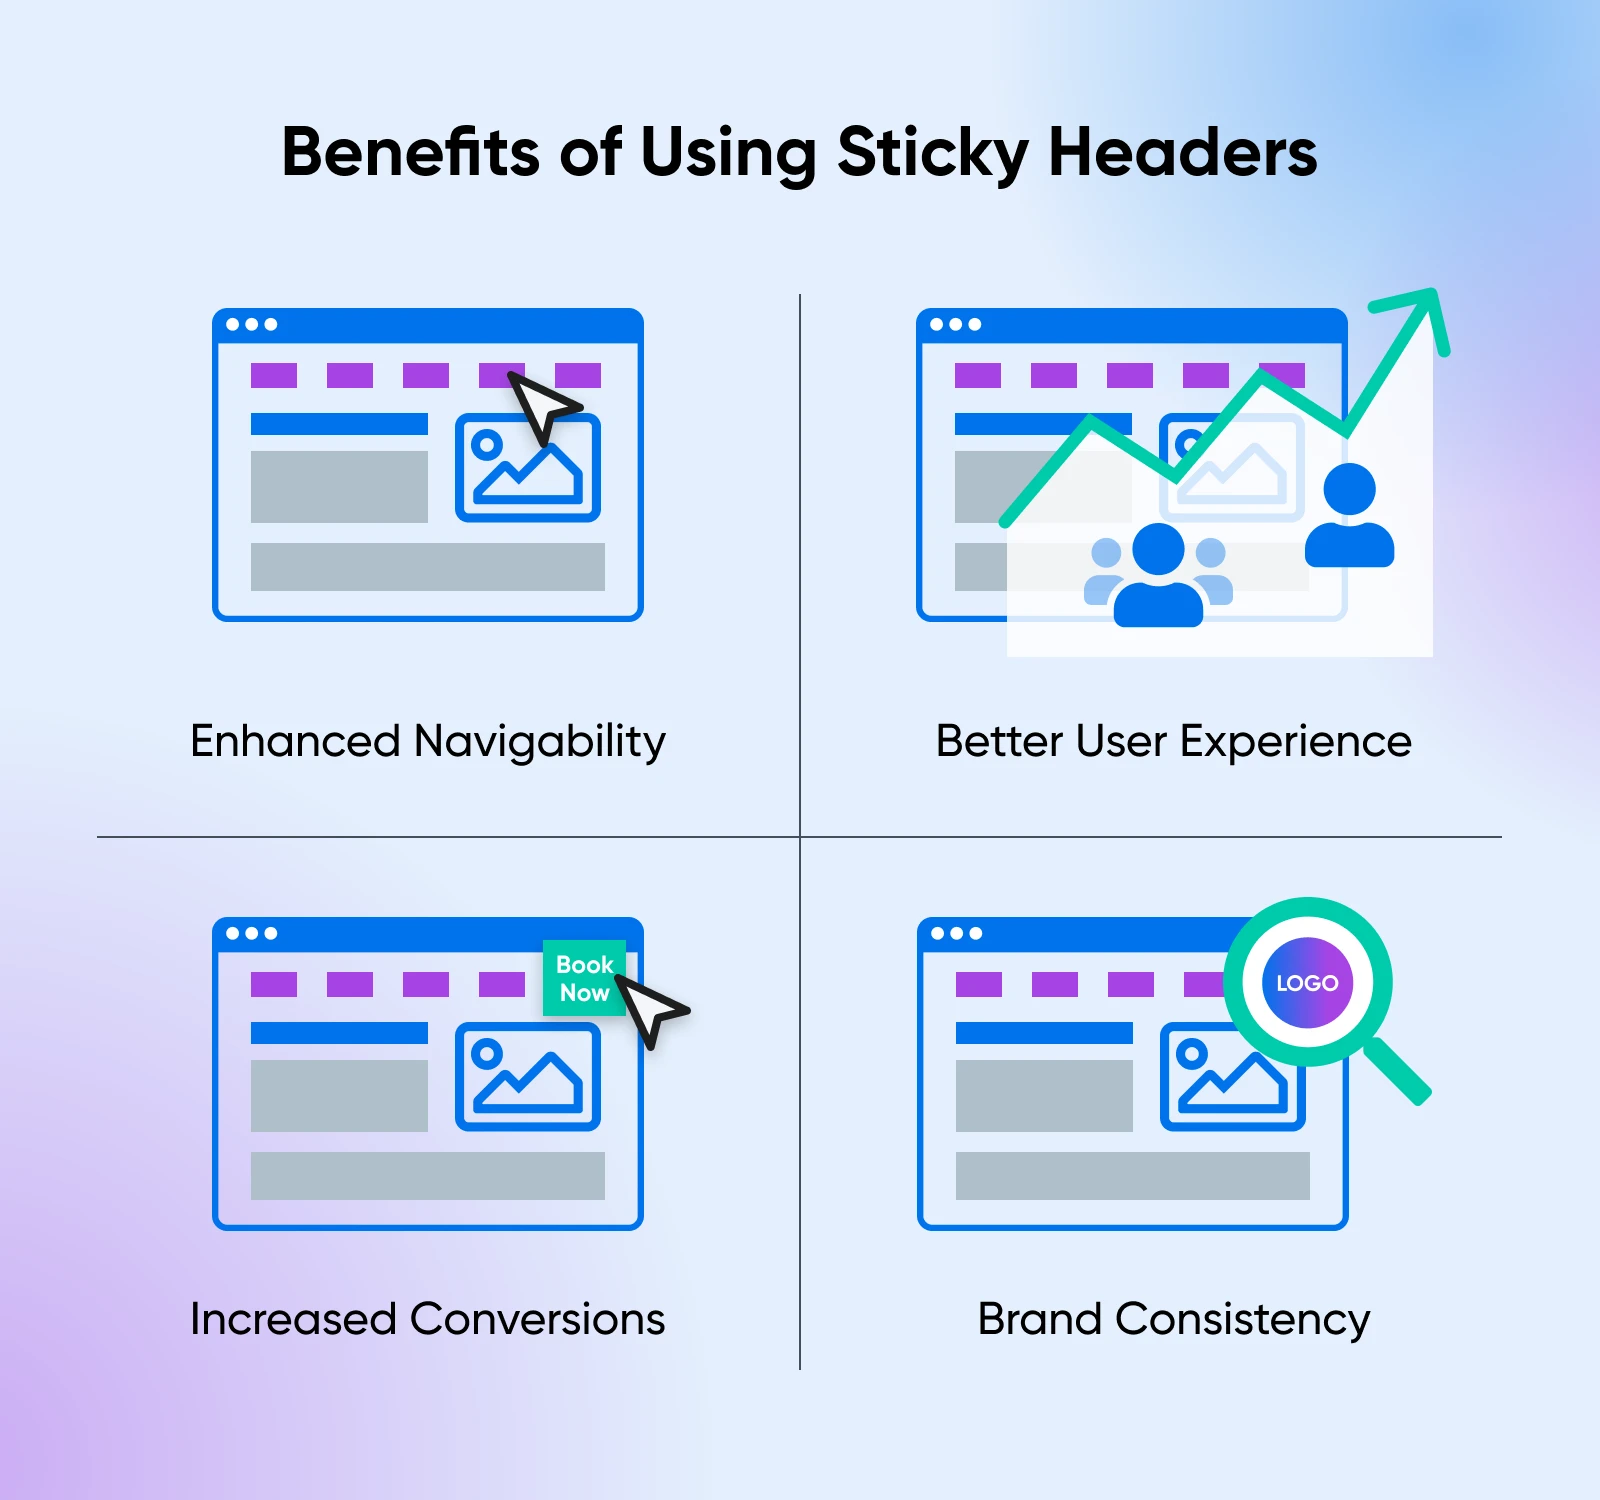
1. Enhanced Navigability
A sticky header keeps your site’s main menu in constant view, eliminating the need for visitors to scroll back to the top when they want to move on to a different page. This ease of movement can make browsing your site more intuitive and enjoyable, especially if you have content-rich pages that require a lot of scrolling.
2. Better User Experience
By keeping essential information and navigation links readily accessible, you reduce friction in the user journey. That kind of seamless browsing experience can lead to longer site visits and fewer early exits — visitors stay with your content instead of bouncing away from it.
3. Increased Conversions
Imagine having a persistent “Book Now” or “Contact Us” button that follows your visitors wherever they go on your site. A sticky header allows you to keep important calls-to-action front and center, gently encouraging users to take the next step —whether that’s making a purchase, signing up for a newsletter, or booking a service.
4. Brand Consistency
A fixed header keeps your logo and other brand elements visible at all times. This constant reinforcement can strengthen brand recognition and trust, making your business more memorable to potential customers.
3 Simple Ways To Create a Fixed (Sticky) Header in WordPress
Now that we know why you want a sticky header for your WordPress site, let’s talk about how you get one.
Below, we’ll guide you through three methods to add a sticky header to your WordPress site, starting with the easiest and progressing to more advanced techniques.
Choose your own adventure: the one that best fits your comfort level and the needs of your website.
Quick shortcut: if your site uses a block theme (you see Appearance > Editor in your dashboard), WordPress has a sticky-header switch built in — skip straight to the Site Editor steps in method 2.
Method 1: Using a WordPress Plugin (Easy)
For those who prefer a no-code solution, WordPress plugins offer a quick and user-friendly way to add a sticky header. Plugins are especially beneficial if you’re new to WordPress or want to implement the feature without delving into technical details.
Recommended Plugins
Features:
- Simple setup process.
- Customizable appearance and behavior.
- Option to make any element sticky, not just the header.
Sticky Menu & Sticky Header (formerly “Sticky Menu (or Anything!) on Scroll”)
Features:
- Flexibility to stick any element.
- Offset options to control when the sticky effect kicks in.
- Works with most themes.
What to do
Step 1: Install the plugin
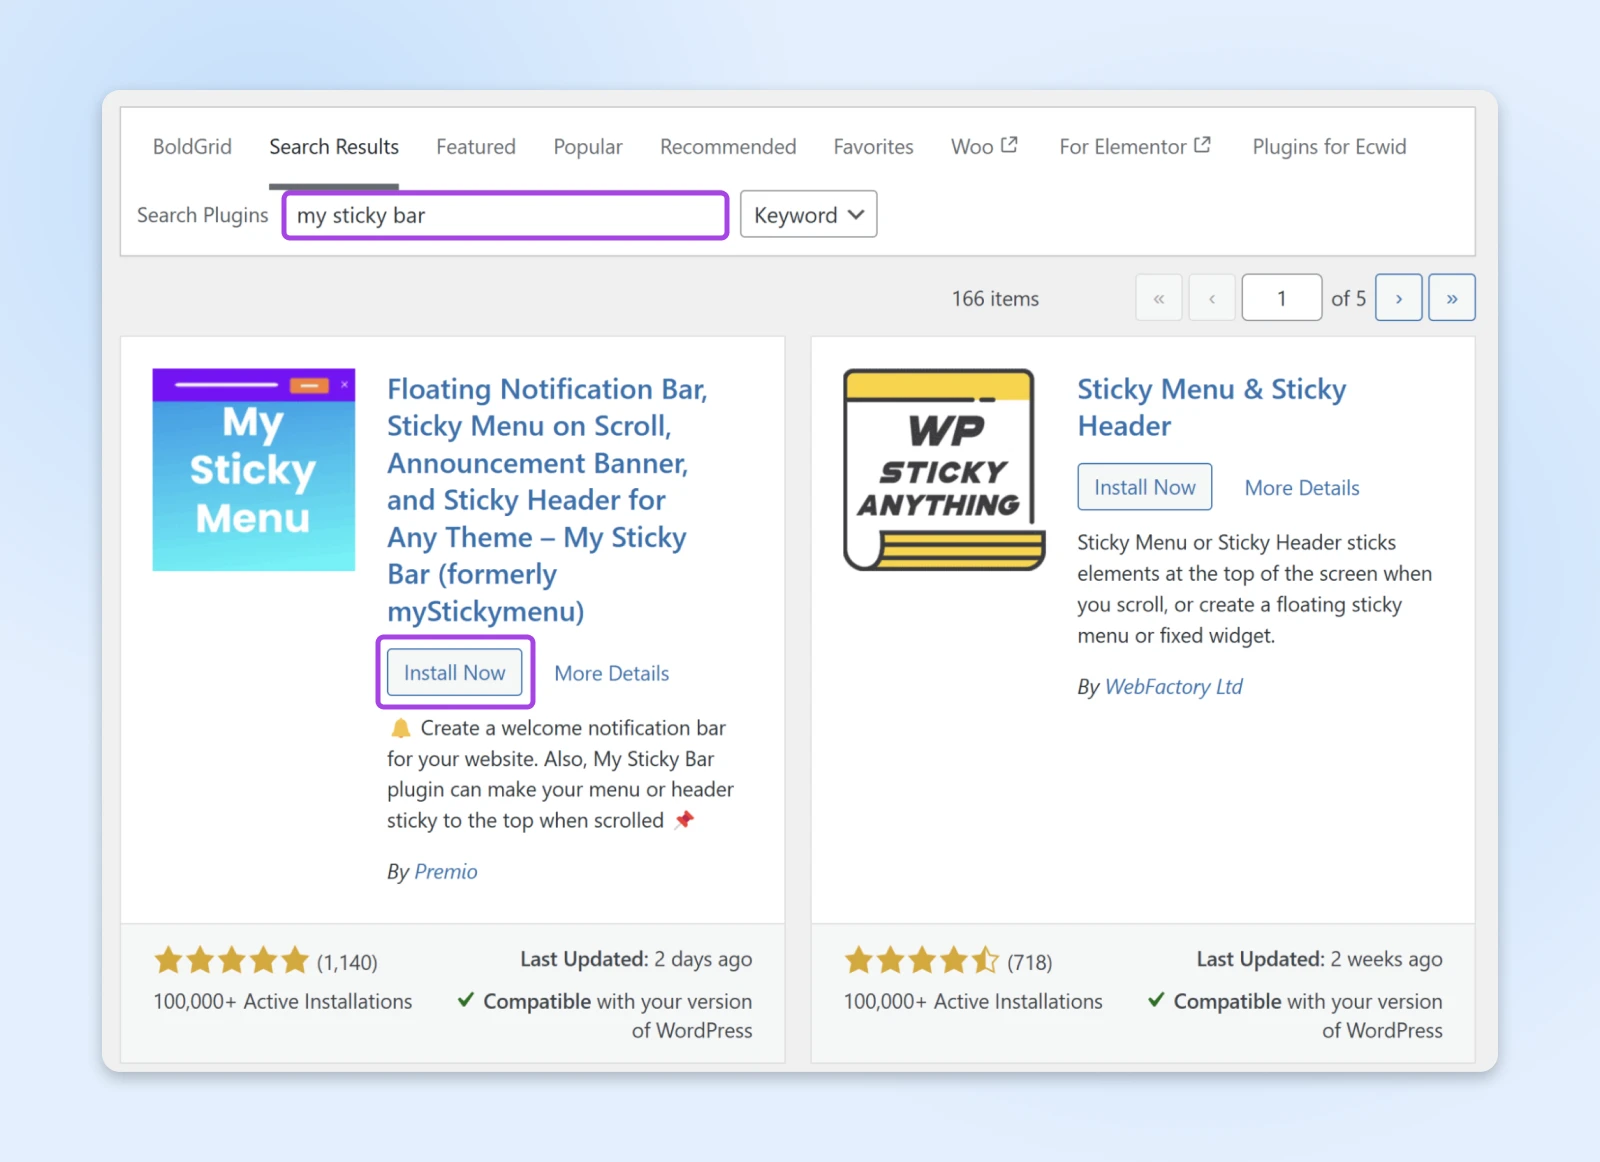
Log into your WordPress dashboard. Navigate to Plugins > Add New Plugin. In the search bar, type the name of your chosen plugin, install it, and activate it.
Step 2: Configure the plugin (if needed)
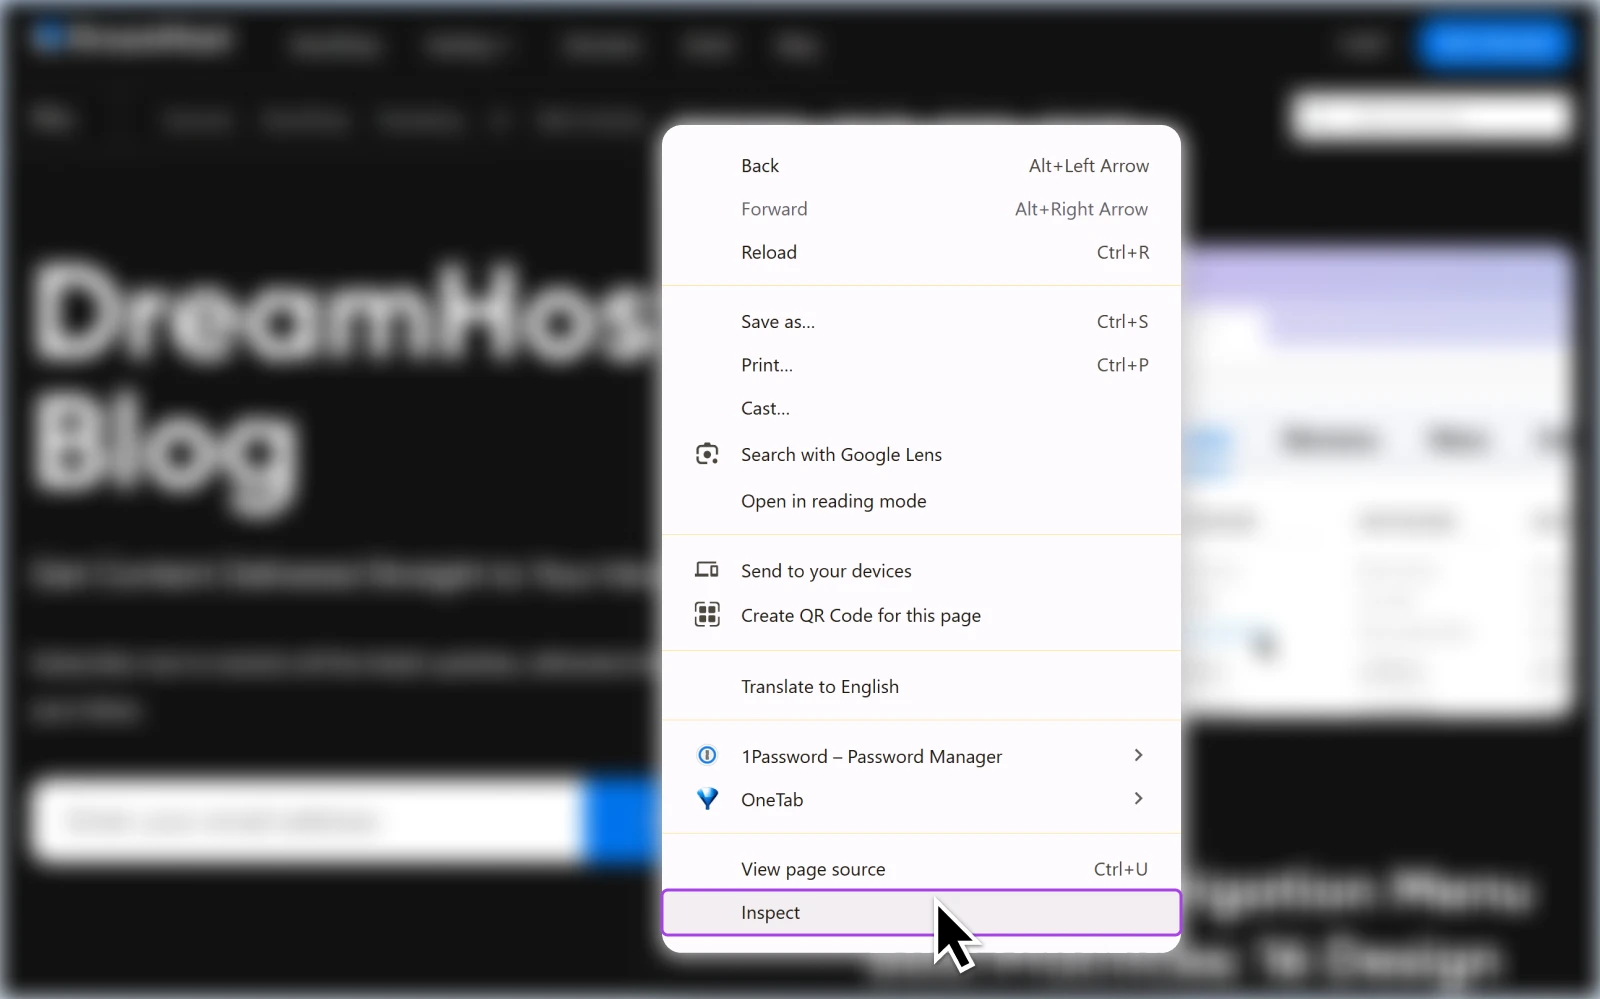
Identify the header element you want to make sticky. Use your browser’s “Inspect Element” tool to find the exact selector if needed. Enter the selector into the plugin’s settings.
To do this, open your website in a browser, right-click on your header, and select Inspect or Inspect Element.
Common selectors include #site-header or .main-header.
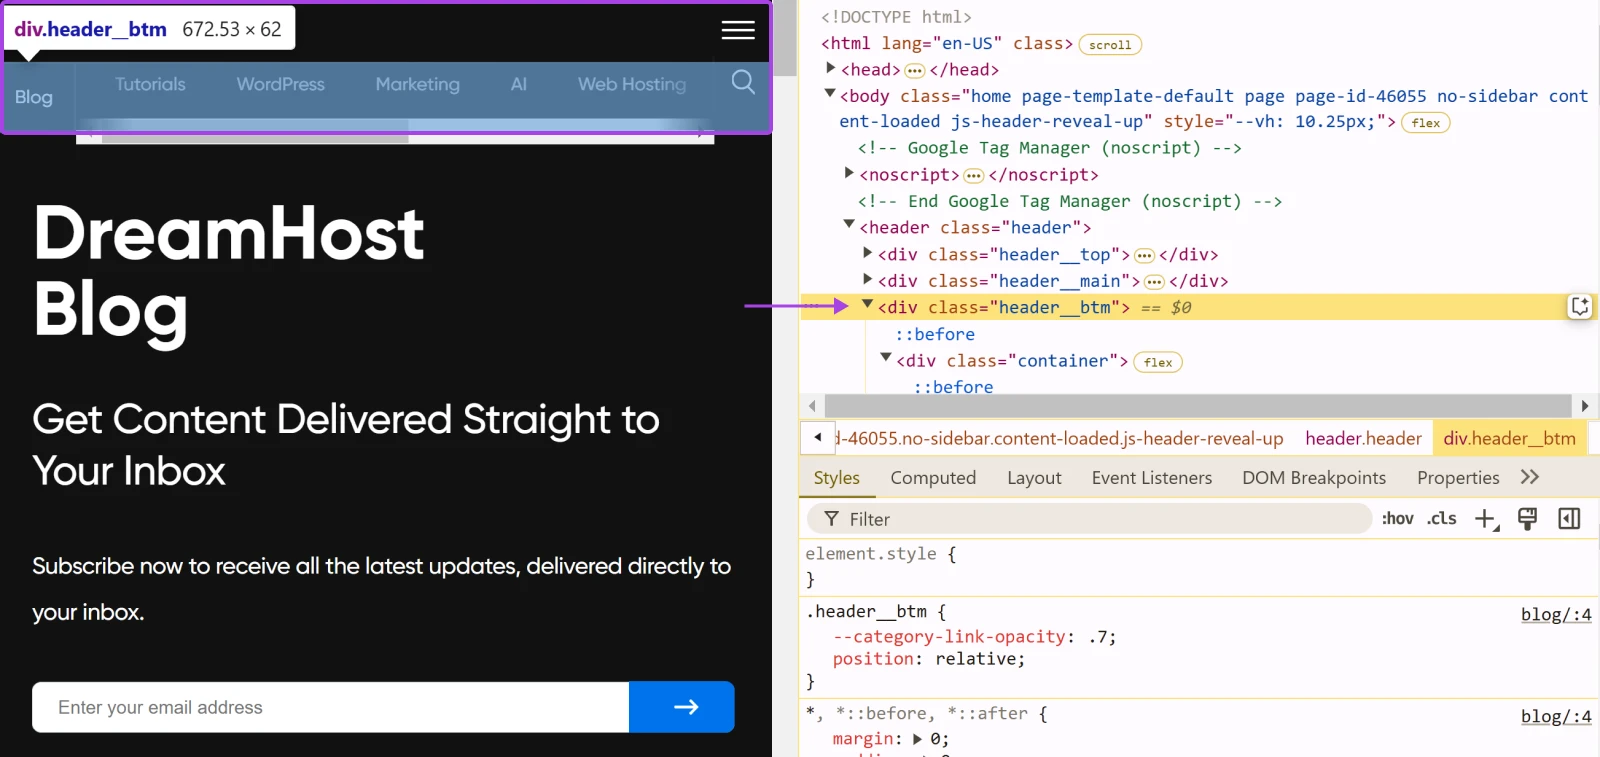
Depending on the plugin you chose, you may be able to customize other options, like adding animation effects or changing the scroll distance before the header becomes sticky.
Step 3: Save changes and test
Click Save or Apply to confirm your settings. Visit your website to test the sticky header. Scroll down to see if the header remains fixed at the top, and be sure to check on different devices.
Method 2: Using Built-In Settings — Site Editor Or Your Theme (Easy To Moderate)
Many modern WordPress themes come with built-in options to enable a sticky header. And if you use a block theme, WordPress itself now has the option built in — no plugin, code, or theme-specific setting required.
On A Block Theme: Use The Site Editor
If your site uses a block theme — the WordPress default since 2022 (if you see Appearance > Editor in your dashboard, you do) — sticky headers are a core WordPress feature:
- Go to Appearance > Editor and open a template that shows your header.
- Click the header area and select the group block that contains it (the container wrapping everything in your header). The List View panel (the ☰ icon in the top toolbar) makes this easier.
- In the block settings sidebar, open the Position panel and choose Sticky.
- Click Save, then scroll a page on your site to confirm the header stays put.
WordPress has supported this Position control since version 6.2 (2023). It appears on group blocks placed at the top level of the template. If your header isn’t wrapped in a group, select the Header template part, open its three-dot menu, choose Group, and set the Position on that new group instead. (A few third-party block themes switch the control off entirely — if so, use the CSS in method 3.)
On A Classic Theme: Use The Customizer
Popular themes with a sticky-header toggle include Astra (requires the Astra Pro addon), OceanWP (a premium Sticky Header extension), and Divi (a paid theme with a built-in fixed navigation setting). On the free versions of most popular themes the toggle isn’t included — if that’s you, use the CSS in method 3 instead.
Step 1: Access the theme customizer
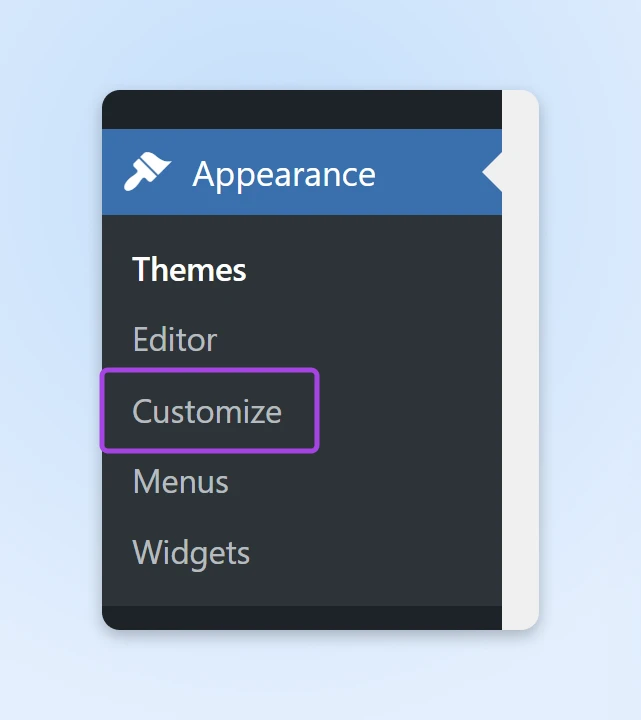
In your WordPress dashboard, navigate to Appearance > Customize.
Step 2: Find your header settings
In the customizer sidebar, look for sections labeled “Header,” “Menu,” or “Navigation” Click on the relevant section to access header settings.
Step 3: Enable the sticky header option
Find the setting labeled “Sticky Header,” “Fixed Header,” or “Enable on Scroll.” Toggle the option to On or Enable.
Step 4: Customize other settings (if applicable)
There may be other settings you can personalize, if you want to, like the background color, transparency levels, logo size while scrolling, etc. Use the live preview to see your changes in real time.
Step 5: Publish and test
Click Publish to save your changes. Visit your site to verify the sticky header functionality. Test on multiple pages and make sure to check its responsiveness on tablets and smartphones.
Method 3: DIY with Custom CSS (Advanced)
If you’re comfortable with a bit of coding, adding custom CSS allows for maximum customization and control over your sticky header’s behavior and appearance.
Again, you’ll need to identify your header element. Open your website in a browser, right-click on your header, and select Inspect or Inspect Element.
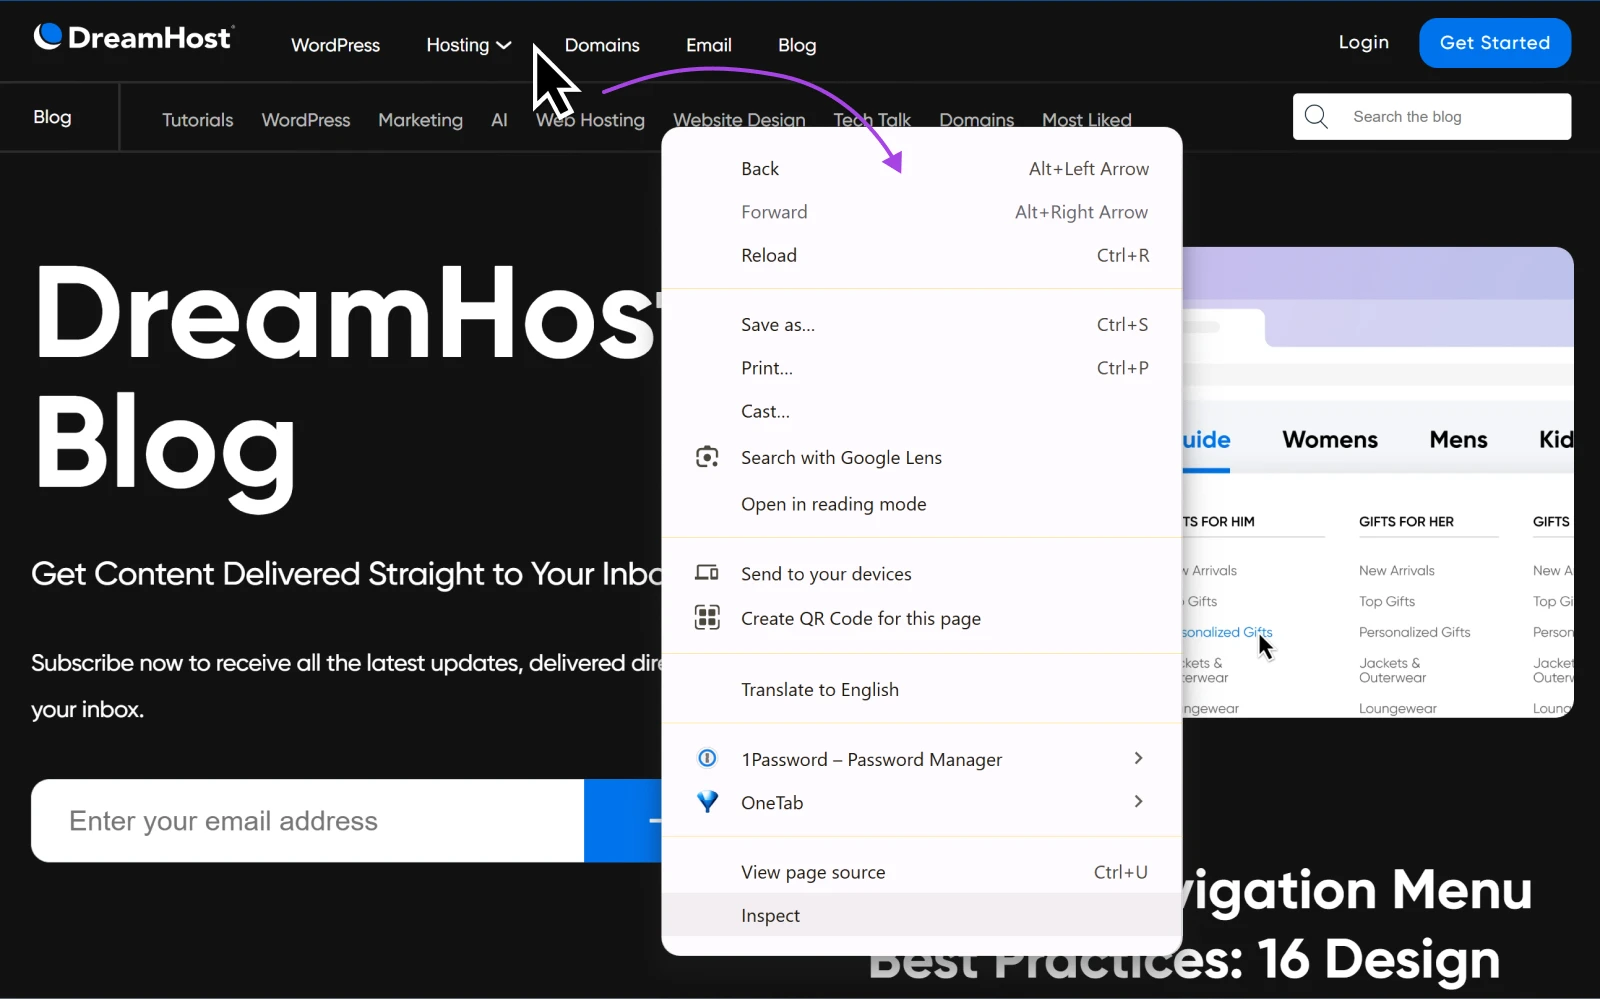
Note the CSS selector for your header. Common selectors include header, #masthead, and .site-header, so look for those.
What to do
Step 1: Go to your additional CSS editor
Go to Appearance > Customize in your WordPress dashboard. Click on Additional CSS at the bottom of the customizer sidebar.
Step 2: Insert custom CSS code
Insert custom code into the CSS editor. Replace header with your specific header selector if different (e.g., .site-header).
Here’s the modern way to do it, using position: sticky:
/* Make the header sticky */
header {
    position: sticky;
    top: 0;
    z-index: 9999;
}
That’s the whole thing. A sticky element scrolls normally until it reaches the top of the screen, then stays pinned. And because it never leaves the page flow, you don’t need extra margin to stop it covering your content. position: sticky is supported by every modern browser.
Step 3: Fall back to position: fixed if you need it
One catch: position: sticky won’t work if an element wrapping your header has an overflow style set, which some themes do. If your header refuses to stick, use the older position: fixed approach instead, and push the page content down to compensate — match the margin-top value to your header’s height:
/* Fallback: fix the header in place */
header {
    position: fixed;
    top: 0;
    width: 100%;
    z-index: 9999;
}

/* Prevent content from hiding behind the header */
body {
    margin-top: 80px; /* Adjust this value to match your header's height */
}
Step 4: Publish and test
Click Publish to apply your changes. Visit your site to make sure your header remains fixed at the top when scrolling and there’s no overlap between the header and the content below. Test on different devices and browsers to make sure it’s consistent, too.
Troubleshooting Tips
1. The header won’t stick
Check whether an element wrapping your header has an overflow style set — that stops position: sticky from working. Sticky elements also only stick within their parent container, so a wrapper no taller than the header gives it nowhere to stick. Remove the offending rule, or switch to the fixed-position fallback above.
2. Overlapping content (fixed fallback only)
If the content below the header is hidden, adjust the margin-top value.
3. Mobile responsiveness
If your sticky header takes up too much space on mobile, you can revert it to a normal, non-sticky header for screens below a certain width. For example, if you want to disable the sticky header on devices narrower than 600 pixels, you could add:
@media (max-width: 600px) {
    header {
        position: static; /* Turns off the sticky or fixed positioning */
    }
    body {
        margin-top: 0; /* Only needed if you used the fixed fallback */
    }
}
4. Z-index issues
Increase the z-index value if the header is appearing behind other elements.
Should You Add a Sticky Header? The Ongoing Debate
While sticky headers can enhance user experience, opinions vary among web designers and users. One Reddit discussion captures this debate, with some arguing that sticky headers are intrusive, while others believe they’re essential for modern navigation.
To sum it up, here are some of the pros and cons of sticky headers:
| Pros of Sticky Headers | Cons of Sticky Headers |
| Improved navigation: Users have constant access to the menu, making site exploration effortless. Increased conversions: Persistent calls-to-action can encourage users to engage more readily. Better engagement: For content-heavy sites, sticky headers keep important options within reach. | Screen space consumption: On smaller screens, sticky headers can take up valuable real estate. Potential distraction: If not designed thoughtfully, they can divert attention from your content. Performance impact: JavaScript-heavy sticky headers can add page weight and cause scroll lag or layout shift. |
When in Doubt, Consider Your Audience
Good news: the research here mostly favors sticky navigation.
Contentsquare’s insights cite research finding that sticky navigation improved basic selection tasks for older adults, with similar (though smaller) benefits for younger users. Still, every audience is different — test the design with yours before committing.
Best Practices
- Minimalist design: Keep the header clean and uncluttered to minimize distraction.
- User control: Offer options for users to collapse or hide the sticky header if they prefer.
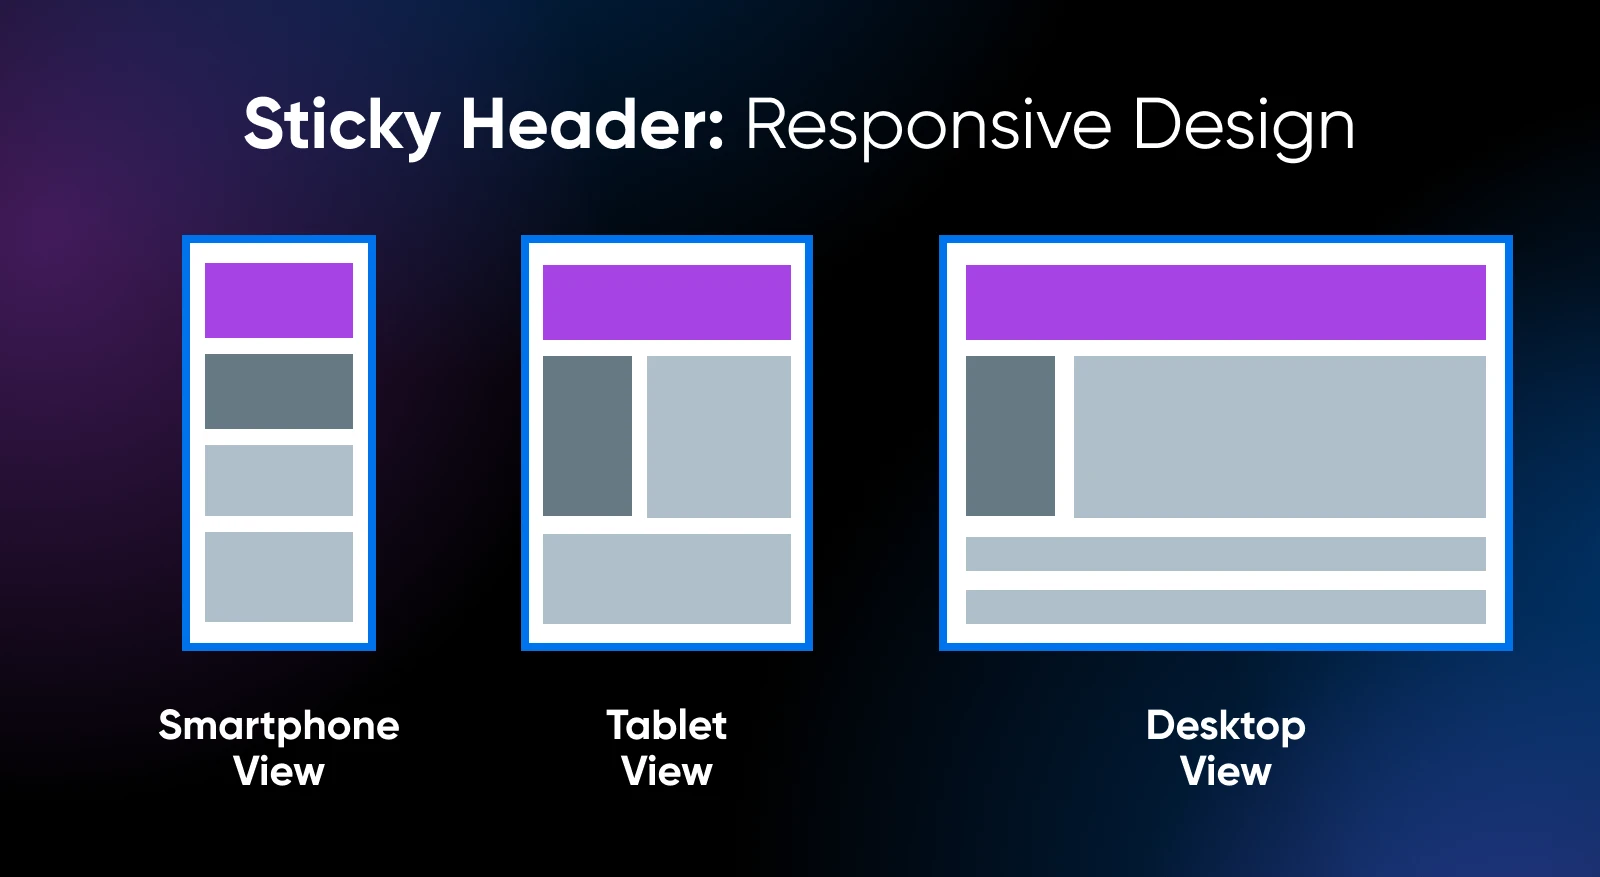
- Responsiveness: Make sure the sticky header adapts well to different screen sizes, or consider hiding it on mobile devices.
The Verdict
Ultimately, whether to use a sticky header depends on your site’s goals and your audience’s needs. We recommend testing its impact using analytics tools.
A/B testing can also provide valuable insights into how a sticky header affects user behavior and conversion rates on your site.
Sticky Header FAQ
What’s The Difference Between A Sticky Header And A Fixed Header?
In CSS terms, a sticky header (position: sticky) scrolls with the page until it reaches the top, then pins in place — without leaving the page flow. A fixed header (position: fixed) is pinned permanently and removed from the flow. In everyday use, both names describe the same effect.
How Do I Make A WordPress Header Sticky Without A Plugin?
On a block theme, select the header’s group block in the Site Editor and set Position to Sticky. It’s built into WordPress. On any theme, add three lines of CSS under Additional CSS: position: sticky; top: 0; z-index: 9999; on your header selector.
Why Isn’t position: sticky Working?
Usually because an element wrapping your header has an overflow style set, which stops sticky positioning from working. Remove that rule or fall back to position: fixed. Also confirm you’ve set a top value; sticky does nothing without one.
Do Sticky Headers Hurt SEO Or Performance?
Not meaningfully, as long as the header is lightweight. What matters is usability: a bulky sticky header that covers content or shifts the layout can hurt the page-experience metrics search engines do measure. Keep it slim, or disable it on mobile.
Should The Header Be Sticky On Mobile?
Often not. Screen space is precious on phones: a 60-pixel bar covers nearly a tenth of a typical screen. You can keep the desktop sticky header and switch it off on small screens with the media query shown in the troubleshooting tips above.
Conclusion
We’ve explored three straightforward ways to add a sticky header to your WordPress site:
- Using a plugin: Ideal for beginners seeking a quick, no-code solution.
- Using built-in settings: On block themes, WordPress’s own Position > Sticky control; on classic themes, your theme’s Customizer option.
- With custom CSS: Offers maximum customization for those comfortable with coding.
A sticky header can significantly enhance the user experience by improving navigation and keeping important elements accessible. For small business owners, this can translate into higher engagement and increased conversions.
Now that you’re equipped with the know-how to add a sticky header, it’s time to put it into action! Choose the method that suits you best and enhance your website’s navigability today.
Ready to take your website beyond the basics? Explore our additional resources and continue your journey toward a more effective and engaging online presence.
Additional Resources for Website Enhancement
Beginner guides:
- Learn WordPress, Fast: 25 Resources To Get You Started
- How To Build Lead-Generating WordPress Landing Pages
- WordPress Posts: Here’s Everything You Need to Know
- Your Website Redesign Checklist for an Incredible Revamp
Tutorials:
- How To Find Your WordPress Login URL & Upgrade It for Security
- Decoding WordPress: Working With Block Patterns
- Your Key to Building a Winning Customer Journey Map
- What To Do When You’re Locked Out Of WordPress Admin
- Keyword Research: How To Reach More Customers With SEO
At DreamHost, we’re dedicated to empowering small business owners and website managers with the tools and knowledge they need to succeed online. From hosting solutions to expert tutorials, we’re here to support your journey every step of the way!

Build the Website You’ve Always Wanted
From first idea to full launch, get everything you need to succeed online.
See MoreThis page contains affiliate links. This means we may earn a commission if you purchase services through our link without any extra cost to you.