
There you are, scrolling through this fascinating web page all about the benefits of training your dog to use those talking buttons you keep seeing online. (Wait, do I even have a dog, you distantly wonder…)
Almost as if in a trance, you click that Buy Now button to become the proud owner of 12 shiny, loud buttons that will soon grace your floor. And eventually, the back of a dusty closet. (I wonder how much that cost, you think, slowly coming out of your daze…)
You, my friend, have been landing page-d.
Landing Page
A landing page is a singular web page that typically serves a unique marketing objective. For instance, this page may be designed to capture email leads or communicate a ‘coming soon’ message.
Read MoreLanding pages are often used by especially astute marketers to plunk you on after you’ve clicked on an engaging ad, social media post, or blog link.
Their purpose? To tell you all about the thing you’ve shown interest in, in the hopes you’ll purchase it — or, to convince you to share your information so they can follow up with more information about why you can’t live without it.
When used well, a quality landing page can increase your website conversions.
Nearly everyone from beginner website owners to full-on website developers can set up effective landing pages that woo visitors and boost revenue.
However, optimizing one for maximum effect can be challenging, especially since you only have the space of a single page to work with.
That’s why the key to a strong landing page is to keep it focused, specific, and as intriguing as possible. If you include the right information at the right moments, you can win leads with an effective call to action (CTA) at the end.
So, no matter where you fall on the spectrum of marketing and website savviness, keep reading! Because in this step-by-step guide to landing pages, we’ll cover it all:
- The ins and outs of landing pages.
- Why you should care about landing pages.
- The basics of landing page design.
- Exactly how to create a landing page in WordPress.
What Are Landing Pages?
When it comes to marketing, sometimes less really is more.
Nothing proves this aphorism quite like landing pages.
A landing page is a one-page website created to achieve a single goal. That focus on one action — signing up, downloading, buying — is what makes landing pages such powerful tools for boosting conversion rates.
Conversion
A website conversion is any action a user takes on a site that moves them further into the sales funnel. Examples include filling out a web form, clicking a call to action, or purchasing a product.
Read MoreA landing page is effectively the whole website conversion funnel that’s been compressed into a single page.
Through this page alone, you’ll take the user on a linear journey toward completing a particular action. That action could be:
- Sharing an email address.
- Completing a form.
- Signing up for a free trial.
- Requesting a call.
- Answering a survey.
- Making a download (coupon, ebook, etc.)
Your goal for a landing page? That could be anything, such as:
- Selling a specific product or service.
- Encouraging sign-ups for your email list.
- Gathering personal information to create more customized marketing.
Every landing page must have an explicit goal as well as a few basic elements. Stay tuned, because we’ll explore exactly how you should design your page.
Related: 30 Excellent Product Landing Pages Guaranteed To Inspire You
Why Invest Time In A Landing Page?
First, landing pages are better than any other sign-up form when it comes to collecting customer information — they convert at around 23%, the highest signup rate of any form type (Omnisend, via HubSpot) — information that’s critical to nurturing leads, converting visitors into leads, and building the relationships that are key to retention.
In addition, landing pages are also one of the best ways to match your marketing efforts to the intent of your audience. This means less time wasted shouting into the void and more time spent on effective campaigns. Why? Because you can promote landing pages with different messaging via the specific platform that works for you.
For example, if you’re selling something expensive with a long sales cycle, you may use a more long-term marketing method, such as SEO, to get your landing page in front of the right readers. However, if you have a landing page that’s all about quick sales, it’s easy to pivot the messaging and set up a pay-per-click advertising campaign that’ll pay off when it comes to quick conversions.
Finally, landing pages are easily measurable and highly changeable. Instead of tracking visitor data from across your whole website and trying to figure out what it all means, you can simply look at the performance metrics on a single landing page for insights.
Not enough visitors making it to the bottom of the page? Not getting the engagement you expected on your CTA? If that’s the case, it’s time to A/B test. In other words, tweak one thing at a time and measure and monitor anew to see if it’s any better. In time, you’ll eventually be able to optimize your way to a high-converting landing page incrementally.
The 5 Key Elements Of Effective Landing Pages
First off, landing pages ought to be unique. Your ideal landing page content and structure all depend on its purpose!
For example, a page intended to sell a product will be focused entirely on that product. It will probably include images, a description of the product’s key features, and reviews. Most importantly, it will feature an action for the user to complete, which in this case would be making a purchase.
Lead-generating landing pages will look different. The fundamentals work the same as if you were selling a product, but instead, you’re selling the value visitors should expect to receive if they share their information with you. There will likely be lots of benefits messaging, testimonials, and perhaps even an offer such as a free trial or download in exchange for their information.
All that said, at a minimum, all of the following elements should be considered when building your very first landing page:
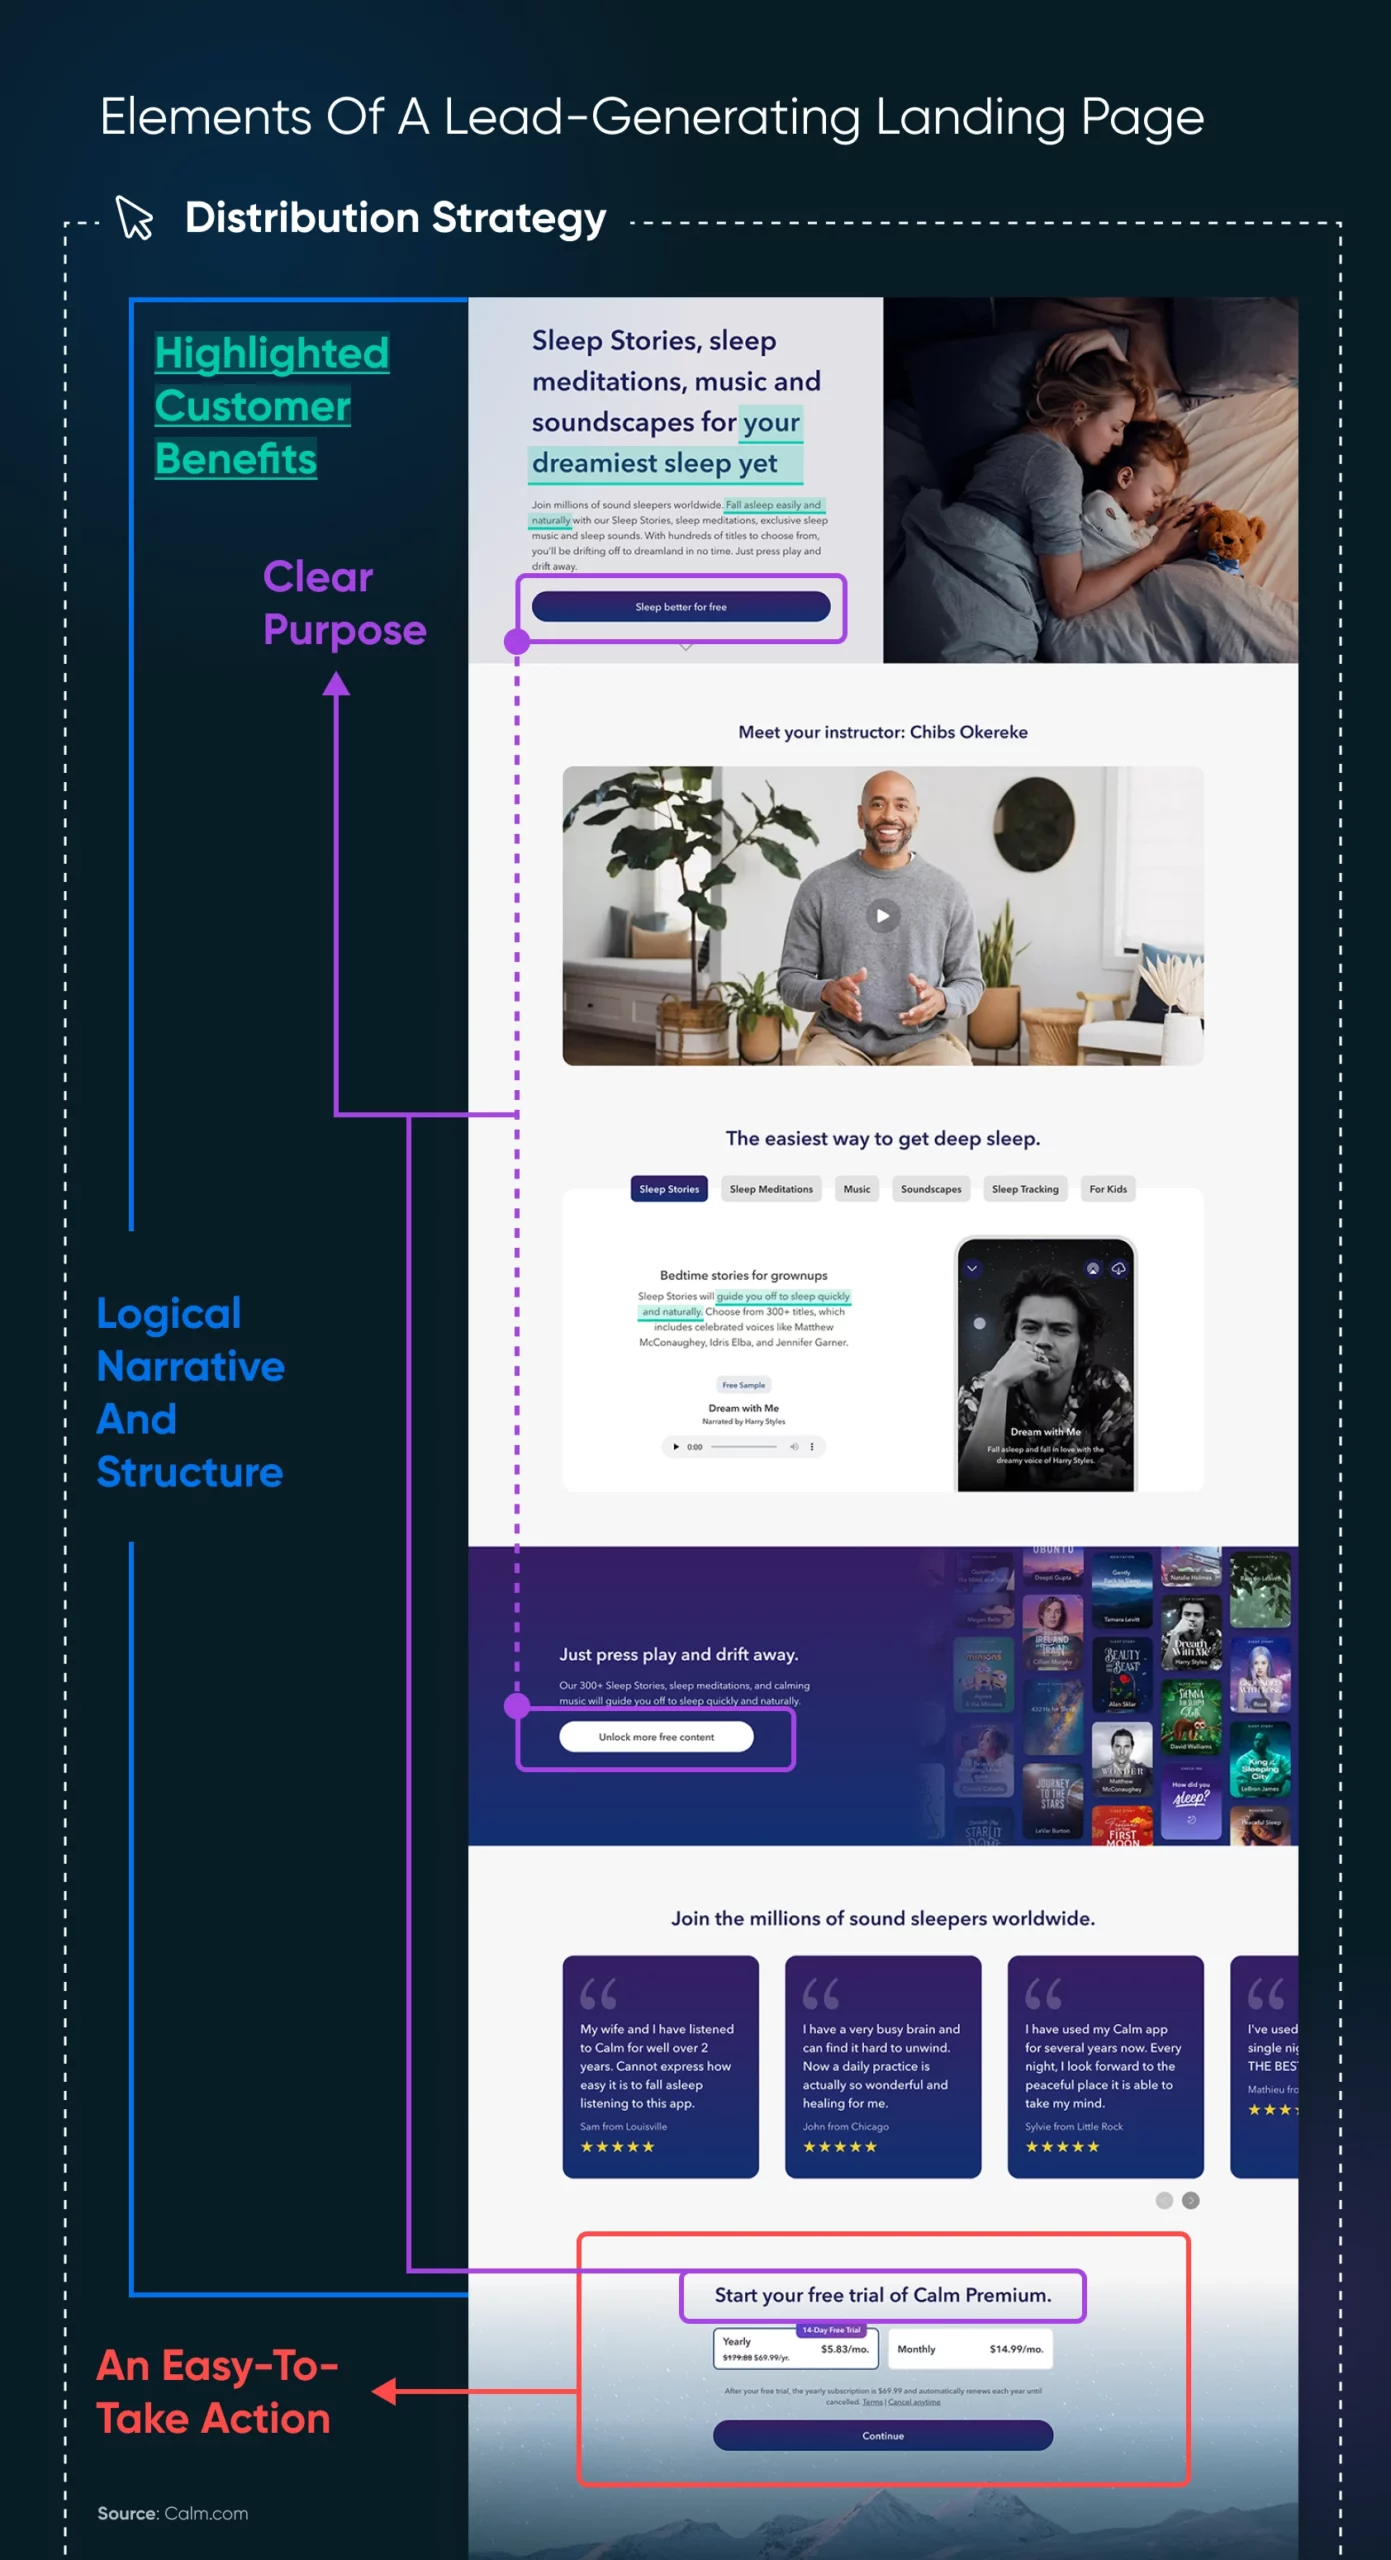
1. Clear Purpose
We’ve talked about this several times (hey, it’s important!) — your landing page needs to be really focused.
Everything you add to the page should work toward the goal you’ve set for it. If you’re trying to generate leads, the entire page should be devoted to information to convince a user to share their contact information with you, or even reach out on their own.
Whatever the purpose, avoid any filler content, extraneous links, and other distractions that can divert attention away from it.
2. Highlighted Customer Benefits
The benefits to the user must be made clear throughout your landing page.
A visitor should be able to get all the information they need from the landing page, so they don’t have to look elsewhere on your site to understand something. This is key to keeping them engaged for long enough to convert them.
Use your own words to explain the benefits to the customer, as well as customer testimonials that provide additional social proof.
3. Logical Narrative And Structure
Consider the order in which you present content from the top of the page to the bottom. If you’ve ever heard of putting some information “above the fold” — this is where that comes into play. Put the most important elements where a visitor will see them without having to read below the newspaper fold. Or, in modern speak, before they scroll at all.
Think of the landing page as a journey you’re taking the user on. Be sure the narrative of the page makes sense, that each part follows logically from the last, and that it all builds up toward your ultimate goal: an easy-to-take action.
4. An Easy-To-Take Action
Your landing page should always end with a strong call to action.
The CTA is the ultimate goal of a landing page. By the time they’ve reached your CTA, visitors should have all the information they need, and be ready to take action.
Be sure to customize the CTA based on the audience and purpose of the page. For example, a CTA for expensive B2B software may be to sign up for a trial, but in the retail space, it may be all about the Buy Now button.
5. Distribution Strategy
With a beautiful, custom landing page fleshed out, there’s one last pivotal element to making sure it’s a success. You have to get it out there!
And you’ll be in good company: virtually every marketer running landing pages pairs them with a promotion plan rather than waiting for traffic to appear. The question is, how do they go about driving it? Per HubSpot’s survey of 101 marketers (2023), these were their top channels:
Here are their top strategies:
- 51.5% use social media.
- 43.6% deploy email newsletters.
- 35.6% rely on search engine optimization.
- 32.7% promote via paid advertising.
- 28.7% link to landing pages from blog posts.
- 20.8% use website CTAs and banner ads.
- 17.8% rely on partner/affiliate marketing.
- 13.9% promote on YouTube.
- 7.9% deploy a link-building-based strategy.
- 5.9% use a podcast to promote landing pages.
How To Build Your First WordPress Landing Page (5 Steps)
From laying the groundwork to putting the right tools and templates in place to making those critical finishing touches, here’s exactly how to go from zero to your first-ever landing page in just a handful of steps.
1. Plan Your Page
You don’t have to get all fancy with a wireframing tool (though you can). At this stage, it’s important to know your landing page’s goal, have most of the content ready, and know how it will flow.
Wireframe
A wireframe is a two-dimensional illustration of a web page that determines where elements will be placed. This is an early step in the design process that focuses on content spacing, functionalities, and intended behaviors.
Read MoreFor this walkthrough, our goal for our landing page will be to generate leads, so the main focus will be on encouraging users to provide their contact information in some way. We don’t have to get too specific on the actual look and features at this point since we’ll be working from a template.
With that in mind, let’s get to the good stuff!
Learn more about wireframing: The Complete Guide To Creating Website Wireframes
2. Choose The Right Tools To Create Your Landing Page
Throughout this guide, we’ll be using WordPress.org, which is different from WordPress.com. That’s important to know because each has its own plugin and theme directories, and the features and functionality in each may look a bit different.
That said, there are several ways you can use WordPress to create a lead-generating landing page. Some are more manual, but we’ll make things simpler by focusing on using the already-created themes and plugins we mentioned.
There are plenty of WordPress landing page-focused plugins. For example, Elementor is a hugely popular page-building plugin that enables you to create landing pages for free, includes various templates to get you started, and now integrates Elementor AI — a credit-based add-on (with free trial credits) for drafting copy and images right in the editor. There’s also the Thrive Suite of (paid) plugins, which includes the Thrive Architect plugin and more for building landing pages as well as a WordPress website that all work together seamlessly.
For tons more, visit the WordPress plugin directory and search for “landing page” to see all the offerings for creating and optimizing landing pages, from big names like Kit (formerly ConvertKit) to smaller creators like Fatcat Apps (whose Landing Page Cat focuses on coming-soon and simple landing pages).
Prefer to skip the manual build? Remixer, DreamHost’s AI website builder, can generate a landing page from a text prompt that you refine from there.
If you’d rather build inside WordPress, you’ll also need to choose a WordPress theme that can be used to construct a landing page. Luckily, today, most modern and updated themes will enable you to do so. If not with built-in features, then by working alongside landing page plugins.
Finally, you can actually build a stand-alone landing page website using any one of the hundreds of landing page themes in the WordPress theme directory.
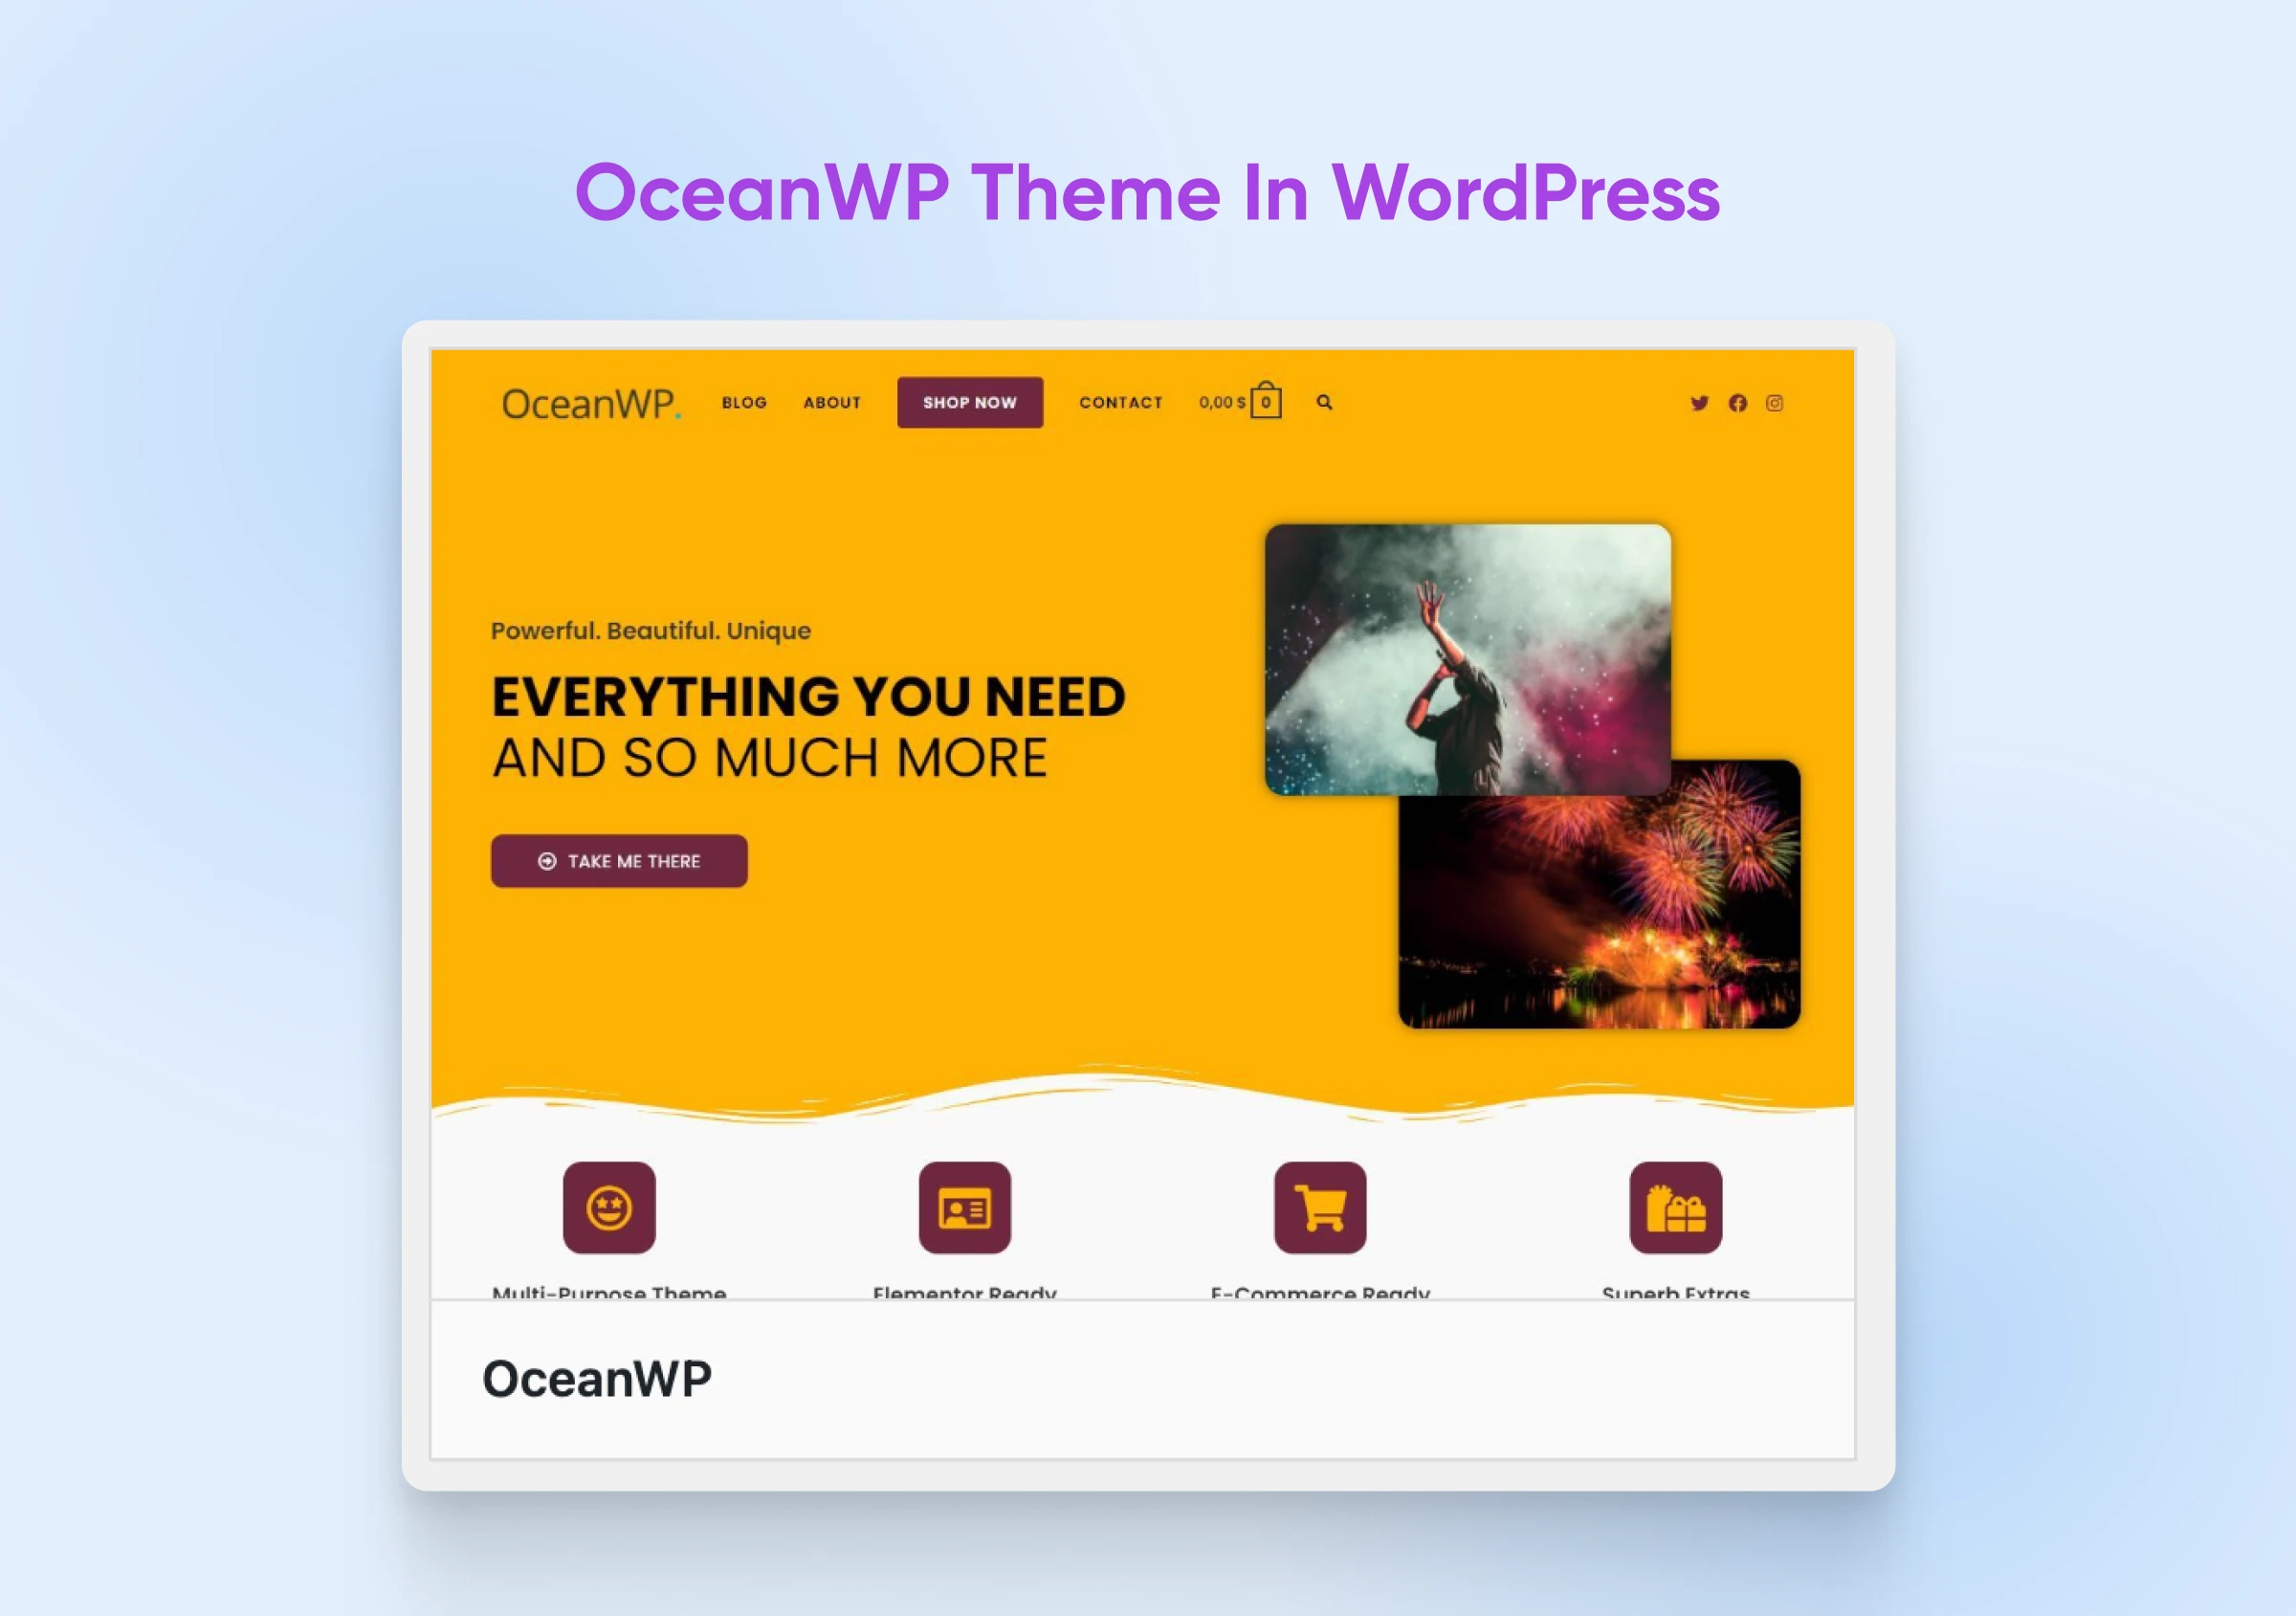
For this walkthrough, we’ve chosen to work with the OceanWP WordPress theme.
This is because OceanWP is a free, versatile WordPress theme that contains multiple templates that can be used to create lead-generating landing pages. It can also be integrated with the above landing page builder plugins for increased functionality. As you’ll see, using this theme will enable you to create and configure the basics of your first landing page quickly, giving you a great foundation for expanding it with your own content.
Now, let’s move on to practical matters and dive into one of the most accessible approaches to building a landing page in WordPress.
3. Install Your Landing Page Theme
Need to upgrade to a modern theme to take advantage of all the newest landing page-building features? Then let’s get to downloading and installing your new theme.
Here’s how to do that with OceanWP:
What we’d recommend doing is going into your WordPress Dashboard, finding Appearance in the left sidebar, and clicking on it to locate Themes.

At the top of the Themes page, use the Add New Theme button and search for “OceanWP.”
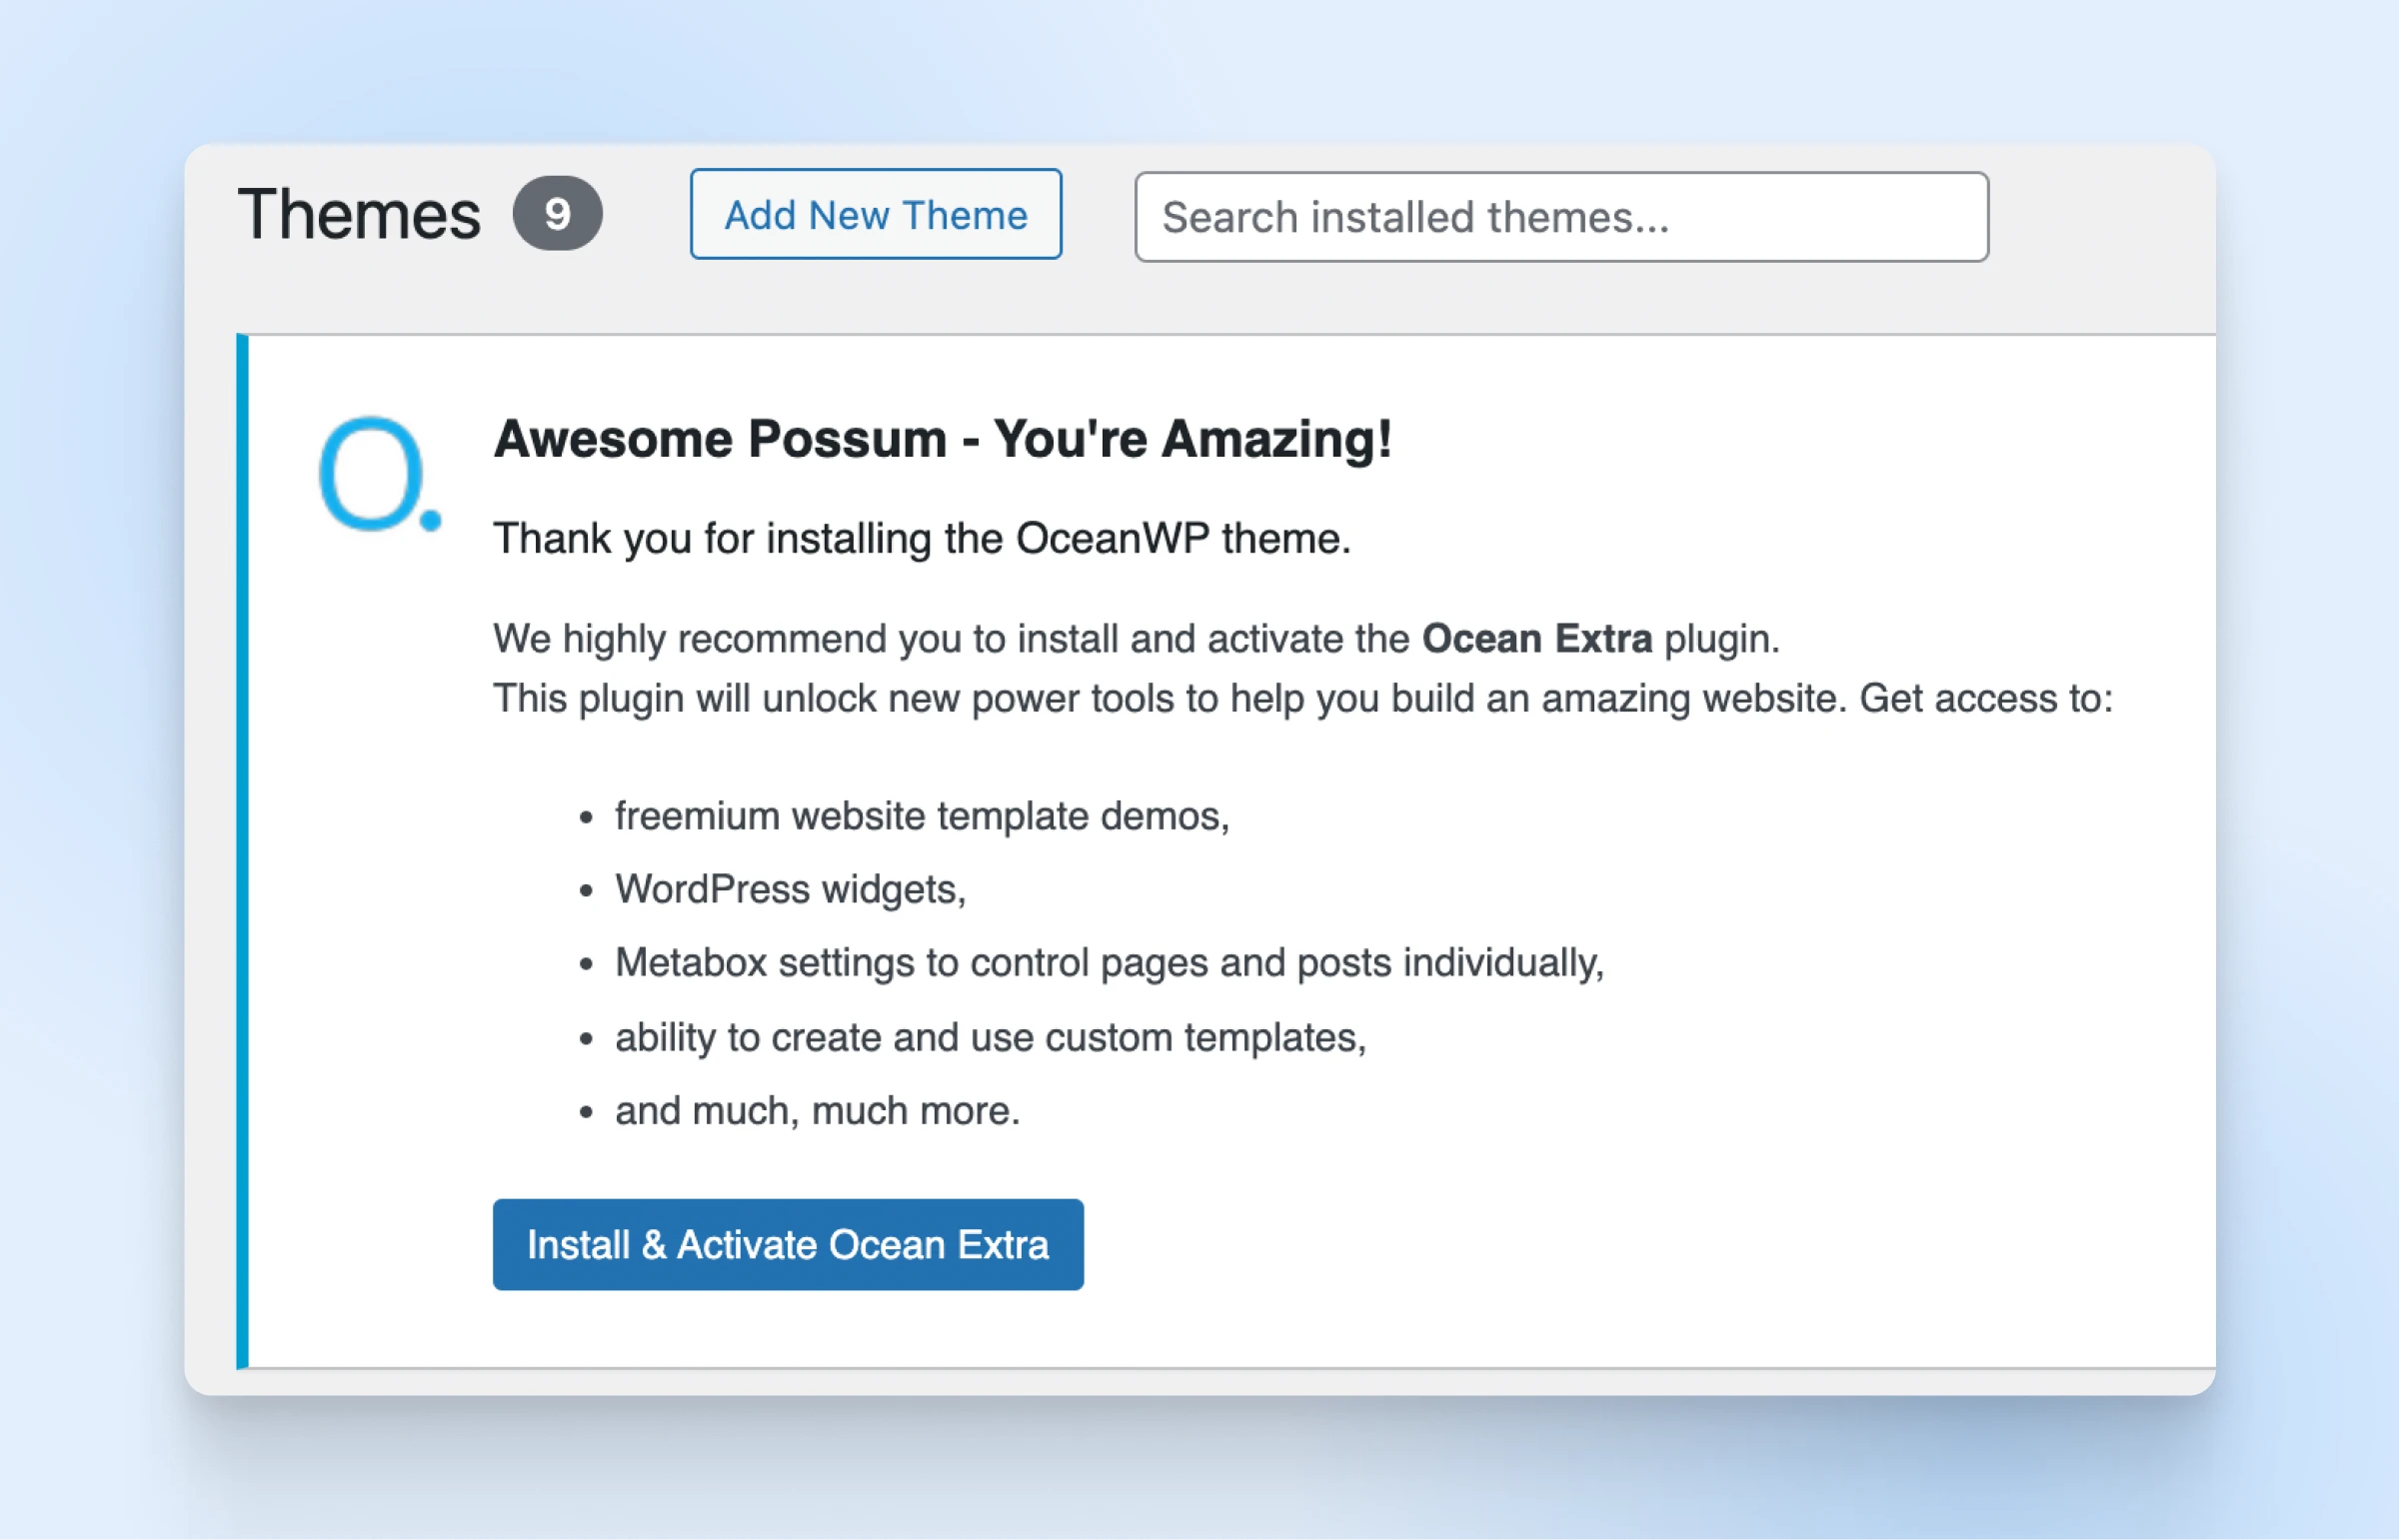
Hover over it to find and click on the Install button. Wait a moment, then press the Activate button once it appears.
Once the page refreshes, you should see a notification at the top of the Themes page asking you to install and activate Ocean Extra. Ocean Extra is a plugin related to OceanWP that includes additional functionality.
Now, it’s time to set up a template for your landing page.
Related: How To Install A WordPress Theme (Tutorial)
4. Import A Landing Page Template
After the previous step, you should have been redirected to OceanWP inside your WordPress instance. If not, just go back to your Dashboard and look for it in your left-hand sidebar.
Now it’s time to install a landing page template, which they call “Demos.”
Click OceanWP > Install Demos in the sidebar:

Scroll down in the OceanWP Panel until you start to see the Demo options. Click on One Page to see the templates that are best for, well, one-page presentations. Choose whichever you like, but we’ll be using the Coach template for our example.
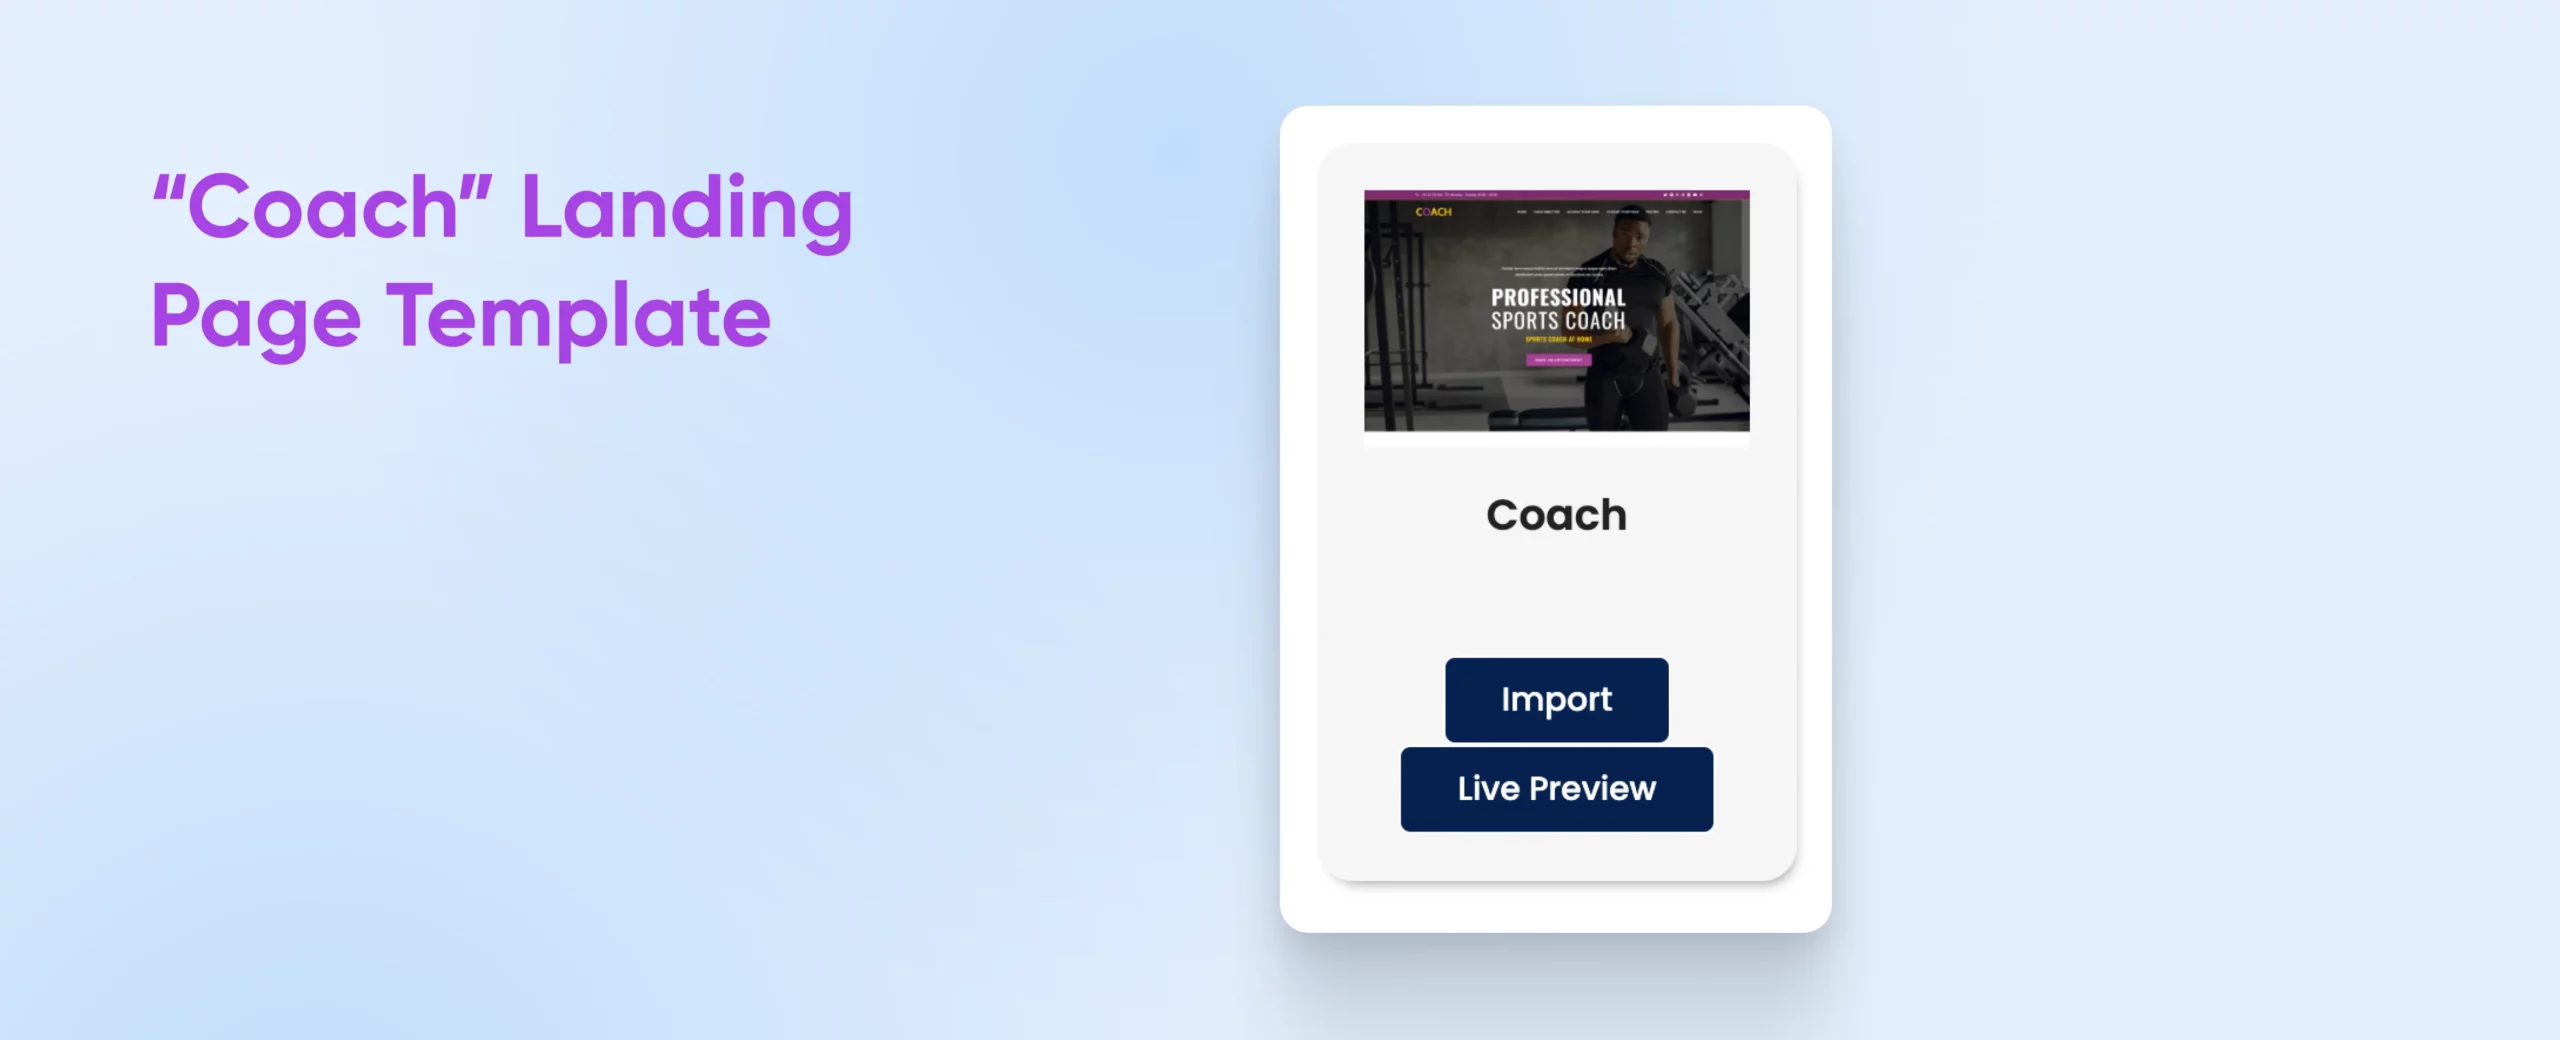
Hit Import on the Coach template, and follow the instructions to add the plugins and add-ons that will make your landing page match the demo. (FYI, a purchase is required for Ocean Sticky Header.)
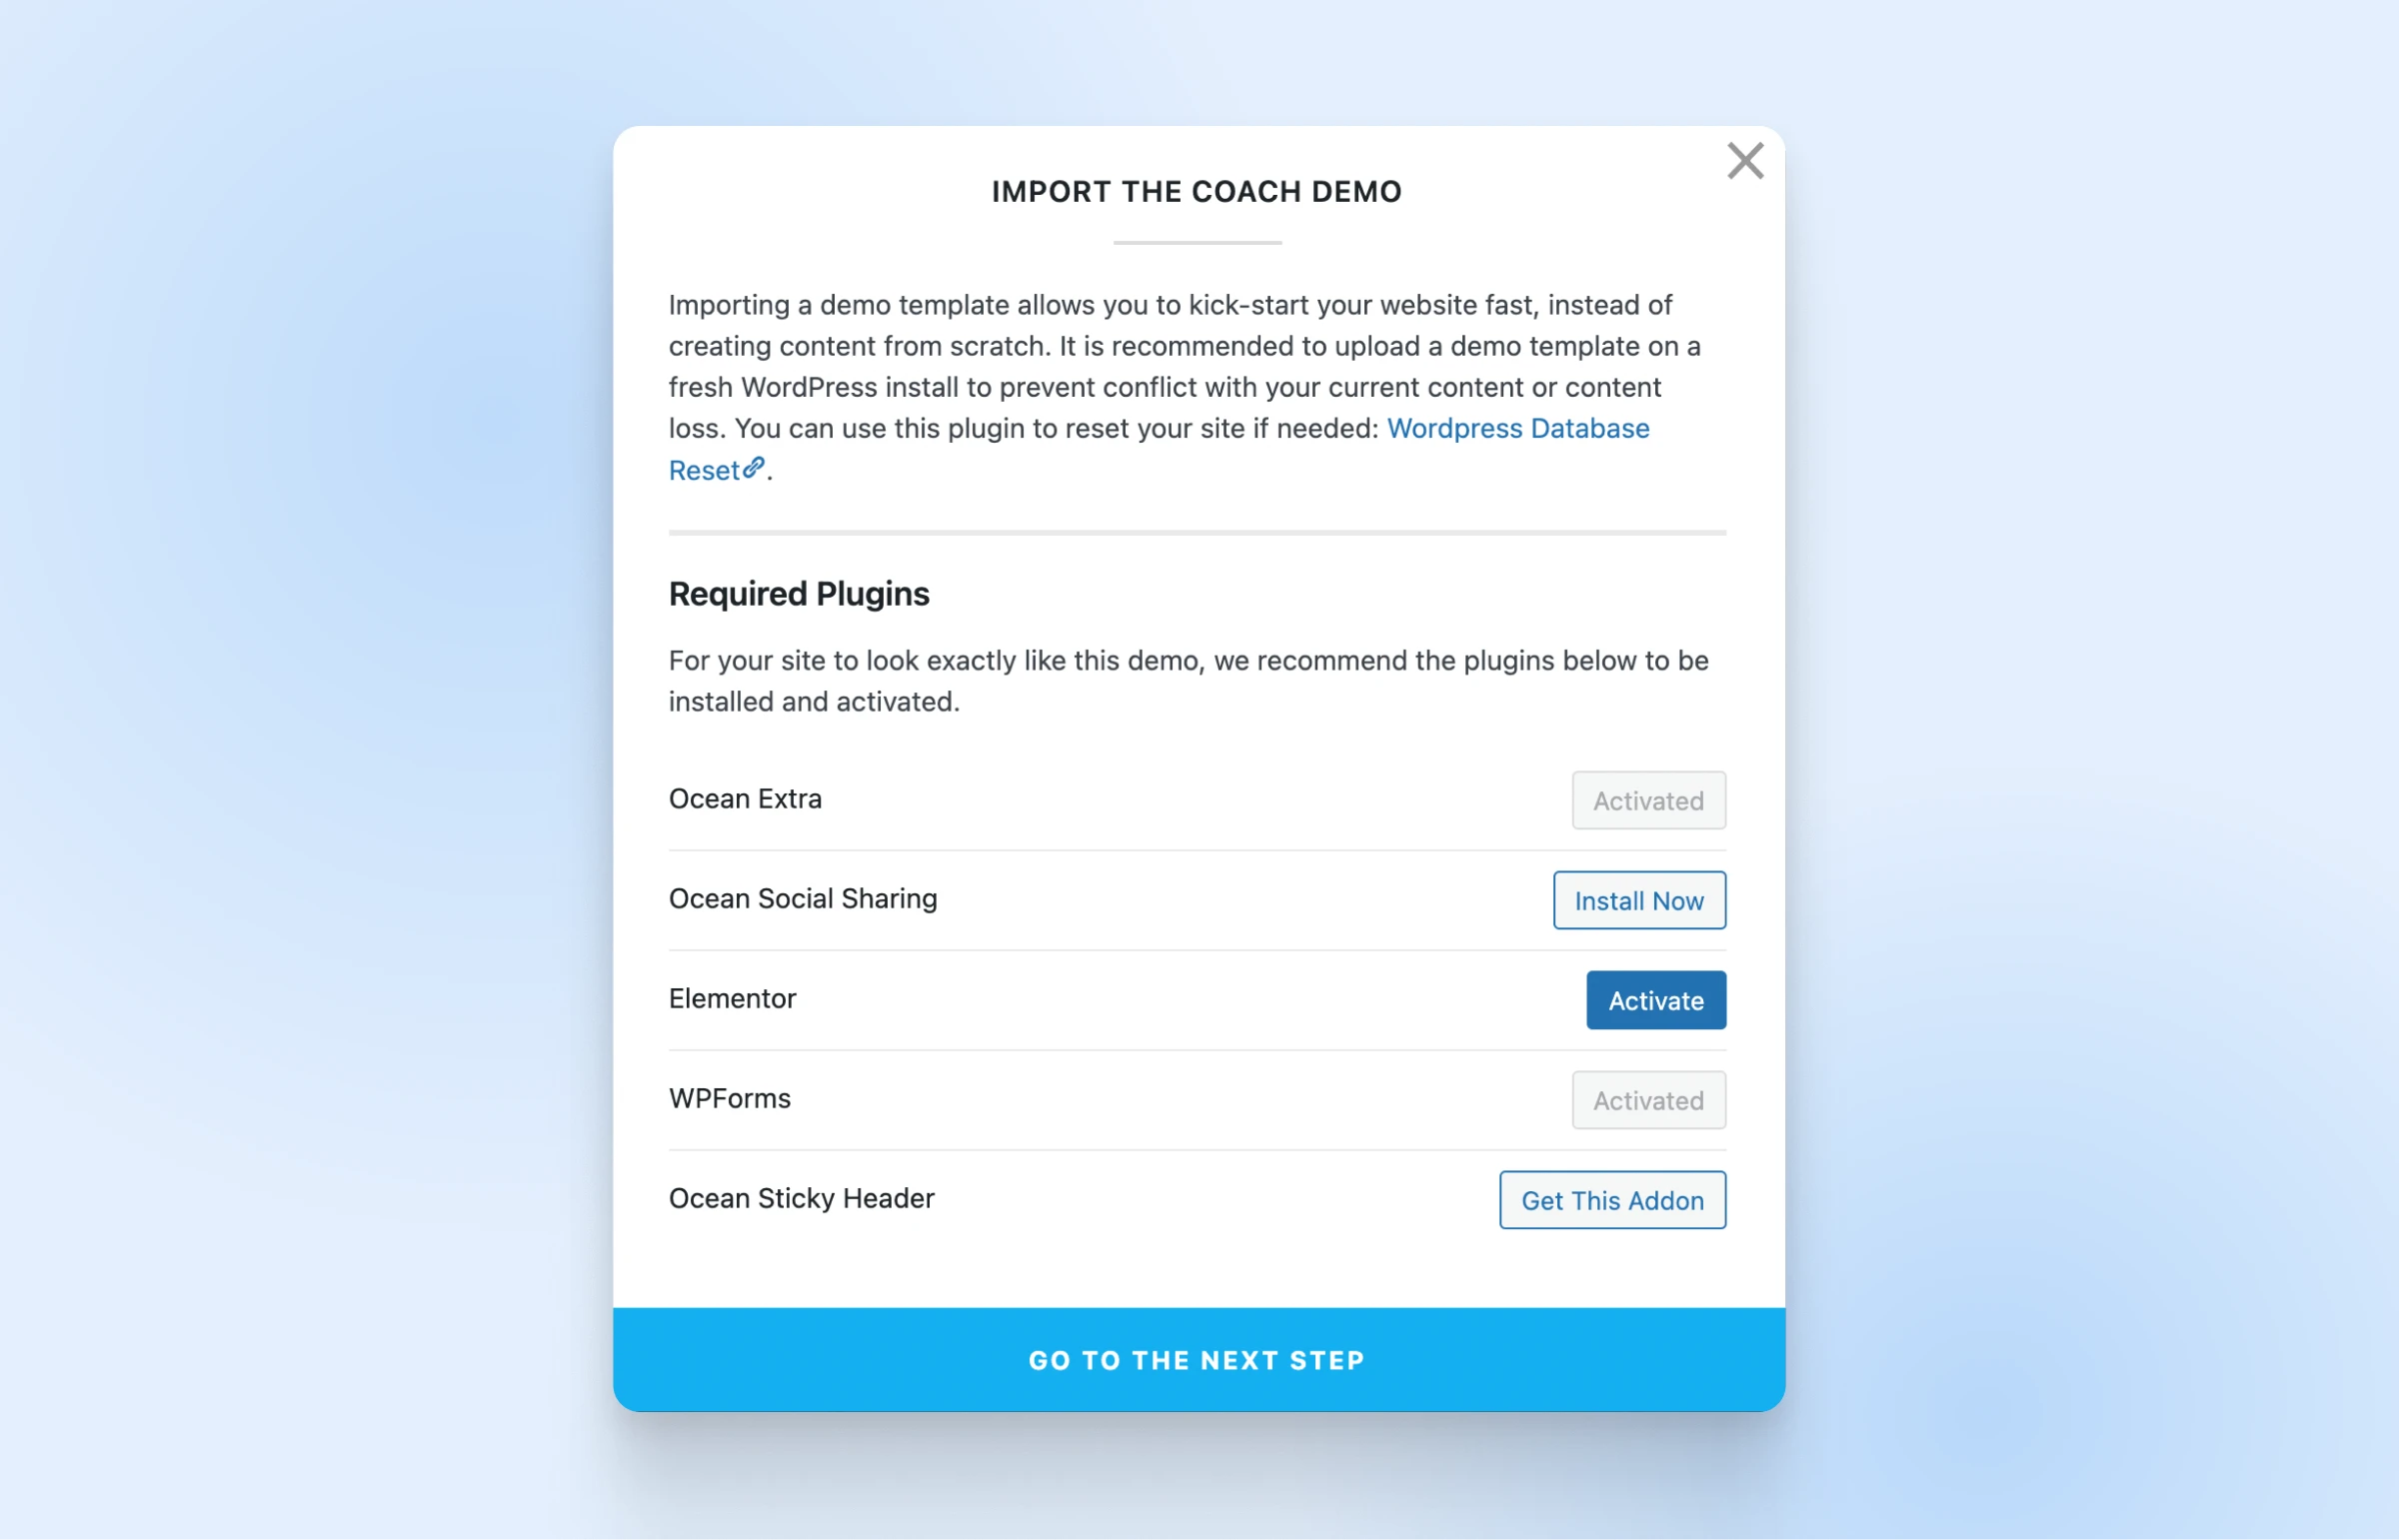
After going to the next step, you can choose what sample data you want to import. This will enable you to edit the existing sample content, rather than creating everything from scratch. Keep in mind this could override any content you already have in this WordPress instance.
We’ll leave all the boxes checked, and finally, we’re ready to install the demo!

Once this process is done, the template will be installed and activated on your WordPress site. And now, it’s time to customize!
Additional reading: Decoding WordPress: Custom Templates And Template Parts
5. Customize Your Landing Page
It’s now time to apply what you’ve learned throughout this article to customize your lead-generating landing page.
We’ll be using the Elementor plugin we installed earlier for this purpose, as it’s recommended by the OceanWP theme.
To start managing your landing page, navigate to Dashboard > Templates > Saved Templates.

Select coach-home then Edit with Elementor. Now you should be looking at the intuitive Elementor page builder, where you can make changes directly to your landing page.
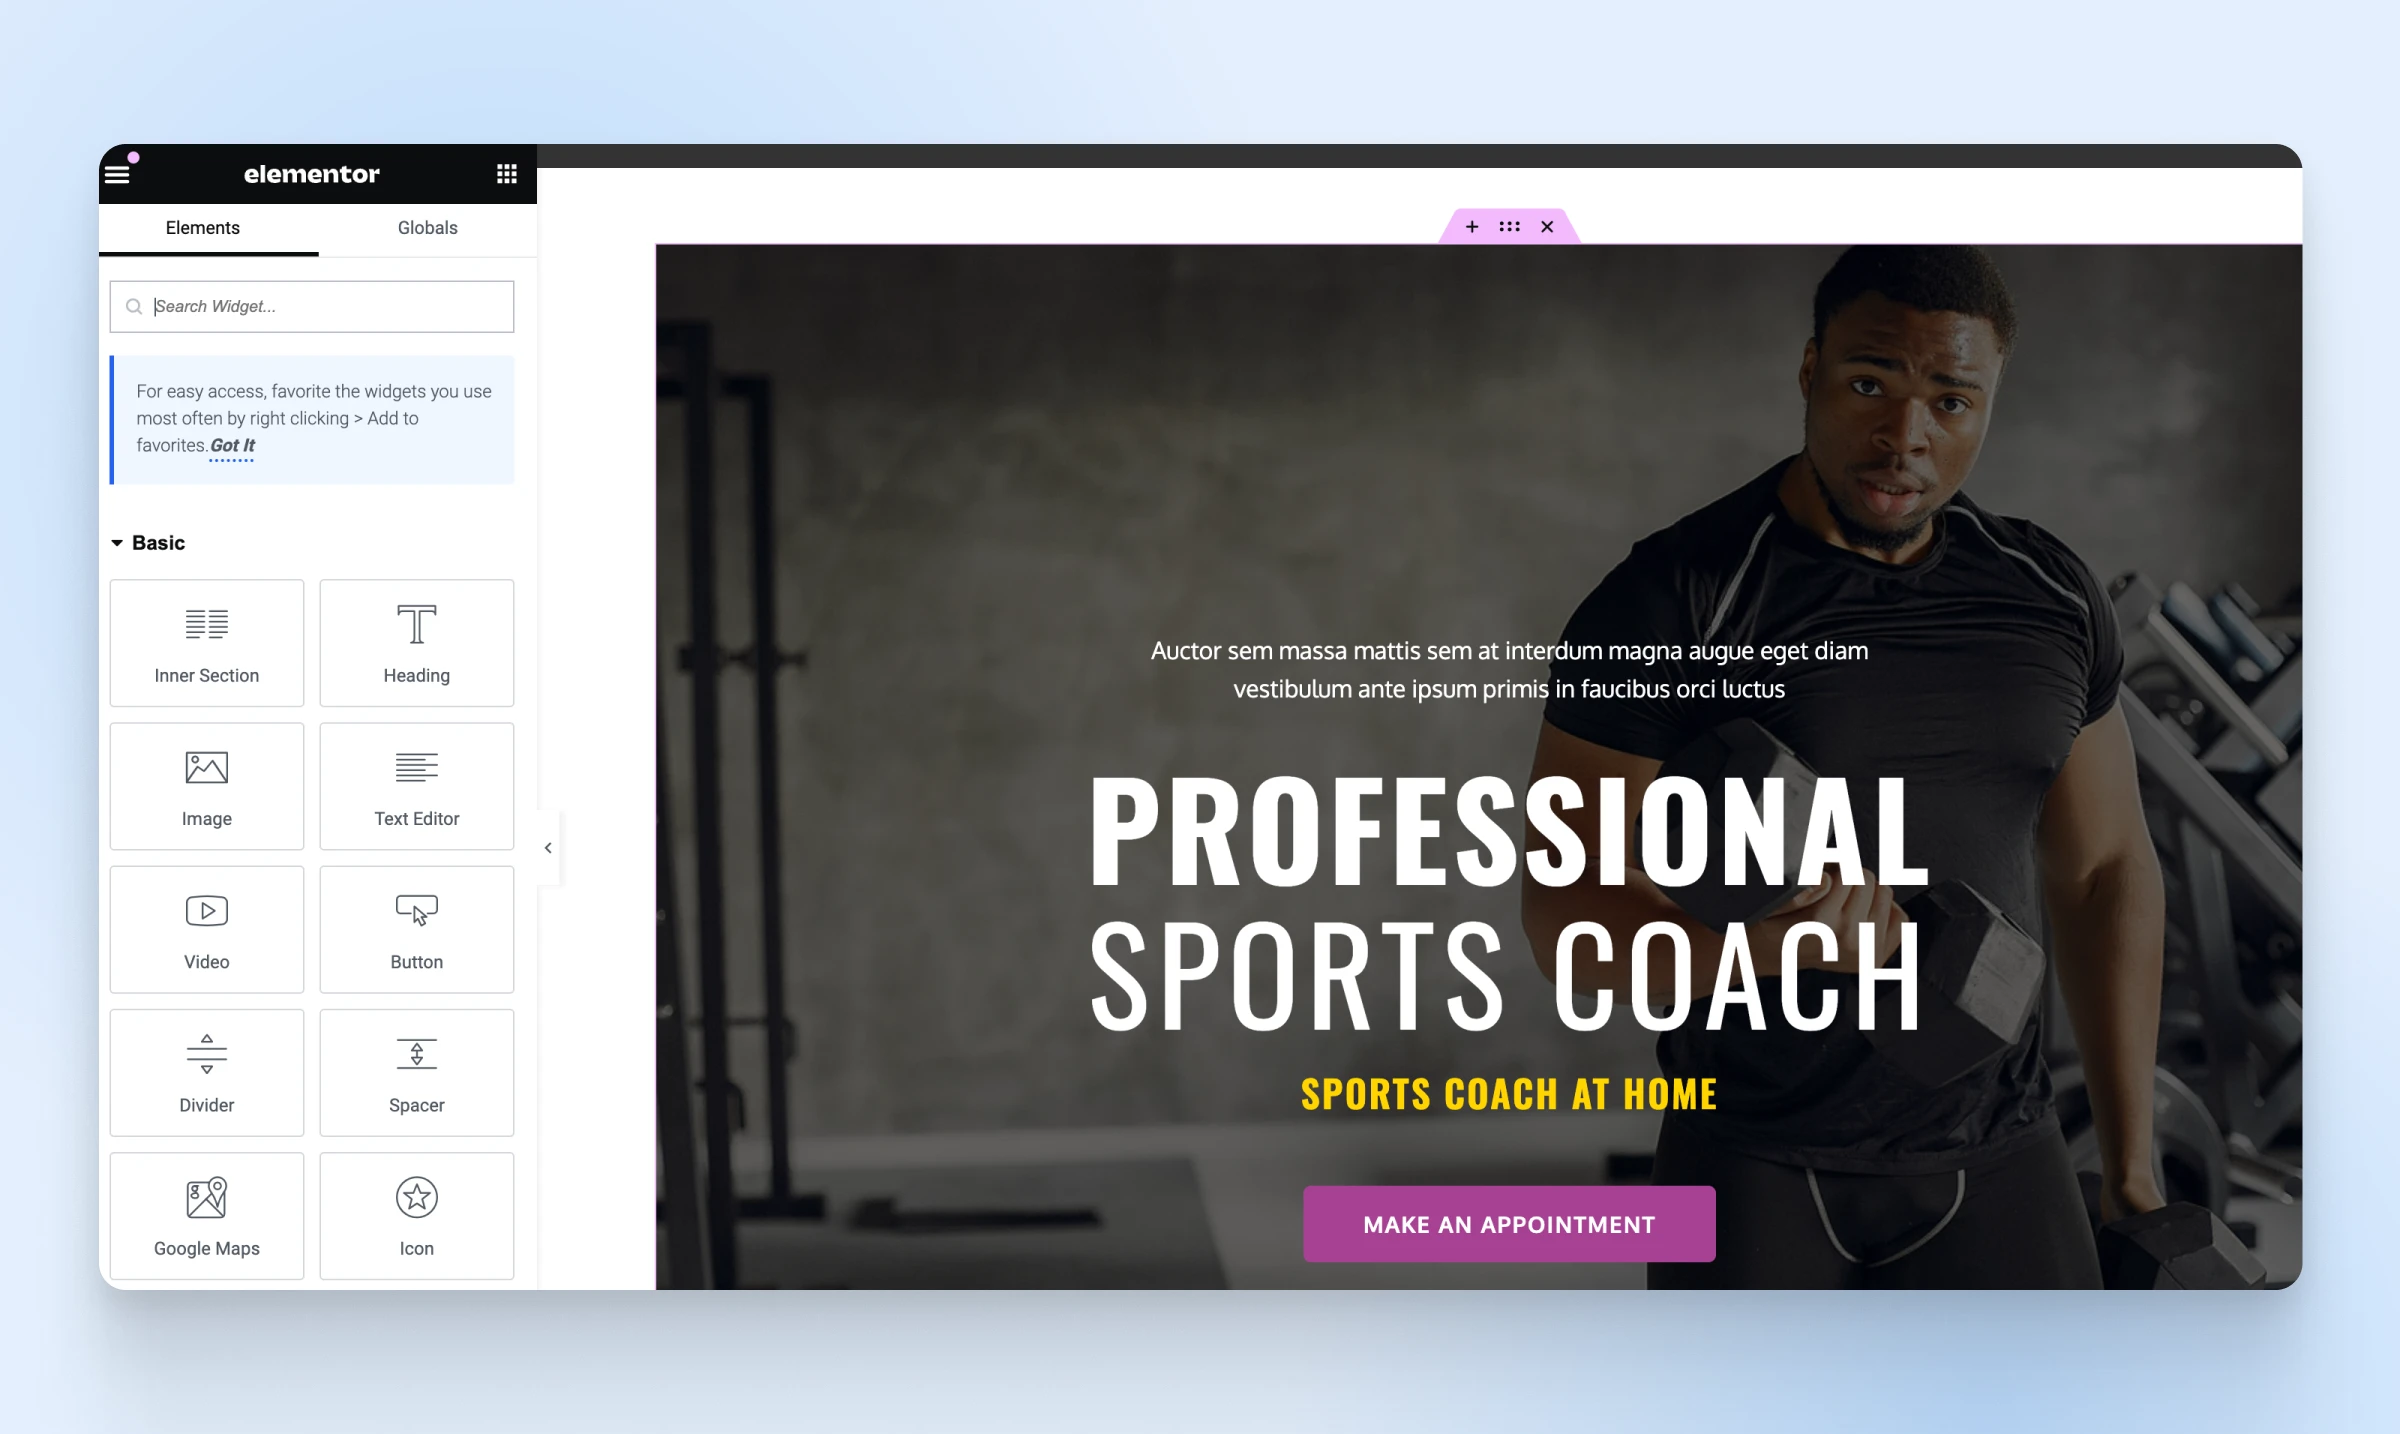
At the moment, the structure of the page is largely in place. You can see how this template uses many of the concepts we discussed earlier. It opens with an attention-grabbing headline and introduces the CTA right away, then dives into well-designed sections that outline everything visitors need to know from benefits to package deals to testimonials.
Of course, you’ll want to customize the visuals, text, and even some elements of the layout of this page. In the left sidebar, you’ll see Elements that can be added to the page. Any of these can be moved and deleted when you click on them.
Want a contact form? Select WPForms in the sidebar and watch it appear. It’s ready to be customized right on the page!

As you click around, you’ll also see the left sidebar update to show what can be edited in the widget you’ve clicked on.
For example, click the Make An Appointment button to change the text, the link it connects to, how it looks (under Style), and even the spacing and other effects (in the Advanced menu).

These are just a few very basic examples of how you can edit this template to suit your own needs and build a well-designed landing page. You can easily spend hours working on this if you like — have fun with it!
When you’re done, at least for the time being, at the bottom of the screen you’ll see options for checking your edits on different screen sizes, reverting to a previous version, saving your changes as a draft, or publishing them live on the internet with the Update button. After each update, we recommend visiting your live page to make sure everything is performing how you wanted.
It’s easy to get carried away here, so when you’re tweaking your landing page, don’t forget the key elements we outlined earlier. Make sure that your page’s goal and purpose are clear, that you always make the benefits to the user obvious, and that the page follows a natural structure and includes plenty of opportunities to plug your CTA.
Need Help Landing More Leads?
Now that you know what goes into making a landing page, why you should bother with it, and have a robust template to customize, you should be well on your way to creating lovely, lead-generating landing pages in no time!
Unless that pesky little time thing is still standing in your way, that is.
Many company owners and website managers need to focus so intently on the immediate income-generating aspects of business that they seldom have time to sit down and build the marketing that paves the way for the future of the business.
If you simply don’t have the time to create important marketing materials, such as landing pages for your website, we know who does. (Hint: it’s us!)
In fact, at DreamHost, we’ve created a whole department to help with exactly that.
From marketing to website design, development, and even management, our pro services providers know exactly how to match up your desires, their expertise, and DreamHost’s robust hosting packages to create wildly effective online experiences.
What do you say we partner up to land you more landing page leads?

WordPress-Optimized Hosting to Power Your Purpose
DreamHost makes sure your WordPress website is fast, secure and always up so your visitors trust you.
Choose Your Plan