Rubber burning.
Sparks flying.
Brakes squealing.
That’s what it feels like to have your very productive day come to a screeching halt when you suddenly — and inexplicably, get locked out of your WordPress dashboard.
Dashboard
The dashboard is a WordPress user’s central hub for WordPress site management. It is the control panel for everything from publishing blog posts to managing user roles.
Read MoreAs you may know, that means you can’t create or publish posts, respond to comments, or perform any of the other tasks you set out to do on your website.
And, unfortunately, there are a wide variety of reasons why you might be locked out of your site. Let’s just say this could take a while.
However, thanks to WordPress’ flexibility, there are several options for diagnosing and fixing this issue. Plus, most of them are relatively straightforward, even for beginners. You should be able to troubleshoot and resolve the issue easily. That’s right, you’ll get some of your time back. Score!
In this article, we’ll explore the common reasons why you might get locked out of the WordPress admin. Then, we’ll walk through seven methods you can follow to fix the problem. If you stay tuned to the very end, we’ve even included a bonus list of how-tos to help you with a huge range of common WordPress issues.
Common Reasons You May Be Locked Out Of The WordPress Admin
There are several ways the issue of being locked out of WordPress can present itself. You might see a different page and message when you try to log in, but the result is the same: you can’t get into your WordPress admin area.
In this section, we’ll briefly run through some of the possible presentations you may encounter, along with an explanation of why you might be seeing that specific error — all of which directly correlate with the list of solutions we’ll dive into shortly!
It’s important to note that while each of these errors might look the same on the surface (that is, you can’t log into WordPress admin), the solutions can be quite different.
There’s not necessarily a one-size-fits-all fix. For that reason, we recommend that you match up the specific error you’re seeing.
Now, with that out of the way, let’s talk about what could be going wrong if you can’t log into your dashboard:
- You see “This has been disabled”: The most likely cause of this error is that you have the wrong login URL for your site. You’ll need to restore your WordPress site’s login URL.
- Your WordPress password doesn’t work: And password recovery? Fails. Sometimes a problem with your site’s email system prevents the recovery email from getting sent. To fix it, you can reset your password with phpMyAdmin.
- You’ve lost administrator privileges: In this scenario, your login works, but you can’t perform any of your administrative functions. Therefore, the next step is to create a new user with administrative privileges.
- You’re locked out due to too many login attempts: Some security plugins do this to prevent unauthorized access. For this issue, you’ll need to disable your security plugin.
- There’s a blank white screen (AKA the “White Screen of Death”): There are several causes for this, but generally, it’s a problem with a plugin. PHP memory issues can also cause it. We’ll cover several methods to troubleshoot the White Screen of Death.
- You see an “Error establishing a database connection” message: This notification indicates a problem with the MySQL database used by WordPress for data storage. It’s time to fix the database connection error.
- The message indicates a “Parse error: syntax error”: Incorrect code is usually the culprit. The solution is to undo any recent code changes.
The list covers the vast majority of login issues you might come across. However, if you run into a problem other than the above, or you can’t seem to get your login working, it’s best to reach out to your hosting provider for help.
If you’re a DreamHost customer, you know WordPress is our thing — and we offer 24/7 expert support. To talk to us anytime, simply click on the support button in the upper-right corner of the DreamHost control panel.
That said, let’s get to work!
Preparing To Fix A WordPress Admin Dashboard Lockout
Before anything else, if you run a DreamHost WordPress install, we recommend trying to log in to WordPress via your DreamHost admin panel since now all DreamHost installs allow logging in from the panel by default (unless opted out.) This may help bypass whatever issue is preventing you from logging in as usual.
Check out the easy instructions here.
Didn’t get you in?
Then it’s time to check to see if you have a recent backup of your site. If so, restoring from a backup could fix the issue. By the way, if you’re a DreamPress user, you get a fresh backup every day.
If restoring doesn’t work or your backup is too old, you’ll want to make a new backup before you start troubleshooting. This way, if something goes wrong, you can easily restore your site to its present condition.
For DreamHost customers, the instructions for creating a backup are easy to follow. Even if you’re using a different hosting provider, they likely offer similar backup capabilities.
Need to make a backup manually? We got you.
First, we’re going to save a copy of your website files.
It starts by finding your Secure File Transfer Protocol (SFTP) credentials in your hosting account. Here’s how to do so with DreamHost.
Can’t find ‘em? Ask your hosting providers for the deets.
Next, download an SFTP client (we like FileZilla). Use those credentials you just sourced to connect to your server.
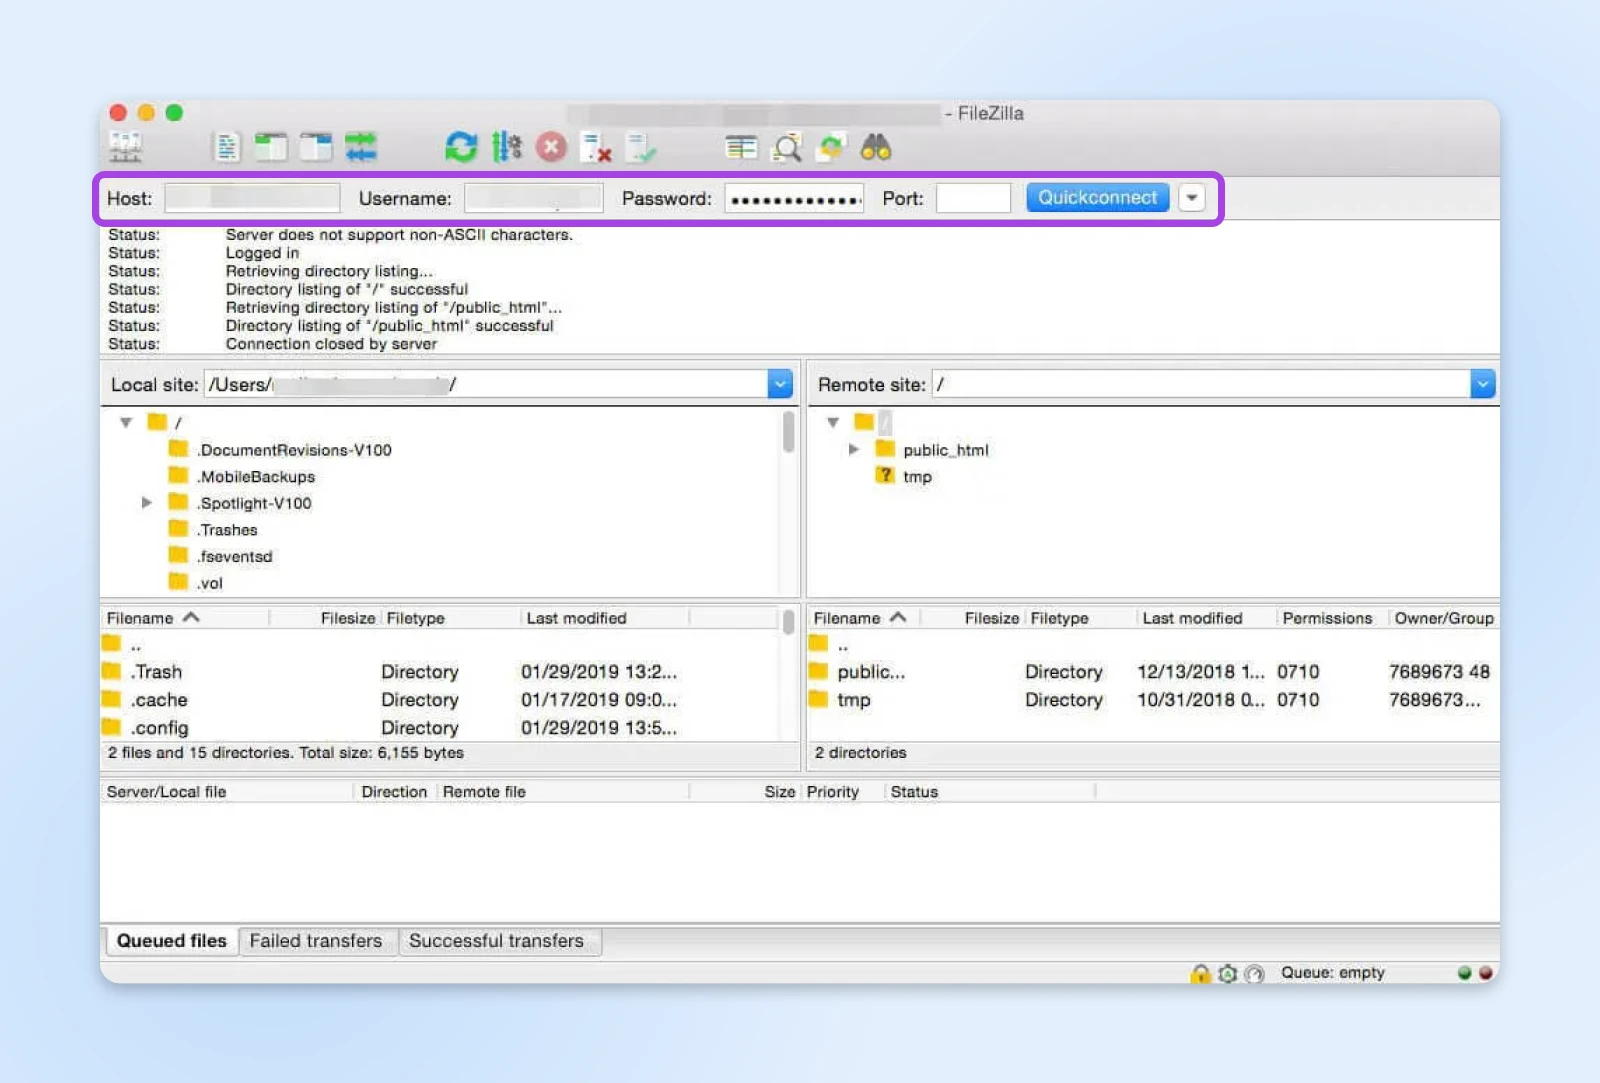
Then, generate the folder that will store your backed-up files in FileZilla. To do so: Right-click inside the upper left quadrant, choose Create Directory, and name your file.
Now, just drag the files you want to save from the upper right quadrant to your fresh new folder.
Not sure what files to grab? Just drag over the entire folder that has your site’s name on it.
Next up: backing up your database.
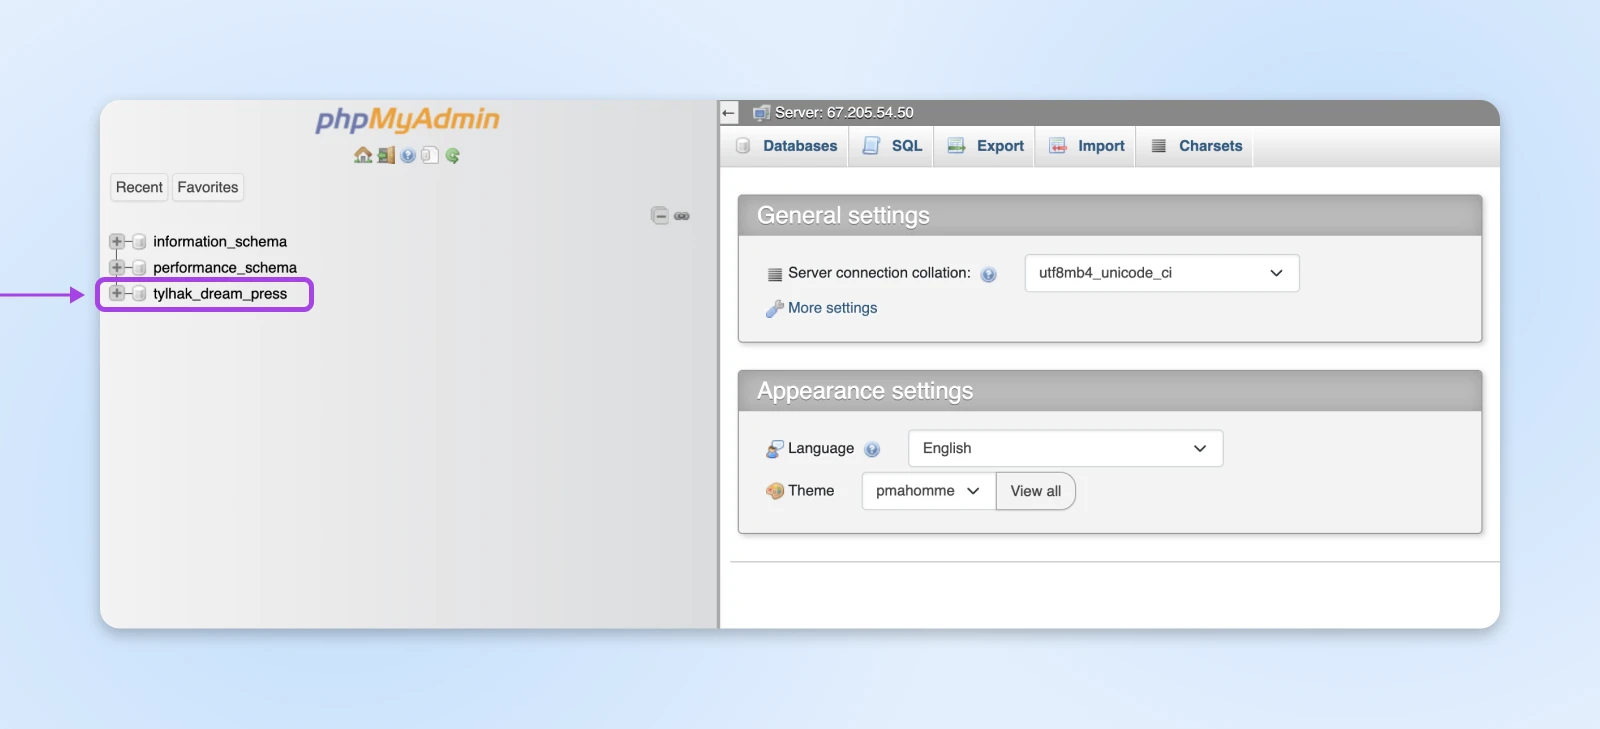
Again, hop into your host account and log into the phpMyAdmin tool. Select your website database in the left sidebar to open it up.
Now, navigate to the Export tab at the top of the screen, choose the Quick method, and use the Export button to begin the download.
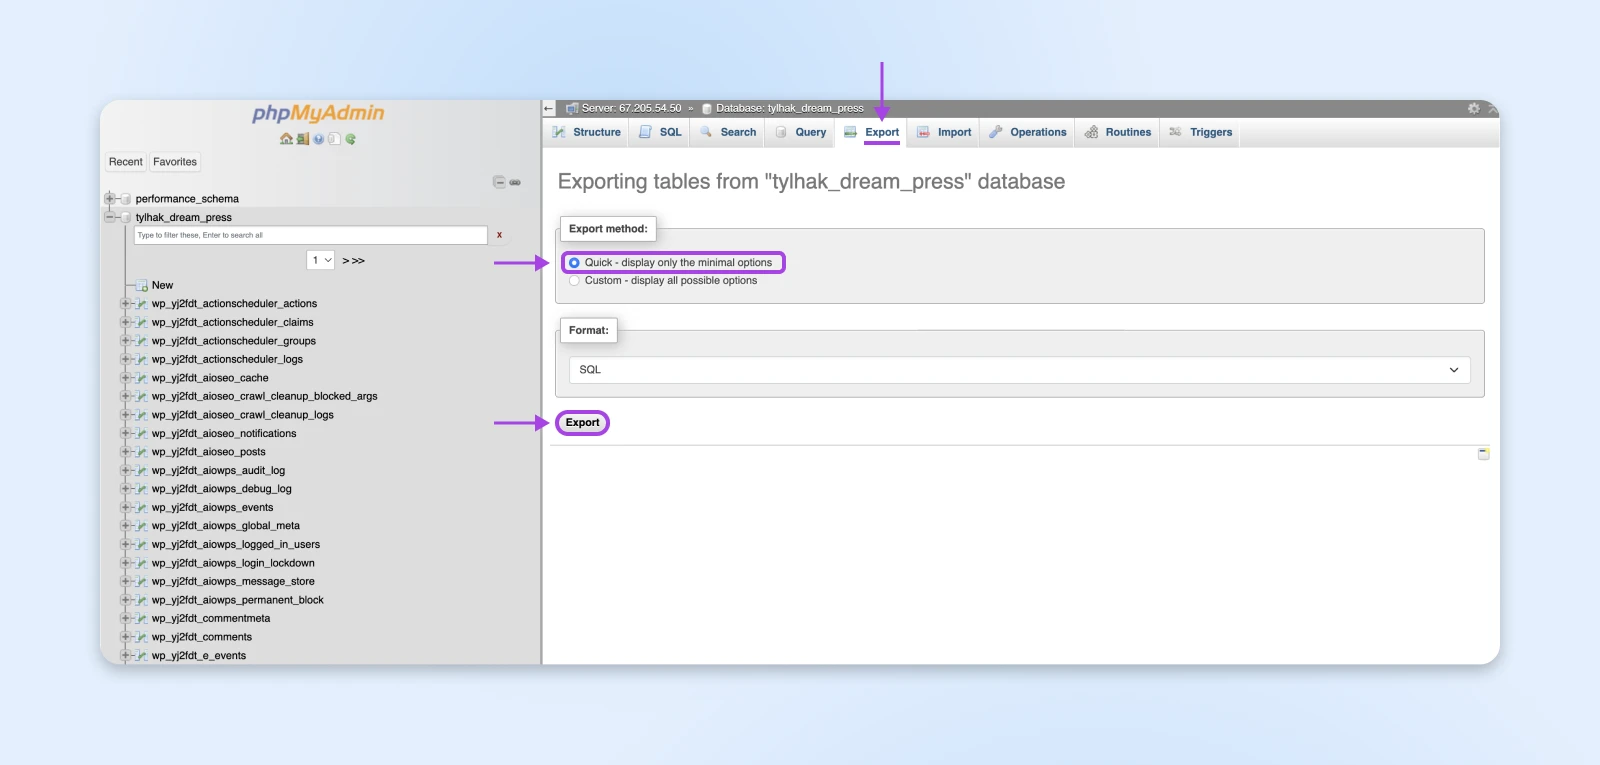
When your database download is done, you’re backed up and ready to rumble!
How To Fix The Common Causes Of Getting Locked Out Of WordPress (7 Methods)
By this point, you’ve hopefully identified the most likely cause of your lockout based on the error message you’re seeing.
You should’ve also created a fresh backup.
Now it’s time to dig into problem-solving.
Note that these are not steps you should try in numbered order. Instead, each fix corresponds to the specific issue and presentation you see when you attempt to log in.
So here we go!
1. Restore Your WordPress Website Login URL
If you’re receiving a This has been disabled message when you attempt to log in, the most likely reason is that you’re using the wrong login URL.
Some sites use a custom URL for logins as a security measure, so hackers can’t guess the URL and try to brute-force their way in. Typically, you would set this up using a plugin such as WPS Hide Login.
Brute-Force Attack
A brute-force attack is a cyber assault where the attacker uses trial-and-error to break into an online account, such as attempts to guess passwords, general login credentials, or digital keys.
Read MoreThe tool works well, but if you’ve forgotten the correct URL, you won’t be able to log into your WordPress dashboard. For this, you’ll need to disable the plugin temporarily to fix it.
DreamHost users can access their website files via their panel following these instructions.
Otherwise, you’ll use the SFTP + FTP client combo you used during the backup stage to access your website files.
Once you can view your files, what you’re looking for is a file with your site’s name on it — then inside that a file named wp-content.
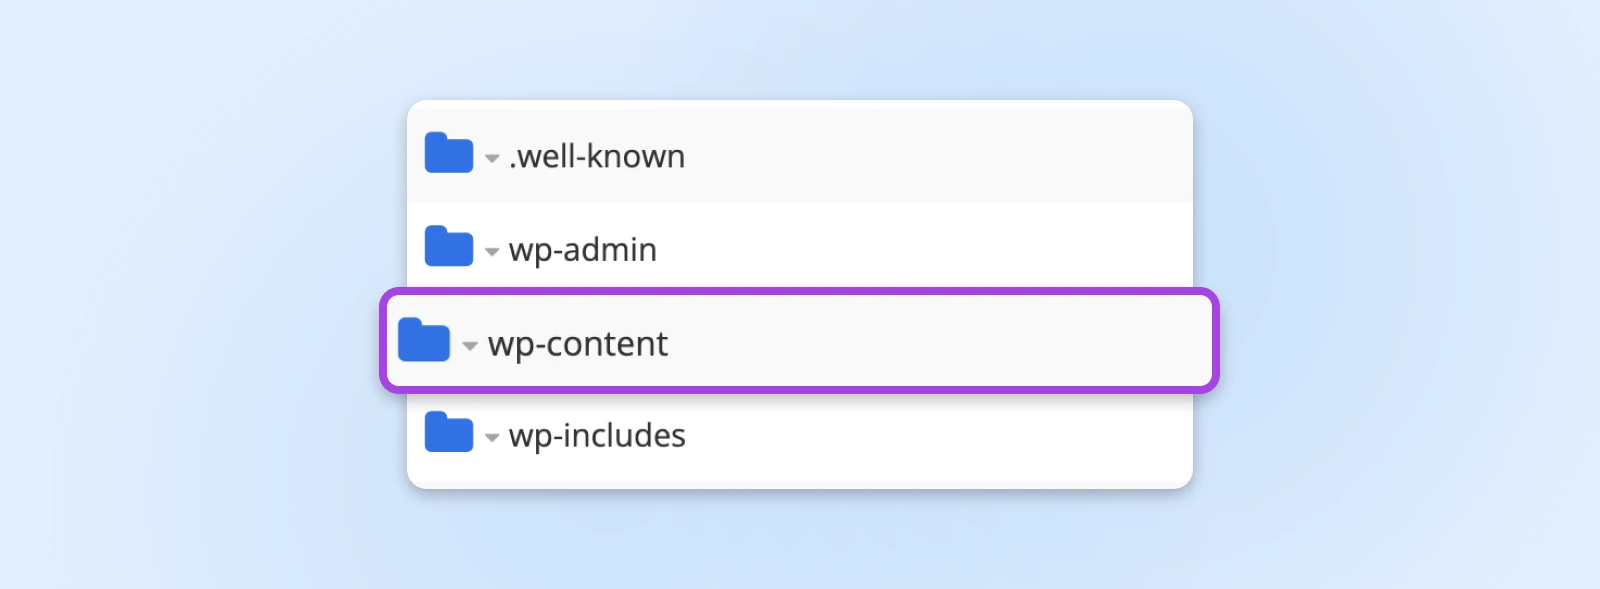
In there, look for the plugins folder. Open that to look for a folder with a name that corresponds to your security plugin.
Change the name of the folder to something else. We recommend simply adding “-disabled” to the end of the folder name, so you can easily recognize it later.
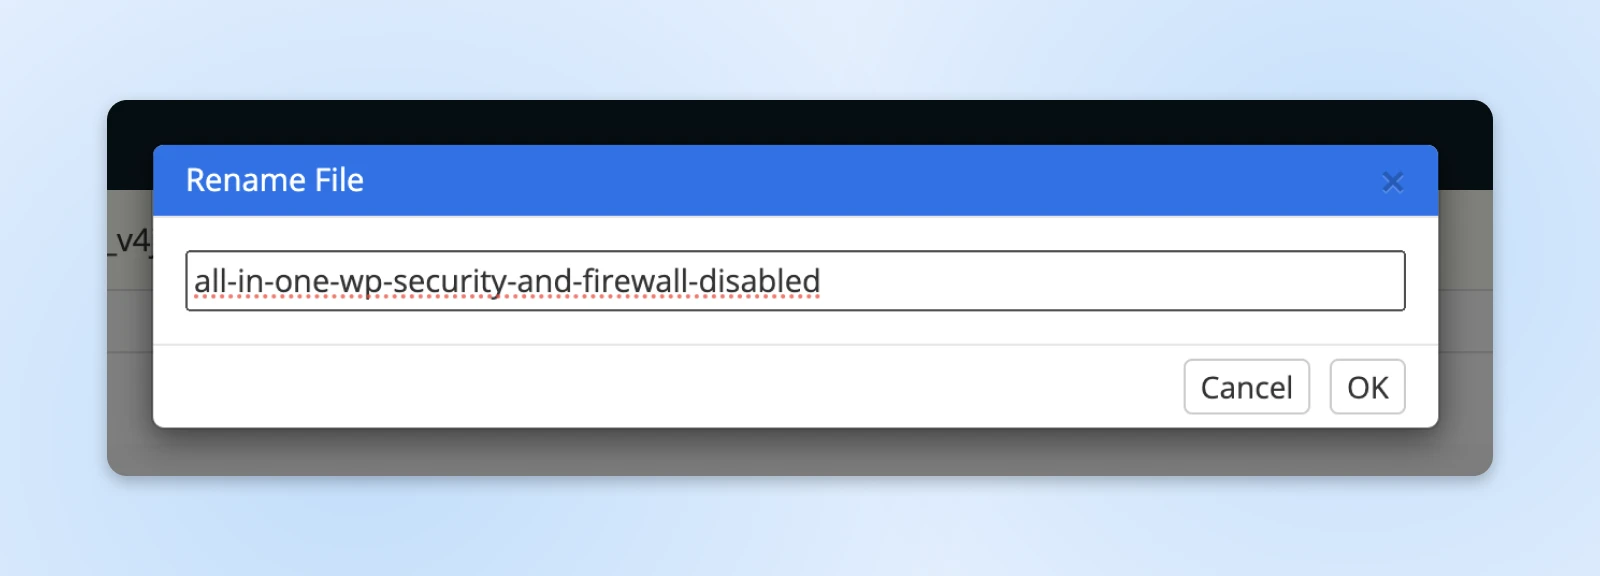
How does this help? Changing the plugin name deactivates it since WordPress won’t be able to recognize it anymore.
Now, you should be able to log into your site successfully! Once in, you’ll want to rename the plugin folder back to its original state.
2. Reset Your Password With phpMyAdmin Or WP-CLI
Typically, if you’ve forgotten your WordPress admin password, you have the option of resetting it via email.
But alas, sometimes the reset email never comes!
Often, this is the result of a temporary issue with the email system on your site. If you’ve tried several times to reset your password and aren’t receiving the recovery email, it’s time to take matters into your own hands.
You can reset your password directly in the database by following these instructions for using phpMyAdmin.
Alternatively, you can also use the wp-cli command line interface to update your password, though not all hosting providers have WP-CLI available.
To use this tool, you’ll first need to ensure your username is registered as a Secure Shell (SSH) user.
If you’re unsure how to do this, check out our instructions on creating a user with SSH access.
If you aren’t familiar with using SSH to access your site, we also have a guide on using SSH that you can review.
Once you’re logged in with SSH, navigate to your WordPress directory. With DreamHost, the command will be:
cd /home/username/yourdomain.com
Replace username with your actual user name and yourdomain.com with your domain name.
Now, run the following command to reset the password:
wp user update your_user --prompt=user_pass
Replace user_login with your WordPress username. This command will have the system ask for the password to be entered securely, and won’t leave a record of the new password in the command line.
Refresh your site.
And finally, check if the password reset was successful by logging into your WordPress admin panel with the new one.
3. Create A New User With Administrator Privileges
Sometimes, even when you can log in, you don’t have your usual administrative privileges. This likely means that you can’t perform the critical functions necessary to keep your site running.
This issue is most often the result of malicious activity: either your site was hacked, or someone with access to your account has made some changes. Security and recovering from a hack is another topic, so we won’t get into that here. However, we will show you how to restore your administrator access.
Head to the phpMyAdmin interface again and pull up your website from the list on the left.
Scroll down (or search) to find the users table. Click on the Insert link.
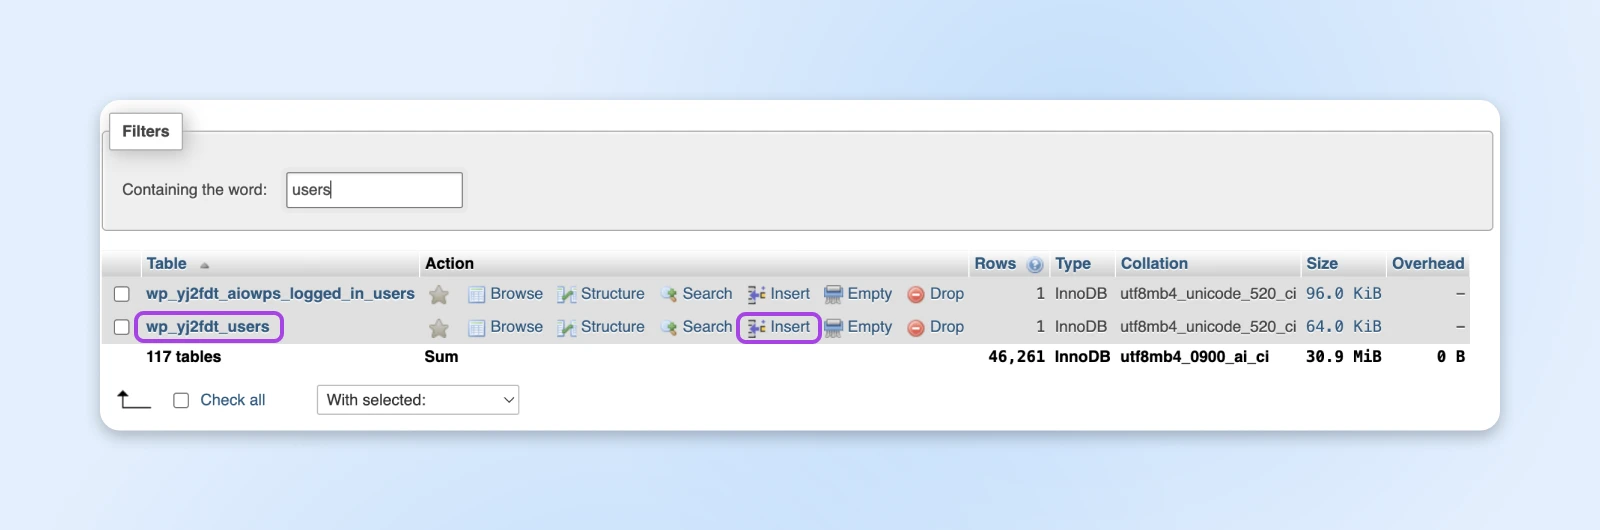
Next, fill out the Value fields on the form in front of you.
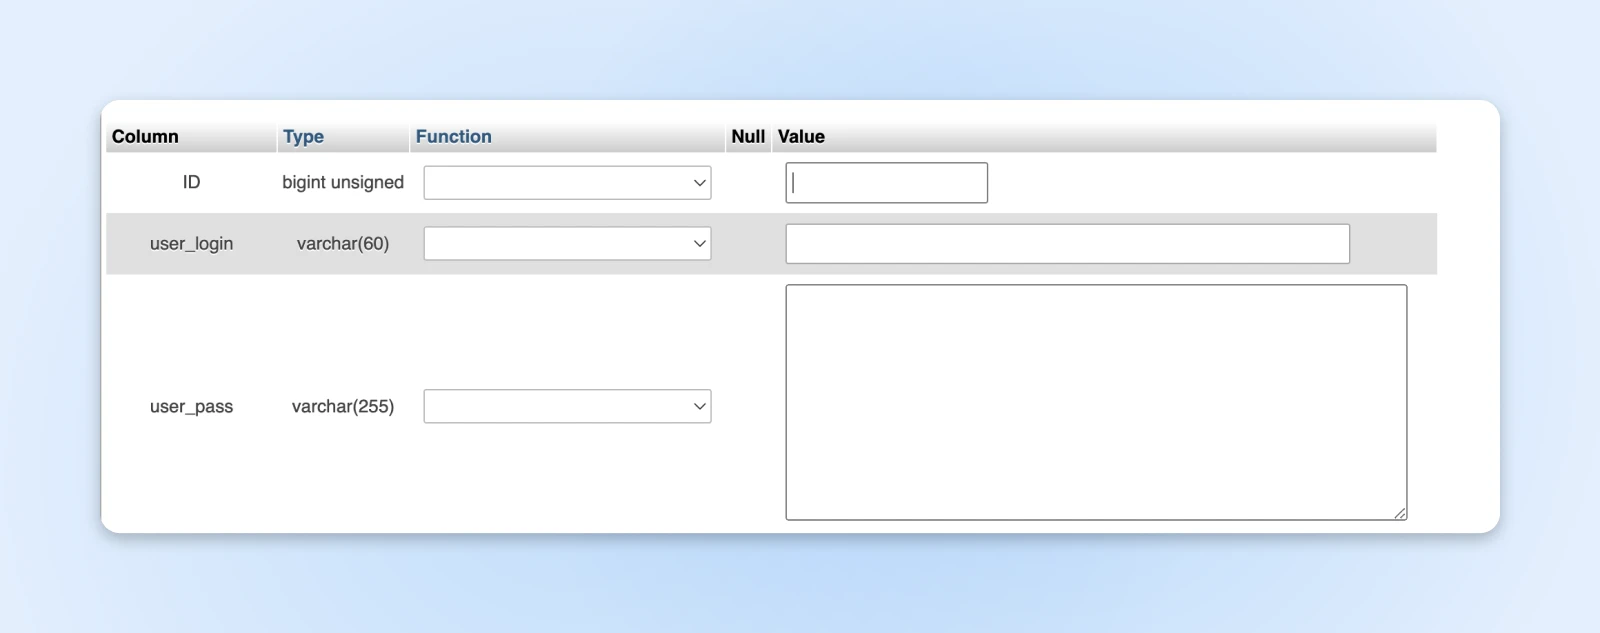
Each field corresponds to a field in the WordPress user settings:
- ID: Choose a number that isn’t already taken by one of the other users on your site. For example, if you have five users, your new user should at least be number six.
- user_login: The username for your new administrator account.
- user_pass: The password for the new user.
- user_nicename: A nickname for the user.
- user_email: The email address for the account.
- user_url: Your website’s URL.
- user_registered: The current date.
- user_status: Should be zero.
- display_name: The name you want to be displayed on your website for this user.
When you’re finished, you click on Go to save this new user.
Next, you need to give this new user administrator access.
Go back to your big list of database tables, and scroll down or search to find the usermeta entry and click on Insert.
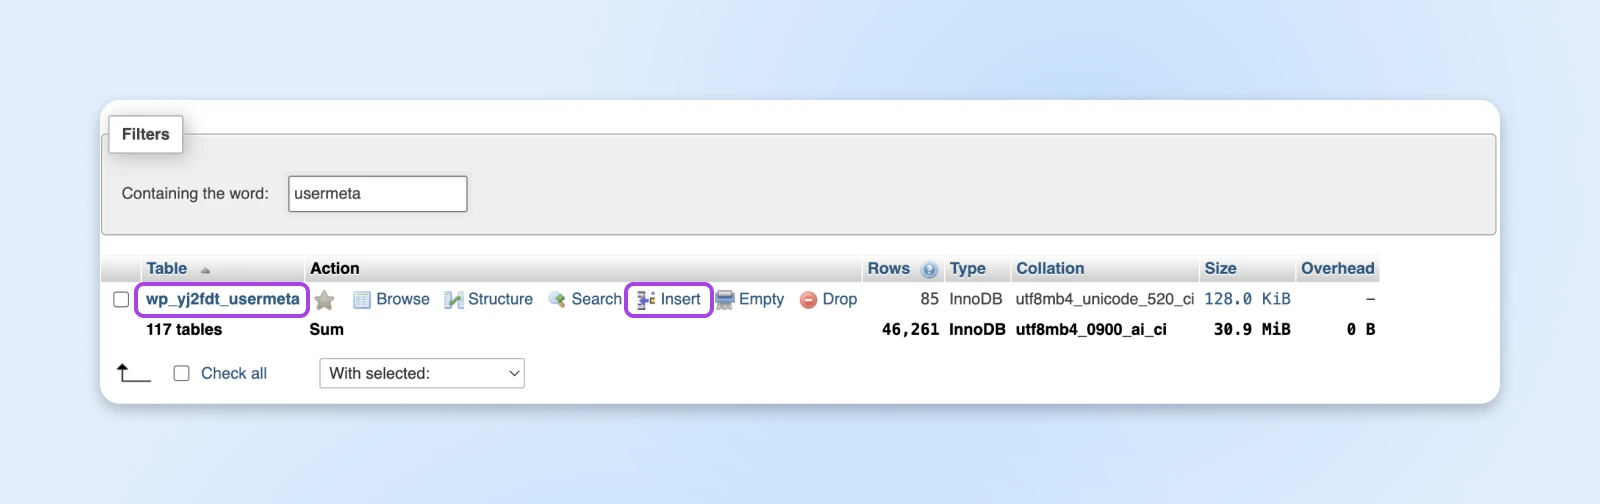
Again, fill in the form fields as follows:
- unmeta_id: Leave this blank.
- user_id: The ID number of the new user (from above).
- meta_key: Enter wp_capabilities.
- meta_value: Type in a:1:{s:13:”administrator”;b:1;}.
When you’re done, click on Go. Now repeat the exact same process with the usermeta file one more time, but use the following values:
- unmeta_id: Leave this blank.
- user_id: The ID number of the new user (from above).
- meta_key: Type in wp_user_level.
- meta_value: Set this to 10.
Once again, you can select Go to save and activate your changes.
Voila! You’ve now successfully given the new user administrator rights.
This user now gives you full access to your WordPress dashboard and site.
If you’re not comfortable with phpMyAdmin, or just prefer the command line, you can also use WP-CLI again to create your new user.
To create a new user with administrator privileges, access your site via SSH, navigate to the WordPress directory, and enter the following code:
wp user create newusername admin@example.com --role=administrator --prompt=user_pass
Just replace username with your desired username, and admin@example.com with the email address you want to tie it to.
4. Disable Your Security Plugins
Many security plugins, such as Sucuri Security, limit the number of failed login attempts. You can’t make any more attempts once you hit the limit.
This functionality is handy since it prevents hackers or malicious users from brute-forcing their way into your site. However, if it’s triggered, it can also prevent you from getting into your own site.
To regain access, you’ll need to disable your security plugin temporarily. To do this without access to your dashboard, you can use SFTP following the instructions from Step 1 above — the process is identical.
Once you have access, you’ll want to re-enable the plugin and remove yourself from any blacklists (if your plugin provides this feature). Then, you can log in as usual.
5. Troubleshoot The White Screen Of Death (WSoD)
“White Screen of Death” (WSoD) is a phrase used in the WordPress community to describe a blank white screen — or more often these days, an error screen, you may see when trying to access your site.
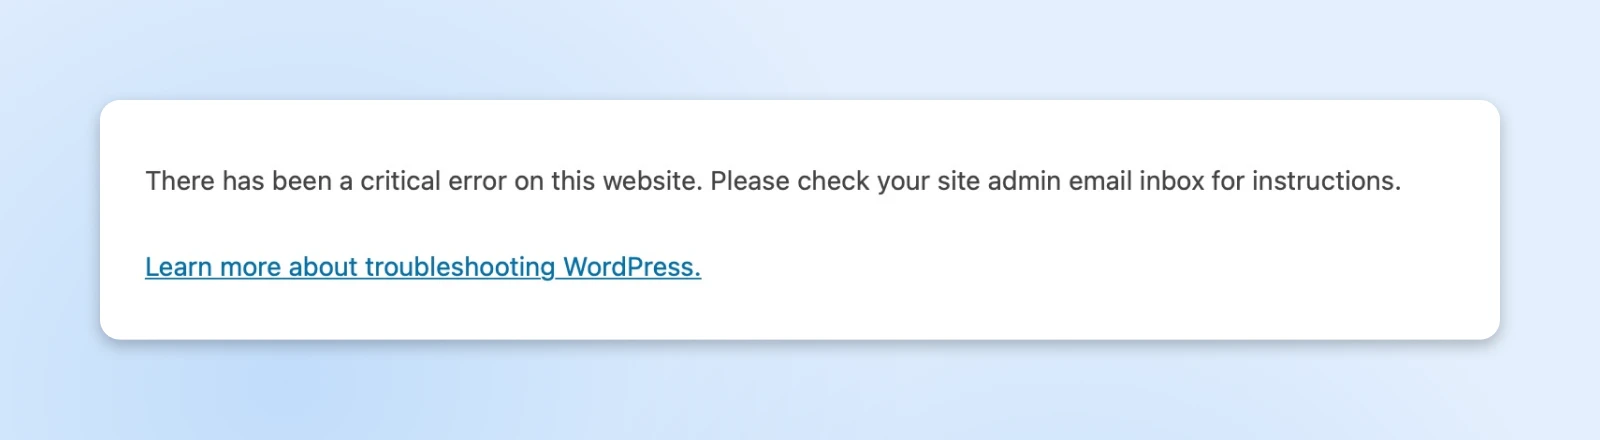
There are several potential causes for a WSoD. Most likely, it’s a rogue plugin on your site or insufficient PHP memory.
We’ll walk through troubleshooting each scenario.
Disable All WordPress Plugins
First, you should check to see if a plugin is the culprit. To do this, you’ll need to disable all of your plugins. If this grants access to your site, you can then turn them back on one at a time until you’ve isolated the specific plugin causing the issue.
To disable all plugins without access to your WordPress dashboard, you’ll need to use SFTP. Again, you can follow the instructions back in Step 1.
However, instead of renaming the folder for a particular plugin, you’ll want to rename the entire plugins folder.
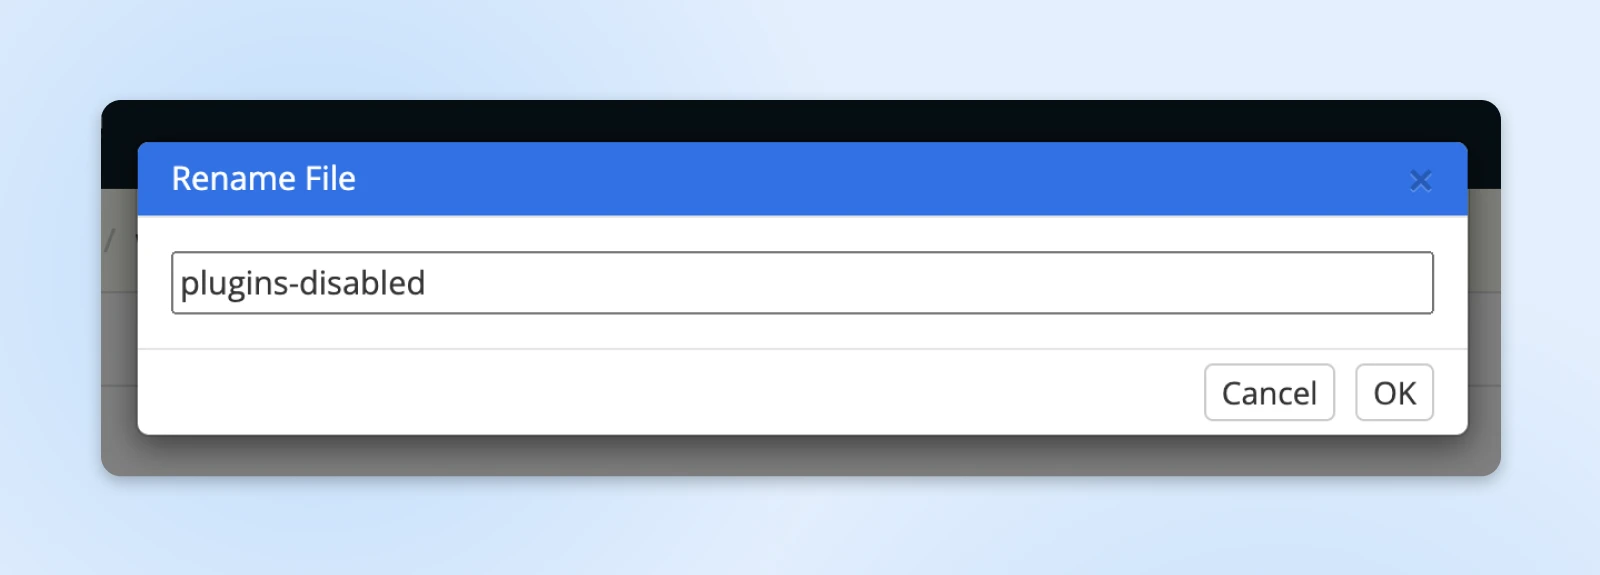
This disables all of them. Then, you can refresh your page and see if you can log in. If not, proceed to the next step.
If disabling all plugins does resolve the issue, and you can log in to your WordPress site, open up your site in SFTP again and restore the plugins folder to its original name (don’t log out of the WordPress dashboard while you do this).
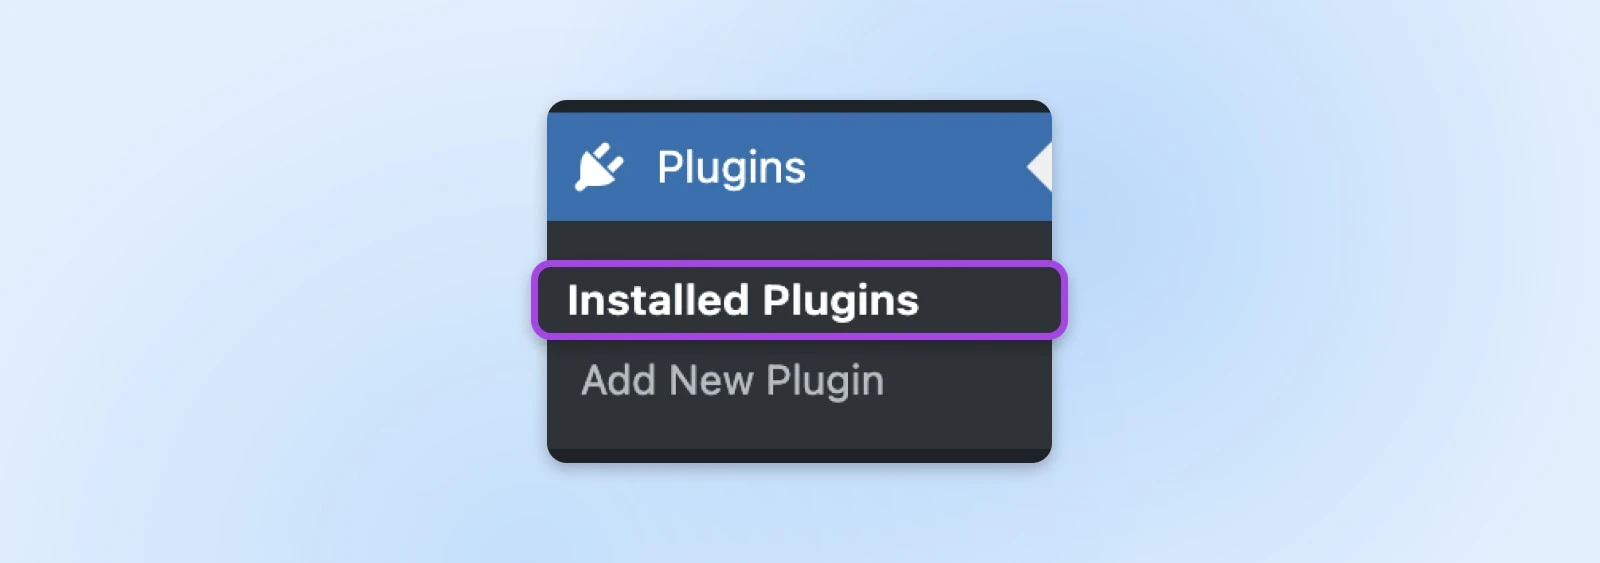
They should appear in the normal plugins list now, located at Plugins > Installed Plugins in your WordPress dashboard.
Next, disable the plugins from within the dashboard by selecting all of them and choosing Deactivate > Apply from the bulk actions menu.
Now, you can go back down the list and enable each plugin one at a time. After enabling each one, refresh your site and check to see if the WSoD returns. If it does, you’ll know which plugin was responsible.
Then, you can either check for updates to resolve the issue or find an alternative plugin.
Increase Memory For Your Site
If a plugin wasn’t the problem, the next step is to try increasing the available memory for your website.
To start, open up your site in SFTP again and locate the wp-config.php file in the root directory.
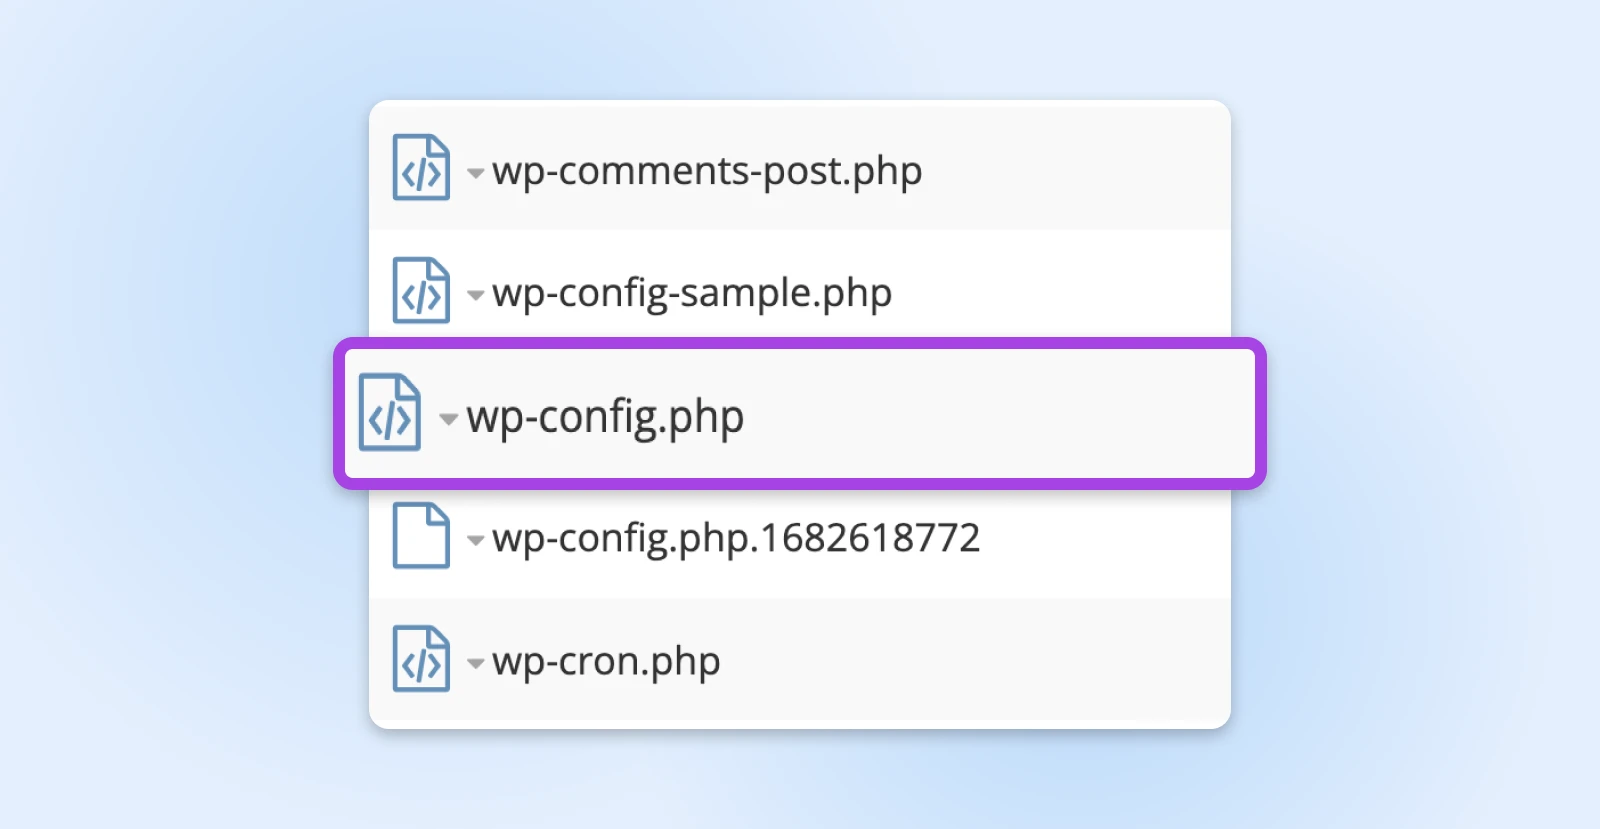
You’ll need to edit that file to add the following line of code:
define('WP_MEMORY_LIMIT', '128M');
Save, then refresh your site to see if it resolved the error.
If not, you can try a few more troubleshooting steps in our comprehensive guide on fixing the White Screen of Death.
In case all else fails, contact your host’s support team.
6. Resolve Database Connection Errors
If you see Error establishing database connection when you attempt to log in, it means that WordPress can’t connect to the MySQL database.
MySQL
MySQL is a relational database management system that offers practical management tools. You can use MySQL to create, modify, and extract data through the SQL programming language.
Read MoreWordPress sites use these databases to store nearly all of the information on your site. If a connection can’t be established, your website won’t load.
The good news is that the causes of this issue are relatively easy to fix. However, since there are multiple options, troubleshooting to find which one applies can be time-consuming.
Here, we’ll cover the fix for the most common issue: incompatible login credentials.
For DreamHost users, here’s how to access your database credentials in the panel. The process may differ among host administrators, but overall, you’ll likely follow the same one.
Following that, you’ll want to compare these credentials to those in your wp-config.php file, which you can once again access via SFTP.
Find the file with your site name on it and locate the wp-config.php file inside. Open or download the file and verify that the information under MySQL settings matches what you found in your panel.
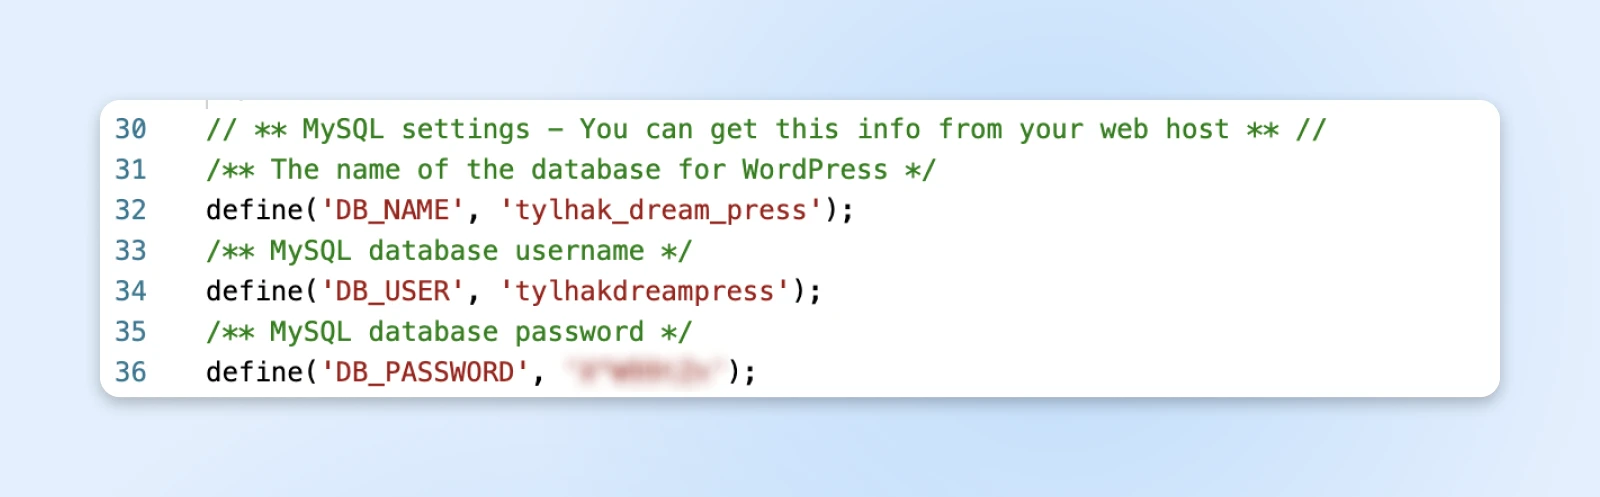
If this was the issue, once those credentials line up, you should be able to access your login page.
Still seeing a database error? No sweat — here’s our guide on fixing WordPress database connection errors.
7. Undo Recent Code Changes
If you load your site and see a Parse error: syntax error message, it means your site contains incorrect code, which prevents WordPress from loading — And you from being able to log in.
This most commonly occurs when code is copied and pasted from the internet without a thorough double-check. Technically, more recent WordPress versions should automatically prevent this from happening, but if your site runs on an older version, you may still see this error.
Fixing this is simple.
You can simply undo the most recent change(s) you made to your site’s code before this error appeared.
Another option is to restore a recent working backup.
In case you still want to use the code that caused the problem, check out our complete guide to fixing syntax errors in WordPress.
The best way to prevent this issue from happening in the future is to validate any code you pull from the web.
As we’ve said before, it’s always a good idea to create a fresh backup of your site — especially before changing any code in case something goes wrong.
WordPress Troubleshooting Resources
Working through other issues on your WordPress site? We’ve put together a lot of tutorials to help you troubleshoot various kinds of WordPress issues:
- Common WordPress Image Upload Issues And How To Fix Them (5 Methods)
- How To Fix Fatal Error: Maximum Execution Time Exceeded (In 6 Steps)
- How To Fix Common SSL Issues In WordPress
- How To Fix Common WordPress Errors
- How To Fix The 500 Internal Server Error In WordPress
- How To Fix The WordPress Not Sending Email Issue
- How To Fix WordPress Error 404 Not Found
- How To Fix White Text And Missing Buttons In WordPress Visual Editor
- How To Fix The Sidebar Below Content Error In WordPress (In 3 Steps)
- How To Fix The WordPress Login Page Refreshing And Redirecting Issue
Get The Most Out Of WordPress With DreamPress
If you’ve ever been locked out of your WordPress admin dashboard, you know how hand-wringingly frustrating it can be.
There are many potential causes, and since the exact error message can vary depending on the underlying problem, finding the root cause can take some time.
By now, hopefully, you’ve learned all about the most common causes of this issue, with detailed walkthroughs on how to fix them.
Whenever you get an error message trying to log in, you can follow the steps accompanying it so that you can regain access to your WordPress site.
Oh, but what’s that? You’d rather focus less on troubleshooting and more on creating amazing content and running your business?
We hear you.
In that case, you should strongly consider switching to DreamPress as your hosting provider.
Our managed WordPress hosting ensures that your site is always available, fast, and protected with regular backups. And we mentioned our 24×7 customer support, right?

Get More Visitors, Grow Your Business
The best-designed site is worthless if no one can find it. Leverage proven online marketing strategies and techniques to help more of your target audience find you.
See More