When you have specific requirements, selecting a WordPress theme is no easy task. Your choice needs to look the part and provide all the functions you need — Some compromise is almost inevitable.
Customizing your chosen theme is one way to get around this issue. However, WordPress themes need to be updated periodically. When the developer of your theme releases a new version, all your customizations could be reset.
The solution?
Create a WordPress child theme that inherits the original theme’s functionality but maintains your styling. Even if you apply a theme update, your customized child theme will remain intact.
In this post, we’re going to take a closer look at WordPress child themes — from why you need one to how to create your own. Let’s dive in!
What Is A Child Theme?
Child Theme
A ‘child theme’ is a WordPress theme with the same appearance and functionality as its ‘parent theme’. However, you can customize its files separately from its parent theme’s files.
Read MoreWordPress allows you to make a lightweight copy of any theme for the sake of customization. The original theme becomes the parent theme, and the copy is known as a child theme.
The child is dependent on the parent, drawing on the functions and design of the original theme. When the parent theme receives an update, so does the child.
But much like a teenager, the child theme does have some independence. When you customize the child theme, the changes are applied on top of the original parent theme. Those additions remain, even when the parent theme is updated or changed in some other way.
It’s also worth noting that customizations to your child theme don’t affect the parent theme. In fact, they are stored separately. This means you have freedom to experiment, without worrying about breaking the underlying code. You can even delete your child theme completely, and it will have no effect on the original parent theme.
Using a child theme makes it easier to maintain and update your site. It will also help you avoid the risk of editing the parent theme directly, which could be overwritten and lost.
Differences Between Child And Parent Themes
Parent Theme
When working with WordPress child themes, there’s always a parent theme. It’s the theme that the child inherits its style and functionality from. Any changes to the child theme won’t impact the parent’s code.
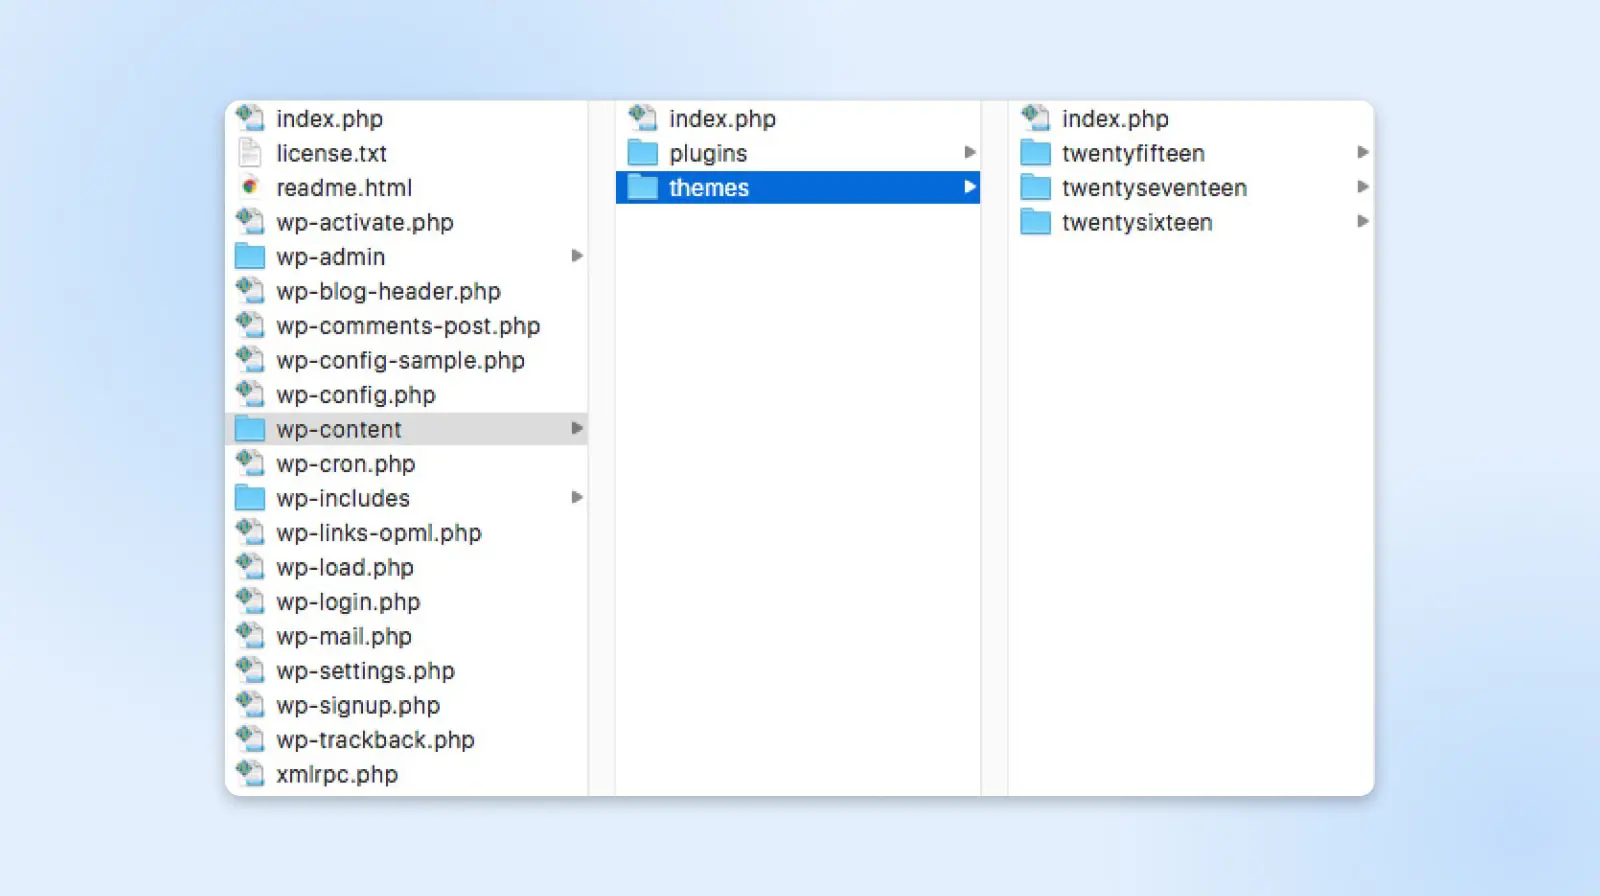
Read MoreThere are several technical differences between a parent theme and a child theme. For example, a parent theme folder typically includes:
- A style.css file that determines the look and feel of your website.
- A functions.php file that enables you to add features or modify the default behavior of WordPress.
- Several template files that define how different pages on your site are displayed.
In contrast, a child theme folder only needs two essential files: style.css and functions.php. You will add these files within the /wp-content/themes/ directory.
You can use a child theme to make stylistic changes to your website, such as changing the default color palette, fonts, and layouts.
For example, let’s say you want to change your site’s color scheme. You can do this by creating a new style.css file in the child theme directory and adding the following code:
body {
background-color:#fff;
}
h1 {
color: #000
}
We’ve changed the background color and H1 color in the code above. These edits will override the parent theme’s styling and update the colors on your site. You can make as many changes as needed in the child theme’s style.css file.
A child theme inherits everything from the parent theme. This includes all template files, functions, and assets such as images and JavaScript files. If you want to make changes to these elements, you need to copy them into the child theme directory from the parent theme. You can then edit the files.
Why You Should Use A Child Theme
There are several advantages to using a child theme on your WordPress site, including:
- Protecting theme changes against automatic updates.
- Adjusting visual elements of your theme.
- Learning how to edit themes, which is a step toward developing your own theme.
Using a child theme also requires minimal coding experience. In most cases, you only need to add a few lines of code to the style.css file. This makes it easy to get started with a child theme, even if you’re not a theme developer.
If you do want to dive deeper, you can add new elements and functions to your child theme via custom code.
How To Create A WordPress Child Theme Using A Plugin
Using a plugin is probably the easiest way to create a WordPress child theme. The plugin can walk you through the entire process in simple steps, meaning you don’t need any technical knowledge.
One heads-up before you start: Child Theme Configurator is built with classic themes in mind. It will happily scaffold a child of a block theme like Twenty Twenty-Four, but that child mostly helps with custom CSS — for deeper block-theme customization, see the Create Block Theme note in the FAQ below.
In this tutorial, we’ll be working with the Child Theme Configurator plugin. This user-friendly tool can help you analyze your theme for issues, create a child theme, and edit it to meet your web design layout and style specifications.
Step 1: Download And Install The Child Theme Configurator Plugin
To start, you’ll need to download and install Child Theme Configurator. You can do this by navigating to the plugin’s page and clicking on the Download button:

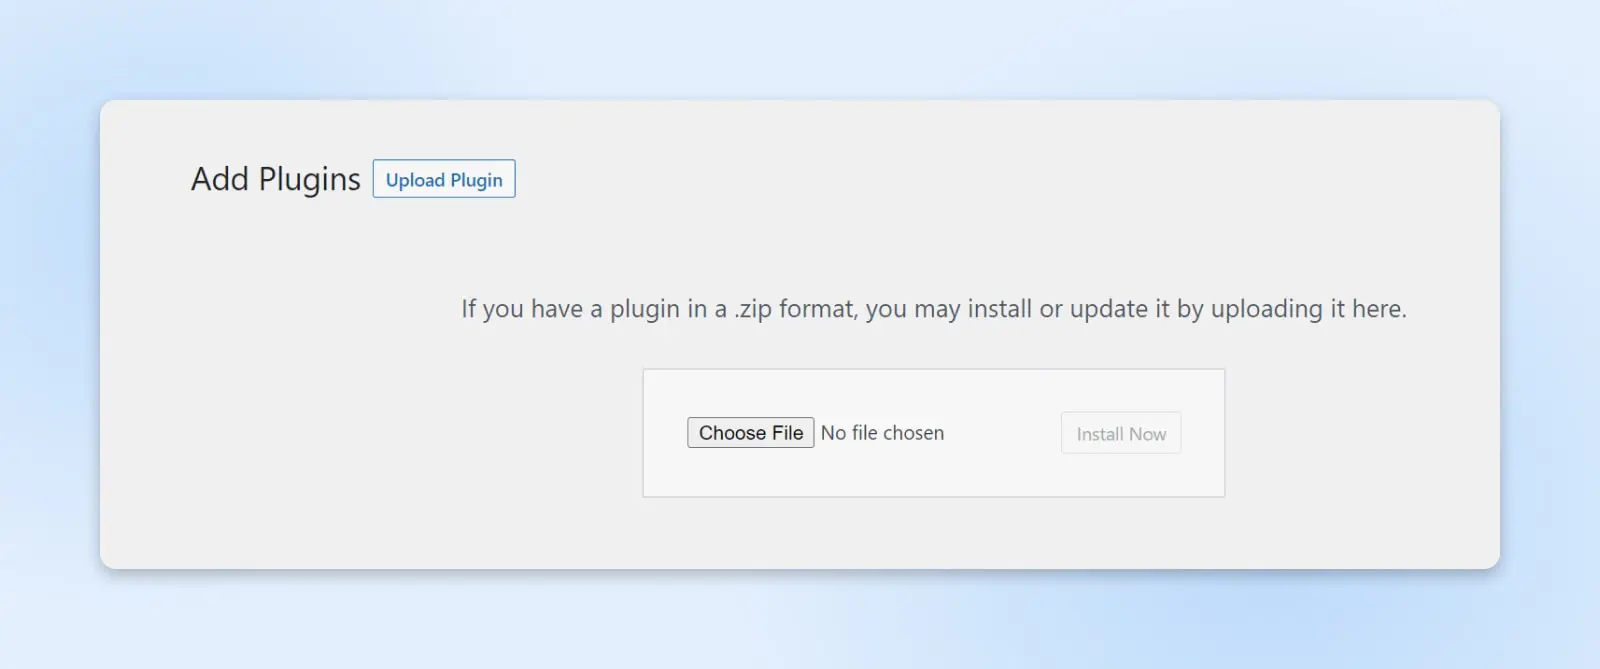
Your computer will download the theme files in a ZIP file. Then, navigate to your WordPress dashboard and go to Plugins > Add New to upload the files.
Click on Upload Plugin > Choose File, and select the downloaded folder:
Once the plugin is installed, you’ll just need to activate it. Keep in mind that you’ll also need to choose a WordPress theme from which to make your child theme.
Step 2: Analyze The Parent Theme
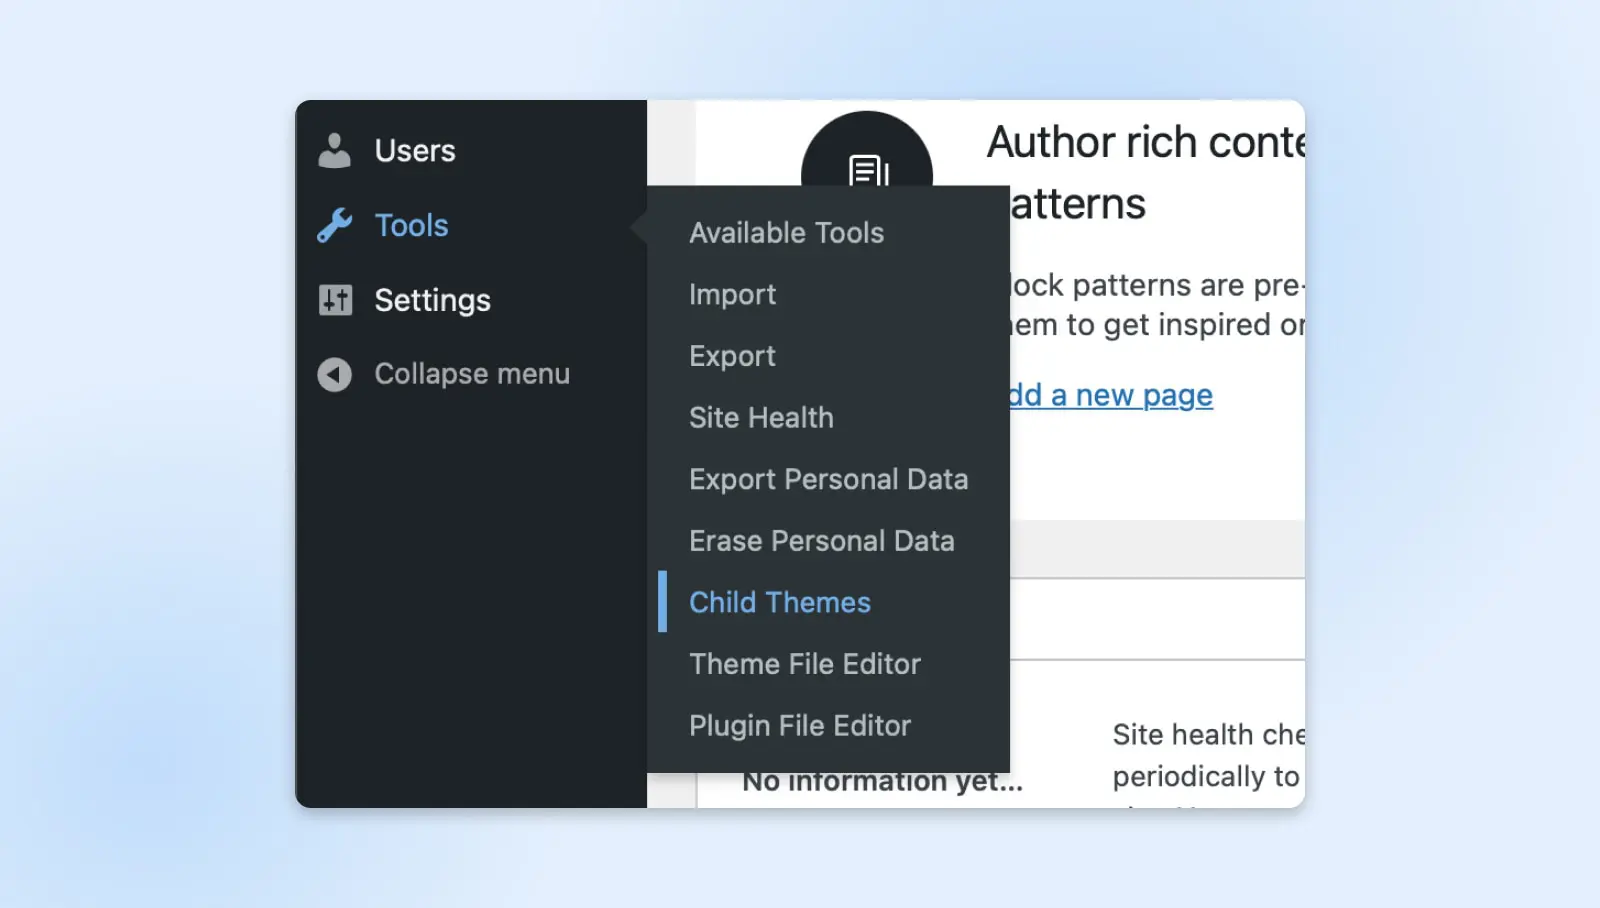
Next, navigate to Tools > Child Themes:
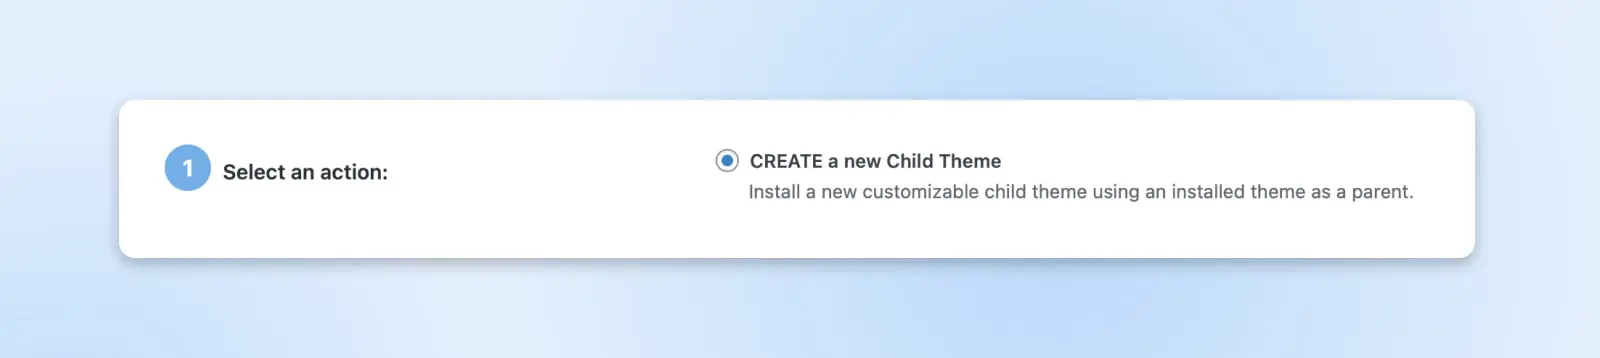
The plugin will walk you through the steps to create a child theme. Simply select CREATE a new Child Theme to get started:
You’ll be prompted to select your parent theme from the dropdown menu. If you have multiple themes on your WordPress site, make sure to choose the one you want to customize:
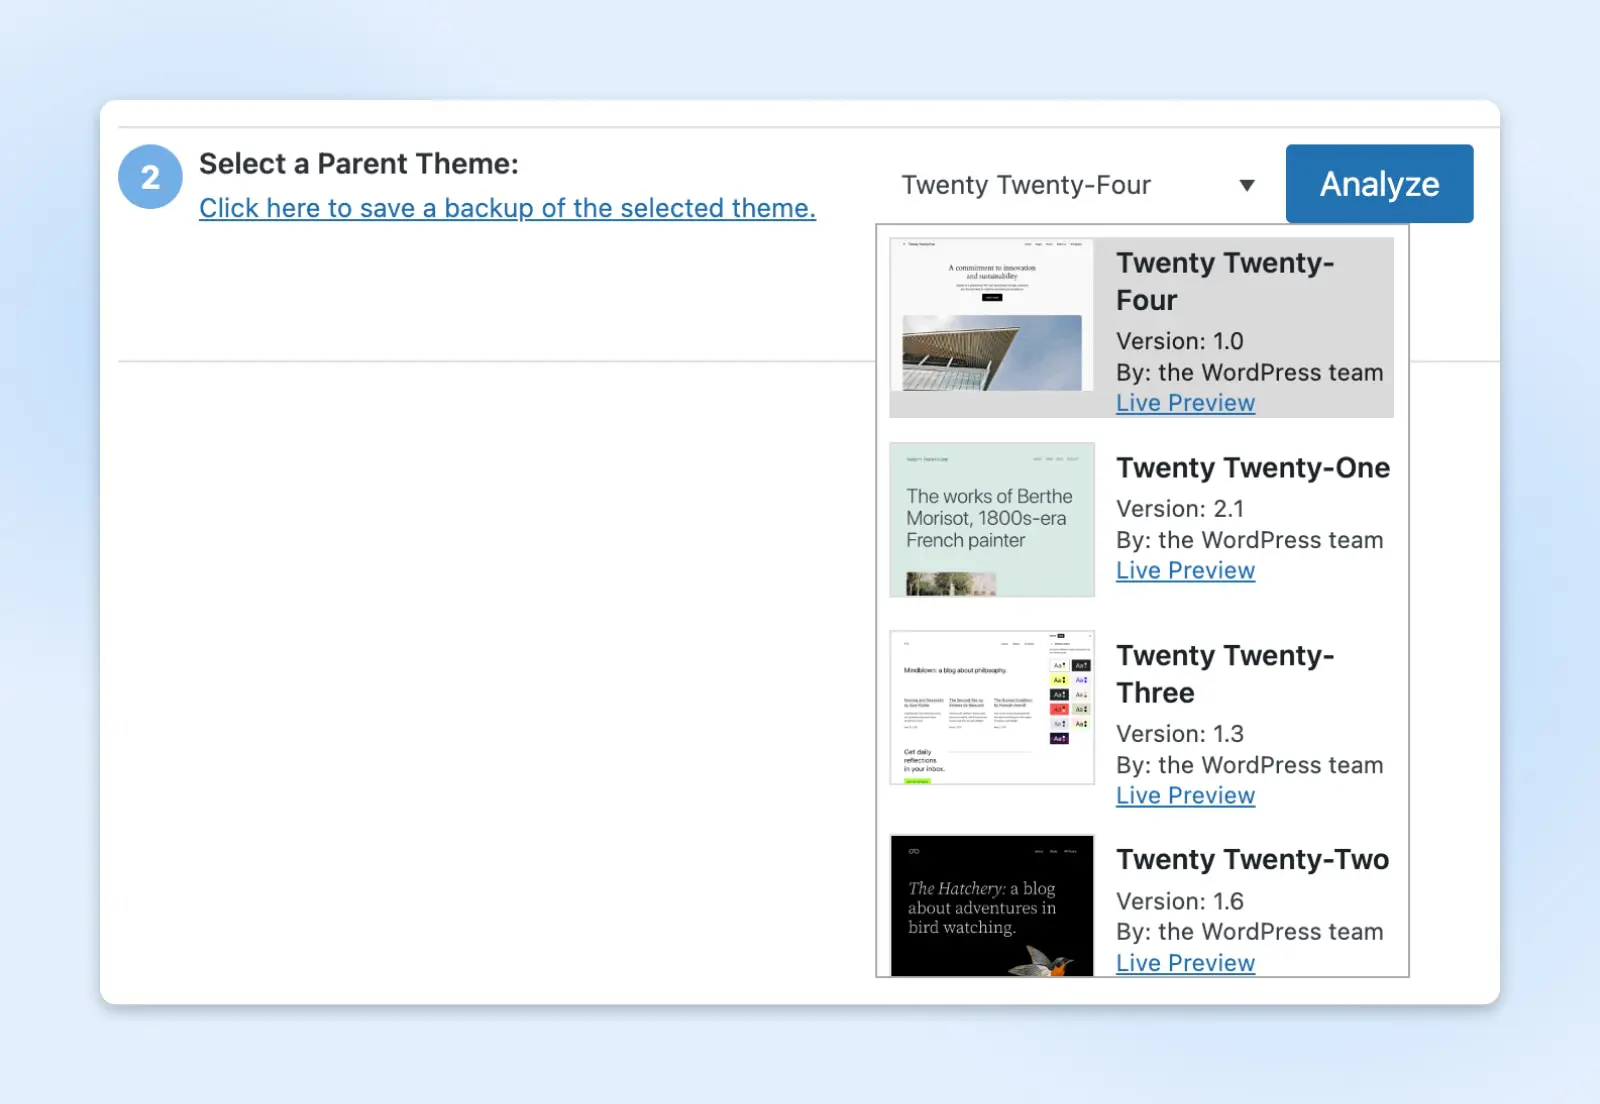
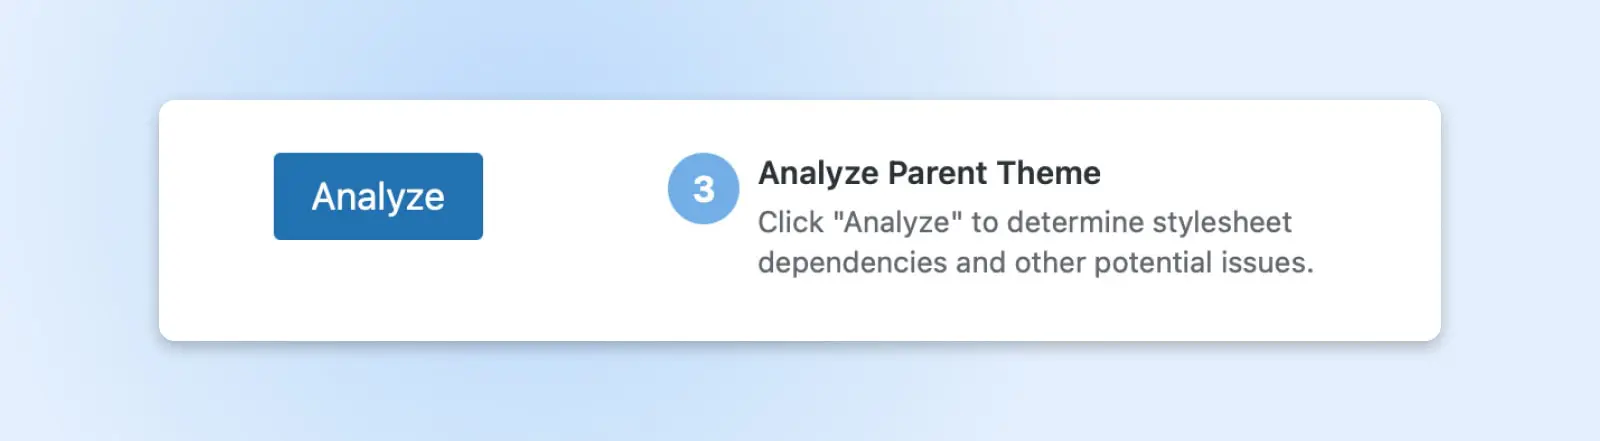
Now hit Analyze to check the parent theme for any potential code issues:
If the plugin finds any compatibility or coding issues, it will list them here. Otherwise, you’ll see a green success message telling you it’s fine to proceed with making the child theme:
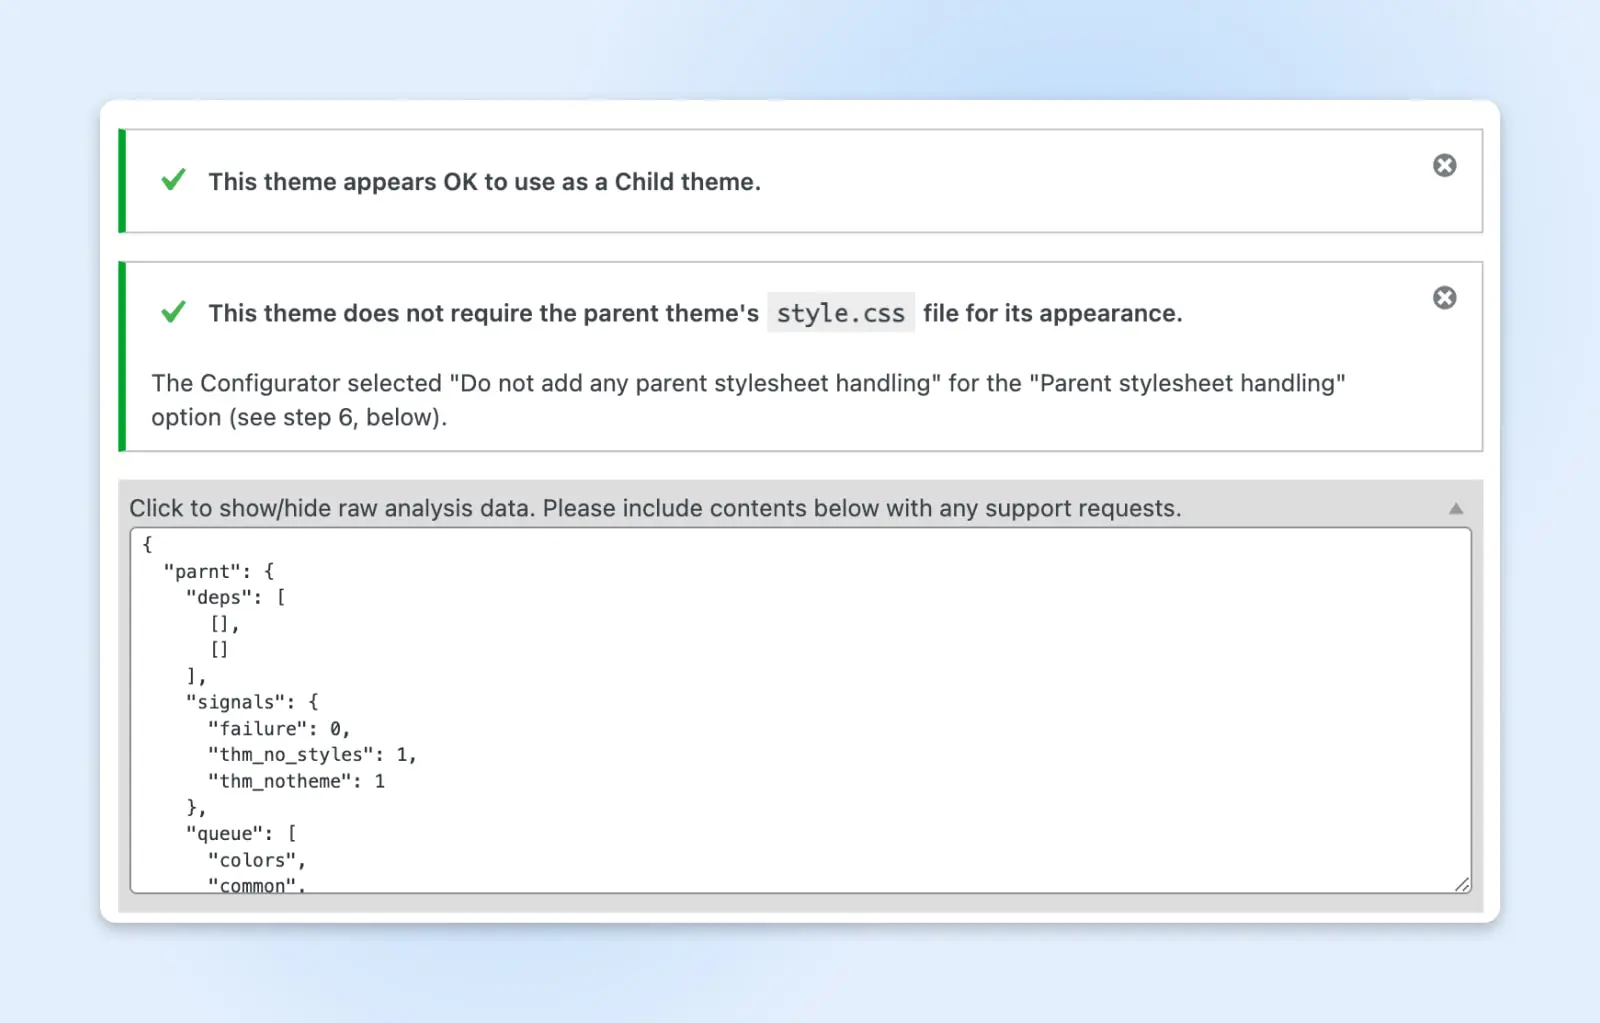
Once you’ve determined that your parent theme will be suitable for a child theme, you can move on to the next step. (You can also show a raw data analysis or submit support requests to the plugin’s creator from this page.)
Step 3: Name Your Child Theme Directory
Next, you’ll be prompted to create a child theme directory name. This is the name of the folder within your website’s files.
You can name it anything you like as long as it’s unique to your site and contains acceptable characters. We’re using “twentytwentyfour-child” for simplicity’s sake:
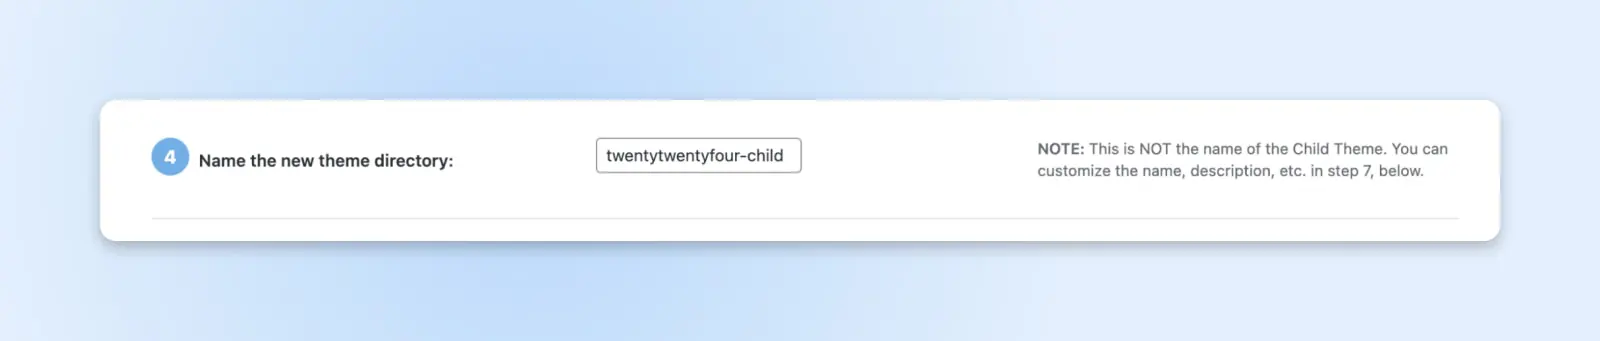
Keep in mind that naming the theme directory is not the same as naming your child theme or adding a theme description. Those steps will come later.
Step 4: Select The Child And Parent Theme Stylesheets
Next, you’ll need to choose the new stylesheet for your child theme. If you select the primary stylesheet (style.css), your custom CSS styles will override the existing theme content.
CSS
Cascading Style Sheets (CSS) is an essential coding language used for styling webpages. CSS helps you create beautiful pages by modifying the appearance of various elements, including font style, color, layout, and more.
Read MoreThis is the default option, and we recommend choosing it if you’re new to child themes:

You’ll now be prompted to choose your parent theme stylesheet handling method. There are various options, but we recommend sticking with Use the WordPress style queue for most use cases:
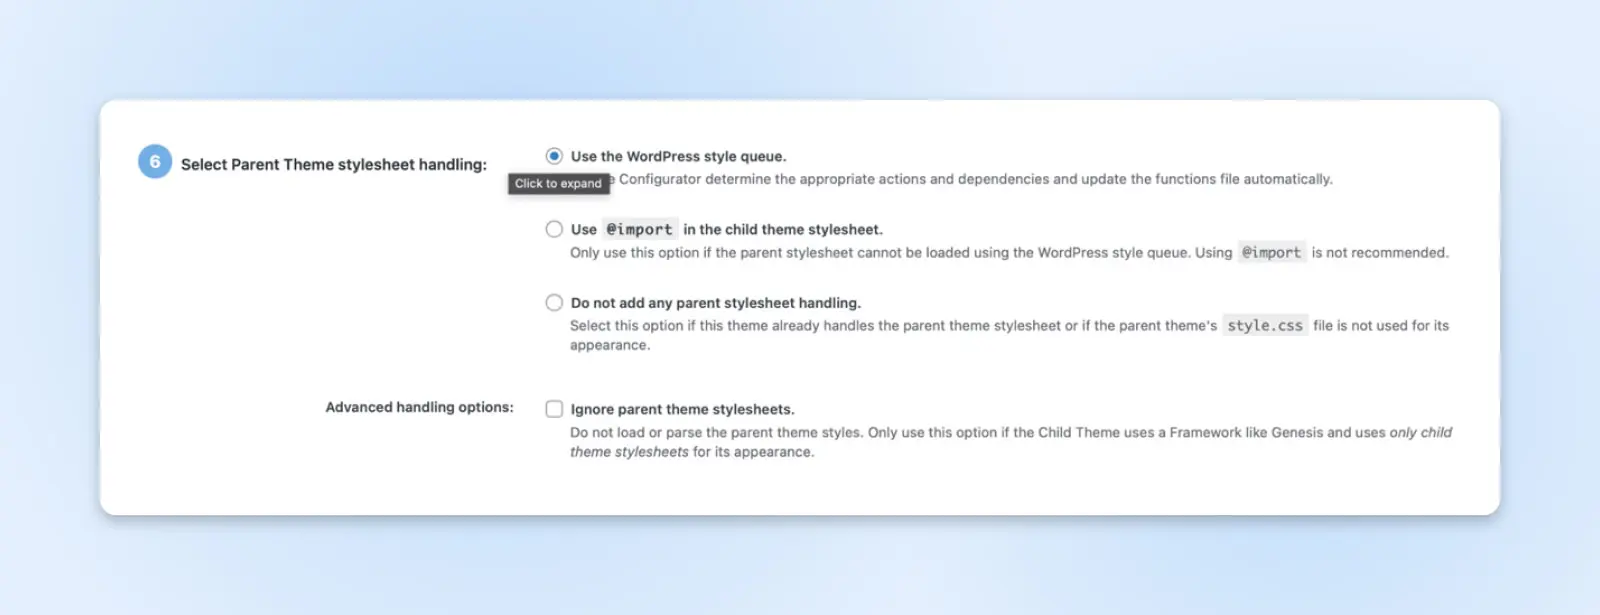
As a beginner, it’s better to use the default option until you’re more familiar with how the parent theme handles the stylesheet. The other options aren’t always compatible with all themes.
Step 5: Name Your Child Theme
The next step is to name your child theme and write a description for it.
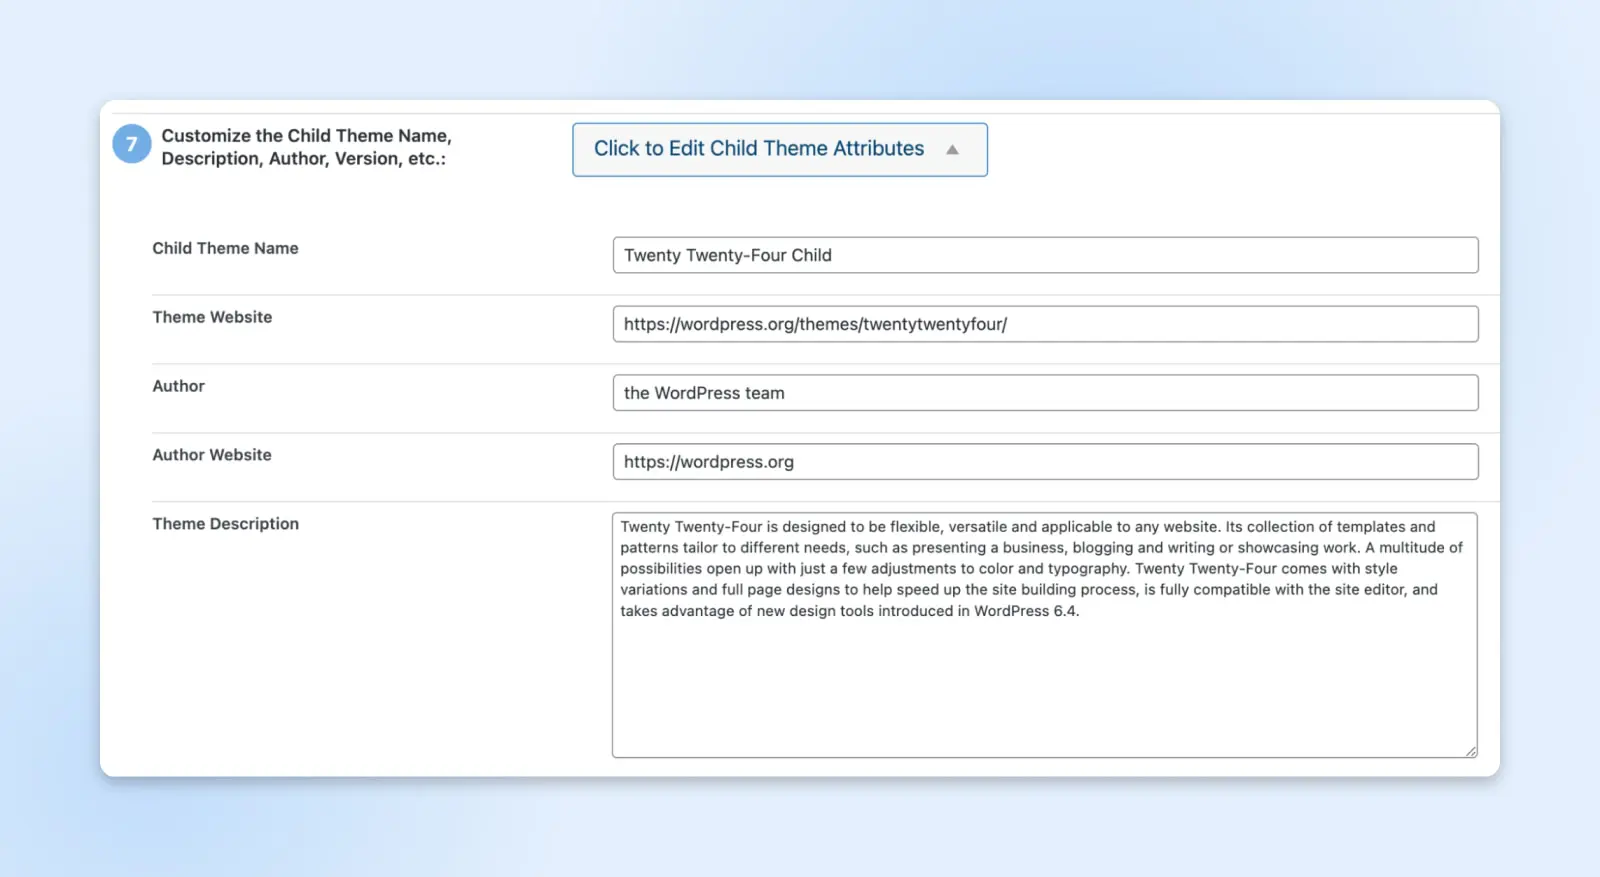
Child Theme Configurator will pull the default information from your parent theme and display it here. If you’re simply making a child theme for personal use, you can leave the data as-is.
However, if your parent theme will serve as the basis for a new theme you’re developing, you might want to add a brief description and a unique name.
Step 6: Copy The Parent Settings To The Child Theme
The plugin will now ask you to confirm that it can copy the parent theme’s settings to your child theme:
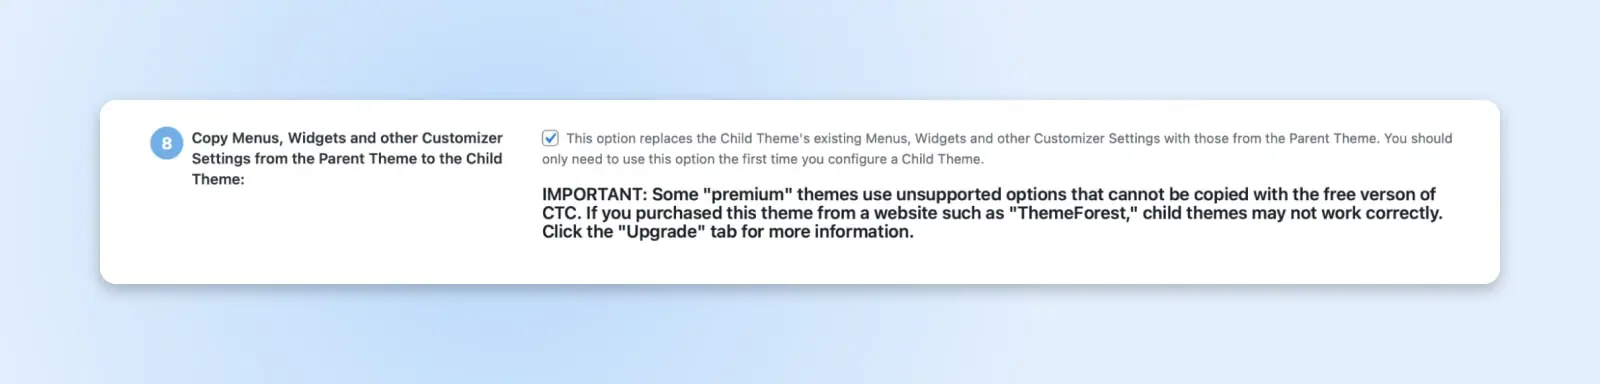
This step will ensure that your child theme pulls its functionality and appearance from the parent theme. Note that if you’re working with a premium or restricted theme as the parent, you may not be able to perform this step.
Step 7: Create Your New Child Theme And Preview It
The final step is to make your child theme. Click on the Create New Child Theme button and wait for the plugin to do its job:

You should get a notification that your child theme was created successfully:

Always preview your child theme before activating it on your website. This step will help you verify that everything is working as it should. Then, hit Activate & Publish to get started with your child theme.
How To Manually Create A WordPress Child Theme
If you’d rather not use a plugin to create your child theme, you can use the manual method. You might prefer this route if you’re already using too many plugins on your website.
Additionally, manually creating a WordPress child theme lets you make all the changes you want at a granular level. Just keep in mind you’ll need an intermediate knowledge of CSS code.
Here’s a step-by-step guide:
Step 1: Develop A Plan For Your Changes
First, find a parent theme you like and list the changes you want to make. You can view the developer tools and see the theme’s code to make the correct changes.
To view the developer tools, right-click anywhere on your site while running the theme and select Inspect Element. You’ll then see a page of data that looks something like this:
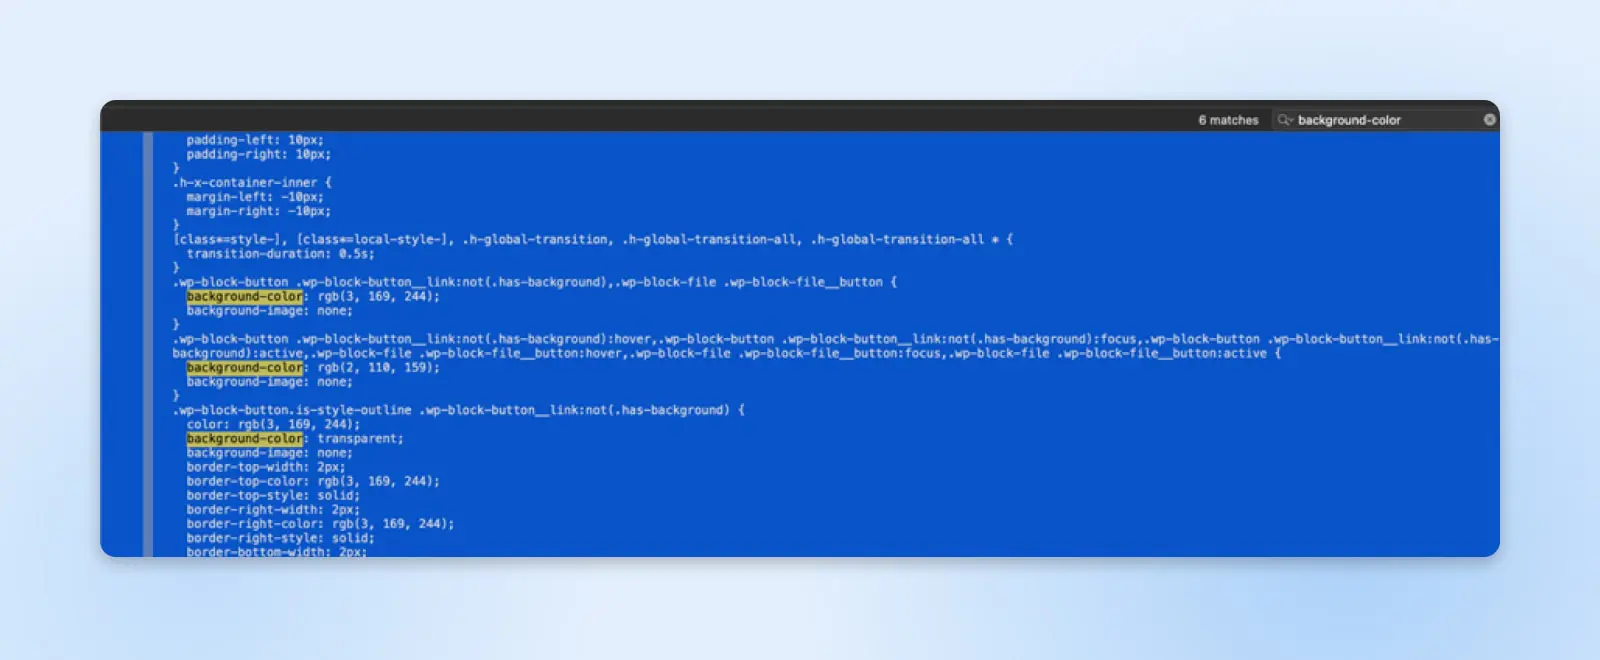
Here, you can search for background colors, font information, margin size, and more. Then, you can make a list of features you’d like to adjust in your child theme.
Step 2: Back Up Your Site
It’s essential to back up your current site before making any changes to avoid losing your settings. You can always revert to this backup if needed. You might also consider utilizing a staging website in case you make critical mistakes.
There are a couple of different ways to back up your site. You can do it manually using a backup plugin, which is probably the easiest method for most people.
Alternatively, you can partner with a WordPress hosting provider that takes care of website backups. Our DreamPress managed hosting plans include automatic and on-demand backups to safeguard your data.
Step 3: Create A Folder For Your Child Theme
You’ll need to create a folder to store your child theme files. To achieve this, first access your files via a Secure File Transfer Protocol (SFTP) client such as Filezilla and navigate to the themes folder:
Here, you can create a new directory for your child theme. Make a new folder that carries the parent theme’s name and add “-child” to the end.
For example, if your parent theme directory is named “twentytwentyfour”, your child theme directory will be called “twentytwentyfour-child”.
Step 4: Make A Stylesheet For Your Child Theme
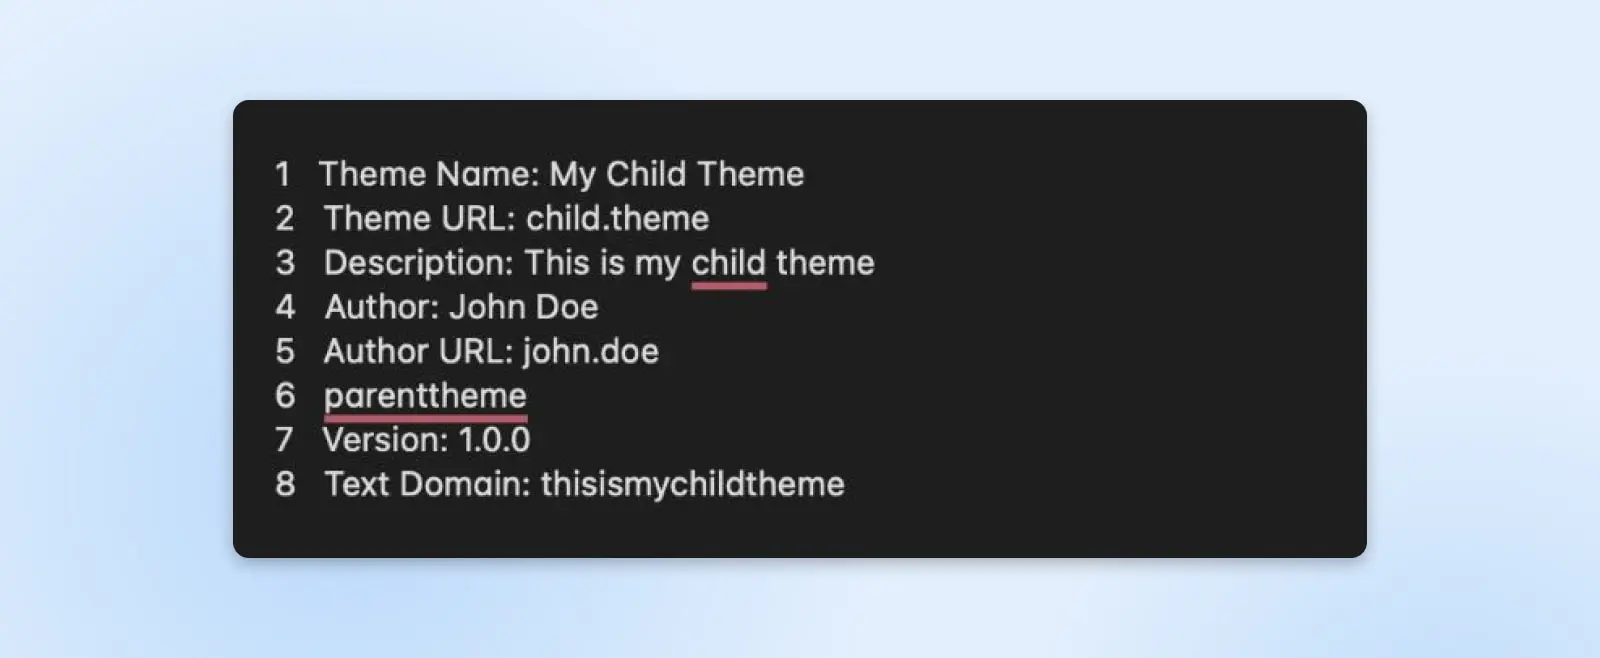
Now you’ll need to make a new text file and name it “style.css”. This file will form the basis of your child theme. It will need some basic header information, including its name, URL, description, and more:
Now save and add the style.css file to the directory folder you just made.
Step 5: Enqueue The Stylesheets
Next, you’ll need to enqueue the parent and child theme stylesheets.
The enqueue function ensures that your child theme will take its style data from the parent theme. It also allows you to edit the child theme without affecting its parent.
Make a new functions file in your child theme directory and name it “functions.php”. You can then tell your child theme to reference the base theme by adding the following code:
<?php
add_action( 'wp_enqueue_scripts', 'enqueue_parent_styles' );
function enqueue_parent_styles() {
wp_enqueue_style( 'parent-style', get_template_directory_uri().'/style.css' );
}
?>
Save the text file and navigate to your WordPress dashboard to activate the theme.
Step 6: Activate The Child Theme
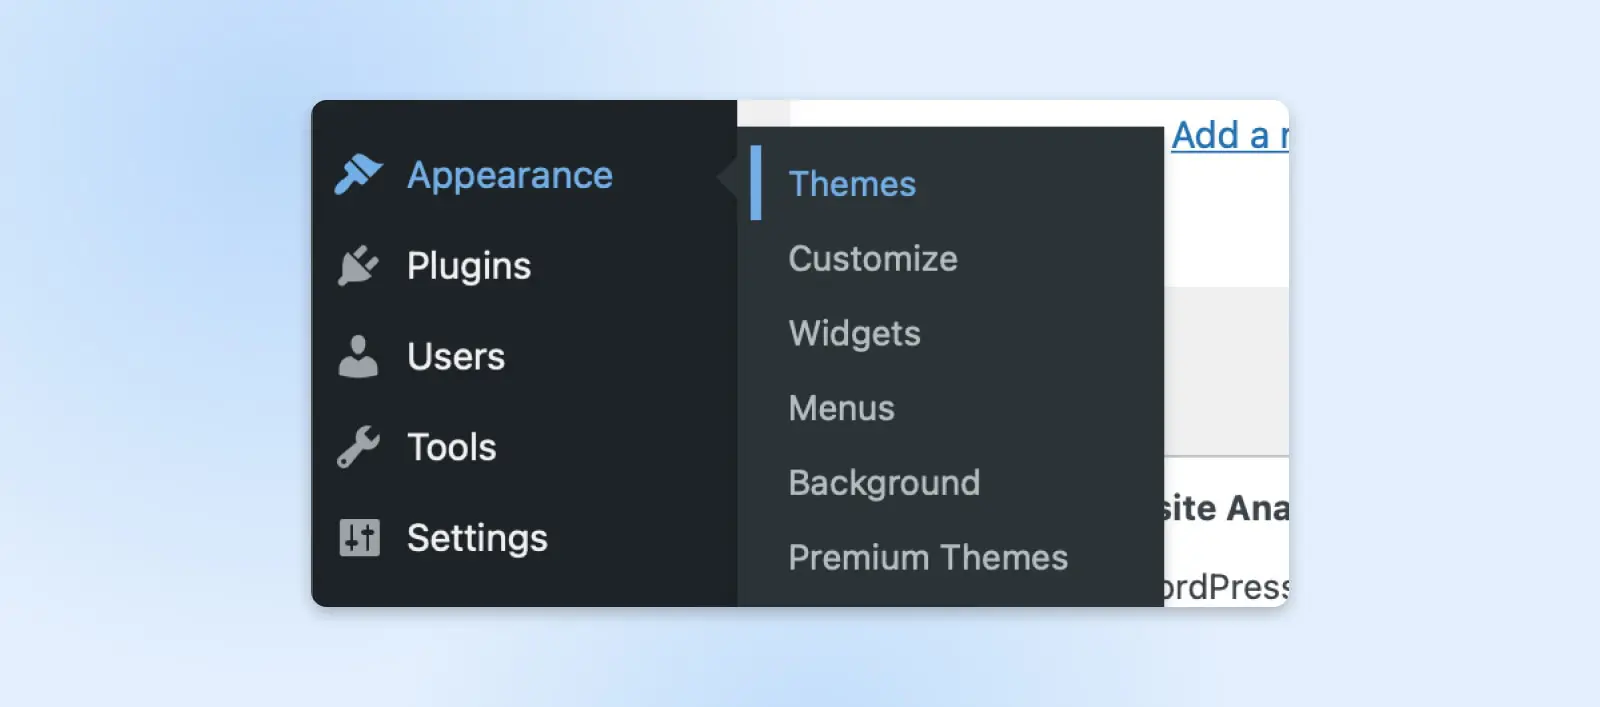
Finally, it’s time to activate your child theme. You can upload it manually by going to Appearance > Themes > Upload. Then, choose a .zip version of your child theme directory:
Activate your child theme. It should now be live!
How To Customize Your Child Theme
Once you’ve activated your new child theme, it’s time to take it for a spin. There are several different ways you can customize the design and functionality.
One principle to bear in mind is that WordPress automatically looks for files in the child directory before scanning the parent theme files. This means any stylesheet or template you add to your child theme will take precedence over the same file in the parent folder.
The child-before-parent system gives us loads of options.
Creating Custom Styles
For basic design changes that aren’t covered by the Theme Options panel, you can create your own custom styles. In most cases, you can simply rewrite existing parent styling rules in a new stylesheet.
The best way to find the CSS you want to modify is by using the Inspector Tools in your browser. You can look at the CSS and the HTML behind any webpage by right-clicking on it and selecting Inspect Element.
At the bottom or the right side of your screen, you’ll find the code for the page. Hover your mouse over the code and highlight the HTML in sections:
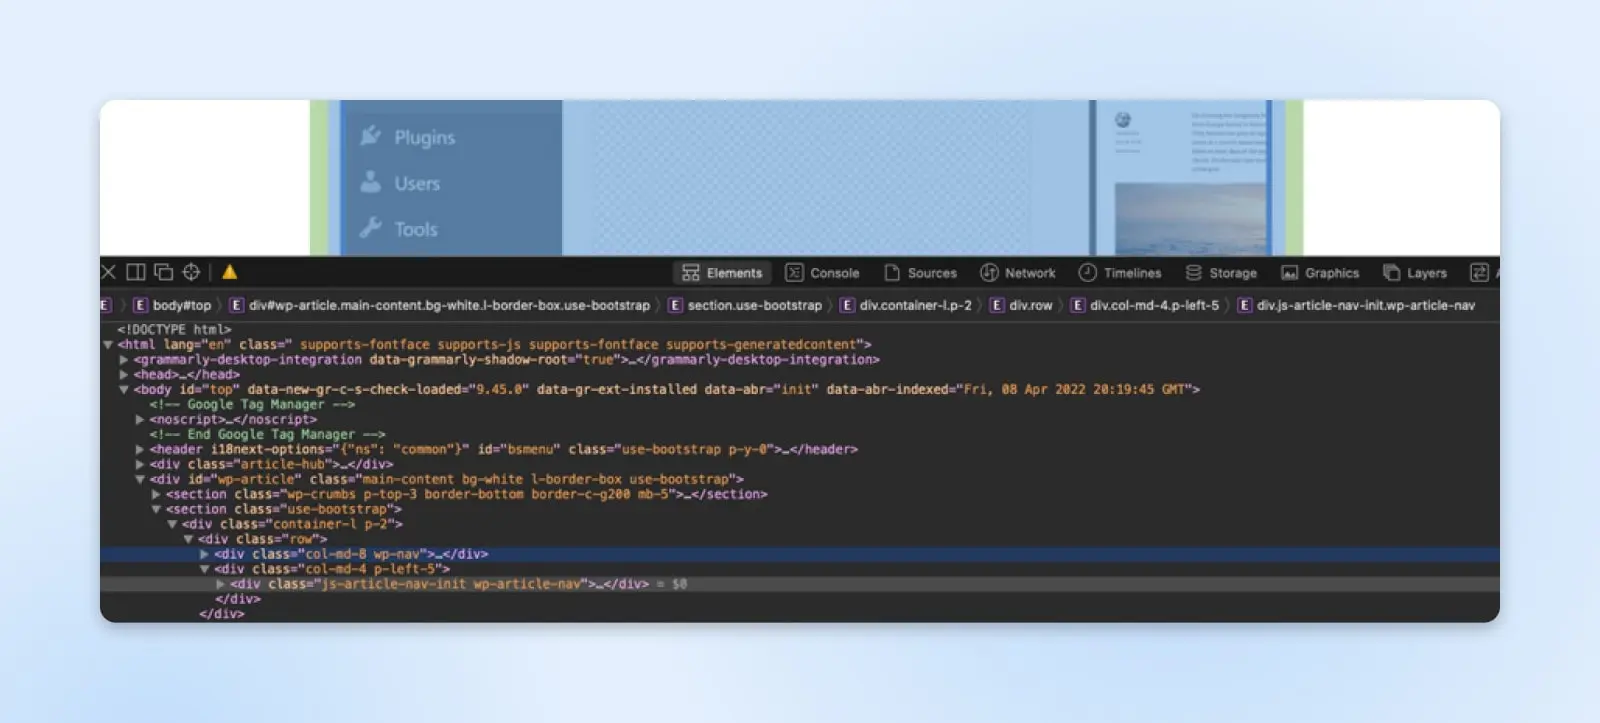
As you hover, it will also display the CSS rules. You can edit the CSS directly with the developer tools to see how it looks.

In this example, we changed the background color from “#9888fd” to “#9888fe” to see how it would look. The background color will change instantly, but it’s not permanent.
You now need to copy the CSS rule and add it to the style.css file of your child theme like this:
body {
Background-color: #9888fe;
}
Save these changes in the style.css file and return to your WordPress dashboard to preview the theme. This process might require trial and error, so take your time to perfect the style.
Override Parent Templates
Just as we can create a new stylesheet for custom CSS, it’s possible to override parent templates with new content. This allows you to make wholesale changes to the structure of specific parts of your website — such as the header and navigation menu, the footer, or the single posts template.
One important fork in the road: the file-override approach below applies to classic themes. Block themes — including every default WordPress theme since Twenty Twenty-Two, like Twenty Twenty-Four — use HTML templates and theme.json instead of PHP template files. For those, customize in the Site Editor (Appearance > Editor), or use the official Create Block Theme plugin to save your Site Editor changes into a theme (it can also generate a child theme for you).
Since our Twenty Twenty-Four example is a block theme, let’s switch to a classic theme for this one. Imagine you’re running Twenty Twenty-One, and you want to change the blog post layout in your child theme so the title of each post appears above the featured image.
This section of your site is controlled by the content.php template file, which lives in the parent theme’s template-parts/content folder. To start making changes, download a copy of it from there via SFTP.
Next, open the child template in your text editor. You might see something like this:
twenty_twenty_one_post_thumbnail();
<header><!-- Title and other header info here --></header>
To adjust the layout of your header, you might change the code to read:
<header><!-- Title and other header info here --></header>
// Post thumbnailtwenty_twenty_one_post_thumbnail();
Finally, save the file and upload it to your child theme, recreating the same template-parts/content folder path. WordPress only uses your override when both the filename and the relative path match the parent’s.
Custom Page Templates
Want something totally different? You can also add brand new templates to your child theme.
The process is exactly like developing templates for a regular theme, except you may also need to create custom header and footer templates. These files need to be referenced in your new custom template — and don’t forget to add some new CSS via the existing child stylesheet.
Creating New PHP Functions
If you want to introduce new features in your child theme, you can create a child functions.php file. This works in tandem with the parent functions file, rather than replacing it.
As such, you don’t need to make a copy of the original file — simply write any additional scripts you want to add on top. The child functions file will run first, followed by the parent version.
Adding a functions file to your child theme opens up a whole range of possibilities. For example, you could:
- Register new widgets and shortcodes.
- Add custom post types and taxonomies.
- Create new theme options.
- Hook up external stylesheets and JavaScript files.
- Lay the groundwork for translating and localizing content.
- Override certain parent theme functions.
You can learn more about creating these functions in our complete guide to functions.php.
Using Theme Hooks
The most efficient way of adding features to your new functions file is by using hooks.
Hooks are part of the core functionality of WordPress. They allow you to alter various parts of your website without having to edit individual templates.
Instead, you simply assign your code to the relevant hook in the functions file. WordPress will then automatically apply this code to matching elements in the parent theme.
In WordPress, hooks come in two varieties:
- Action Hooks: Used to “hook” custom code into specific parts of your WordPress theme, such as a new widget area or a custom message to be displayed after each blog post.
- Filter Hooks: Used to modify content generated either by WordPress or a parent theme, before it’s sent to a browser or stored in the database. In terms of child themes, they are most often used to adjust the length of excerpts.
Most hooks only require a small code snippet. For example, here’s the code you would need for adding some content to the footer of your site:
function my_custom_footer_content() {echo '<div>Custom footer content here</div>';}add_action('wp_footer', 'my_custom_footer_content');
You see that ‘wp_footer’ bit? That’s the hook, and it tells WordPress where this code needs to go. In this case, your custom function should come straight after the footer template — wherever that is invoked within your theme. Neat, huh?
WordPress Child Theme FAQs
We’d like to think this guide has been pretty comprehensive so far. But if you still have questions hanging, we have answers:
Should I activate parent or child theme in WordPress?
There’s a simple rule here: activate the theme you want to use.
If you want to revert to the original design as your active theme, activate the parent. But if you want to enable those glorious customizations, be sure to activate the child theme.
What are the disadvantages of using a child theme?
There aren’t many disadvantages to using a child theme. It’s a little more technical than customizing your site via the Dashboard. To make bigger changes, you will need at least some basic knowledge of HTML, CSS, and PHP.
It’s also worth noting that a poorly optimized child theme can slow down your site, and you’re always going to be reliant on the parent theme.
Can a child theme exist without a parent theme?
Nope, a child theme doesn’t work without a parent theme.
The concept of a child theme is inherently dependent on a parent theme. Remember that the parent supplies everything other than the custom styles and templates you add. What’s more, the whole folder structure of your site would be messed up if you removed the parent folder.
If you want to separate out your child design, consider converting it to a standalone theme.
Can you have multiple child themes for one parent theme?
Yes, you can. This means you can craft multiple versions of the same site to suit different audiences. You could even run A/B testing this way.
What are the best WordPress child theme creator plugins?
Along with Child Theme Configurator, which we worked with earlier, check out WP Child Theme Generator and Child Theme Wizard.
WordPress.org has its own official plugin for this, too: Create Block Theme, built by the WordPress themes team. It’s the right tool when your parent is a block theme.
What is the difference between a child theme and a custom theme?
Dependency is probably the biggest difference. A child theme leans on the core files of a parent theme, whereas a custom theme stands alone.
That independence means that theme developers can introduce new core features and more customization. On the flip side, you need to be comfortable with code to create and maintain a custom theme.
It requires way more development time to build a complete theme from scratch, as well.
Protect Your Theme Customizations And Updates
Using a child theme helps you avoid the complications of editing a parent theme directly. A child theme is easy to adjust, enabling you to make sweeping design changes to an existing website. Plus, it isn’t affected by automatic theme updates.
Here’s a quick recap of how to create a child theme manually:
- Make a plan.
- Back up your current site.
- Create a folder for your child theme using an SFTP client.
- Make a style sheet and upload it to your site.
- Enqueue the child and parent theme stylesheets.
- Activate and preview your child theme.
- Make changes using CSS.
Having a beautiful theme is just one part of running a successful website. You’ll also need a hosting provider that fits your needs. Check out DreamHost’s web hosting plans for affordable options that prioritize website performance, with 100% uptime guaranteed!

We Make WordPress Easier for You
Leave migrating your site, installing WordPress, managing security and updates, and optimizing server performance to us. Now you can focus on what matters most: growing your website.
Check Out Plans