
One of the main reasons that WordPress is so popular is its open-source nature.
Because of that, there are more than 60,000 free plugins in the official directory alone — all built for the internet’s favorite content management system (CMS).
And you can join in on the fun by creating your own WordPress plugin.
There have never been more ways to do it, either. You can write every line yourself — still the best way to actually learn WordPress development — or you can describe the plugin you want in plain English to an AI coding assistant like Claude Code and review what it builds. This guide covers both paths: the classic six-step manual build, then an AI-assisted walkthrough.
Either way, if it goes really well, you may even be able to sell your plugin and turn the project into a side hustle!
A Quick Intro To WordPress Plugins
A WordPress plugin is a package of code that adds features to a WordPress site without changing the core software. Plugins hook into WordPress at defined points to change how the site works or looks. You install and activate them from the dashboard, and you can build one yourself with a single PHP file.
WordPress has a market share of 59.2% among all sites with an identifiable CMS (per W3Techs, July 2026), making it the most popular option by a landslide.
WordPress
WordPress is an open-source Content Management System (CMS). Since it is free and accessible, WordPress is used to power almost any type of website, from blogs to e-commerce businesses.
Read MoreAs mentioned earlier, WordPress is an open-source software platform. That means its source code, plugins, and themes are available for anyone to work with and modify as they see fit.
Note: There’s a difference between WordPress.com and WordPress.org. The .org version is the open-source option that’s free to download and use to create a custom site. It’s the version we’ll cover in this post. The .com version is a hosted site builder with which you can create a limited site for free.
WordPress plugins are created by different developers all around the world and are designed for a variety of purposes.
For instance, in the existing plugin library you’ll find options for adding social media share buttons, adding newsletter signup forms to your sidebar, improving website search engine optimization (SEO), turning WordPress into a full-blown ecommerce site, and much more.
The WordPress plugin ecosystem lets people without coding knowledge build and customize powerful websites — and gives developers a huge audience to build for.
Why Develop A WordPress Plugin?
WordPress has one of the largest markets for developers. This means you’ll find plenty of resources to help you develop the exact plugin you need to optimize your website. (But don’t worry, we’ll also detail the process here soon!) You won’t find that level of support on many other website-building platforms.
The magic of WordPress is that you can develop a solution for your own site and you don’t have to share it on the plugin market. However, many developers choose to make their plugins available to others to help them work around similar issues as those the developers encountered.
If you do choose to offer your plugin to others, there’s some earning potential associated with WordPress plugins because of the massive user base.
While there’s no shortage of competition, if you have a new or better solution to a common problem, you could find your plugin downloaded for thousands of sites. With a great plugin, the right pricing strategy, and some marketing efforts, a plugin could turn into a nice passiveish income stream.
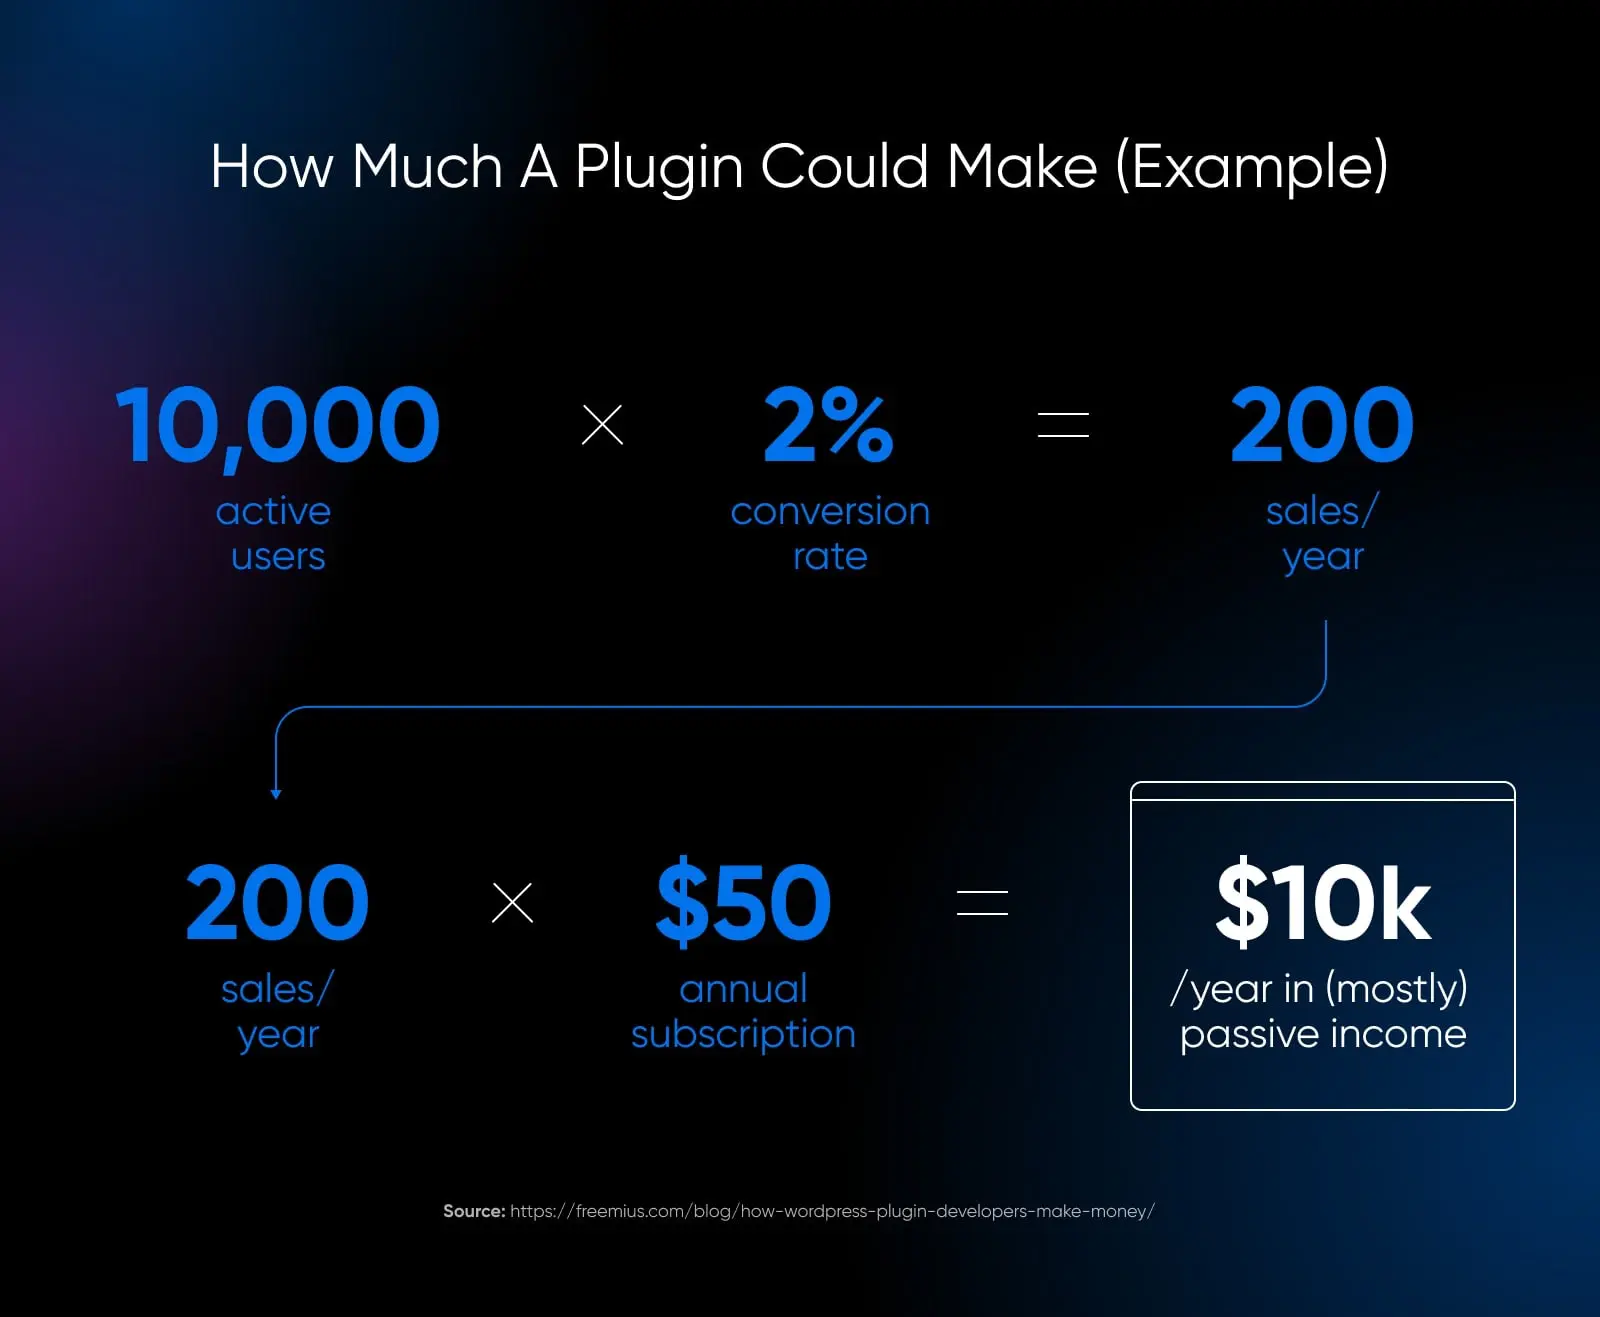
Lastly, WordPress is an ideal platform for learning how to code. Because it has been around for over 20 years, there’s no shortage of resources both on and off WordPress to help you get the hang of development.
Speaking of resources, let’s dive into everything you need to know to create your very own WordPress plugin.
How To Create A WordPress Plugin By Hand (6 Steps)
While different plugins will require different amounts of coding and know-how, they all tend to follow this same general development process. Even if you plan to lean on AI for the code (covered in the next section), read through these steps first — you’ll need every one of them to understand, test, and ship what the AI writes.
Step 1: Do Your Research And Planning
Like we said, there are numerous tools in the WordPress plugin directory — tens of thousands of them in fact. Therefore, the first thing you’ll want to do is do some research to see if your idea already exists.
Even if it does, you could still proceed with your plan, provided that you make some tweaks so that you’re not creating an exact replica. Explore similar plugins and find out how you might be able to improve upon them. Alternatively, you could complement what’s already available with something like your own custom post type — say, to help keep a diary of your media consumption — or additional features.
You might also want to check the status of existing plugins. For instance, if a plugin hasn’t been updated in some time or isn’t compatible with the latest version of WordPress, there might be an opportunity to provide a better solution.
You can also look at the number of active installations to see if there’s a big market for the type of plugin that you have in mind. This can help you decide if it’s worth the effort if you’re looking to earn money. It’s also a good idea to test the plugin on your own site to see what it does well and what could be done better.
Finally, before diving into the build, you’ll want to read up on the WordPress Coding Standards. This is particularly important if you’re planning to share or sell your plugin. These coding standards are a set of guidelines and best practices that developers should try to adhere to when creating themes and plugins for WordPress.
Related: Want To Learn WordPress? Start With These Resources
Step 2: Set Up A Testing Environment
The next step is to set up a testing environment.
As a beginner, you’re likely to learn (and maybe break) a few things along the way. You don’t want to experiment on your live website that any internet user can see. A private testing environment — a local site on your computer, or a staging copy of your site — will enable you to test your plugin privately as you work on it.
We endorse using Local to create a WordPress site on your computer. It offers a straightforward, user-friendly development environment that offers powerful yet flexible tools for most people.
For quick experiments, there’s an even faster option: WordPress Playground runs a full WordPress site entirely in your browser, with nothing to install or sign up for. It’s free and open source, and a great place to try out a small plugin in seconds. (By default it resets when you refresh or close the tab, so treat it as a scratchpad, not a workspace.)
You can also create an online staging environment. With DreamHost web hosting, you can easily create a staging WordPress site where you can test your plugin without breaking your live site or interrupting your visitors’ user experiences.
Step 3: Create Your Plugin File
Once you have your staging environment set up, it’s time to use it to create your plugin.
The first step is to create a folder for it in your site’s directory.
You can use an FTP/SFTP client like FileZilla to access your site’s files and folders. Or, you may be able to tap into your site via the file manager provided in your hosting account. For DreamHost users, our guide to using the website file manager will help you use our built-in file manager.
Once you’ve connected to your site’s directory, navigate to wp-content/plugins and create a new folder for your plugin.
Next, you’ll need to create a PHP file to add to this folder. To do this, open your preferred text editor and enter the following information:
<?php/*** Plugin Name: test-plugin* Plugin URI: https://www.your-site.com/* Description: Test.* Version: 0.1* Author: your-name* Author URI: https://www.your-site.com/**/
Of course, you’ll need to change the above information to match your details. When you’re ready, you can save your file. Remember to use the file extension “php” (e.g., my-first-plugin.php).
Then, you’ll need to upload this file to the plugin folder that you just created at wp-content/plugins. Once you’ve done this, navigate to your test site’s WordPress dashboard and go to the Plugins page.
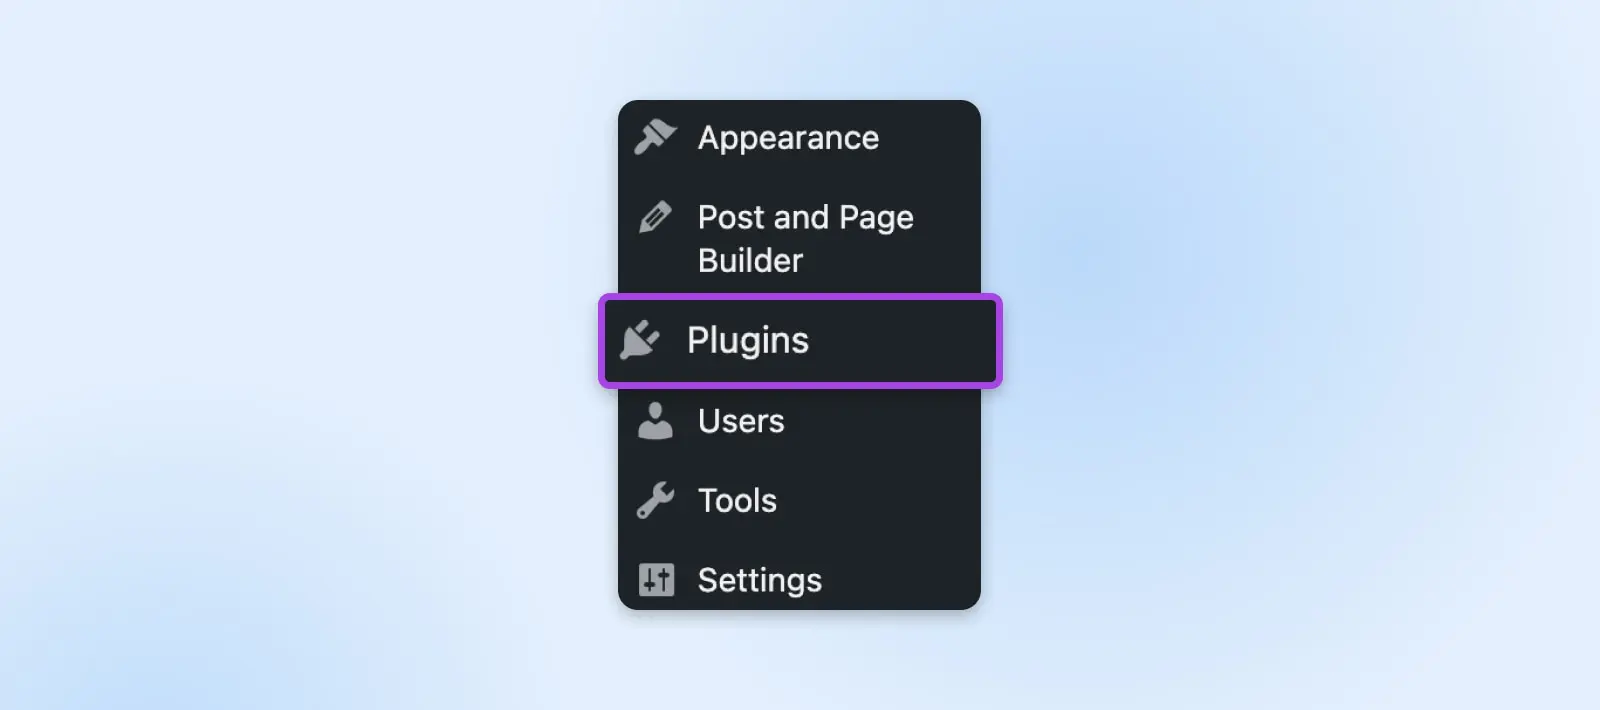
Here, you should be able to see your new plugin!
This plugin won’t do anything yet if you were to activate it. However, WordPress will recognize it as a functional add-on from this point forward.
Step 4: Add Code To Your Plugin
Every plugin is different. However, they all share common components. For instance, all plugins use hooks to interact with WordPress.
Hook
WordPress hooks are pieces of code that allow you to modify the CMS and add new features to it without tinkering with core files. Hooks make this possible by enabling you to “hook” custom code into pre-defined spots in WordPress.
Read MoreA hook is how a plugin connects to the pre-existing code of WordPress’s core programming. In other words, the hook is the anchor point where a plugin inserts itself in order to add or change the functionality of a site.
Hooks are an important part of WordPress development. There are hundreds of hooks that can be used as triggers for a plugin, and you can even create new ones if needed.
But for now, there are two types of hooks that you’ll need to consider when creating your plugin:
- Actions: These add or change WordPress functionality and make up the majority of hooks.
- Filters: These are used to modify the functionality of actions.
To code your plugin, you’ll need to familiarize yourself with hooks and how they work. Fortunately, the Plugin Handbook from WordPress can help you get started.
For this guide, we’ll use the following code (source) as an example:
function modify_read_more_link() {
    return '<a class="more-link" href="' . get_permalink() . '">Click to Read!</a>';
}
add_filter( 'the_content_more_link', 'modify_read_more_link' );
As you might be able to see, this code uses a filter to modify the standard “read more” link by replacing it with a different value: “Click to Read!”
If you add this snippet to your PHP file and activate the plugin on your site, you’ll end up seeing the following anchor text below your post excerpts:

Feel free to experiment with the code and try using a different function.
Note that you could also add this code to your theme’s functions.php file. This file contains code that adds functionality to your site and works in a way that’s similar to how a plugin adds functionality. However, if you switch to a different theme in the future — or your theme is upgraded to a new version — you’ll lose these changes.
One caveat: the example above works only for sites using classic themes. Block themes work differently — post excerpts and their “read more” links are laid out visually in the Site Editor, so this particular filter won’t change anything there. The plugin structure you just learned is identical either way.
Related: How To Install A WordPress Theme (Tutorial)
Step 5: Test Your Plugin
As you continue developing your plugin, it’s important that you save your work often and test your changes on your staging or development site.
Once you’re satisfied with your plugin, you should try it on a live site. Again, you’ll want to make sure that you’ve already thoroughly tested your plugin for any bugs and vulnerabilities.
It’s also a good idea to create a backup of your live site before testing your plugin on it. This way, if anything does go wrong, you can restore your content.
If you’re happy with the performance of your plugin at this point, you could offer it to other developers for them to use and test. This can earn you valuable feedback. You could also ask them to put your plugin through its paces and try to break it to prove its stability.
To do this, you’ll want to export your plugin to a zip file for easy distribution and installation. Locate your plugin’s folder in the site’s directory, then right-click on it and follow the steps to create a zip file. For example, on Microsoft Windows select Send to > Compressed (zipped) folder.
Choose a destination, and the files within your folder will be compiled into a zip folder that you can easily share. If you’re developing on a live site, you may need to first download the plugin folder from your SFTP client before compressing it.
To install your plugin on a WordPress site, simply navigate to Plugins > Add New Plugin from the sidebar in your WordPress admin panel.

At the top of the page, you’ll see a button to Upload Plugin. Once selected, you’ll be prompted to choose a zip file to upload to your site.

Upload the compressed file you just made and select Install Now. WordPress will then unpack and install the plugin on your site.
Once that’s complete, just click on Activate Plugin.
Your new plugin is now live!
Step 6: Distribute Your Plugin (2 Options)
Now, you can start distributing the plugin you’ve created. Let’s look at the best ways to do this.
A. Publish Your Work To The WordPress Plugin Directory
By adding your plugin to the WordPress plugin directory, you can share your work with the community and gain exposure. You can take advantage of the WordPress user base to attract new clients.
However, you’ll need to make sure that your plugin complies with best practices and the Detailed Plugin Guidelines before uploading it for review. Keep in mind, it might take a while for your plugin to be reviewed and accepted.
Once your plugin is approved, you’ll need to add your files to the Subversion directory.
When this is all done, WordPress users will be able to install your plugin on their sites.
B. Share The Plugin On Your Own Website
In addition to uploading your plugin to the WordPress directory, you could also create a website for it.
You can use a site like this to market and provide more details about your plugin. You could also include documentation, tutorials, support options, links to other plugins you’ve made, and so on.
Developers often use websites to promote their premium plugins while providing a free or “lite” version in the WordPress directory. That way, users are able to easily find and download the product via WordPress before upgrading to a paid option.
You can lock certain advanced features behind a paywall, which can all be explained on a plugin website. Additionally, you can offer a multi-tiered membership model that offers a variety of feature sets depending on a user’s needs and budget.
How To Build A WordPress Plugin With AI (Claude Code Walkthrough)
Can AI write a WordPress plugin? Yes. For simple plugins, it can write the whole thing from a plain-English description. AI coding tools like Claude Code generate the plugin header, the hooks, and the PHP, then explain what each part does. Your job shifts from writing code to describing what you want, reviewing what comes back, and testing it before it touches a live site.
One thing up front: AI writes the code, but you ship it. Everything you learned in the manual path — staging sites, testing, backups, coding standards — still applies. AI just compresses the typing.
Here’s the workflow using Claude Code, Anthropic’s “agentic” coding tool — meaning it doesn’t just suggest code, it can create files, edit them, and run commands on its own (with your approval). Anthropic describes it as a tool to “build, debug, and ship” right from your terminal. Unlike a chatbot that hands you a snippet to paste somewhere, Claude Code works with real files: it creates the plugin folder, writes the PHP, and edits it in place as you refine your request.
Step 1: Install Claude Code
Claude Code runs in your terminal — the text-based command app that ships with your computer (Terminal on macOS; on Windows you’ll need WSL, the Windows Subsystem for Linux, which lets Windows run Linux tools). Desktop, web, and code-editor versions exist too, but we’ll use the terminal here. The official quickstart recommends the native installer:
curl -fsSL https://claude.ai/install.sh | bash
Homebrew (brew install --cask claude-code) and Windows WinGet (winget install Anthropic.ClaudeCode) also work. You’ll need a Claude account — there’s no free tier for Claude Code, so check current plans (a Claude Pro subscription is the usual entry point; developers can instead pay per use through Anthropic’s API).
Step 2: Point It At Your Plugin Folder
Open your terminal, create a folder for your plugin (or navigate to wp-content/plugins on your Local site from Step 2 of the manual path), and start Claude Code inside it:
mkdir reading-time-plugin
cd reading-time-plugin
claude
Everything Claude Code creates will land in this folder. If you created it inside wp-content/plugins on your Local site, it’s already where WordPress looks for plugins. If you created it anywhere else, no problem — you’ll zip it and upload it in Step 5.
Step 3: Describe The Plugin You Want
Now describe your plugin in plain English. The more specific your prompt, the better the result. A good first prompt names the feature, the WordPress mechanism if you know it, and your standards:
Create a WordPress plugin that displays an estimated reading time
above the content of every blog post. Use a filter on the_content,
calculate from the post word count at 200 words per minute, and let
me change the label text from a simple settings page. Follow the
WordPress Coding Standards, escape all output, and add a proper
plugin header comment.
Claude Code will propose the files it plans to create — a main PHP file with the plugin header (the same one you wrote by hand in Step 3 above), the filter hook, and the settings page — and then write them. Notice that everything you learned in the manual path shows up here: the header comment, the hooks, the file structure. That’s why learning the manual path first pays off — you can actually read what the AI built.
Step 4: Review, Ask Questions, Iterate
Don’t just accept the code. Read it. This is where AI tools double as tutors. Ask follow-ups right in the same session:
- “Explain what the add_filter line does, like I’m new to WordPress.”
- “Why did you escape the output with esc_html? What happens if you don’t?”
- “Change the default reading speed to 230 words per minute and hide the label on pages.”
Each request edits the actual files in your folder. This review loop is the actual job: you are responsible for every line this plugin ships with, and interrogating code you didn’t write is the fastest way to level up your own skills.
Step 5: Test It Exactly Like Hand-Written Code
AI-generated code gets zero shortcuts on testing. Zip the folder (or copy it straight into your Local site’s wp-content/plugins), activate it on your staging site, and put it through the same paces as the manual path: activate, deactivate, try weird settings values, check the front end with a classic and a block theme. WordPress Playground is handy here too — drag your plugin zip into a throwaway browser WordPress and see it run in seconds.
A few AI-specific rules to keep yourself out of trouble:
- You own every line. The WordPress.org plugin guidelines don’t have a special rule for AI code — they hold you responsible for everything in your plugin, however it was written, and they require code to be human-readable (no obfuscation).
- Security review is still yours. Confirm the plugin sanitizes input, escapes output, and uses nonces on any form it adds. Ask the AI to walk you through each of those — and verify against the WordPress developer documentation’s security page.
- Keep secrets out of prompts. Never paste database credentials, API keys, or customer data into any AI tool.
- Staging first, always. An AI-written bug takes your site down just as thoroughly as a hand-written one. Test on staging, back up before deploying live.
Other AI Tools That Can Help
Claude Code isn’t the only option, and the right tool depends on how you like to work:
- ChatGPT (and the Claude chat app) work in a browser with no setup: describe your plugin, get code back, paste it into a PHP file yourself. Great for one-file plugins and quick questions; you do the file handling.
- GitHub Copilot works alongside you directly in your editor, suggesting lines or entire functions as you type. It has a free tier, and it shines when you’re writing the code yourself and want smart suggestions as you type.
- Cursor is an AI coding agent built into its own editor — a middle ground if you want agentic file editing inside a visual IDE rather than a terminal.
Whichever you pick, the workflow is the same: describe, review, test on staging, ship. And when your plugin is ready to share, distribution works exactly as described in Step 6 of the manual path.
WordPress Plugin Development FAQs
Do I need to know PHP to create a WordPress plugin?
For a simple plugin, no — AI tools can generate working PHP from a plain-English description. But you’ll need enough PHP to read the code you ship, because you’re responsible for it. The basics (variables, functions, and WordPress hooks) go a long way.
Can AI really write a whole WordPress plugin?
Yes, for well-defined plugins. Agentic tools like Claude Code can create the folder, the plugin header, hooks, and even a settings page from one prompt. Complex plugins still benefit from a developer’s architecture decisions. Either way, human review and staging-site testing are non-negotiable.
Does WordPress.org allow AI-generated plugins in the directory?
Yes — nothing in the Detailed Plugin Guidelines prohibits AI-assisted code; the guidelines don’t address AI-generated code directly (as of July 2026). They make you responsible for all code you submit and require it to be human-readable. Review every line as if you wrote it, because officially, you did.
How much does it cost to develop a WordPress plugin?
Potentially nothing but time. WordPress, its developer documentation, Local, and WordPress Playground are all free. Optional costs: an AI coding subscription, and web hosting with a staging site for realistic testing before you go live.
Set Yourself Up For Plugin Success With DreamHost
As an open-source platform, WordPress enables you to develop your own plugin and share it with other users. Whether you write every line yourself or draft it with an AI assistant, what actually protects you is the same habit: test on staging before anything touches your live site.
Once you’ve gained enough experience, you may even want to start selling premium versions of your plugins for a rewarding and mostly passive income stream!
The one thing every path needs is a safe place to test. DreamPress, our managed WordPress hosting, includes one-click staging — so you can try new plugins, themes, and code safely before pushing changes live. And when your plugin is ready for the world, our domain registration and Remixer, our AI website builder, make it easy to spin up a marketing site for it.

Do More with DreamPress
DreamPress managed WordPress hosting includes one-click staging, so you can test your plugins safely before they touch your live site.
Check Out Plans