
Are you looking for ways to earn a passive income from your website? Although this may seem challenging, it’s easier than you might think.
It’s super easy to monetize your WordPress website with Google AdSense. Better yet, it’s a hassle-free approach since Google matches you with relevant companies and lets you integrate ads seamlessly into your pages.
In this post, we’ll take a closer look at using ads to monetize your site. Then, we’ll introduce you to Google AdSense and show you three ways it can help you make serious money from your WordPress website. Let’s get started!
The Different Types of Ads You Can Sell on Your Site
Typically, you can choose from four main ad types on your site. This section will explain each of them to help you pick the best option for your pages.
CPC/ PPC Ads
CPC (Cost Per Click), also known as PPC (Pay Per Click) ads, are some of the most popular options. In short, you make money every time a user clicks on one of your advertisements.
For example, you might price your ad space at $2 per click — When a brand approaches you with a PPC/CPC campaign of $2000, it’s essentially paying for 1000 clicks on your site. The company will pay you every time the ad is clicked on until they’ve exhausted all of its budget.
CPM Ads
Cost Per Mille (CPM) ad pays you for every 1,000 impressions. Typically, “impression” refers to the number of times the ad is viewed on your site. Therefore, this advertisement tends to work best on high-traffic websites.
These ads are popular with advertisers because they only need to pay you once their ads have been viewed. Like PPC ads, a $2000 campaign with an ad cost of $2 enables brands to gain 1 million impressions (or views) on your site.
CPM ads are often cheaper than PPC ads because they require less effort on your part. All you need to do is advertise on your pages, and you’ll get paid when visitors land on your site.
Affiliate Ads
Affiliate ads are also known as CPA (Cost Per Action) because they rely on user behaviors. However, advertisers can be super selective about the action(s) they want to be completed.
For example, some businesses will only pay you when a user clicks on the ad and completes a purchase. However, some companies will pay you just for generating a lead. This means that users only need to click on the advertisement.
Affiliate ads are much more expensive on a CPA basis. While you can find PPC ads going for $2, affiliate ads tend to be at the higher end of the scale at around $50 per action.
This means there’s the potential to generate higher earnings than other ad types. However, there’s no guarantee that your visitors will complete the desired action.
Flat-Fee Ads
Flat-fee ads have the most straightforward pricing model, so they’re popular with advertisers and website owners who don’t want to mess about with calculations.
Just as they sound, flat-fee ads pay according to a predetermined price. For instance, you might set your rate at $2000 per month for a banner ad on your website.
Unlike other ad types, your earnings aren’t based on views or actions — Once the company stops paying the fee, you take the ad down from your website.
Why You Should Consider Monetizing Your Website with Ads
Although it might sound like a lot of work, there are many reasons to consider monetizing your website with ads. For starters, at the most obvious level, it’s one of the easiest ways to start making passive income.
This is especially true for high-traffic sites that could be generating plenty of revenue. Plus, placing ads enables you to make money without significant changes to your business or content.
Moreover, ads are great for content creators and bloggers with no physical services or products to sell:

Of course, the downside to running advertisements is that you risk annoying your visitors and disrupting the User Experience (UX). However, since ads are so widely used now, most web users expect to see them at some point while browsing.
Better yet, with advanced targeting algorithms, it’s now easier to find ads that fit your branding and customer base. That way, you can display advertisements that offer value, making them less annoying.
An Introduction to Google AdSense
There are many different ways to sell ads on your website. For instance, you might sell ad space directly if you want to handle negotiations. However, this approach can be a little intimidating for many website owners.
Alternatively, you could reach out to specific advertisers you want to work with, which can be a great way to form authentic collaborations with brands you admire. However, this option works best if you’ve already established a strong presence or have some valuable connections.
The easiest way to sell ads on your site, though, is to use an automated advertising network like Google AdSense:

Google AdSense is a network of advertisers and websites, all vetted by Google. The platform matches you with suitable advertisers that fit your brand and audience. Plus, Google handles all of the payment processing.
Therefore, it’s a super simple way to get started. This makes Google AdSense a popular choice for website owners that prefer to focus on building their businesses or creating great content.
Additionally, this approach enables you to display more relevant advertisements to your visitors. This is because Google runs different ads based on factors such as cookies and demographics.
How You’ll Get Paid with Google AdSense
The way you get paid with Google AdSense depends mainly on the types of ads that you run. As stated before, if you choose PPC/CPC, you’ll get paid every time a visitor clicks on your advertisement. The rates vary according to your website quality, niche, ad size, and more.
On the other hand, if you opt for CPM ads, you’ll be paid just for advertising on your web pages. These advertisements tend to pay less than PPC bids because they require far less effort on your part.
With an Active View CPM, the impression must be measured as “viewable” — It works similarly to the CPM model but with additional criteria.
For example, at least 50% of the ad needs to be shown for at least a second. Therefore, the bid for Active View CPM tends to be higher than traditional CPM ads.
Finally, you can get paid for CPE (Cost Per Engagement) ads. In this instance, your earnings are generated according to the level of user activity on your site, such as clicking or hovering over a lightbox.
How to Monetize Your WordPress Website with Google AdSense (3 Ways)
To get started with Google AdSense, you’ll first need to create an account with Google. If you use a service like Gmail, Docs, or Drive, you might already have one. If not, you can create a new account by visiting Google AdSense.
Before you continue, it’s important to know that there are specific eligibility requirements for Google AdSense. For instance, you’ll need to ensure that your content complies with the AdSense program policies, and you must be the website owner.
If you meet all the criteria, you can create your Google AdSense account by clicking on Get Started. This will take you to a short signup page where you’ll need to fill in some details about your website:
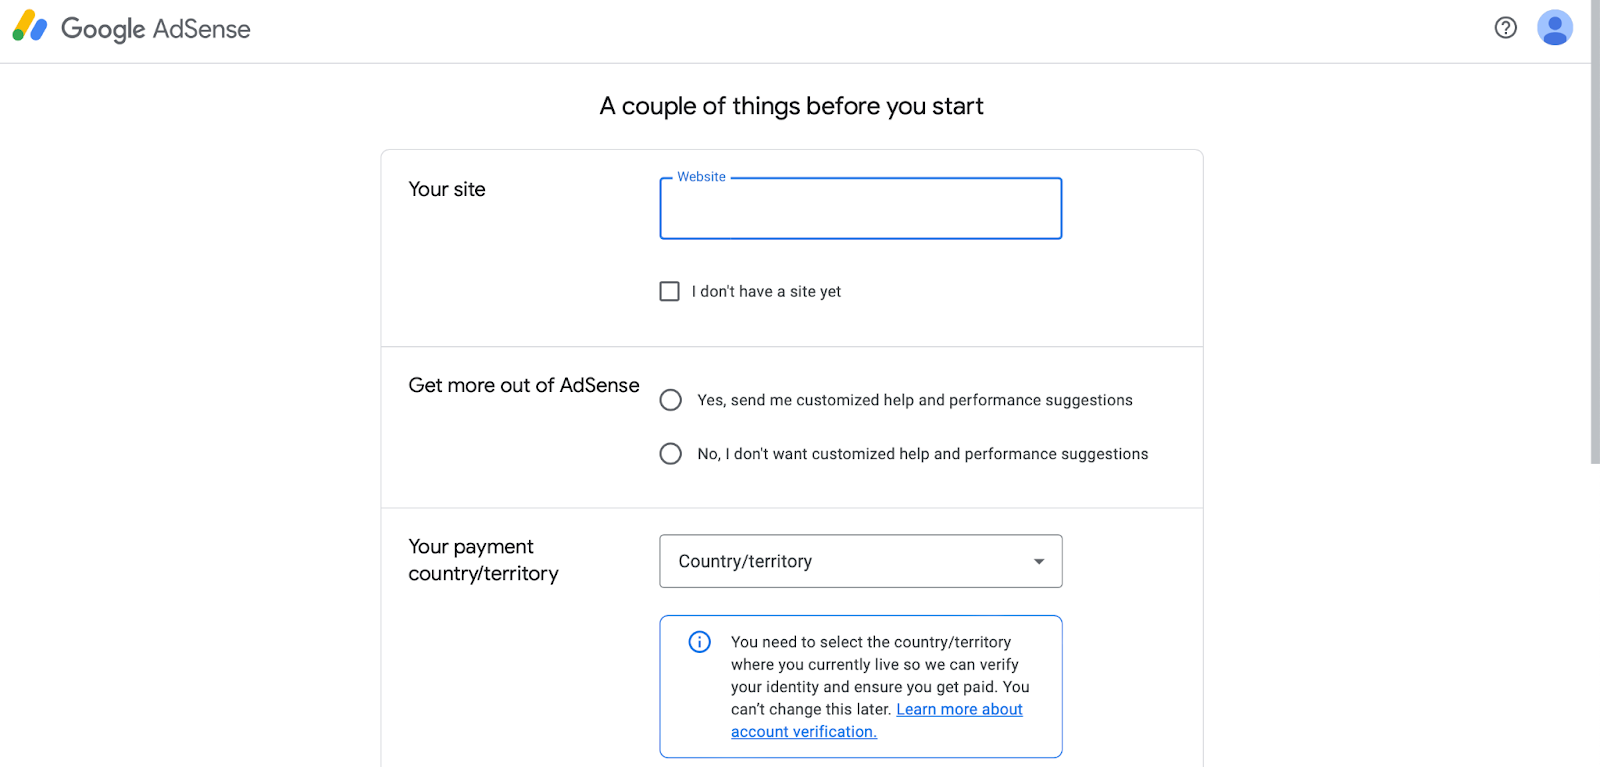
Complete all the fields and select Start using AdSense at the bottom of the page.
You’ll have to wait for your account to be approved, which might take a little while. If your site isn’t approved, it might be too new, or you don’t have enough content yet. Other reasons for declining your account include plagiarized material, security issues, or problems with your website’s code.
Once your account is approved, log in to Google AdSense to retrieve your ad code. You’ll need it to display ads on your site.
There are a few different ways to implement Google ads on your pages. Firstly, you can insert your ads manually. Otherwise, you might use a plugin or enable Google AdSense auto ads. This way, Google will decide when, where, and how many ads to show on your pages.
Method 1: Manually Implement Google AdSense Ads in WordPress
The manual route might be the best option if you’d prefer to place ads individually on your website. This way, you’ll get more control over the placement and display of the advertisements.
To get started with this method, head to your Google AdSense account and click on Ads in the menu to the left. Then, select By ad unit:
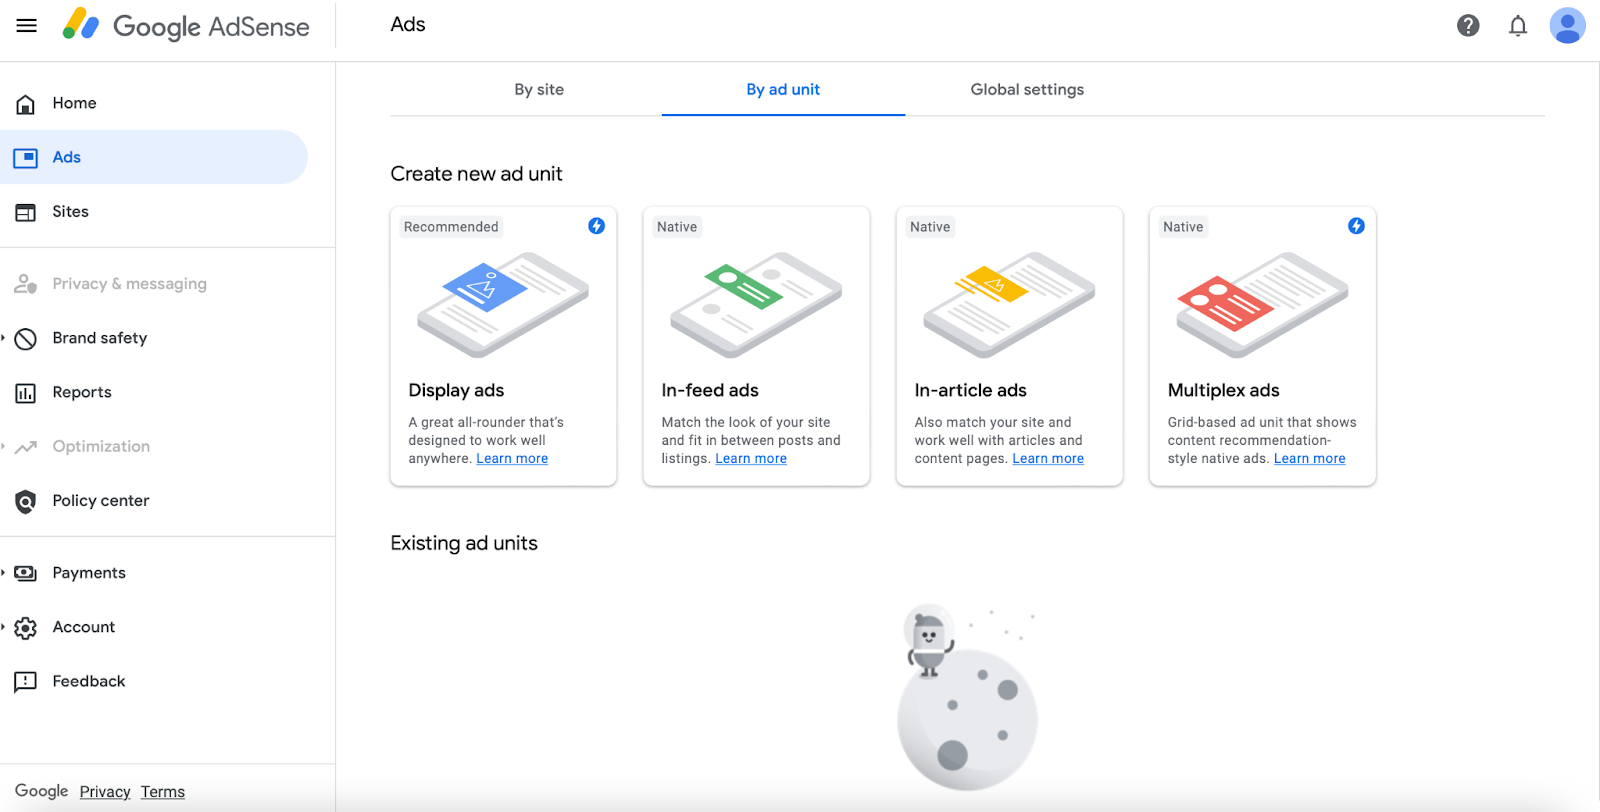
Here, you’ll be able to select your ad types, such as display, in-feed, or multiplex. Display ads are the most common because they can go anywhere on your site. Meanwhile, in-feed advertisements sit in a list of articles or products on your pages, in-article ones display within your content, and multiplex ads display in a grid.
Make your selection. Then, you’ll be taken to a new screen where you can give your ad a name and select the appropriate size:
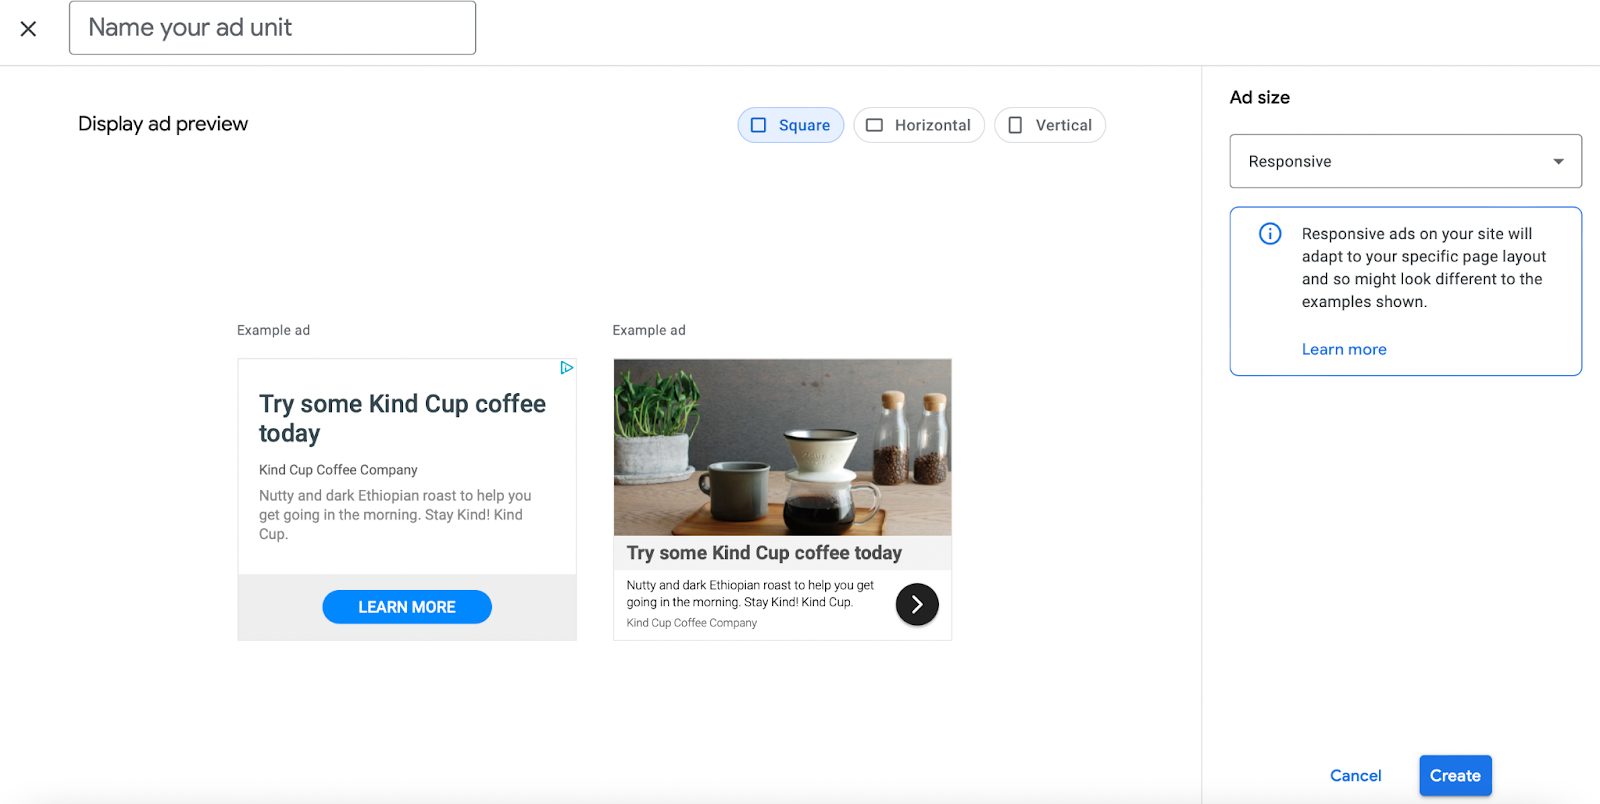
It’s also a good idea to make your ad responsive. That way, you can optimize your content for mobile devices and tablets.
At this point, click on Create, and Google will generate your ad code:

Now, you can insert your ad code within a new post or page in WordPress. Alternatively, you can add it as a widget by going to Appearance > Widgets in your dashboard.
Whichever way you choose, you’ll need to add a new block (or widget) and select Custom HTML:
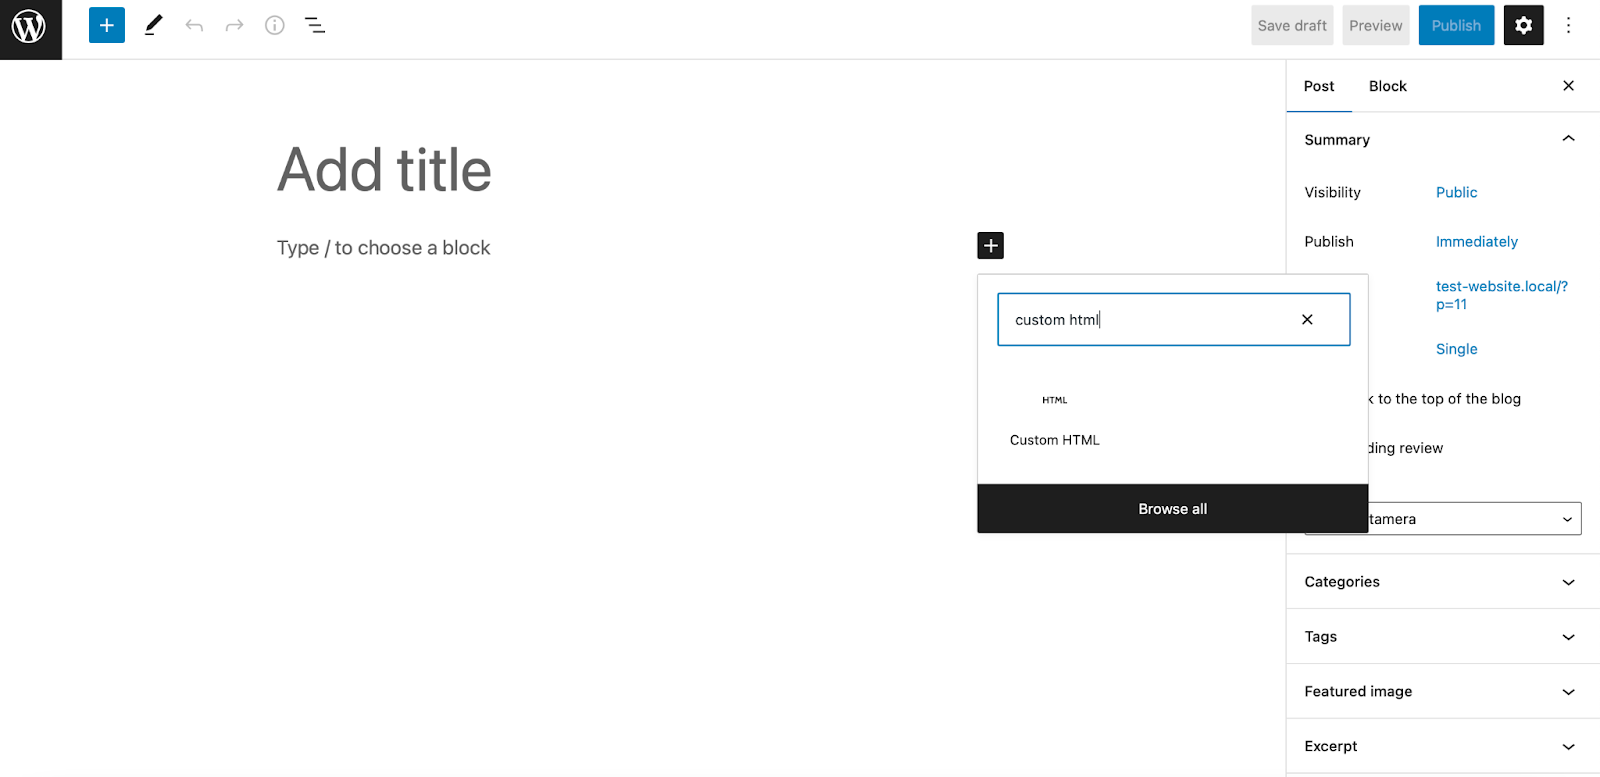
Then, enter your code and save the changes.
Method 2: Use an Ad Management Plugin to Display Google AdSense Ads in WordPress
If you’re a beginner, you might not want to mess around with code on your site. Fortunately, you can use a plugin to display Google ads.
There are several plugins available to help you display ads in WordPress. Here are some of the best tools to consider:
- Adsanity: Enables you to manage direct and automated ads in WordPress.
- Ad Inserter: Adds the advertisement code in optimal positions on your site, such as opt-in forms, header scripts, and JavaScript.
- Ads by WPQuads: Integrates with all Google AdSense ads, including display, in-feed, and automated advertisements with fixed and responsive sizes.
- WPCode: A great option for displaying banner ads in headers and footers.
- Google Site Kit: Google’s official WordPress plugin.
All of these plugins provide an easy way to display Google AdSense ads on WordPress sites. We’ll guide you through a quick tutorial on how to get started with Ad Inserter.
Display Google AdSense Ads with Ad Inserter
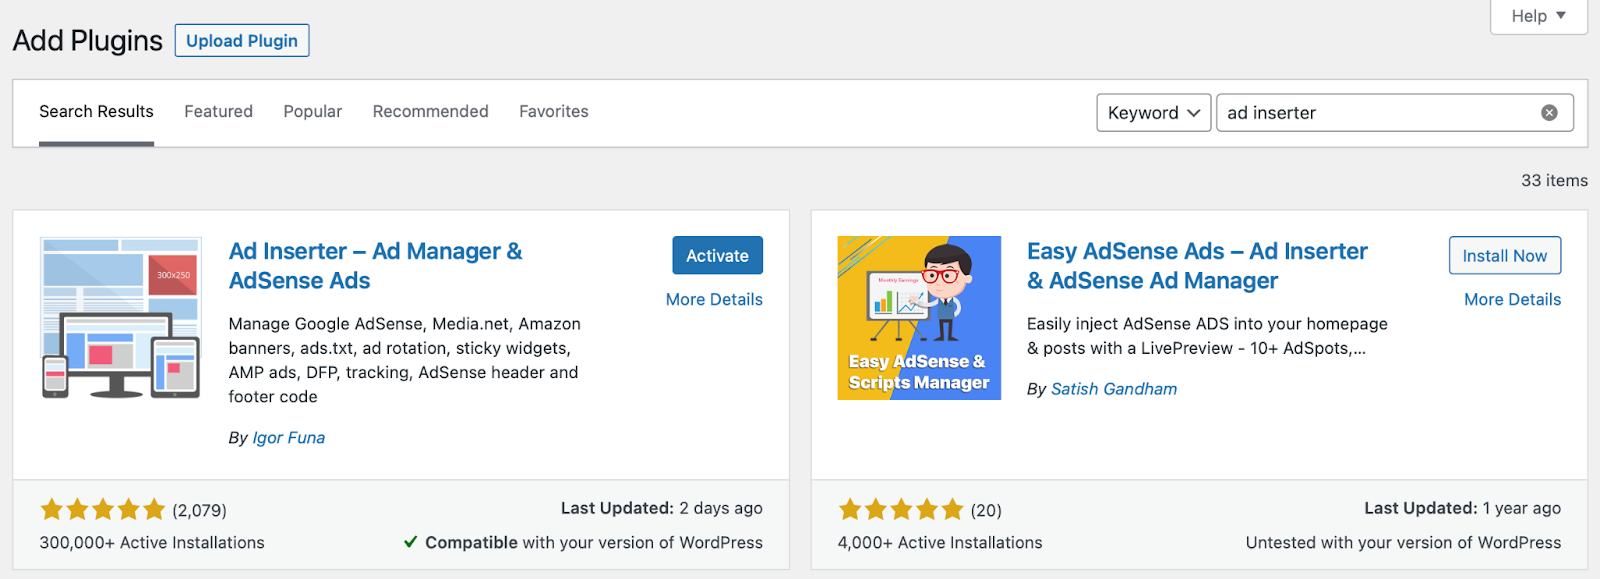
To get started with Ad Inserter, you’ll need to install and activate the plugin in WordPress. First, head to Plugins > Add New.
Then, search for “Ad Inserter” and click on Install Now > Activate:
Ad Inserter supports several ad networks, so you’ll need to configure the plugin’s settings. To do this, head to Settings > Ad Inserter:
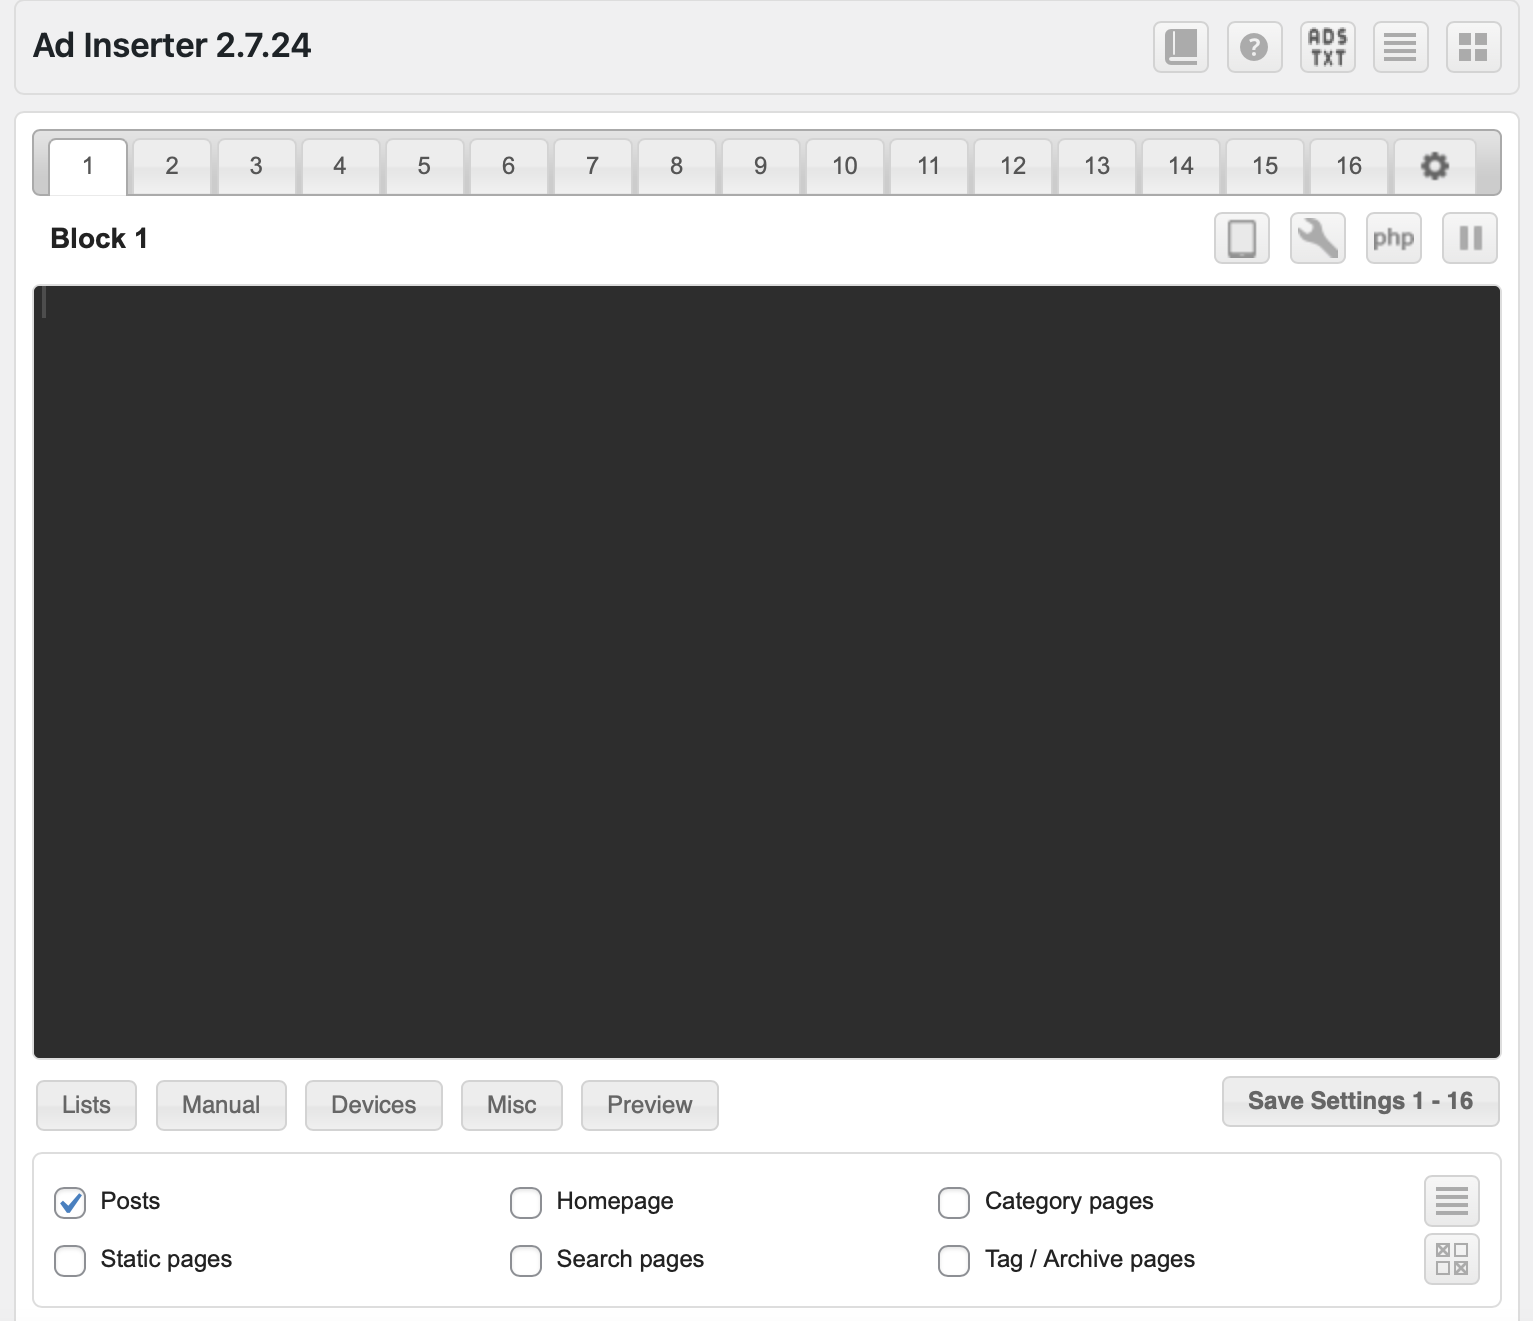
The plugin enables you to display up to 16 advertisements on your site, each with its own ad block. Better yet, you can determine specific page(s) where you want your ads to appear and even choose the exact location on each page.
For instance, if you want ads to appear in your posts, check the box that says Posts. Then, use the Insertion dropdown menu to specify the precise placement for the advertisement, such as before images, after content, or between comments:
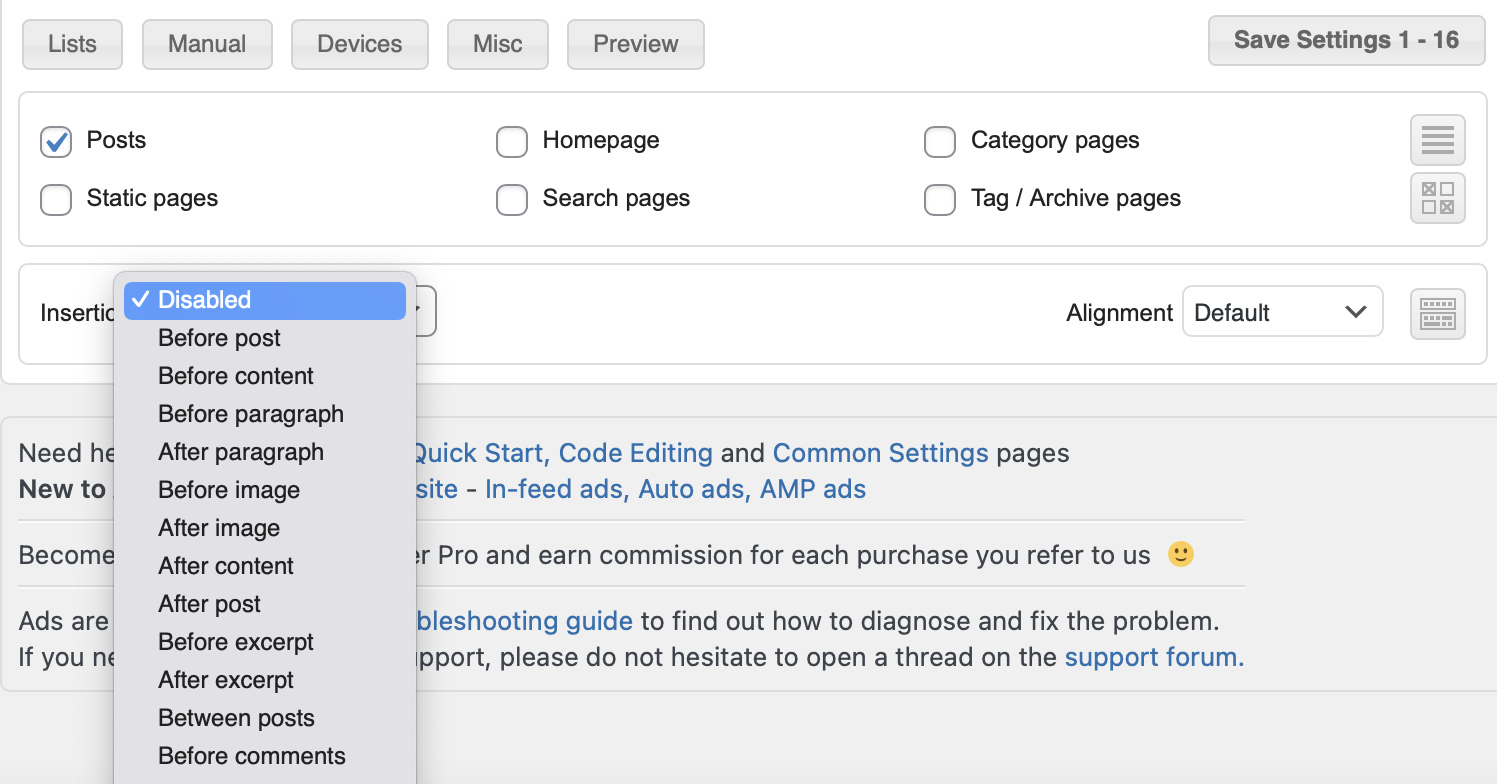
Then, paste your Google AdSense code into Block 1 and adjust the display settings below. In our example, our ad will display after the second paragraph of our posts:
Make sure to save your settings before exiting the plugin.
Method 3: Enable Google Auto Ads in WordPress
If you’re short on time or don’t know the best locations for ads, you might prefer to use Google auto ads. This way, you only need to add one code snippet to WordPress, and Google will take care of the location, size, and type of advertisement you’ll display.
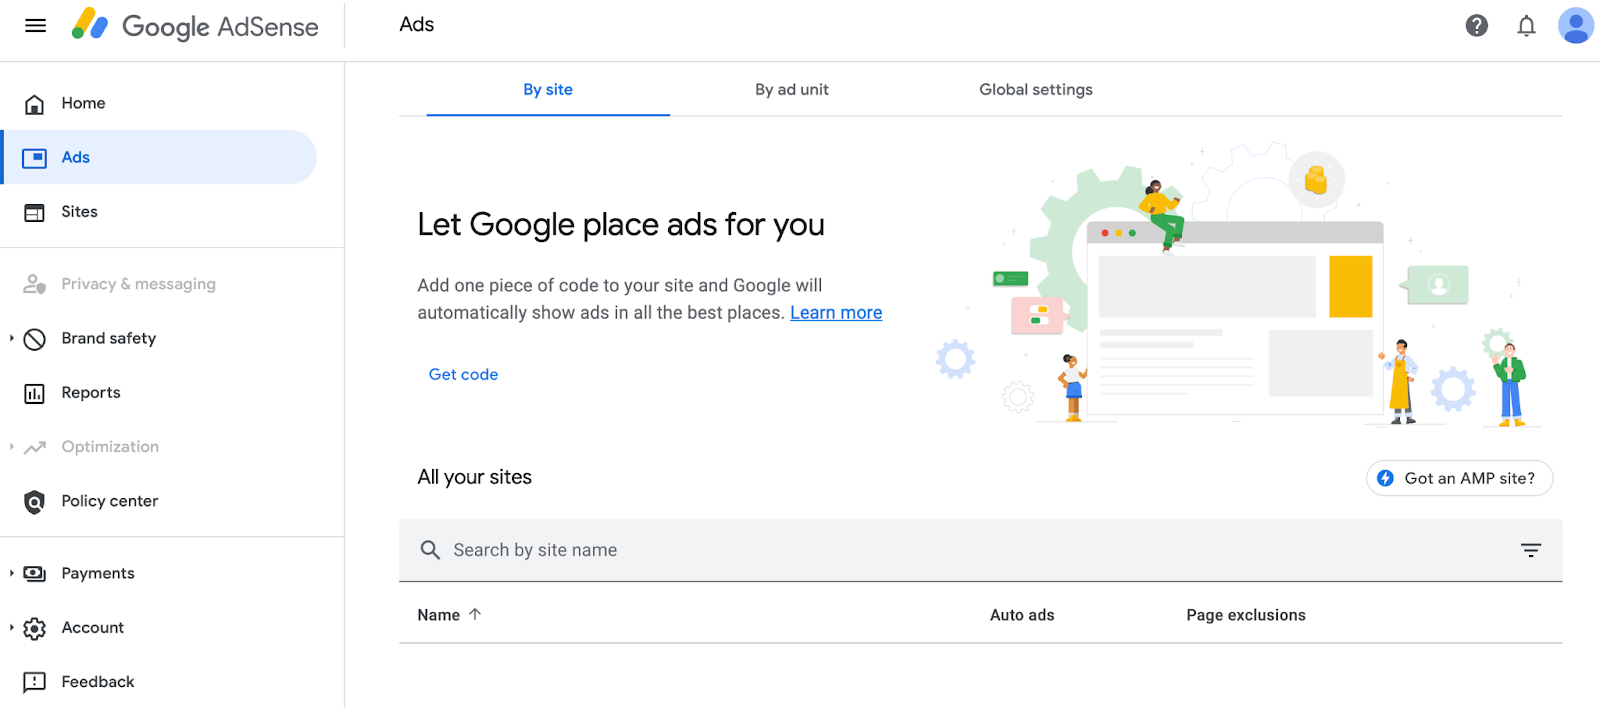
To enable Google auto ads, log in to your Google AdSense account and click on Ads. Then, switch to the By site tab:
Now, select Get code to generate the auto-ads code, and copy it:
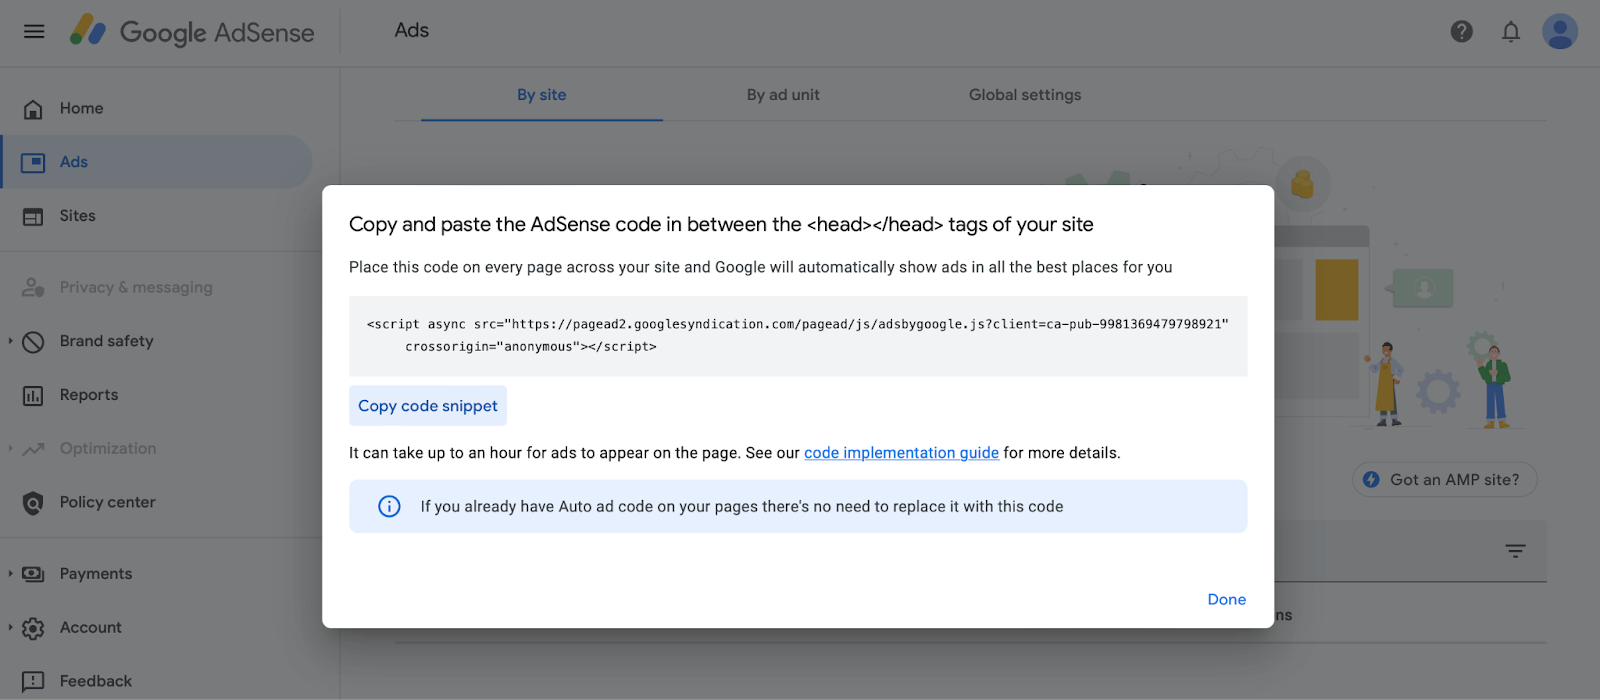
All you need to do now is add the code snippet to the pages where you want to display your ad. For example, you might insert the code into your theme’s header between the <head></head> tags. However, it’s important to note that this snippet will disappear if you switch or update your current theme.
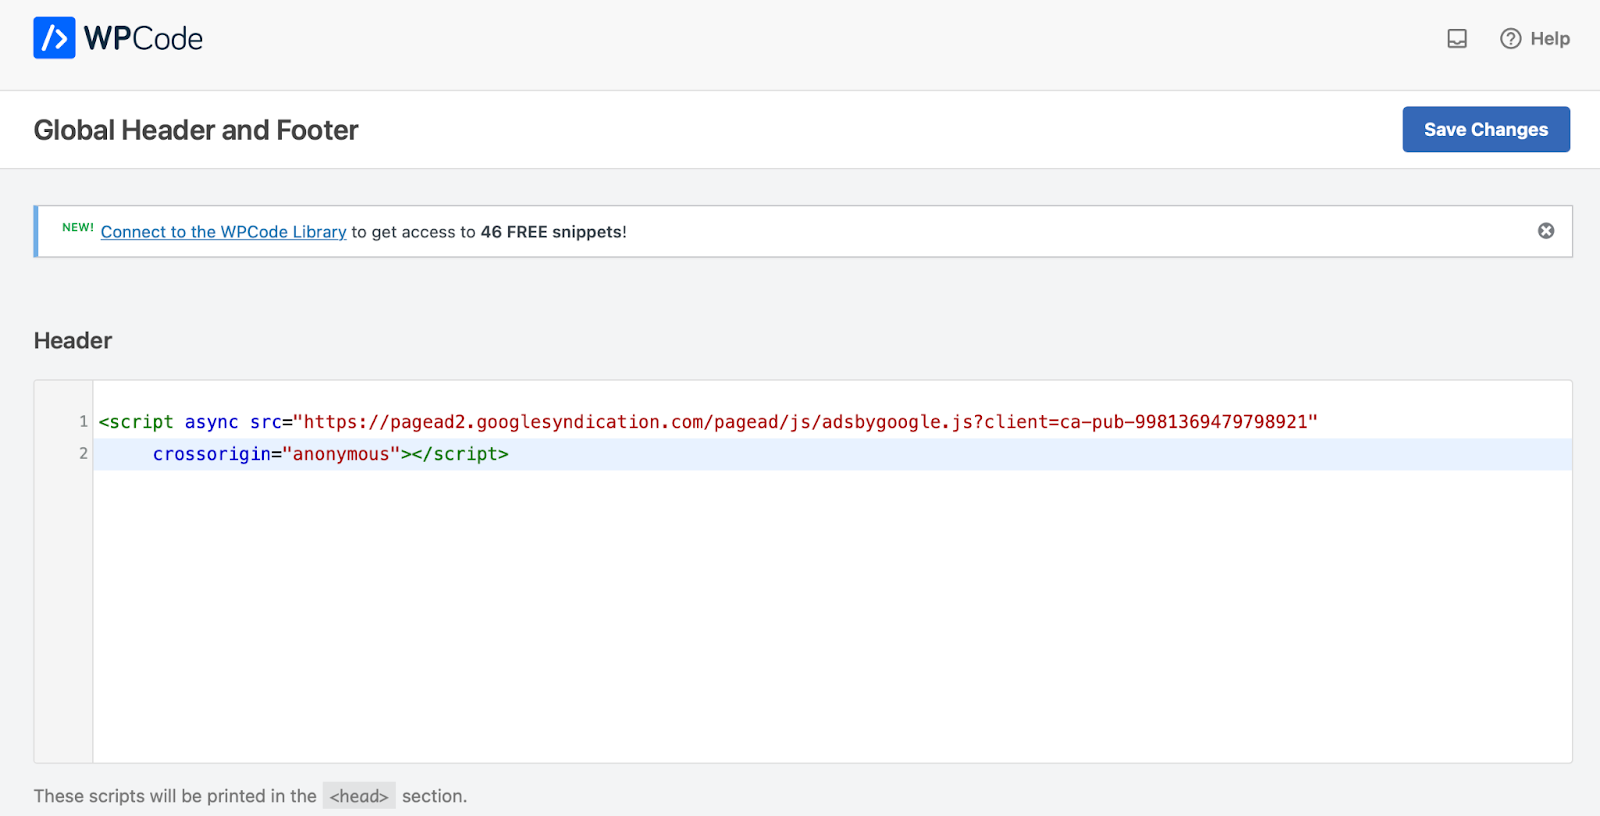
Therefore, it can be a better idea to use a child theme or a plugin like WPCode to manage your Google auto ads:

This also tends to be a simpler way to do things since you don’t need to edit HTML code on your pages manually.
Once you’ve installed and activated the plugin, head to Code Snippets > Header & Footer, then paste your Google auto ads code into the editor:
Now, click on Save Changes. At this point, your Google AdSense code will be added to all pages on your site.
Google AdSense Best Practices
You’re now ready to start monetizing your website with Google AdSense. Remember the following important considerations to get the most out of your ads:
- Don’t click on your own ads. Clicking on your ads is fraudulent and can result in Google disabling your AdSense account.
- Avoid placing ads on e-commerce sites. If you sell products or services, you won’t want to redirect potential customers elsewhere to spend their money.
- Experiment with different ad units. Straight off the bat, you’re unlikely to know the types of ads that will resonate with your users best. Therefore, it’s a good idea to try out different ad sizes and placements and see which gets the best results.
- Track your results. It’s important to measure the performance of your ad spaces to identify areas you can improve. Tools like Google Site Kit enable you to analyze and optimize your site.
Additionally, Google has its own list of ad best practices that you can check out to improve your campaigns.
Monetize Your Website with Google AdSense
Monetizing your website with ads allows you to make a passive income without lifting a finger. Plus, Google AdSense provides an easy way to earn money from your site using relevant advertisements that won’t harm your UX.
To recap, here are three ways to monetize your WordPress website with Google AdSense:
- Manually implement Google AdSense ads in WordPress using HTML.
- Use an ad management plugin such as Ad Inserter.
- Enable Google auto ads in WordPress.
If you want to sit back and let your website run itself, we recommend switching to managed hosting. At DreamHost, we’ll take care of your site maintenance tasks, including automated backups, optimizing your site’s speed with in-built caching, and software updates. This way, you will have more time to focus on growing your business. So check out our plans today!

Do More with DreamPress
DreamPress Plus and Pro users get access to Jetpack Professional (and 200+ premium themes) at no added cost!
Check Out Plans