A WordPress theme can include one small file that changes how your whole site behaves. The WordPress functions.php file — also known as the functions file — is a PHP file in your theme’s folder that works much like a plugin: WordPress loads it automatically along with your active theme, and any custom PHP code you add to it runs on both the front end and the admin side of your site. You’ll find it at wp-content/themes/your-theme/functions.php.
That makes the functions file a perfect place to start with WordPress development. By editing this one file, you can add Google Analytics to your site, create custom menus, or display a post’s estimated reading time — no extra plugin required. In this guide, we’ll explain how the file works, show you 2 safe ways to edit it, and share 8 practical code snippets you can copy today.
What Is the functions.php File?
The functions.php file is one of WordPress’s standard theme files — technically optional, and easy to create yourself if your theme doesn’t have one. To the untrained eye, it may not look like much, but the functions file is a powerful tool that enables you to do a lot of interesting things:
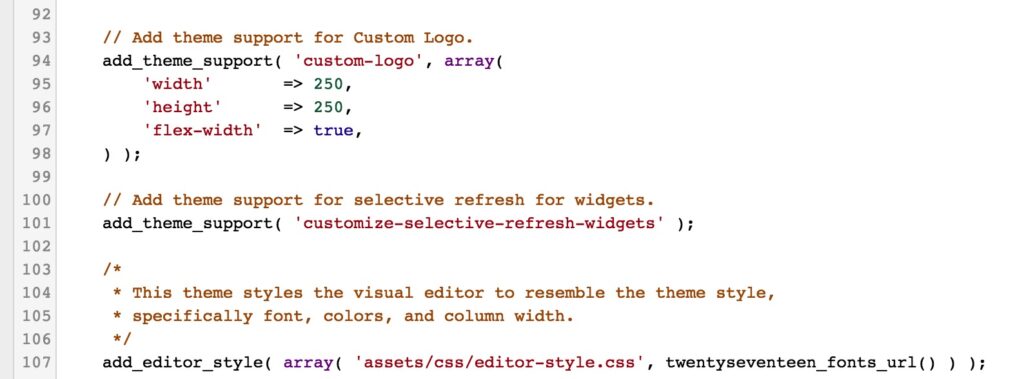
The WordPress Theme Handbook describes the functions file like this:
“The functions.php essentially acts like a WordPress plugin, letting you add custom PHP functions, classes, interfaces, and more. It opens up the entirety of the PHP programming language to your theme.”
In simple terms, the functions file enables you to add custom code to your site. It lets you create new functions or reference existing ones in customized ways. As the handbook points out, this makes the functions file very similar to a plugin — but there are some differences between the two.
The most important difference is that the functions file belongs to a specific theme. For a standalone active theme, WordPress loads that theme’s functions.php. When a child theme is active, WordPress loads both the child and parent functions.php files. If you switch away from that theme, its custom code stops running, and a theme update can overwrite edits made directly to that theme’s files.
For this reason, you should consider creating a child theme and adding your code to the child’s functions file instead. WordPress loads a child theme’s functions.php just before the parent theme’s, so your customizations keep running — and survive parent theme updates.
The Theme Handbook’s rule of thumb is that themes should only deal with the site’s design. If you’re building a feature that should stick around no matter what your site looks like, it’s best practice to create a plugin for it. For design-tied tweaks, the functions file is fair game — the choice is yours. For now, let’s look at the different ways you can edit your functions file!
Where Is the functions.php File Located?
Your theme’s functions file lives in the root of the theme’s own folder: wp-content/themes/your-theme/functions.php. If you use a child theme, the child keeps its own separate functions.php in its folder. If the file doesn’t exist, create it there and put <?php on the first line before adding PHP snippets; WordPress will load it automatically.
How to Edit the Functions File (2 Methods)
Editing your functions file is easy when using a standard text editor, like TextEdit or Notepad. However, before you get started, it is vitally important that you create a backup of your site and save the original, unedited functions.php file. This will enable you to restore your website if something goes wrong during the editing process. (Even safer: test your changes on a staging copy of your site first. DreamPress, DreamHost’s managed WordPress hosting, includes 1-Click Staging on every plan for exactly this.)
1. Use the WordPress Editor
If you have access to the WordPress admin interface, you can edit the functions file directly from the Theme File Editor. Go to Appearance > Theme File Editor:
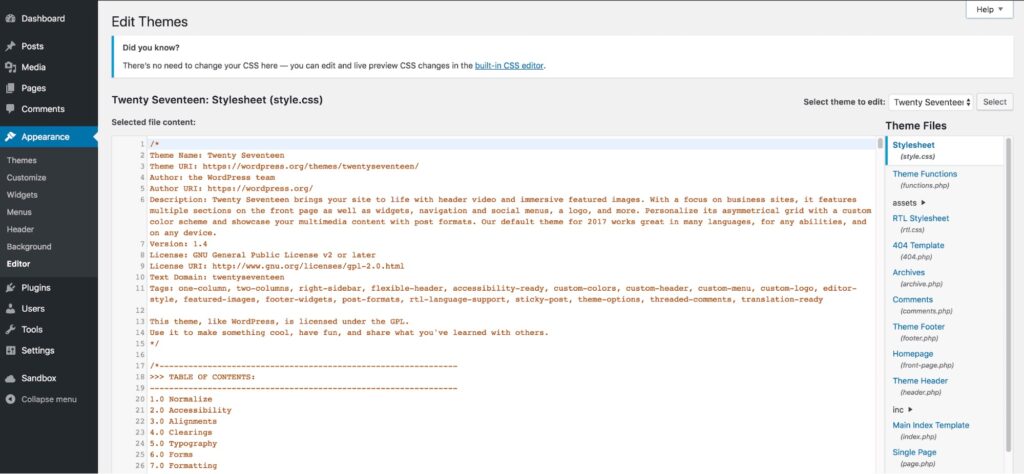
On the right-hand side of the screen, you will see a list of all your theme files. These differ depending on which theme you use, but one of the options should be Theme Functions (functions.php).
Simply click on the file to open it in the editor:
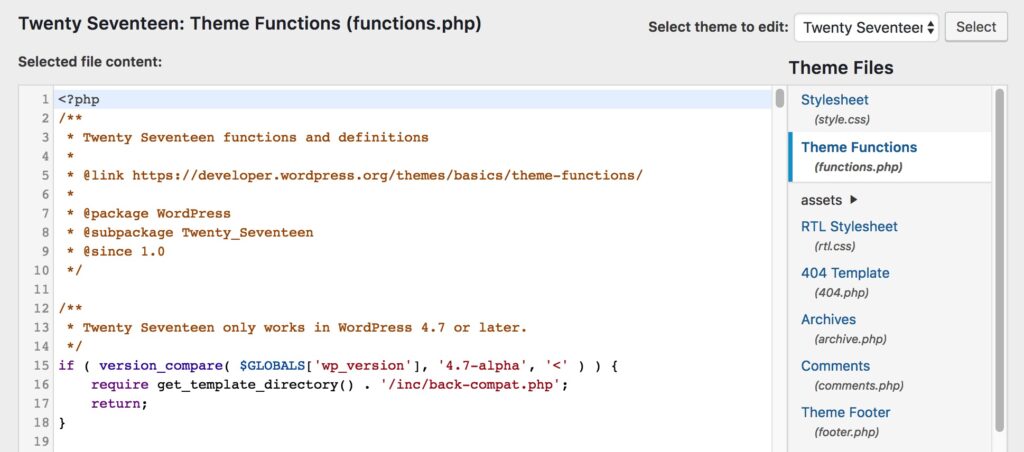
Now, you can edit the file directly. Don’t forget to click on Update File at the bottom to save your changes when you’re done.
One warning from WordPress’s own documentation: the Theme File Editor doesn’t make backup copies. If a change crashes your site, you can’t use the editor to fix it — you’ll need the second method below to restore your saved copy of the file.
2. Access the File Through FTP
If you are unable to use the admin dashboard or prefer to configure files directly, you can also access the functions file using a Secure File Transfer Protocol (SFTP) client such as FileZilla.
Open your SFTP client and enter your hosting credentials to connect to your site. To find the right file, navigate to wp-content/themes/[the name of your theme]. When you open this folder, you’ll see the functions.php file:
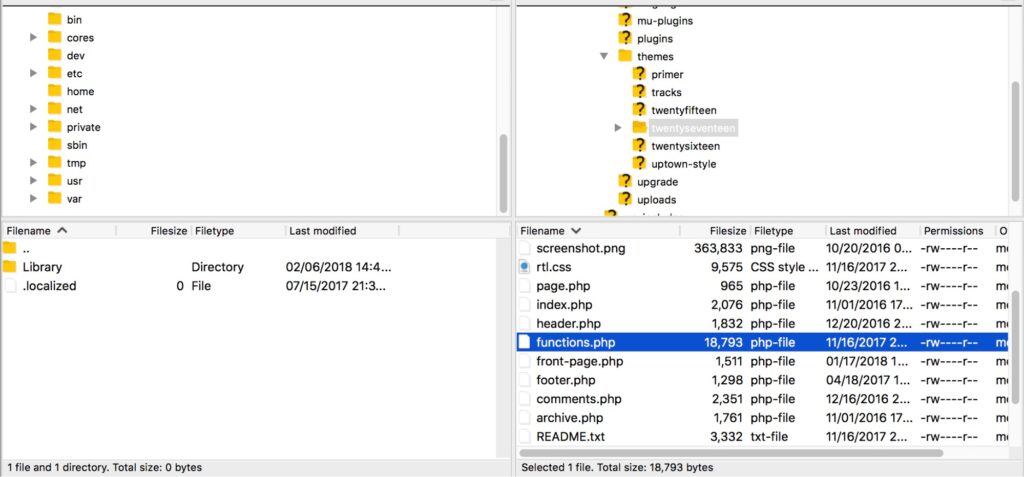
All you have to do now is to edit it using your preferred text editing software. When you’re done, save the file and overwrite it with the exact same name and extension.
8 Tricks You Can Accomplish With the WordPress Functions File
You should now be ready to start editing your functions file. To get you started, we’ll look at some changes that you can make. All you need to do is copy the provided code snippets and paste them on a new line at the very bottom of your functions file (don’t forget to save it!).
One tip from the Theme Handbook before you paste anything: if your functions file ends with a closing ?> tag, leave it out. Stray whitespace after that tag is a classic cause of the WordPress “white screen of death,” and skipping the closing tag altogether is perfectly valid PHP — and standard practice.
1. Add Google Analytics to Your Site
Google Analytics 4 (which replaced Universal Analytics — standard Universal Analytics properties stopped processing data back in July 2023) tracks your site through the Google tag: a snippet of code that needs to load on every page. Because analytics should keep working when you switch themes, a plugin or site-level integration is the safer production choice. If you use functions.php, the example below hooks the tag into the active theme’s header and will stop working when you switch themes.
First, grab your tag from Google Analytics. Go to Admin > Data streams, click your web data stream, then choose View tag instructions > Install manually and copy the Google tag code — it begins with <!– Global tag (gtag.js) –> and already contains your tag ID (the one that usually starts with “G-”).
Then paste this wrapper at the bottom of your functions file:
add_action('wp_head', 'wpb_add_googleanalytics');

function wpb_add_googleanalytics() { ?>

<!-- Replace this line with your Google tag (gtag.js) snippet -->

<?php }
Swap the placeholder line for the Google tag snippet you copied, save the functions file, and every page on your site will load the tag. If you’re moving over from an old Universal Analytics setup, our guide to switching from Universal Analytics to GA4 walks through the whole migration.
2. Change the Default Login Error Message
By default, when somebody makes an unsuccessful login attempt to a WordPress site, they’ll see an error message like this:
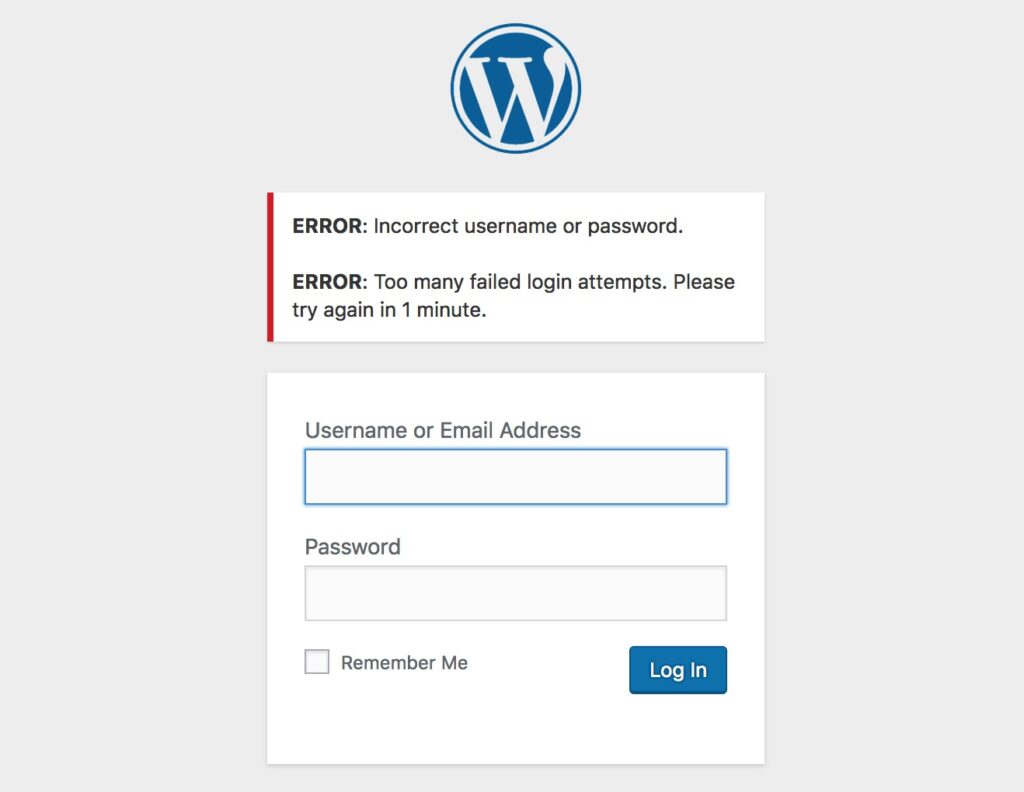
Unfortunately, this message is giving potential intruders information about why the attempt didn’t work. To reveal less detail in the login-form response, you can change this to a generic message instead. This is not a substitute for controls such as strong passwords, multifactor authentication, and login rate limiting.
You can do this easily with WordPress’s login_errors filter, which controls the error messages displayed above the login form. Add the following code to your functions file:
function no_wordpress_errors(){
return 'Something went wrong!';
}
add_filter( 'login_errors', 'no_wordpress_errors' );
See that Something went wrong! message on the second line? That message will now appear the next time an incorrect login attempt occurs:
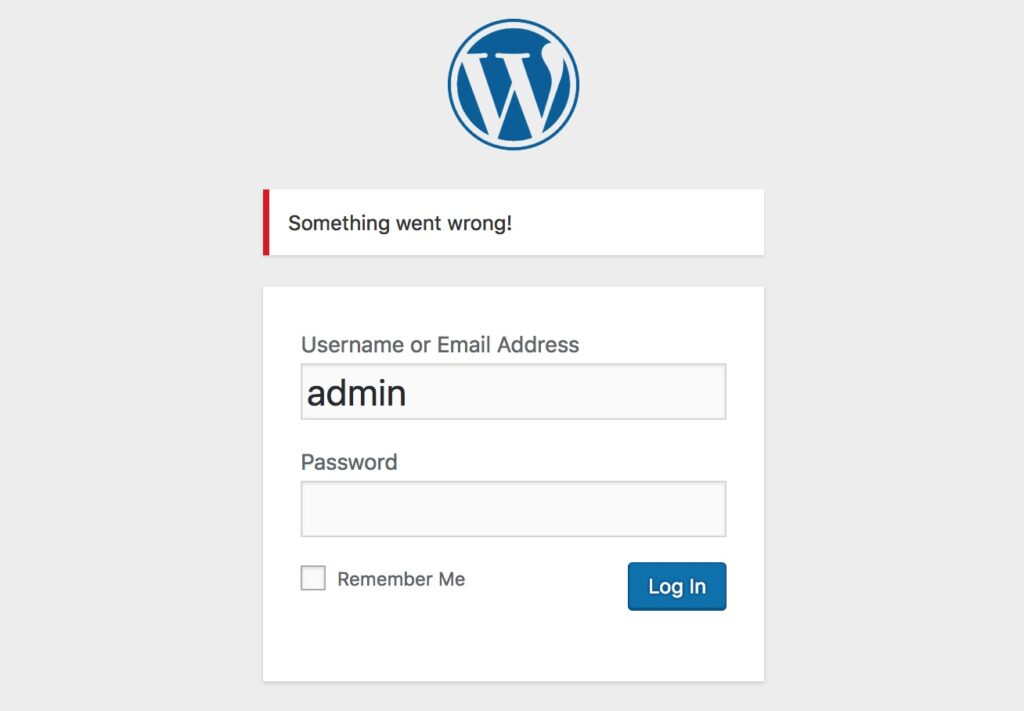
You can change the text to whatever you want, as long as you keep the single quote characters. Try it out with different messages to see how it works.
3. Add the Estimated Reading Time for a Post
This neat trick enables you to calculate and display the estimated amount of time required to read a post. Your visitors can then get a general idea of the content’s length right away.
To implement this code, you will need to make two separate edits. The first one happens within the functions.php file, where you’ll want to paste the following snippet (it assumes a reading speed of 200 words per minute — change that number to taste):
function reading_time() {
$content = get_post_field( 'post_content', get_the_ID() );
$word_count = str_word_count( strip_tags( $content ) );
$readingtime = ceil($word_count / 200);
if ($readingtime == 1) {
$timer = " minute";
} else {
$timer = " minutes";
}
$totalreadingtime = $readingtime . $timer;
return $totalreadingtime;
}
However, this snippet only performs the calculation. You’ll now need to add the following code wherever you want the results to be displayed:
echo reading_time();
For example, you could add it to the metadata that appears alongside each post. Every theme is constructed differently, but typically you’ll find it in template-parts > post > content.php:
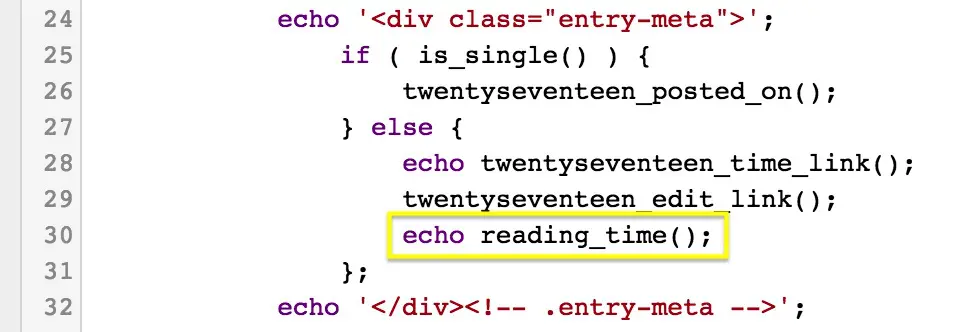
The estimated reading time will now appear in each post’s header alongside the date.
4. Remove the WordPress Version Number
Old versions of WordPress may contain security flaws that malicious hackers and bots can exploit. Removing the generator tag can hide one public version indicator, but it does not fix vulnerabilities in outdated software or replace promptly updating WordPress. This is called security through obscurity.
Before we move on, it’s important to note that obscurity should never be your only security measure. It’s more like adding an extra bulwark to your already secure WordPress fortress.
By default, WordPress prints a generator meta tag — including your WordPress version — in your page header via the wp_generator function. Hiding it only requires adding the following code snippet to the functions file:
remove_action('wp_head', 'wp_generator'); The generator tag — and the version number it contains — will no longer appear in your page source.
5. Automatically Update Your Copyright Notice
Updating the year in your copyright notice is one of those little tasks that’s easy to forget. You can edit your functions file to generate a copyright year range from the earliest and latest published posts.
Paste the following code into your functions file:
function wpb_copyright() {
global $wpdb;
$copyright_dates = $wpdb->get_results("
SELECT
YEAR(min(post_date_gmt)) AS firstdate,
YEAR(max(post_date_gmt)) AS lastdate
FROM
$wpdb->posts
WHERE
post_status = 'publish'
");
$output = '';
if($copyright_dates) {
$copyright = "© " . $copyright_dates[0]->firstdate;
if($copyright_dates[0]->firstdate != $copyright_dates[0]->lastdate) {
$copyright .= '-' . $copyright_dates[0]->lastdate;
}
$output = $copyright;
}
return $output;
}
Then add the following code wherever you want the copyright information to be displayed:
<?php echo wpb_copyright(); ?>
You’ll now see the dynamically updating copyright date on your site.

In our case, we added the date to the footer.php file, so it would be displayed at the bottom of the page.
6. Add Custom Menus
Most themes have pre-defined navigation menus. However, what if you want to create your own menu and place it wherever you want on your site?
All you need to do is register a new menu location with the register_nav_menu() function by pasting this code into your functions file:
function wpb_custom_new_menu() {
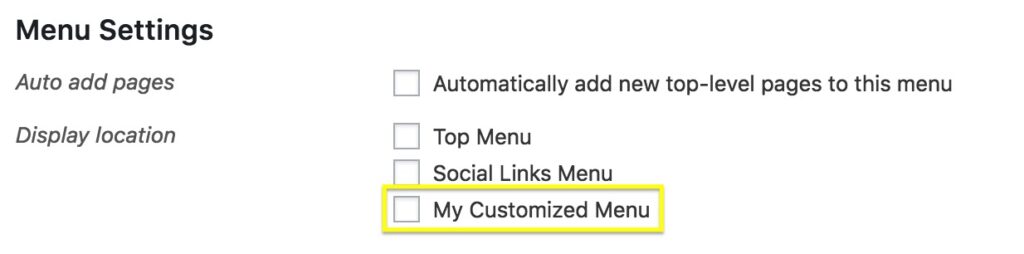
register_nav_menu('my-custom-menu',__( 'My Customized Menu' ));
}
add_action( 'init', 'wpb_custom_new_menu' );
You can replace ‘My Customized Menu’ with the name you want to give the menu. If you go to Appearance > Menus in your admin area, you should see the new option listed on the page:
You can now add the new menu anywhere on your site with wp_nav_menu().
<?php
wp_nav_menu( array(
'theme_location' => 'my-custom-menu',
'container_class' => 'custom-menu-class' ) );
?>
Most probably, you’ll want to place this code in the header.php file. This will place the menu at the very top of your site.
7. Customize Your Excerpts
Excerpts are short sample descriptions of your posts that you can display on your homepage or blog feed. By default, all excerpts have the same length and link text, but you can change that.
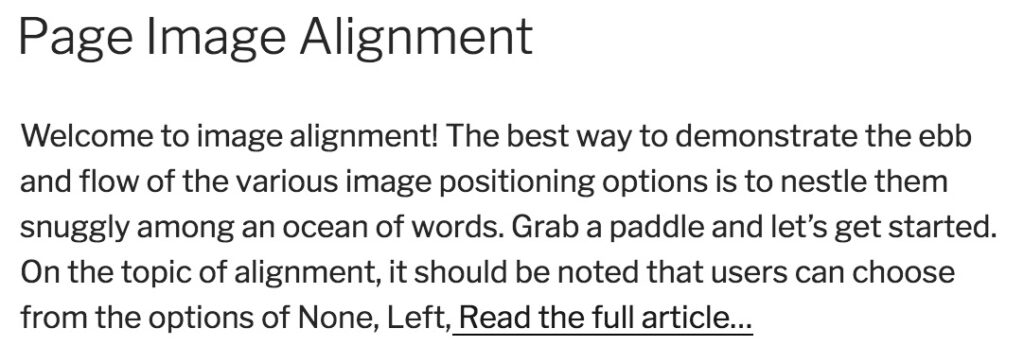
First, let’s alter the text of the link that takes you from the excerpt to the full post. This is usually “Read more” or “Continue reading,” but you can make it whatever you want with the excerpt_more filter. Paste the following snippet into your functions file:
function new_excerpt_more($more) {
global $post;
return '<a class="moretag" href="'. get_permalink($post->ID) . '"> Read the full article...</a>';
}
add_filter('excerpt_more', 'new_excerpt_more');
Here, the link text has been set to Read the full article…
Then, let’s change the length of the excerpt using the excerpt_length filter. Paste this code into your functions file:
function new_excerpt_length($length) {
return 20;
}
add_filter('excerpt_length', 'new_excerpt_length', 999);
By default, the standard length is 55 words. However, in this example, it’s been set to 20. You can change the number to whatever you wish. (That 999 at the end is the filter priority — WordPress’s documentation recommends a high number like this so the default filter doesn’t run afterward and override your setting.)
8. Generate a Random Background to Your Site
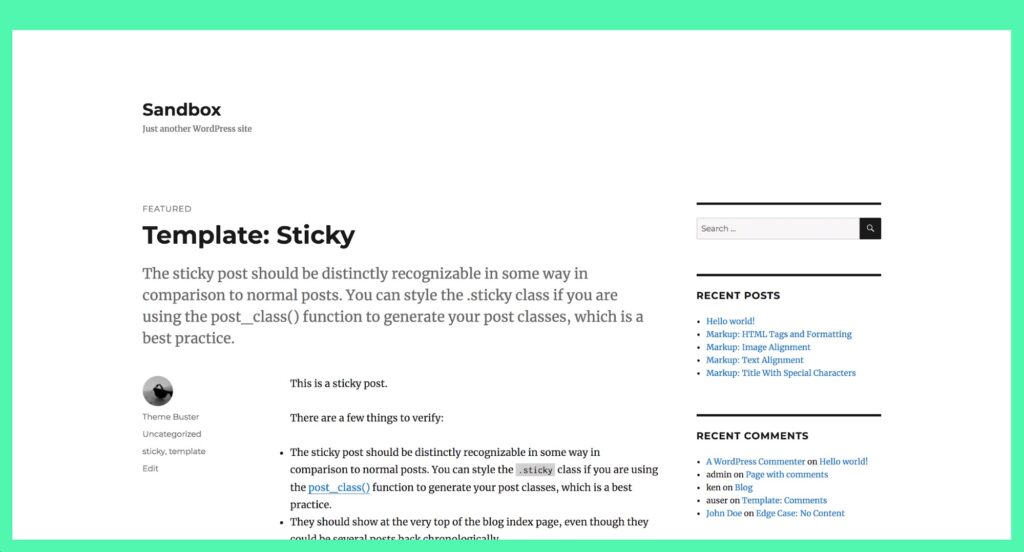
Finally, let’s end with a fun design trick. This tweak lets you randomly generate a new background color for your site every time somebody visits it. Start by adding the following code to the functions file:
function wpb_bg() {
$rand = array('0', '1', '2', '3', '4', '5', '6', '7', '8', '9', 'a', 'b', 'c', 'd', 'e', 'f');
$color ='#'.$rand[rand(0,15)].$rand[rand(0,15)].$rand[rand(0,15)].
$rand[rand(0,15)].$rand[rand(0,15)].$rand[rand(0,15)];
echo $color;
}
This code generates a random hex color code, so all you need to do now is to make sure it gets applied to the page. To do that, you’ll need to find the <body> tag, which should look like this:
<body <?php body_class(); ?>>
This is usually in the header.php file but can be elsewhere, depending on your theme. When you’ve located the right line, simply replace it with the following code:
<body <?php body_class(); ?> style="background-color:<?php wpb_bg();?>">>
Save your file and open your website. You should see that it has a new background color:
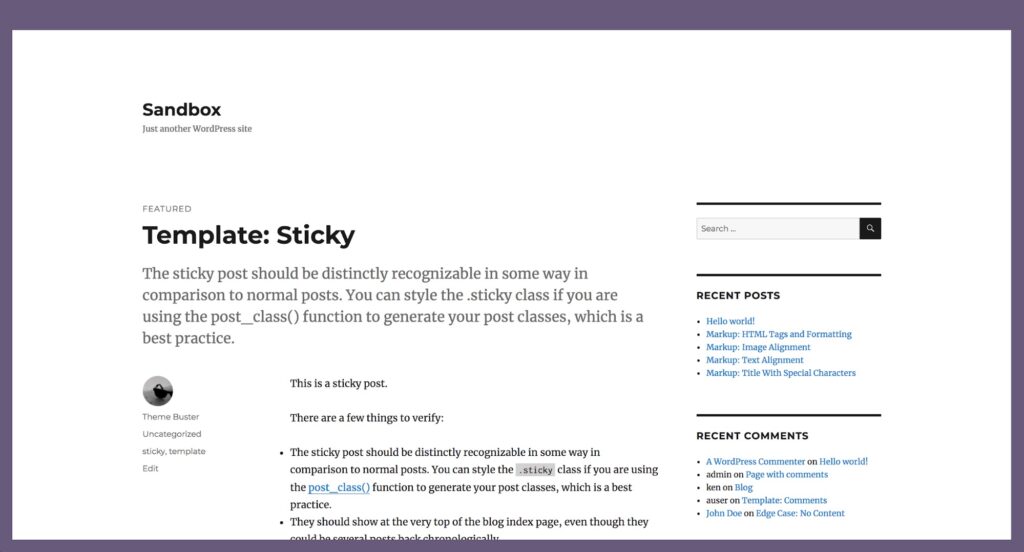
Reload the page, and you’ll see a new color every time:
This is obviously not the right design choice for every site, but it’s a neat trick for some!
FAQs About the WordPress functions.php File
Where is functions.php in WordPress?
Your theme’s functions.php file is at wp-content/themes/your-theme/functions.php — the root of your active theme’s folder. A child theme has its own separate functions.php in its own folder. You can reach the file through Appearance > Theme File Editor in the WordPress dashboard, or over SFTP.
Should I add code to functions.php or a plugin?
Put design-related code in the functions file and everything else in a plugin. The WordPress Theme Handbook’s rule of thumb is that themes should only deal with the site’s design — features that should keep working regardless of which theme is active belong in a plugin, because the functions file stops running the moment you switch themes.
Will my functions.php changes survive a theme update?
No — updating a theme replaces its files, and any code you added to its functions.php goes with them. The fix is a child theme: WordPress loads the child theme’s functions.php just before the parent theme’s, so your custom code keeps running through every parent update.
What if editing functions.php breaks my site?
Restore your backed-up copy of the file over SFTP — the Theme File Editor doesn’t make backup copies, so you can’t undo a site-crashing change from inside WordPress. To avoid one possible source of breakage, don’t leave a closing ?> tag at the end of the file: trailing whitespace after it can white-screen your site, and omitting the tag is valid PHP.
What are functions in PHP?
A PHP function is a named, reusable block of code that runs when you call it. WordPress defines its own PHP functions — like the register_nav_menu() and wp_nav_menu() examples above — and your theme’s functions file is where you can call them or define new ones of your own.
Edit Your functions.php File
The WordPress functions.php file is the perfect place to tinker with your site’s default functionality. It’s a powerful file that gives you a lot of control over your site once you understand how it works.
Depending on your WordPress theme, you might be able to use the built-in Theme File Editor to access and edit your functions.php file. Otherwise, you can access it via SFTP. Then, you can use custom code to do everything from displaying the estimated reading time of a post to customizing your excerpts.

Test Code Changes the Safe Way
Every DreamPress managed WordPress plan includes 1-Click Staging and daily backups, so you can try new functions.php code before it touches your live site.
Check Out Plans