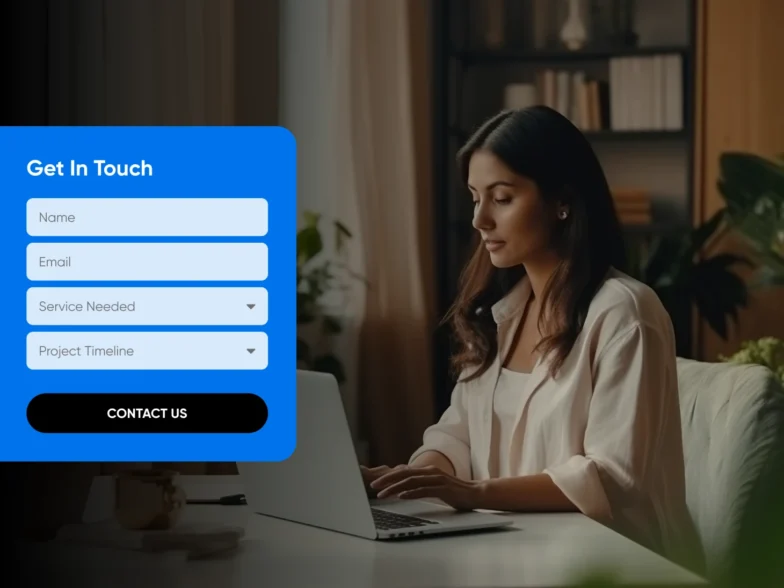
How to Create an Eye-Catching Photography Portfolio Website (In 4 Steps)

How to Create an Eye-Catching Photography Portfolio Website (In 4 Steps) thumbnail

Photography is a popular and engaging hobby, especially with the variety and convenience of advanced camera options. Whether you’re into dark rooms and film or high-end digital lenses, turning your photography hobby into an online business might be on your radar.

That’s where WordPress and the time-saving functionality of website builders come in. When you combine the content management options of WordPress with drag-and-drop site design capability, it’s easy to turn your big ideas into a professional photography site.

This article will cover four steps for creating a photography website with WordPress. So take that lens cap off your camera, friend, and let’s get started!

Why You Should Consider Starting a Photography Portfolio Website

As a photographer, it’s worth sharing your work online on a portfolio website. This site will serve as a collection of your different photos in one place, advertising your skills to a wide range of users.

Although you may be tempted to use social media to build your photography business, it can help to have a dedicated website for your brand. Along with showcasing your beautiful images, you’ll be able to add a contact form. This is an easy way for prospective clients to get in touch:

Photography website contact form

Plus, you can organize your website into different galleries. For example, wedding photographers might want to add photo collections for specific couples:

Photography portfolio galleries

A website can also be a great place to showcase your personal style. If your work is colorful and bright, you could display the same qualities in your graphic design. A well-designed landing page can even increase leads and conversions:

Photography portfolio landing page

Without a website, you may struggle to connect with new clients. Ultimately, it’ll be more difficult to advertise and distribute your services. Therefore, when you’re ready to grow your business, you’ll want to create an online portfolio.

3 Tips for Building Your Photography Portfolio Website

Building a site can be a daunting task. To help you get started, here are a few tips to create the best photography portfolio website!

1. Stick to Your Brand

One of the first steps in designing a photography website is determining your style or niche. Whatever your focus might be, knowing it ahead of time will help you create your site and target your specific audience. With this in mind, take a few minutes to set some goals for your site and then write them down.

Since there are many photographers, you’ll want your website to have some personality. By defining your brand niche, you can tell visitors why you’re the best option for their needs.

For example, Jenn Emerling is a professional photographer specializing in destination weddings. Instead of being a standard, run-of-the-mill wedding photographer, she defines herself as an “artist who happens to shoot weddings”:

Jenn Emerling photography portfolio website

Her vibrant, multi-colored website, powered by WordPress and DreamHost, has proven to be a huge success. By focusing on her unique approach, Jenn was able to attract dream clients while reflecting her authentic artistic voice.

2. Highlight Your Best Work

When creating an online portfolio, your photos should be the center of attention. Since you’re a unique photographer, your website will also have a custom layout and web design. However, make sure that this structure properly highlights your work.

At the very least, you should have a dedicated page for your portfolio. Although you may be tempted to include hundreds of photos for prospective clients to browse, it’s better to showcase 10-20 of your best pieces.

If you’re having trouble narrowing down your work, consider diversifying your portfolio. You’ll want visitors to immediately understand your main niche without displaying the same type of photo over and over. Alternatively, you can also browse competitors’ portfolios to see their images, as well as any holes that you can fill.

3. Use the Right Content Management System

Although options like Adobe Portfolio are designed explicitly for creating portfolio websites, we’d recommend a more versatile platform.

Since it powers over 30% of all websites, WordPress is the most popular Content Management System (CMS). It is a flexible software that can give anyone full control over their online presence:

WordPress website

Outside of those numbers, WordPress’s practical, open-source software is another reason we suggest it for a photography portfolio website. You can find thousands of free themes and plugins in its directories to extend your site. Whether you need to build an image gallery or contact form, WordPress can help you create a truly unique website for your photography business.

One more plus? WordPress software is free. You can afford to run a self-hosted website even as a brand-new photographer.

Get Content Delivered Straight to Your Inbox

Subscribe to our blog and receive great content just like this delivered straight to your inbox.

How to Create an Eye-Catching Photography Portfolio Website (In 4 Steps)

Once you’ve defined your niche and collected some of your best photographs, it’s time to build your website. Fortunately, we’re here to guide you through setting up and designing a site with WordPress!

Step 1: Choose Your Domain Name and Web Host

No matter what website you build, a good first step is finding a hosting provider. Essentially, web hosts give you the server space and resources you need to store and grow your site online.

Although choosing a web host might seem overwhelming at first, there are a few features you can look for:

  • Storage: If you plan on using the same host for your website and photos, you’ll want to investigate the amount of available storage. There may even be additional storage as an add-on to handle your larger, high-quality images.
  • Software: You’ll also want to consider whether you need a one-click solution to get started with WordPress. This is an excellent option for beginners who don’t want to hire a developer.
  • Support: The last thing you want is for your clients to be unable to access your site while trying to view your photos. Make sure your web host has 24/7 support and provides a downtime guarantee. You’ll also want to read up on its site backup and restoration options in case something happens.
  • Extras: Some hosts come with extra features you might want to consider. These include premium themes, plugins, staging sites, or website builders that can streamline your design process.

No matter what type of hosting you ultimately decide you need, here at DreamHost, we offer a wide range of WordPress plans. Each package comes with a free SSL certificate, automated backups, and a free domain name. Plus, we’ll automatically install WordPress for you:

DreamHost WordPress hosting

Once you’ve signed up for a hosting plan, you’ll be able to register a domain name. This is the web address that potential clients will use to find your portfolio:

DreamHost domain name registration

Most photographers choose to include their full names within their domain. Alternatively, you can incorporate target keywords for your niche if your name is already taken. For example, Jenn Emerling is a wedding photographer, so her URL is ‘jennemerlingweddings.com’.

Step 2: Install a Dedicated Photography Theme

Installing a theme enables you to customize the look of your WordPress site. What’s more, it’s as easy as uploading a file or clicking a button. There are a lot of photography themes out there, however, so deciding which one is best for you might be the hardest part.

If you’re using DreamHost as your WordPress hosting service, you’ll have access to our Website Builder. As a photographer, you can drag and drop elements in a front-end view of your website. In addition, you’ll be able to choose from photography-specific custom templates and view your changes live as you make them.

Getting started is easy. You simply need to select “WP Website Builder” as an option when purchasing your DreamHost plan:

Enable DreamHost Website Builder

Once you’ve completed your purchase with the website builder selected, sign in to WordPress. You’ll see a new Inspirations tab once you visit your dashboard. This will take you to a setup page:

DreamHost website builder

Next, you’ll be able to choose from a menu of theme categories. Our website builder contains many photography themes designed to showcase your skills:

WordPress photography themes

Once you’ve selected the theme you want, you’ll be guided through choosing some custom content options. You can use preset page layouts and menus. You’ll also be able to test your theme’s responsiveness on mobile devices:

Edit WordPress theme

You might notice additional content in your WordPress dashboard now as well. There are some tutorial videos, for example, in case you need extra support along the way. Plus, if you want to spice things up later and change your theme, the Inspirations menu will lead you through that process.

Step 3: Select Plugins to Enhance Your Site

Now that you’ve selected a theme, it’s time to install some plugins. WordPress plugins are add-on packages of code that can enhance and extend the platform’s functionality. You’ll want to familiarize yourself with the best way to manage them to ensure you keep your site safe and secure.

Photography blogs and websites often display and watermark high-quality images. To do this, you can install a photography plugin like Envira Gallery. This tool includes options for watermarking your photos, which may be an important part of your security strategy:

Envira Gallery plugin

With Envira Gallery, you can also set up an online store, create video galleries, and import content from Instagram. Combining this tool with our website builder makes it easy to display your work dynamically online.

You may also want to create image galleries with password protection or tie your e-commerce options to a file download manager. With MemberPress, you can protect your content with access rules:

MemberPress plugin

This plugin will enable you to turn your photography portfolio into a membership site easily. You can direct visitors to purchase subscriptions before viewing or downloading specific photos. This paywall can be an effective option if you’re looking to monetize your website.

Step 4: Create Compelling Content

When it comes to Search Engine Optimization (SEO), there is more to think about than just keywords. To secure better page rankings, it’s important to encourage other people to talk about you.

Gaining backlinks and social media shares are both effective ways to improve SEO and acquire new clients. To encourage this sharing, you’ll need to create compelling content. This could include tutorials, downloads, infographics, videos, or podcasts.

Adding a blog to your page is also a great way to build a following and establish yourself as a trusted name in the industry. A beautiful example of this can be seen on the Mostly Lisa website. Visitors can be inspired by these extensive how-to articles on taking high-quality photos:

Photography portfolio blog

Ultimately, adding a photography blog can make your portfolio feel more credible and engaging for potential clients. Plus, this blog content can easily be shared on social media or referenced by other websites.

How to Promote Your Photography Business

Now that your photography has a home on the web, you might wonder how to get more eyeballs on your work. Self-promotion can sometimes be challenging, but with WordPress and your professional theme, you have plenty to showcase!

There are a few ways to approach promoting your new site, including:

  • Social media: Promoting your work on social media can reap significant benefits. We recommend staying on a posting schedule, so viewers know they can regularly expect new content. This can develop a loyal, engaged audience interested in your work.
  • Testimonials: Research shows that more than 80% of consumers seek recommendations from family and friends before making purchases. This makes customer testimonials a powerful tool on your website.
  • Call to action: If your goal is to gain clients or fill up your email subscriber list, you might want to learn how to write a good Call to Action (CTA). It will clearly guide your site’s visitors toward the action you want them to take.

At the end of the day, there are many ways to build a following online. By creating a well-designed photography website and regularly posting on social media, you’ll be able to gain new clients in no time!

Feature Your Photos Online

If you plan on pursuing photography professionally, you’ll need to get your photos online. Whether your focus is nature, weddings, family portraits, or street photography, you can show off your images with a WordPress photography theme and our Website Builder. These tools can help you easily and quickly create a platform where clients can see and purchase your services.

To review, here’s how you can build a photography portfolio website:

  1. Choose your domain name and web host.
  2. Install a dedicated photography theme.
  3. Select plugins like Envira Gallery and MemberPress to enhance your site.
  4. Create compelling content.

If you’re just starting your photography business, you’re probably looking for a budget-friendly hosting provider. Here at DreamHost, our shared hosting plans are designed to maximize WordPress performance without breaking the bank!

Power Your Website with DreamHost

We make sure your website is fast, secure and always up so your visitors trust you.

shared hosting
Photo of Ian Hernandez
About the Author:

Ian is a Product Designer based in Los Angeles, California. He is responsible for driving brand and product design at DreamHost, developing and maintaining our internal design system, and writing frontend code when he can. In his free time, he enjoys walking his dog, learning history, and discovering new music online and irl. Connect with him on LinkedIn: https://www.linkedin.com/in/ianhernandez23/