
Publishing posts to your blog on a regular basis is essential. However, several issues might get in the way of consistent and optimized publishing, such as a full workload, trouble posting during high-traffic periods, or even the decision to take a vacation. Even expert bloggers need a little R ‘n R now and then.
Fortunately, if you built your website with WordPress, there are a number of ways you can schedule your posts for publication ahead of time. Scheduling your posts enables you to put fresh content up on your site at regular intervals — without having to actually log in each time.
In this article, we’ll explain the advantages of scheduling blog posts on your WordPress site. Then we’ll share a few methods for doing so, and go over some tips for troubleshooting issues that may arise during the process. Let’s dive in!

Schedule Posts With WordPress, Power Your Site with DreamHost
We’ll make sure your blog is fast, secure, and always up so your visitors trust you. Plans start at $2.59/mo.
Choose Your PlanWhy It’s Smart to Schedule Your Blog Posts
Creating a schedule for your blog posts is the best way to ensure that you always have fresh content. Plus, when you post regularly, readers will always know when to expect new articles. This can help keep them engaged and coming back regularly.
On top of that, scheduling posts can help you manage your workload. When you have a busy week coming up, you can write your posts ahead of time and set a future publication date and specific time for each. Scheduled posts can also make it possible for you to take a vacation from your blog.
In addition, assigning publication dates and times is useful for posting during peak traffic hours. Your readers may be most active on your site during a time of day you have to be away from your computer, for example. Automated publication lets you make new posts live at the ideal moment.
How to Schedule Posts in WordPress (3 Methods)
Fortunately, there are several ways to schedule posts on your WordPress website, so you can choose the method that works best for you. Let’s look at three of the most common options.
1. Schedule Posts in the Block Editor
WordPress has innate post scheduling capabilities, which you can access right from the editor screen. Let’s look at how to set a post up for automatic publication in the Block Editor (which you have access to if your WordPress version is 5.0 or higher).
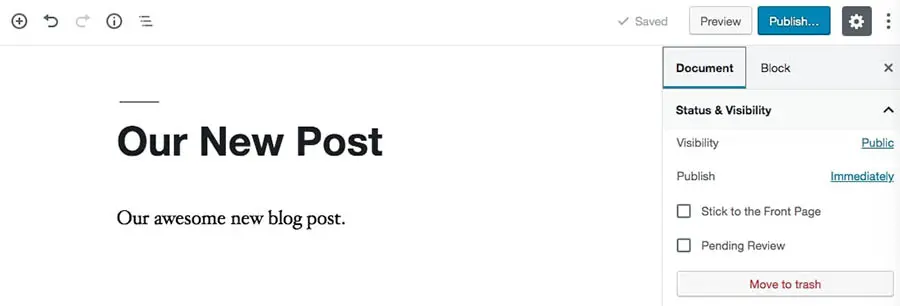
Open up the post you want to schedule, and in the sidebar to the right, select the Document tab. Under Status & Visibility, you’ll see that your post is set to publish Immediately by default.
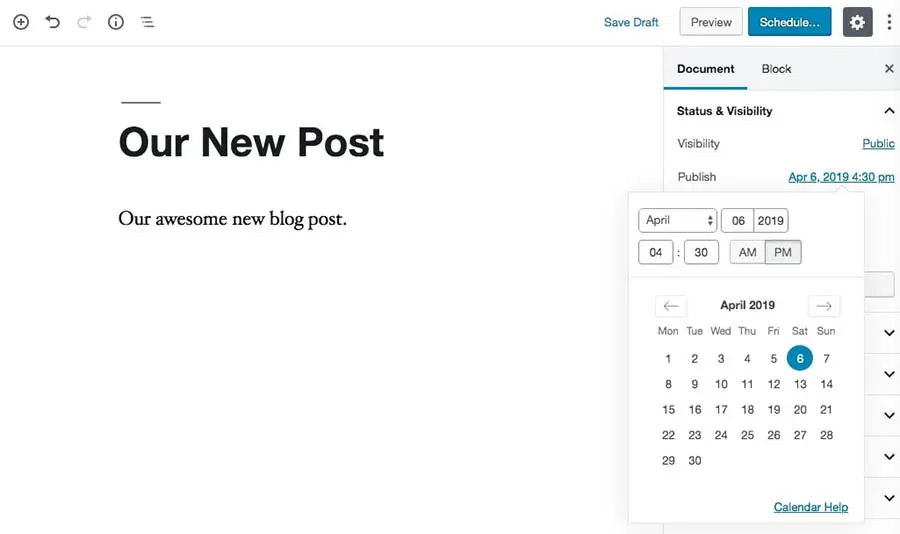
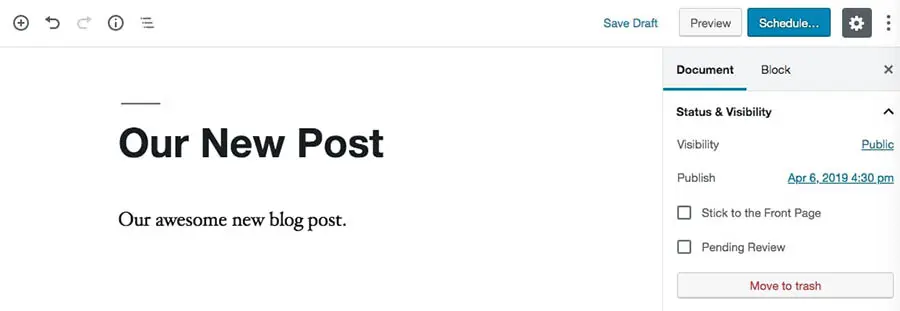
If you click the link, it will open a calendar where you can select a future date and time. Once you’ve done so, Immediately will change to your specified publication time in the sidebar. Click anywhere outside the calendar to close it.
When you’ve given your post one final read-through and are sure it’s ready to go, click on the blue Schedule button at the top of the editor.
You’ll have the chance to review and edit your post’s publication date and time and set its visibility status to Private, Public, or Password-Protected. WordPress will also point out any last-minute items you may want to address.
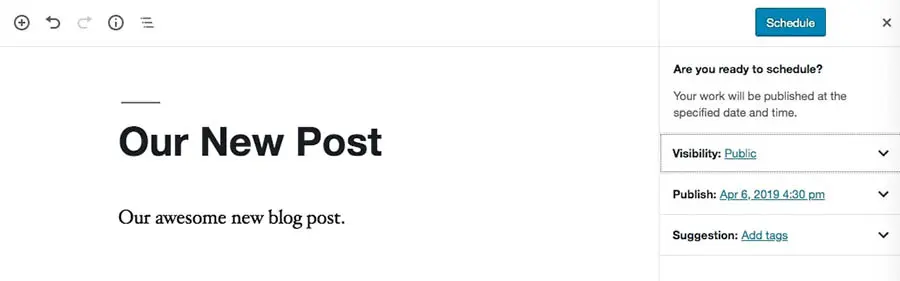
When you’re happy with your settings, select the blue Schedule button again.
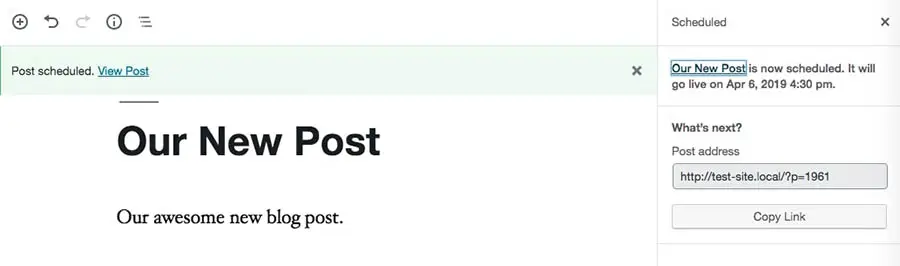
You should receive a final notification that your post has been set to publish at the date and time you chose. That’s all you have to do!
2. Set Up Scheduled Posts in the Classic Editor
If you’re still using the Classic WordPress Editor, never fear. You can still easily set up scheduled posts. Simply head over to the post you want to schedule and check out the Publish widget.
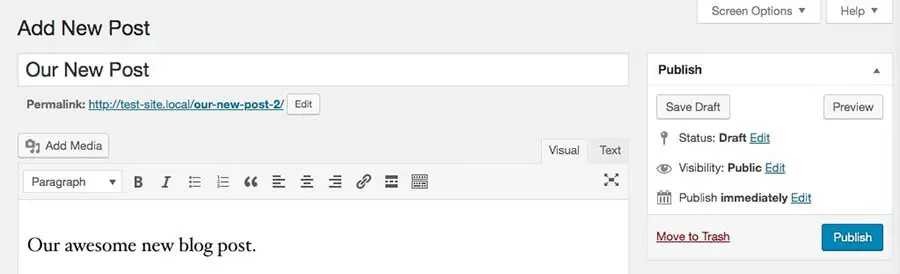
Just like in the Block Editor, your post will be set to publish immediately by default. Click on Edit next to Publish immediately, which lets you access the date and time settings.
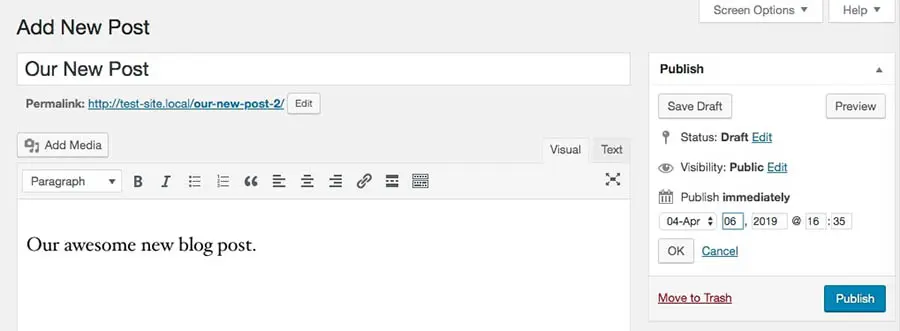
There’s no fancy calendar here, but it’s still easy enough to set your desired publication date and time. Just make sure to use the 24-hour clock.
Then, click on OK when you’re done. After you’ve finalized your post’s details, select the blue Schedule button in the Publish widget.
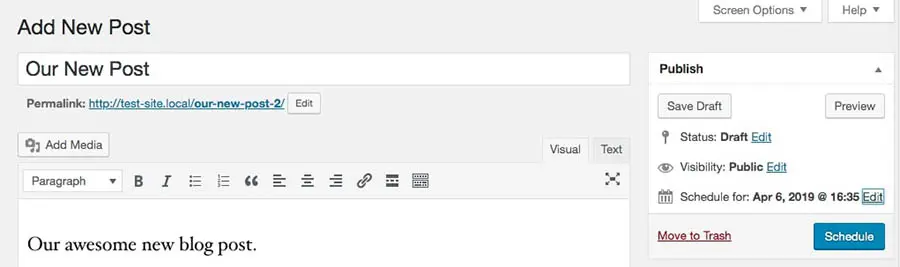
You should receive a notification that your post has been scheduled and see its changed status in the Publish widget.
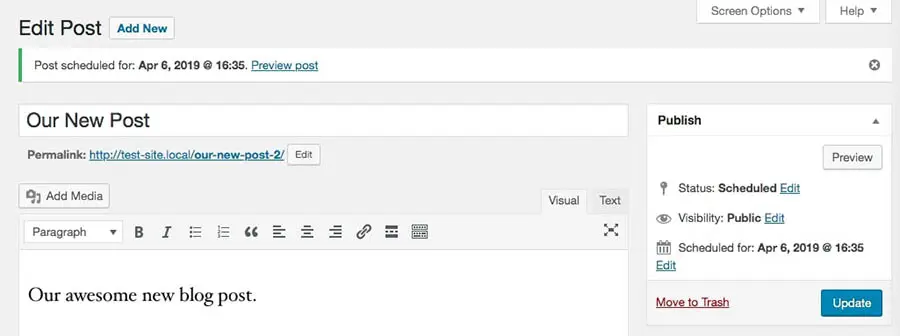
If you need to make any updates, you can do so by clicking on the blue Edit link next to any of the settings. Be sure to hit the Update button afterward.
3. Use a Plugin to Schedule Posts
If you want to access more advanced automatic publishing features, you may want to consider WordPress plugins. Let’s look at two of the best options.
WP Scheduled Posts
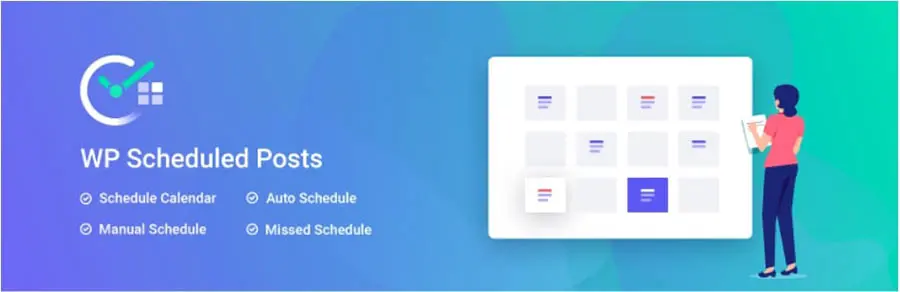
WP Scheduled Posts adds an editorial calendar to your WordPress dashboard. You can drag and drop posts to schedule them so setting publication dates is fast and easy. This tool also helps you keep track of all your authors if you have multiple people creating content.
You can even add new posts right in the calendar — save those great ideas you have for a future date. The plugin is free to download, but if you opt for a premium plan, you’ll gain access to additional features including the ‘Auto Scheduler’ and ‘Missed Post Handler.’
CoSchedule
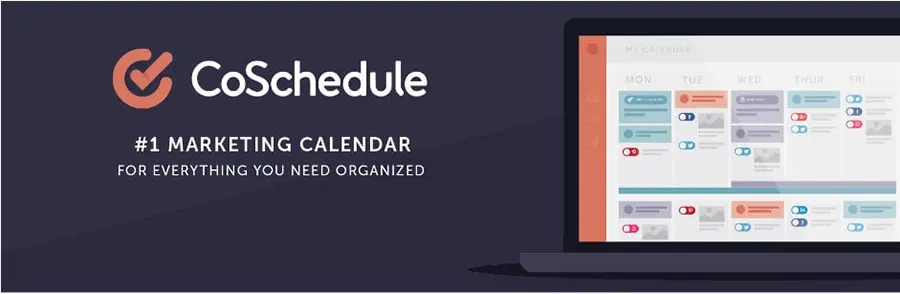
If you need a more complete content and marketing scheduling system, check out CoSchedule. While you’ll still have to follow the steps for scheduling posts in the WordPress editor as described above, with CoSchedule, you can manage your scheduled blog posts, social media content, and marketing campaigns from a single calendar right in your WordPress dashboard.
You can download the CoSchedule WordPress plugin for free, but you won’t be able to do anything with it unless you also have a paid CoSchedule account. Plans for those accounts start at $80 per month.
Troubleshooting Issues With WordPress Scheduled Posts
Scheduling posts in WordPress is simple, but there are a few issues you may run into. Fortunately, the most common problems have easy solutions.
Setting the Right Timezone
First, it’s important to make sure that when you’ve chosen a publication date and time, they’re set to the right time zone.

You can check your site’s time zone settings by going to Settings > General in your WordPress dashboard, and scrolling down to Timezone. There, you can see the time zone your site is currently set to, and change it if need be.
Handling Missed Posts
You’ll also want a failsafe in case something goes wrong, and a post you’ve slated for publication doesn’t go live as expected. For this, we suggest looking into a plugin such as Scheduled Post Trigger, which checks for and publishes missed scheduled posts.
This way, if your post doesn’t publish automatically for whatever reason, the plugin can still get your content up on your site (even if it’s a little late). If you’re using the premium version of WP Scheduled Posts, its ‘Missed Posts Handler’ feature works in much the same way.
Unscheduling Posts
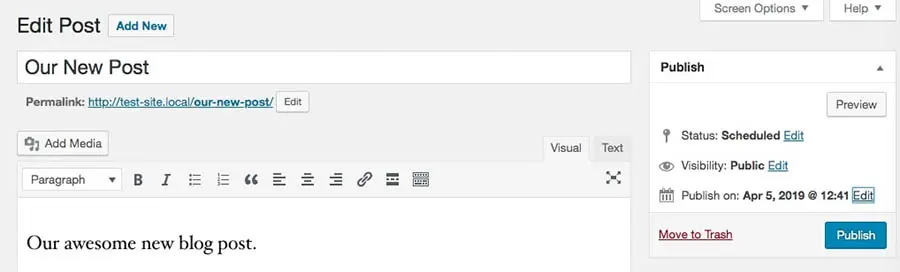
Finally, there may be times when you’ve set up a post for future publication, and then you decide you want to publish it right away instead. To do this in the Classic Editor, head over to the Publish widget and click on Edit next to the date by Scheduled for. Change the settings to the current date and time, and then select OK.
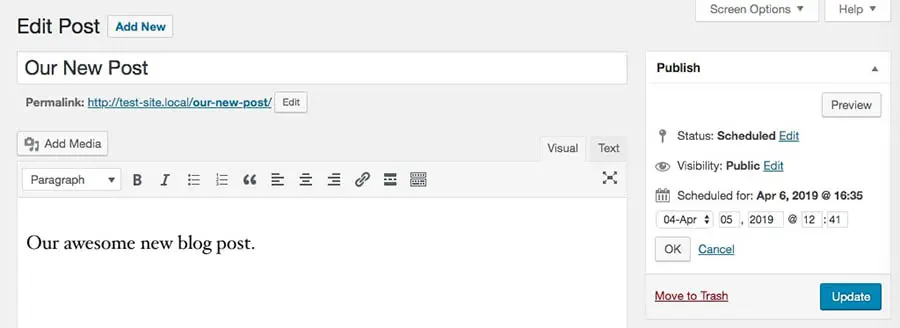
Click on the blue button, which will say either Update or Publish. Once you do, you should receive a notification that your post has been published.
In the Block Editor, this functionality works much the same. Change the scheduled date and time to the current moment, and click outside the calendar to exit the feature. The blue button at the top of the editor will now say Publish.
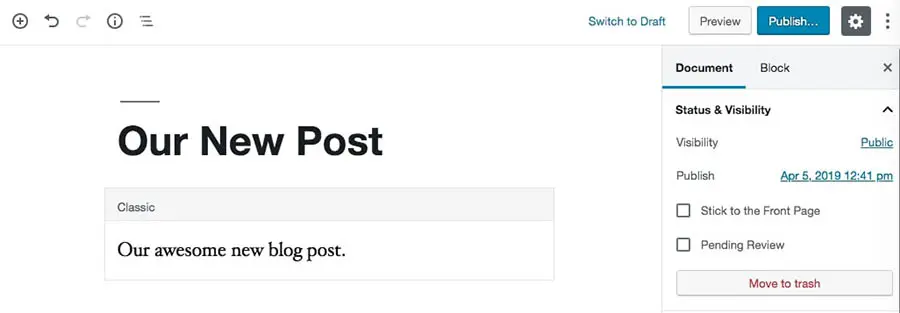
Select it, and WordPress will put the post up on your site immediately.
Keep Us Posted
Posting consistently on your WordPress blog is key to your site’s success. Scheduling your blog posts in advance can help you gain more loyal followers, while also making it easier for you to manage your site over time.
Do you have any questions about how to schedule posts in WordPress? Follow us on Twitter and let us know!