
It’s a Friday afternoon, your team’s pull request is sitting in review, and your laptop pings with a familiar message: GitHub is having issues again.
Maybe Actions are stuck.
Maybe `git push` returns a 500 error for the third time this month.
The thread in your team chat already has eight messages.
The first time this happens, you laugh about it. The second time, somebody links the GitHub status page, and you all go get coffee. The third time, usually right before a release window, somebody finally types the question out loud: “Should we just run our own?”
For most teams, the honest answer is no. GitLab.com Free covers small teams comfortably, and the operational tax of running your own version-control server is not zero.
It’s the kind of trade you only make for a real reason.
If your team has one of those reasons, such as a customer contract that forbids third-party SaaS, a compliance boundary, or a seat-license bill that’s starting to look ridiculous, self-hosting GitLab CE is the cleanest move you can make. It’s open source, runs on a single VPS, and, once tuned, maintenance takes about an hour a month.
At DreamHost, we’ve hosted countless self-managed servers, and we keep seeing a pattern: developers who succeed with self-hosted GitLab pick the right plan up front, get the Secure Shell Protocol (SSH) and Domain Name System (DNS) prep right, and then resist the urge to keep tinkering once it’s stable.
Why Would You Self-Host GitLab Instead of Using GitLab.com?
You self-host GitLab when GitLab.com or GitHub.com can’t meet your privacy, compliance, or cost-control needs. For most other teams, the hosted option is a better trade.
Three real reasons hold up under scrutiny:
- Privacy and data sovereignty: Your source code lives on infrastructure you manage and patch on your own schedule. No third-party access, no shared platform, no breach blast radius beyond your own server.
- Compliance: Regulated industries like healthcare, finance, and government often need data-residency control. Self-hosted GitLab CE is the simplest way to keep code inside a controlled boundary.
- Cost control at scale: GitLab.com charges per active user. According to GitLab’s pricing page, Premium costs $29 per user per month, while Ultimate pricing is available only on request. A 50-person team on Premium runs $17,400 per year before add-ons. A self-managed VPS plus an hour of monthly maintenance often costs less.
If you’re a two-person team with no privacy or compliance reasons, the right answer is GitLab’s free tier. (Yes, we know that sounds funny coming from a hosting company).
With self-hosting, you’re trading a monthly SaaS bill for ongoing operational time. That’s a worthwhile swap only if you have a good reason to make the switch.
Here’s where this option makes sense and where it doesn’t:
| Scenario | Best fit |
|---|---|
| Privacy or compliance requirement | Self-hosted GitLab CE |
| Team larger than ~30 active users | Self-hosted is often cheaper |
| Code is your IP, and you want it local | Self-hosted GitLab CE |
| 2-5 person team, no compliance needs | GitLab.com (free) |
| You don’t want to patch a server | GitLab.com |
GitLab Community Edition is free under an MIT-style open-source license. There’s no user limit, no feature gate on the basics, and no upsell prompts. The whole platform is yours to run.
What Are the Hardware Requirements for GitLab CE?
GitLab CE has clear hardware thresholds, and getting them right is the difference between a snappy install and one that thrashes through swap memory (disk space your operating system uses when RAM fills up).
According to GitLab’s official installation requirements, sizing is expressed in requests per second rather than fixed per-user tiers. The published baseline is 8 vCPU and 16 GB of RAM for up to 1,000 users (about 20 requests per second). Smaller teams can run on less, down to a documented floor of 2 GB of RAM plus 1 GB of swap for evaluation, though performance suffers below 4 GB.
A fresh GitLab install consumes around 4-6 GB at idle. Once CI/CD jobs start running, memory spikes fast. So plan for headroom — or plan for slowness.
As far as storage goes, GitLab’s official baseline is 40 GB plus repository size, but 50 GB is a safer starting point in practice. Repositories grow, and build artifacts pile up. NVMe, a faster type of solid‑state storage, makes a noticeable difference on Git operations and CI cache reads.
Here’s how those thresholds map to DreamHost’s VPS hosting tiers:
| Use Case | Recommended RAM | DreamHost VPS tier |
|---|---|---|
| Evaluation / personal | 4 GB RAM | Stack 4 |
| Small team, light usage | 8 GB RAM | Stack 8 |
| Up to ~1,000 users (GitLab’s published baseline) | 16 GB RAM | Stack 16 |
| Running CI/CD runners on the same box | + 2-8 GB RAM on top of your tier | Size up (e.g. Stack 16 → Stack 32) |
The right starting point for most teams running real CI/CD pipelines is Stack 16. That sounds like overkill until you watch the first build kick off and Sidekiq, Postgres, and a runner all spike at once.
16 GB of RAM gives you enough headroom for GitLab’s stack of services (roughly 4 to 6 GB at idle on a default install) and a couple of CI workers (1-2 GB each) to run hot at the same time without anyone in the team chat noticing.
How Do You Prepare Your VPS Before Installing GitLab?
Spend 10 minutes on prep — it pays off the first time you reboot. Simply follow these steps:
- Provision the VPS: Pick Ubuntu 22.04 LTS or 24.04 LTS. Both are supported by GitLab’s official Omnibus packages (the bundled all-in-one installer GitLab ships) and have years of free security updates ahead of them.
- Point a domain to the server’s IP: Create an A record (the type of DNS record that maps a domain to an IP address) and let it propagate for at least 15-30 minutes before installing. Without it, the automatic SSL setup will fail because the certificate authority has nowhere to validate.
- Update packages: Connect to the VPS using `ssh root@your-server-ip` and run `sudo apt update && sudo apt upgrade -y`.
- Install dependencies: Run `sudo apt install -y curl openssh-server ca-certificates perl postfix`. The `postfix` package is a mail server that handles outgoing email so GitLab can send merge-request notifications and password resets.
When the installer asks about mail configuration, choose Internet Site and use your domain. This gets GitLab sending mail immediately.
For production: skip local postfix and configure an SMTP relay in gitlab.rb instead. VPS IPs are frequently on spam blocklists, and password-reset emails routed through local postfix will often land in spam. SendGrid, Mailgun, and DreamHost’s outbound relay all work — see GitLab’s SMTP configuration docs. - Open the right ports: Configure a firewall using UFW (Ubuntu’s built-in firewall tool) and allow ports 80, 443, and 22.
sudo ufw allow http
sudo ufw allow https
sudo ufw allow ssh
sudo ufw enable
How Do You Install GitLab CE on Ubuntu Using the Omnibus Package?
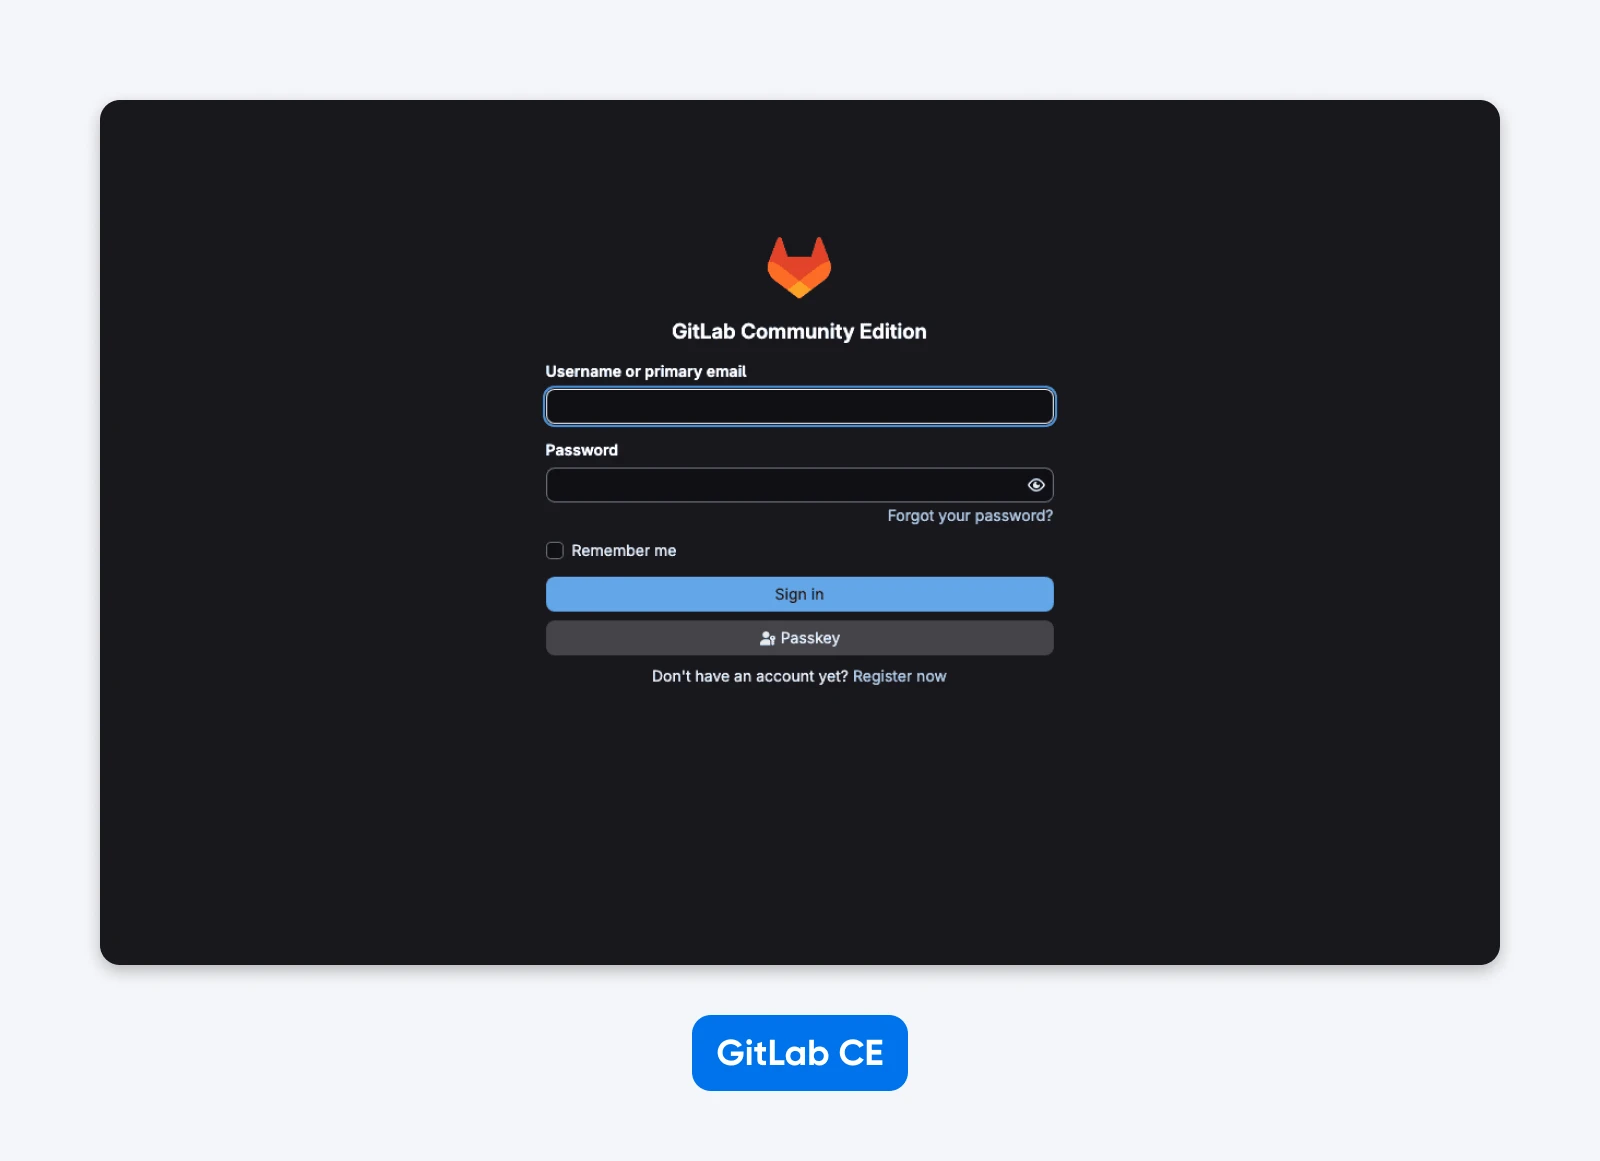
Add the GitLab CE repository:
curl -sSL https://packages.gitlab.com/install/repositories/gitlab/gitlab-ce/script.deb.sh | sudo bashThen, install GitLab CE with your domain set as the external URL:
sudo EXTERNAL_URL="https://gitlab.example.com" apt install gitlab-ceSetting `https://` here tells GitLab to automatically request a Let’s Encrypt certificate during installation, as long as ports 80 and 443 are open and DNS is pointed correctly. If either of those isn’t ready, the install completes but SSL fails — and you spend the next thirty minutes troubleshooting something that isn’t actually broken.
Next, wait for the reconfigure step.
GitLab runs `gitlab-ctl reconfigure` (the command that applies any changes to GitLab’s configuration) automatically at the end of install. It takes five to 10 minutes. And yes, the reconfigure step really does take that long.
Get the initial root password:
sudo cat /etc/gitlab/initial_root_passwordThis file is auto-generated and gets deleted in 24 hours, so grab the password and log in. Visit your domain in a browser, sign in as `root`, and change the password immediately.
Finally, verify the install.
From the GitLab welcome screen, create a test project. Push a commit to it from your local machine. If the push succeeds and the file shows up in the web UI, the install is healthy.
If the reconfigure step hangs, check `tail -f /var/log/gitlab/reconfigure/*.log`. That’s where the actual error lives.
How Do You Lock Down a Self-Hosted GitLab Instance?
GitLab ships with reasonable defaults, but they’re tuned for an open community server, not your private team instance. Spend an hour here.
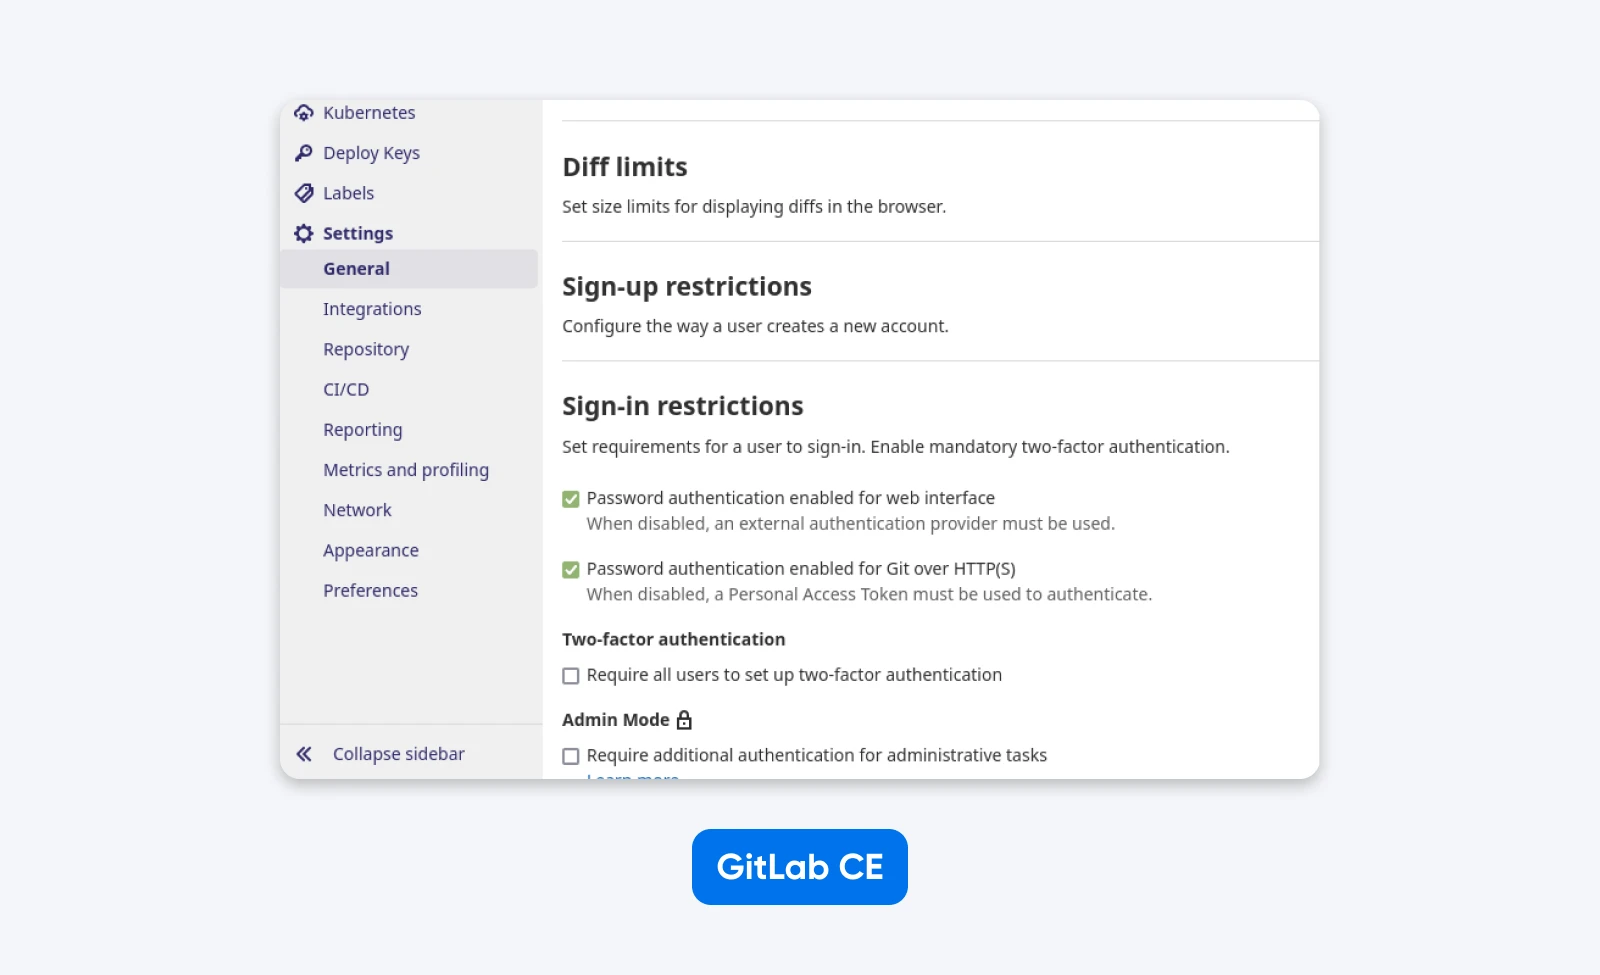
- Disable open sign-up. Open sign-up is on by default. In the Admin Area, navigate to Settings > General > Sign-up restrictions and turn off the “Sign-up enabled” checkbox. Otherwise, anyone with the URL can create an account.
- Enable two-factor authentication. Go to Admin Area > Settings > General > Sign-in restrictions and enforce 2FA for all users. Lower the grace period from the default 48 hours to 8 hours.
- Restrict project creation. Set Default Project Creation to Maintainers or No one, depending on how locked down you want it.
- Verify SSL renewal. GitLab auto-renews Let’s Encrypt certificates by default. To confirm, run `sudo gitlab-ctl renew-le-certs` once and check the output.
- Lock down SSH on the VPS itself. Disable root password login, allow only SSH key authentication, and (if you can swing it) move SSH off port 22. A self-hosted Git server is only as secure as the box underneath it.
For an in-depth version, GitLab published a Hardening Guide covering authentication, encryption, and instance settings. Read it once, apply what matches your threat model, and move on.
How Do You Back Up and Restore a Self-Hosted GitLab Instance?
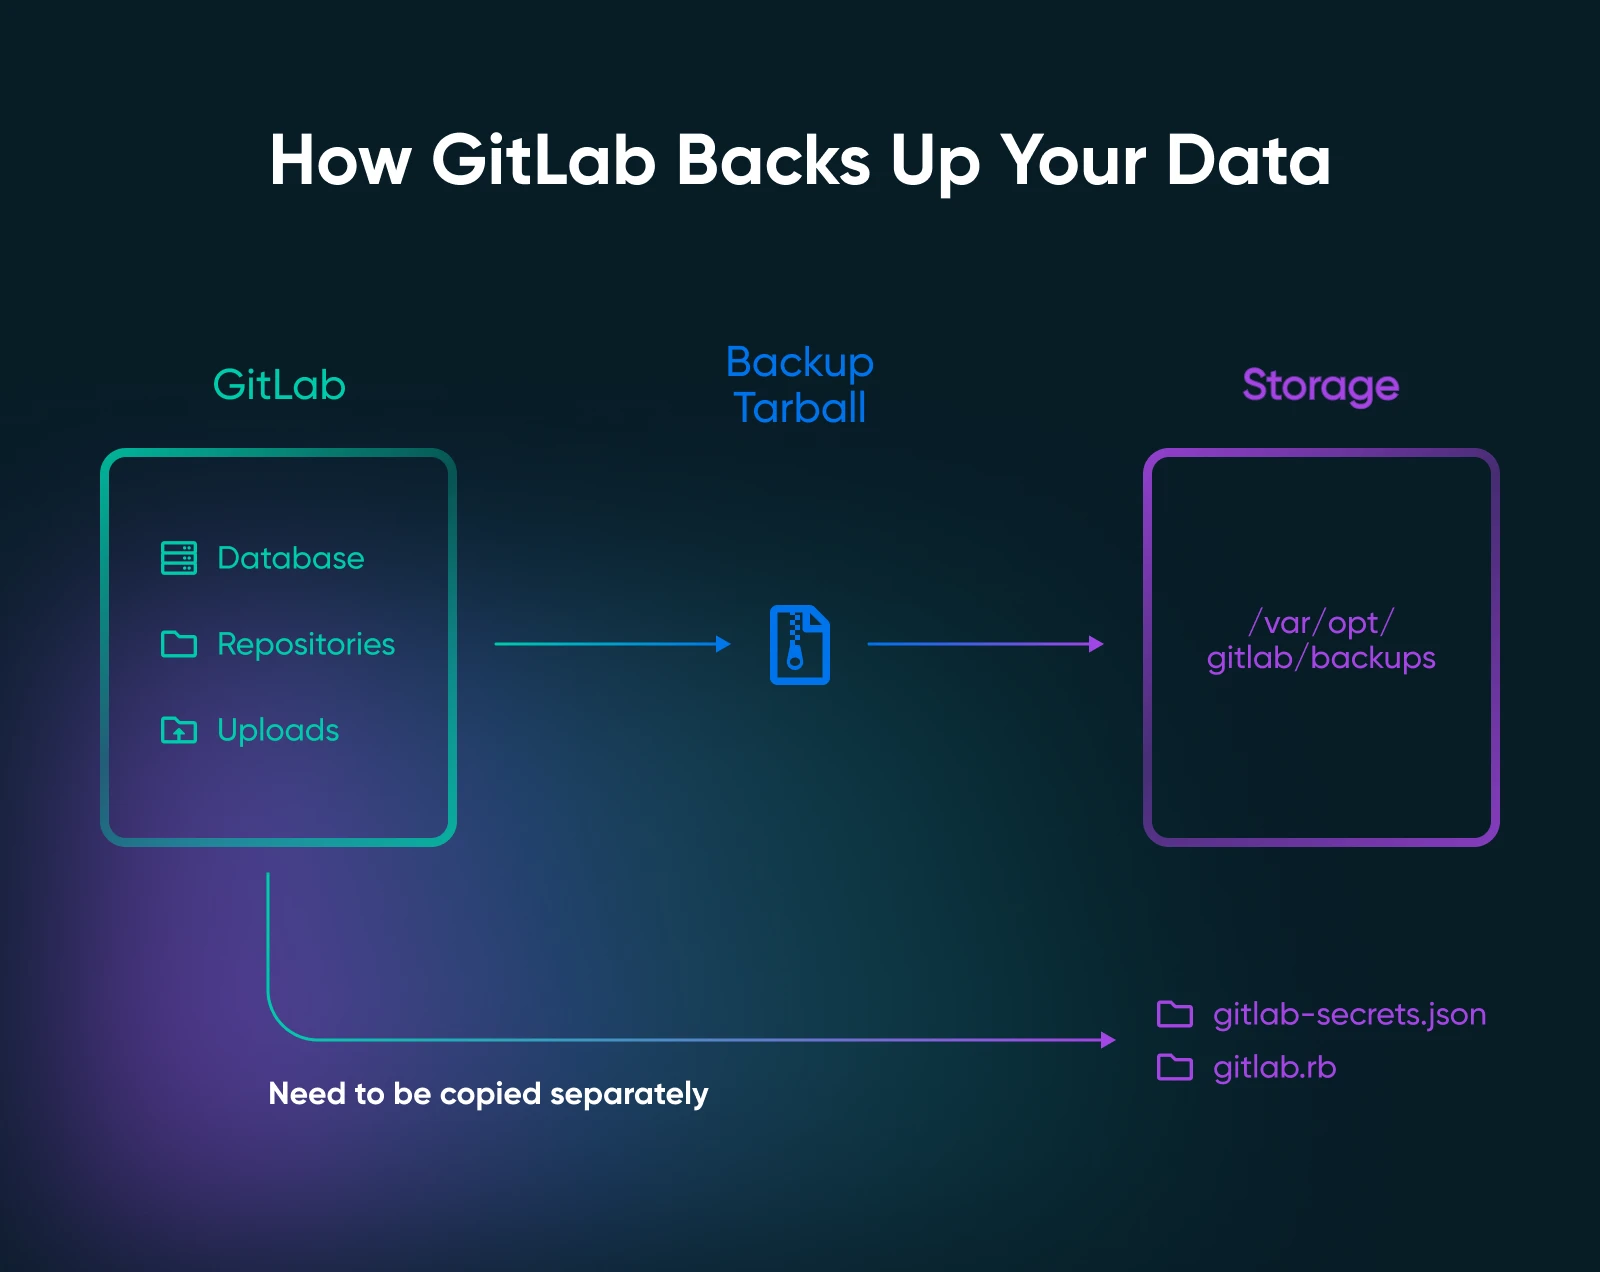
GitLab includes a built-in backup tool. The first time you need it, you’ll be glad you set it up.
Create a backup:
sudo gitlab-backup createThis drops a tarball into `/var/opt/gitlab/backups`. Schedule it daily via cron with a seven-day retention window. Run sudo crontab -e and add these two lines:
0 2 * * * /opt/gitlab/bin/gitlab-backup create CRON=1
0 3 * * * find /var/opt/gitlab/backups -name "*.tar" -mtime +7 -delete
The CRON=1 flag suppresses progress output so that it doesn’t spam cron logs.
Pro tip: the data backup does not include `/etc/gitlab/gitlab-secrets.json` or `/etc/gitlab/gitlab.rb`.
Those files hold the database encryption key, two-factor seeds, and CI/CD variables. The configuration secrets are not part of the regular backup and must be saved separately. Restore data without the secrets file, and two-factor accounts break, encrypted variables turn into garbage, and you spend a long evening figuring out why.
Add this to the same cron job:
sudo cp /etc/gitlab/gitlab-secrets.json /etc/gitlab/gitlab.rb /var/opt/gitlab/backups/A backup can only be restored to the same version and edition (CE-to-CE, not CE-to-EE) of GitLab on which it was created.
Upgrade carefully: don’t restore an old backup onto a freshly installed GitLab without first downgrading the install to match.
Test the restore process at least once. A backup you’ve never tested is just a file.
Is Self-Hosting GitLab Actually Worth It for Your Team?
Self-hosting GitLab is a control decision for most teams. The cost math sometimes works out, but the reason people stick with self-hosting is rarely the line item.
Here’s the honest monthly time cost for a small-team install:
- ~30 minutes of patching – apt upgrades, GitLab minor releases
- ~15 minutes of backup verification – don’t trust a backup you haven’t restored
- ~15 minutes of capacity check – disk usage, RAM headroom
- ~2x if CI/CD runs on the box – A busy runner can double the load
That’s about an hour a month on a slow week, or two on a busy one.
At around $150 per hour, 12 hours of operational time runs about $1,800 — roughly five GitLab.com Premium seats.
A practitioner case study from Mad Devs walks through how their team saves more than $10,000 per year by running self-hosted GitLab CE instead of paying for Premium seats. The savings only materialize once the team is large enough that seat licenses dominate the budget.
That said, self-hosting is the wrong choice for:
- Two- to three-person teams without compliance reasons. GitLab.com Free covers you. The operational time is more than the saved cost.
- Teams without anyone comfortable on the command line. “Comfortable” doesn’t mean sysadmin-grade. It means you can read `/var/log/gitlab` errors without panic.
- Teams whose biggest blocker is hiring, not tooling. Self-hosting takes attention away from the product. If product velocity is the constraint, hosted is the right call.
So, when does self-hosting make sense? Below are a few scenarios:
- Regulated industries with explicit data-residency or chain-of-custody requirements
- EU/UK teams with sovereignty concerns about U.S.-hosted code
- Teams of 30+ where seat licenses dominate the budget
- Customer contracts that forbid third-party SaaS for source code
If your reason is “GitHub charges per seat,” you’ll probably come out ahead. If your reason is “I want to feel in control,” you might find the operational reality less romantic than expected.
Should You Run GitLab CI/CD Runners on the Same VPS?
For evaluation, yes. For production, no.
A CI runner on the same box steals memory and CPU from the GitLab UI. The classic symptom is “GitLab feels slow at 9 a.m.,” which usually traces back to a build kicking off the morning’s first pipeline and starving the web frontend. The cleaner setup is a separate small VPS (or a DreamCompute instance) for the runner, registered to the GitLab instance over the network.
If you must keep runners on the same box, bump the VPS to 16 GB.
According to GitLab’s runner system requirements, the runner process itself is light. The workloads it executes are not, and they share the box’s CPU and disk with everything else GitLab is doing.
Ready to Make the Switch?
Back to the Friday afternoon team chat.
If GitHub goes yellow and your team laughs about it again and goes to get coffee, that’s fine.
But if GitHub going down starts to feel like something serious?
Maybe it’s threatening a customer contract? Comes up in a compliance audit? Or the seat-license bill finally crossed the line?
Self-hosting GitLab CE starts to become a totally reasonable option. All it takes is a VPS, a domain, an Omnibus install, and an hour of hardening.
By the next time the GitHub status page lights up, your code will keep pushing just fine.

Own Your Entire Stack. Apps, AI, Databases, and More.
Keep every credential and conversation on a server you control, with NVMe speed and unmetered bandwidth built in.
Explore VPS Hosting PlansFrequently Asked Questions About Self-Hosting GitLab
Is there anything else you want to know about self-hosting GitLab on a VPS? Below are the answers to some commonly asked questions.
Is GitLab CE free for self-hosting?
Yes, GitLab CE is free for self-hosting under an MIT-style open-source license. There’s no user limit and no per-seat pricing. The only costs are the VPS itself and the operational time to maintain it.
DreamHost’s VPS Stack 4 is a reasonable starting point for evaluation. Production teams typically run on Stack 8 or Stack 16.
How much RAM does GitLab CE actually need?
Plan for 16 GB of RAM for up to 1,000 users, which is GitLab’s published baseline (about 20 requests per second). Smaller teams can run on less, down to a documented floor of 2 GB plus 1 GB of swap for evaluation. Either way, if you run CI/CD pipelines on the same box, plan for 16 GB.
Can I self-host GitLab on a 4 GB VPS?
Yes, you can run GitLab CE on 4 GB, but it will feel sluggish under any real load. GitLab documents a 2 GB + 1 GB swap fallback for memory-constrained environments — that path is for evaluation, not production. For a team actively pushing code and running pipelines, 8 GB is the practical minimum.
How long does it take to install GitLab CE on a VPS?
About 10 to 15 minutes for the package install, plus roughly an hour for prep and hardening, so about 90 minutes start to finish. The install itself is mostly waiting on the reconfigure step.
The hardening pass, which requires disabling open sign-up, enforcing two-factor authentication, and locking down project creation, takes the remaining hour and is non-optional for any production instance.
Is self-hosting GitLab worth it for a five-person team?
Probably not, unless you have a privacy or compliance reason. GitLab.com Free covers up to five users with unlimited private projects and 400 CI/CD minutes per month. The operational time of self-hosting outweighs the saved per-seat cost at that team size.
Self-hosting starts to pay off, in pure cost terms, around 30+ active users.
What’s the difference between GitLab CE and GitLab Community Edition?
GitLab CE and GitLab Community Edition are the same product. CE is the standard abbreviation. The “Self-Managed” terminology refers to where you run it (your infrastructure), not which edition.
GitLab Community Edition is open-source. GitLab Enterprise Edition (EE) adds paid features on top of the same code base.
Where does GitLab CE differ from GitLab EE?
GitLab CE is the free, open-source edition. GitLab EE uses the same code base, plus paid features that activate when you upload a license file.
The practical difference comes down to the following:
- CE is MIT-licensed and fully functional. Source control, merge requests, issues, basic CI/CD, container registry, the works.
- EE adds enterprise features behind a license. Think epics, advanced compliance frameworks, value-stream analytics, multiple approval rules, and advanced security scanning. Per GitLab’s self-managed feature comparison, the gap matters mostly for organizations with formal change-management processes.
- You can install EE without a license, and it functions as CE until licensed. That’s how most teams hedge against a future need to upgrade.
- You cannot downgrade EE to CE cleanly. Plan accordingly.
For most self-hosting teams, CE is sufficient. If your reason is privacy or cost, EE features rarely change the calculus.
How do I keep my self-hosted GitLab instance updated?
Run `sudo apt update && sudo apt upgrade gitlab-ce` to apply security patches. Monthly cadence is the practical floor for a production instance. Always create a backup before upgrading.
Major version upgrades must be done sequentially — you cannot skip major versions. Going from 16.x to 18.x requires upgrading to 17.x first, then 18.x. Skipping a major version will break database migrations. Always check the GitLab upgrade path tool before upgrading, and create a backup immediately before each step.
Where does DreamHost fit into self-hosted GitLab?
DreamHost’s VPS Hosting provides the root-access Linux server GitLab CE installs onto. The Stack 16 plan (16 GB RAM) matches GitLab’s official requirement for up to 1,000 users, with headroom for active CI/CD pipelines.
