
Picture this: You’re in a Zoom meeting, and your coworker joins — but he’s accidentally added a filter that makes him look like an adorable puppy and he doesn’t know how to remove it. It’s a viral video in the making, but no one is recording the call. You have to at least take a screenshot to share in the Watercooler Slack channel so everyone at the company can get a kick out of this, but there’s just one problem: You don’t know how to take a screenshot on a Mac.
Taking a screen grab on a Mac computer is essential for more than just capturing hilarious Zoom faux pas. You can take screenshots to share information with colleagues, show examples of bugs — you can even mark up your screenshots to make visual instructions. And MacOS makes screenshots easy with keyboard shortcuts you can learn in minutes.
Mockup
A mockup is a static design used to showcase how a website or an application might look. People use mockups to help evaluate potential designs without coding the actual application or site.
Read MoreSo here’s your chance to never miss another hilarious moment without documenting it — read on to learn how to take a screenshot on a Mac (plus some other time-saving shortcuts all Mac users should know.
4 Ways to Take a Screenshot on a Mac
There are actually many different ways to take screenshots on a Mac, depending on the type of screenshot you need. All of these use Apple’s built-in screenshot tool, so there’s no need for third-party apps or tools.
For each type of screenshot, you’ll press command. Then, while still holding it down, press shift and a number.
| Command + Shift + 3 | Screenshot your entire screen |
| Command + Shift + 4 | Screenshot a selected portion of the screen |
| Command + Shift + 5 | Open the screenshot menu |
| Command + Shift + 6 | Screenshot the Touch Bar, if your Mac has one |
Check out the different types of screenshots below for the keyboard shortcuts and some more information about each.
How to Screenshot Your Entire Screen
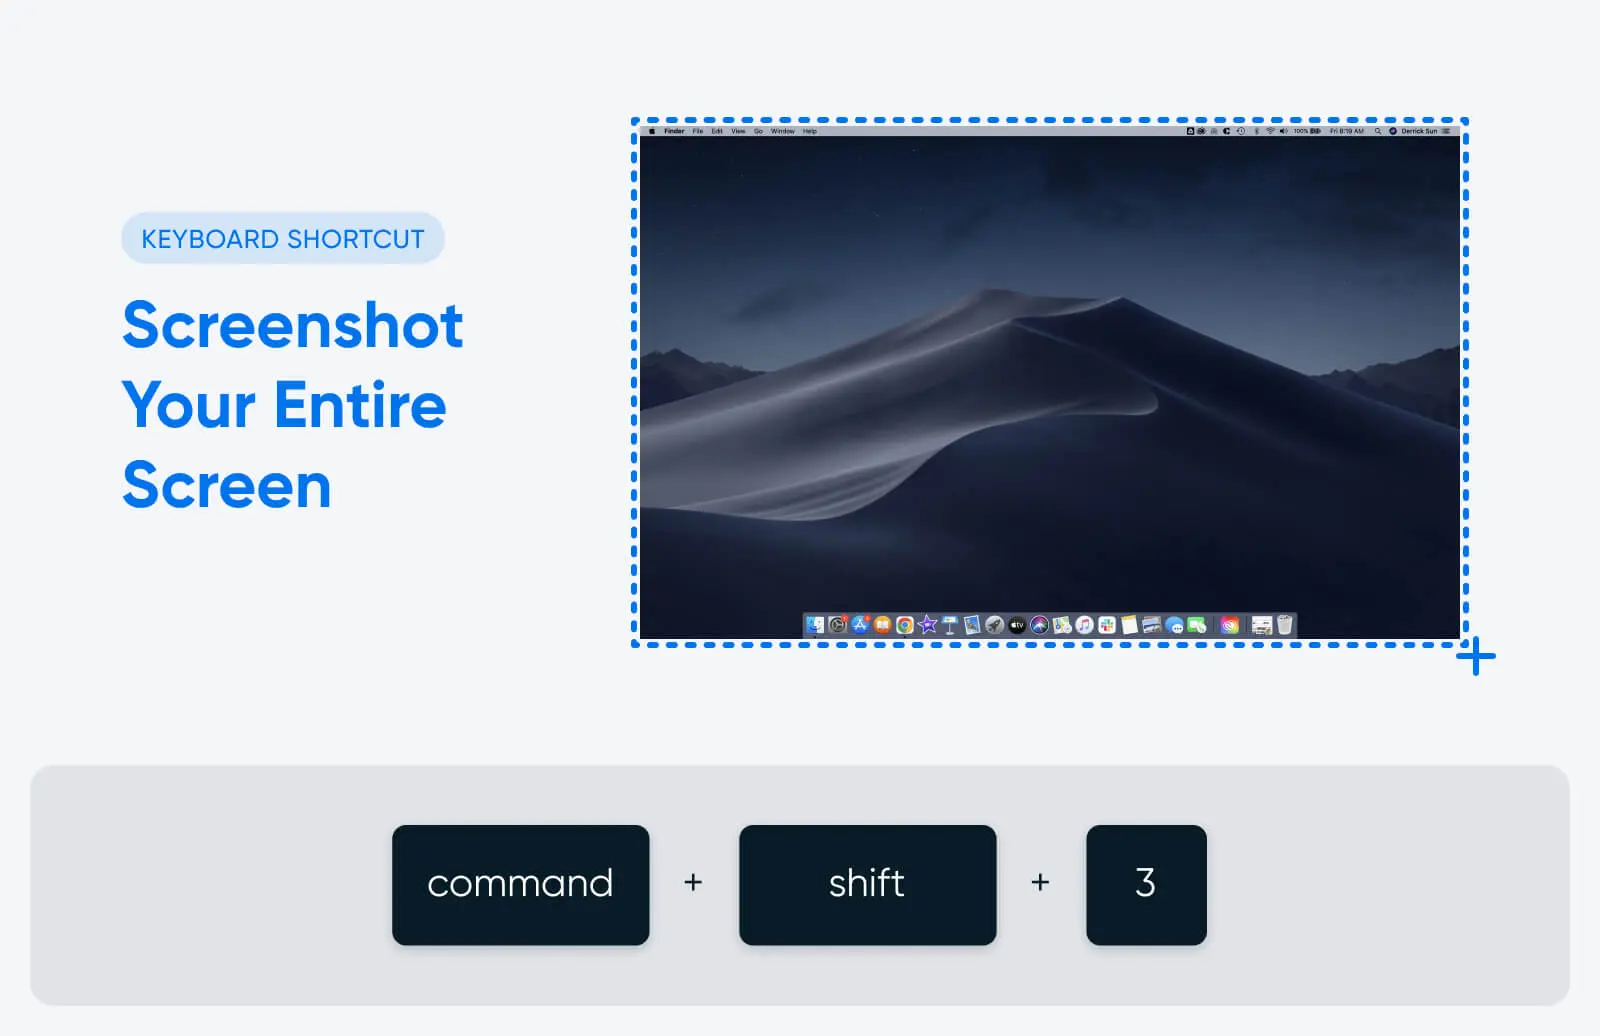
If you need a screenshot of your whole screen, use this shortcut:
Command + shift + 3
This shortcut will work whether you’re in full-screen mode or have multiple windows visible on your screen. Note that if you’re using multiple monitors, this shortcut will take and save a screenshot of each one simultaneously.
How to Screenshot Part of Your Screen
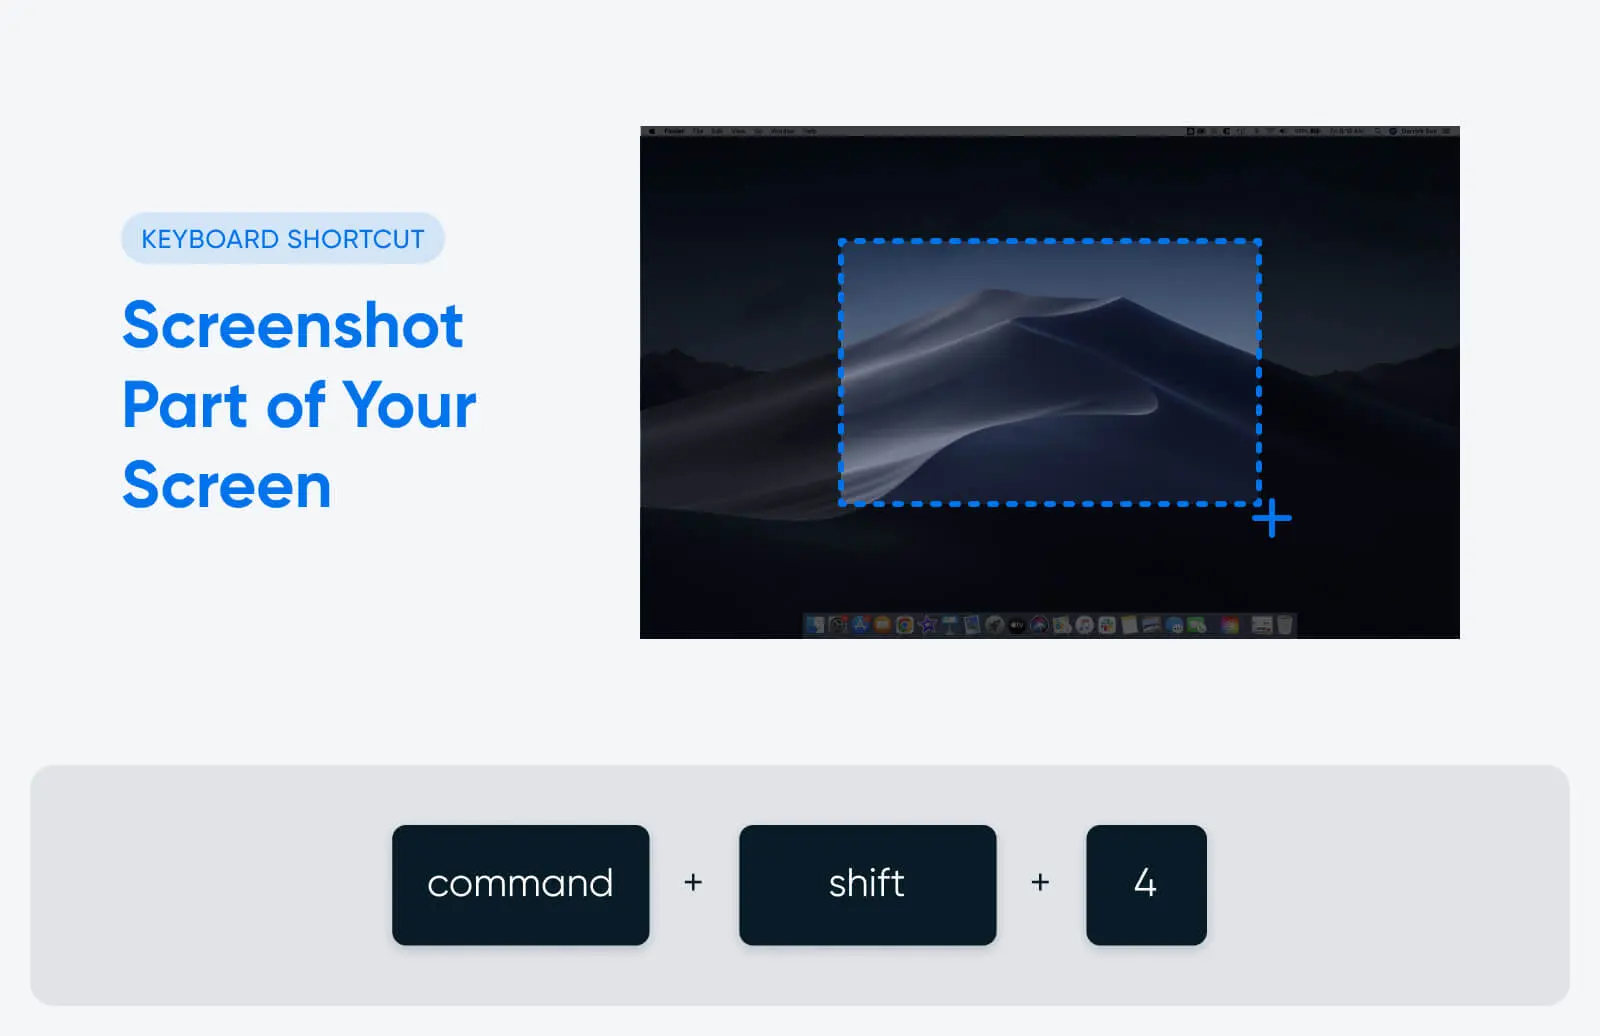
If you don’t need a screenshot of the entire screen, but rather a selected area or part of the screen, use this shortcut:
Command + shift + 4
Once you use the shortcut, your cursor will turn into a crosshair. Use your mouse button or trackpad to click and drag the crosshair to select the part of the screen you want to capture. Let go when you have the total area you want inside the screenshot box, or press the Esc key to cancel the screenshot.
There are a few more ways you can use this shortcut:
- Press Command + shift + 4 and then hit the spacebar. This will turn your mouse pointer into a camera icon, and instead of clicking and dragging to select an area for your screenshot, you can click on a specific window to capture it.
- After clicking and dragging to create your screenshot area, press and hold the spacebar. This will lock the size and shape of the box. You can then drag it anywhere on the screen, and release the spacebar to take your screenshot.
- After clicking and dragging to create your screenshot area, press and hold the Shift key to adjust the height and width of the selected area. Press Shift to toggle between height and width. Let go of the mouse button or trackpad to take the screenshot.
How to Screenshot the Touch Bar

Not every Mac computer has a Touch Bar, but some models of the Macbook Pro come with this backlit toolbar built into the keyboard. It replaces the function keys and serves as a menu bar for volume, brightness, video playback controls, and more.
On a Mac that has a Touch Bar, you can screenshot it by using this shortcut:
Command + shift + 6
This will capture everything showing in the Touch Bar at the time you took the screenshot.
How to Open the Screenshot App
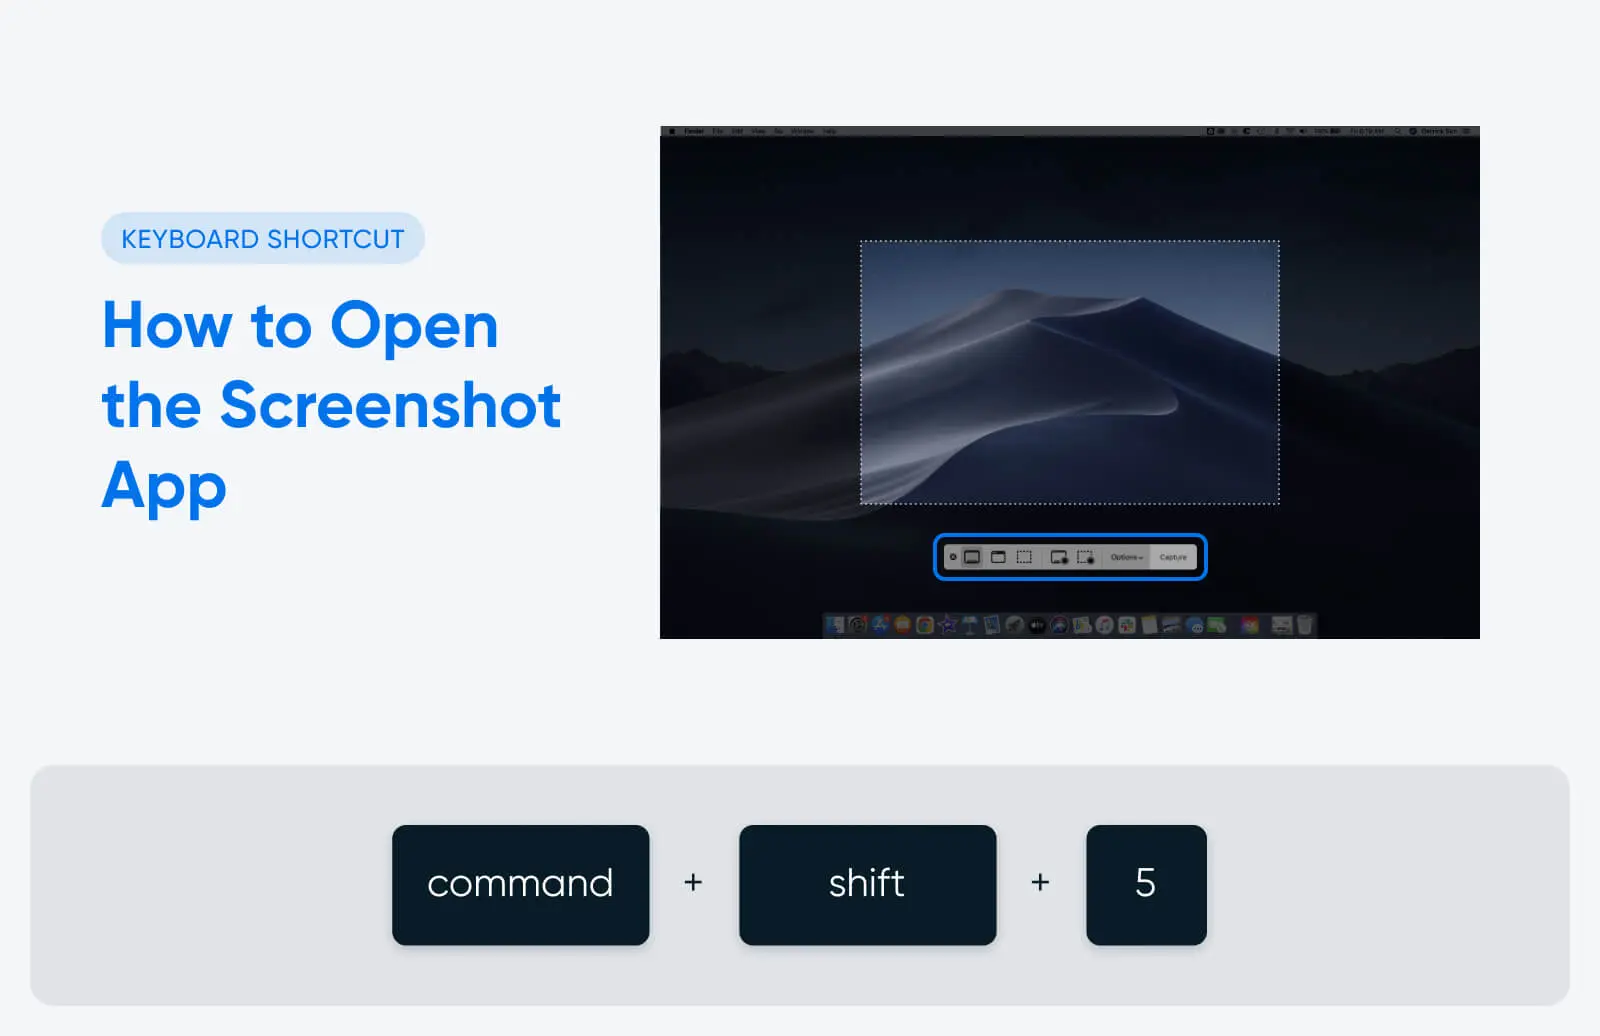
Certain Mac operating systems (including MacOS Mojave, Catalina, Big Sur, Monterey, and Ventura) have a built-in screenshot app that offers even more screen capture features and options.
To open the screenshot app, use this shortcut:
Command + shift + 5
The icons on the left side of the menu allow you to take a screenshot. From left to right, clicking the icons will allow you to:
- Screenshot your entire screen
- Screenshot a selected window
- Screenshot a selected portion of your screen
Once you’ve chosen the option you want, click the “Capture” button on the far right of the menu to take and automatically save the screenshot.
The screenshot app also has an “Options” menu that allows you to customize how your Mac takes and saves screenshots. For example, if you click “Options,” then “Show Floating Thumbnail,” you can customize whether a thumbnail preview of your screenshot appears in the corner of your screen right after taking it. You can also customize how and where your screenshots are saved (but more on that in a minute).
How to Take a Screen Recording on a Mac
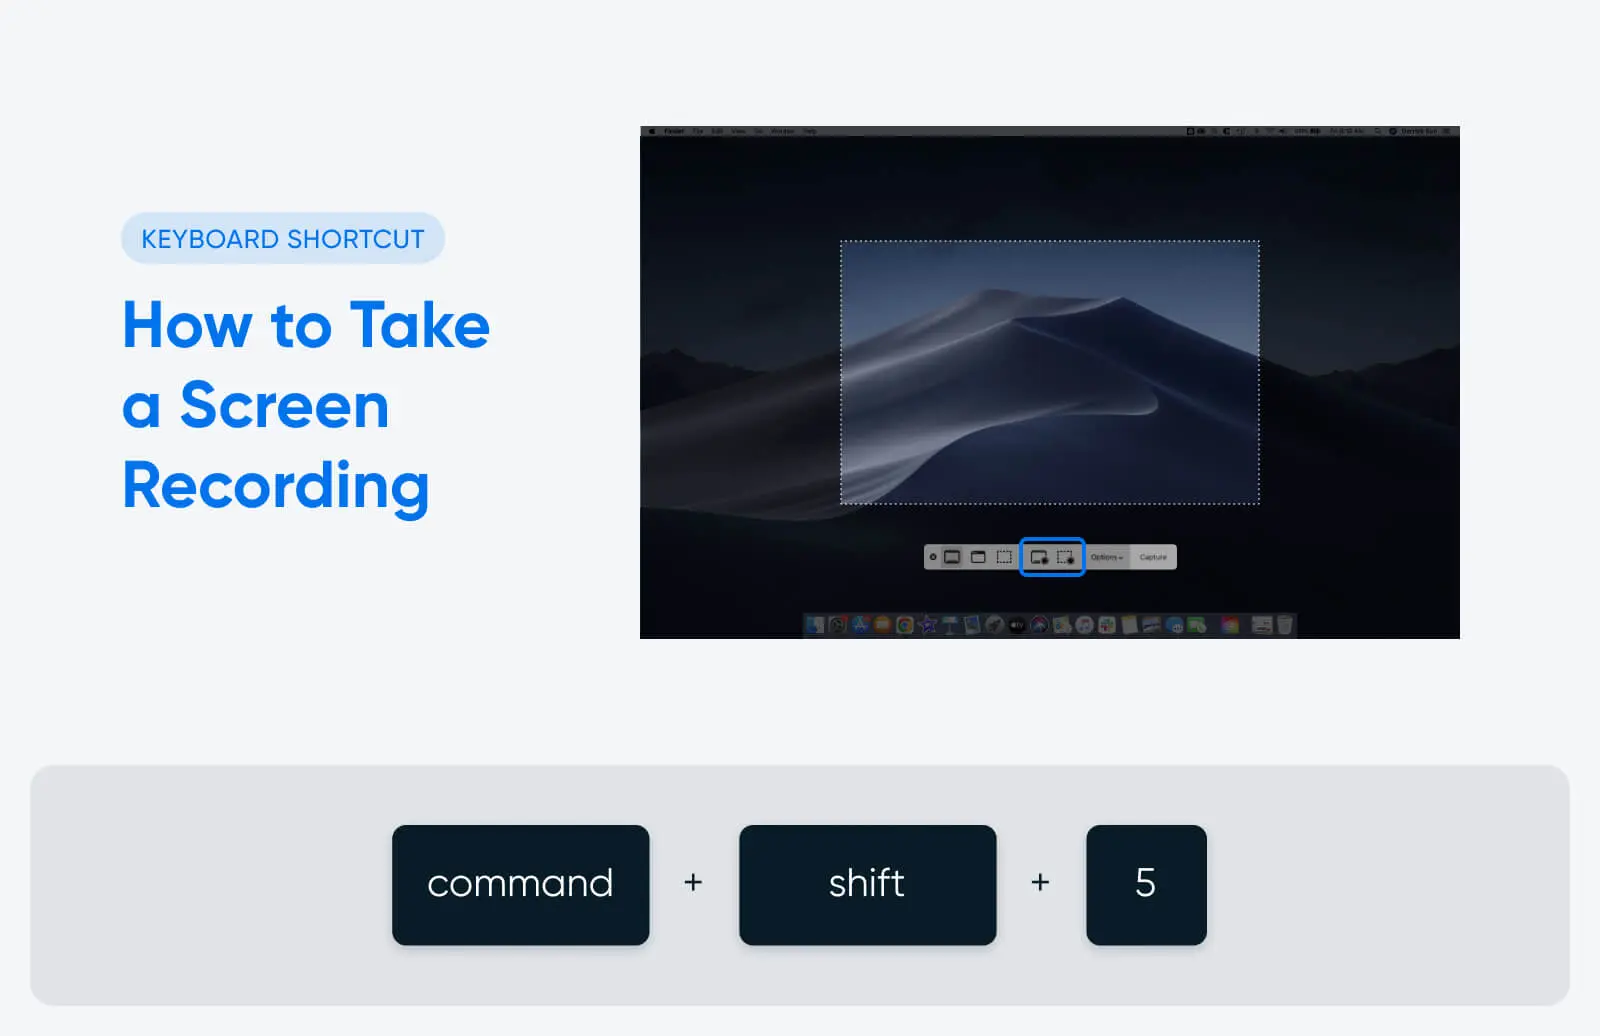
Screenshots are static images of a single moment in time on your screen. Screen recordings are videos that show everything happening on your screen over several seconds or minutes — great for giving someone visual instructions on how to do something cool on their Mac, for example.
To take a screen recording without a third-party tool, you’ll need a Mac with an operating system installed that supports the built-in screenshot app. Open it with this shortcut:
Command + shift + 5
Then, use one of the two buttons immediately to the left of the options menu. The left button will record your entire screen, while the right button will record just a portion of the screen you select.
After you select the type of screen recording you want to take, click on the screen to begin recording. A black circle icon with a white square in the center will appear in the menu bar at the top, right side of your screen. Click this icon when you want to stop recording, and your video will automatically save to your desktop (or wherever you’ve chosen, if you’ve customized your screenshot saving options).
How to Screenshot on an iPhone
To take a screenshot on an older iPhone, press the Home button and the Power button (on the right side of the iPhone) simultaneously.
If you have an iPhone X or newer (without a Home button), press the Side and Volume Up buttons instead.
You’ll see a flash on the screen and hear the sound of the camera shutter if your phone is not on silent. The screenshot will be saved in your Photos app under the “Screenshots” album.
If you take a screenshot on an iPhone and need to share it with a Mac, you can do so wirelessly using Airdrop. Here’s how:
- Open the screenshot in your Photos app.
- Tap the “Share” button (the square with an upward arrow).
- Scroll down and tap on “AirDrop.”
- Make sure your Mac is nearby and has AirDrop enabled.
- Your Mac should appear as an icon in the AirDrop section. Tap on it to send the screenshot.
- On your Mac, a window will appear asking you to accept the AirDrop transfer. Click “Accept” to save the screenshot on your Mac.
Where to Find Your Mac Screenshots After You Take Them
Right after you take a screenshot, it will appear as a preview in the bottom right corner of your screen. You can click the preview to open the screenshot, change the size or crop, add annotation, or make other edits.
By default, screenshots save to your desktop. You can also find them by going to the “Desktop” tab in Finder.
In the screenshot app, you can find an options menu that allows you to change and customize how your screenshots are saved. For example, if you want them to save to a specific screenshots folder you create (instead of your desktop), you can set that up in the options menu. Older Macs that still need to upgrade their operating systems to include the screenshot app will not have this option.
20 Other Mac Shortcuts You Should Know
You can use keyboard shortcuts on your Mac to do much more than just capture screenshots.
Developer Bruno Michels documented an experiment where he found that he could save up to five seconds every single time he did a basic action (like copying and pasting some text) with a keyboard shortcut instead of with his mouse.
After experimenting and measuring, Michels developed a formula to determine how much time he could save over the course of an entire year by utilizing keyboard shortcuts. According to his math, the average person wastes 134 hours per year using their mouse instead of their keyboard to perform most basic computer tasks. That’s a total of 17 work days — almost a full month of work.
With that in mind, these are the time-saving Mac shortcuts that everyone should know:
| Shortcut | Function |
| Command + c | Copy highlighted text or images |
| Command + v | Paste |
| Command + shift + v | Paste without formatting |
| Command + a | Select all |
| Command + z | Undo |
| Command + x | Cut |
| Command + w | Close the window you are active in |
| Command + option + w | Close all open app windows |
| Command + , (comma) | Open Preferences for the app you are active in |
| Command + m | Minimize the front app window to the dock |
| Command + option + m | Minimize all open windows to the dock |
| Command + tab | Tab through all open apps |
| Command + ` | Tab through all windows in the app you are active in |
| Command + space | Open Spotlight to search your Mac |
| Command + L | Navigate to the URL bar in an active web browser |
| Command + option + d | Show or hide the dock |
| Command + control + q | Instantly lock your Mac |
| Option + shift + volume | Adjust your Mac’s volume in small increments |
| Control + command + space | Open the Character Viewer to insert emojis ? |
| Option + command + esc | Force quit an app that’s stopped responding |
Bonus: How to Customize Your Mac Shortcuts
One of the best things about Apple products is that they’re designed to be intuitive, user-friendly, and customizable. That goes for your keyboard shortcuts, too.
If you don’t love Apple’s pre-set keyboard shortcuts, did you know you can create your own?
Just open up System Preferences, then click “Keyboard,” then “Shortcuts.” From there, you can view all your Mac’s built-in shortcuts — and customize them if you want to.
Now, not only do you know how to take a screenshot on a Mac, but you’re also armed with all the knowledge you need to become an Apple power user. Good luck shortcutting, and enjoy all the time you’ll save using your Mac.