Why You Should Update Your PHP Version (& How to Do It)
Regularly updating your site’s copy of WordPress ensures that your website will have a high level of performance and security. If you forget to update your site’s PHP version though, you’re leaving your site vulnerable to both hackers and potential performance bottlenecks. Yikes!
Fortunately, it’s fairly easy to check your site’s current PHP version and proceed with upgrades if it’s outdated. This process can contribute to faster load times, improved security, and support for new functionality.
This article will discuss what PHP is, and why you should consider updating it. Then, we’ll show you how to check your current PHP version and upgrade it if needed. Let’s get started!
Get Content Delivered Straight to Your Inbox
Subscribe to our blog and receive great content just like this delivered straight to your inbox.
An Introduction to PHP
PHP is a programming and scripting language that plays an important role in WordPress development. PHP takes data from the database and converts it into an HTML web page whenever someone visits your website.
As a website owner, you might never need to learn PHP coding. However, after downloading WordPress, you’ll automatically receive all of the PHP files that make up WordPress core:

Although these files have been written for you — and are just waiting for your content, themes, and plugins — there are some scenarios where you can benefit from editing PHP files:
- Developing a custom theme or plugin
- Manipulating files on your server
- Connecting a website to a MySQL database
Since PHP is one of the key languages behind WordPress, learning a little bit about how to work with it will open up the scope of projects that you are able to do.
It’s likely that you won’t have to edit your PHP files. Still, learning the language can be handy for developers who wish to create new software or customizations.
Related: Want to Learn WordPress? Start with These Resources
Why You Should Update Your PHP Version
You might already be familiar with the importance of updating your WordPress, themes, and plugins. It’s also crucial to regularly update your PHP version.
Currently, WordPress recommends upgrading your PHP version to at least 7.4, with even greater performance possible with 8.0. This isn’t required, but older versions may have reached their end of life, meaning they no longer have active support for bug fixes or security updates.
Here are the main benefits of upgrading your sites to the latest PHP version:
- Better security: Older PHP versions can be more vulnerable to cyberattacks.
- Improved performance: Upgraded PHP can improve load times through internal code improvements and reduced memory usage.
- More support: Currently supported versions have active support, with regular bug fixes and security patches.
Take it from our Director of IT Operations, Luke Odom:
“Running a modern, supported, version of PHP is one of the best things you can do for the health, security, and speed of your website. Let’s compare an outdated PHP version to an old car. Sure, it will run and get you from point A to B, but without modern safety sensors, technology, fuel efficiency, and GPS navigation you may find yourself in some trouble a bit more easily.”
Ultimately, your website will be faster and more secure when it’s running on the latest version of PHP. If your web host does not provide automatic updates for their customers, you can follow this manual process.
How to Check Your Current PHP Version
Before you get started, you should check which PHP version is currently supporting your website. If you’ve installed WordPress 5.0 or higher, you can view your PHP version in your dashboard.
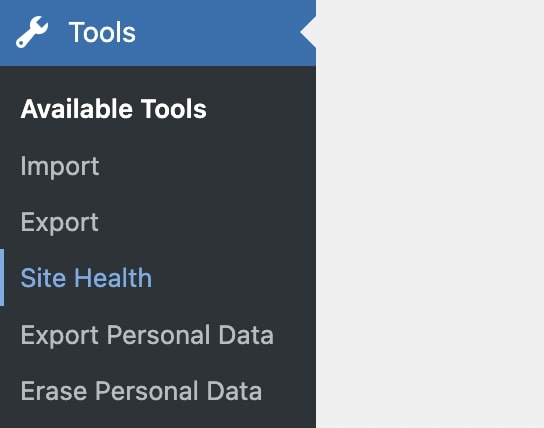
First, go to Tools > Site Health:
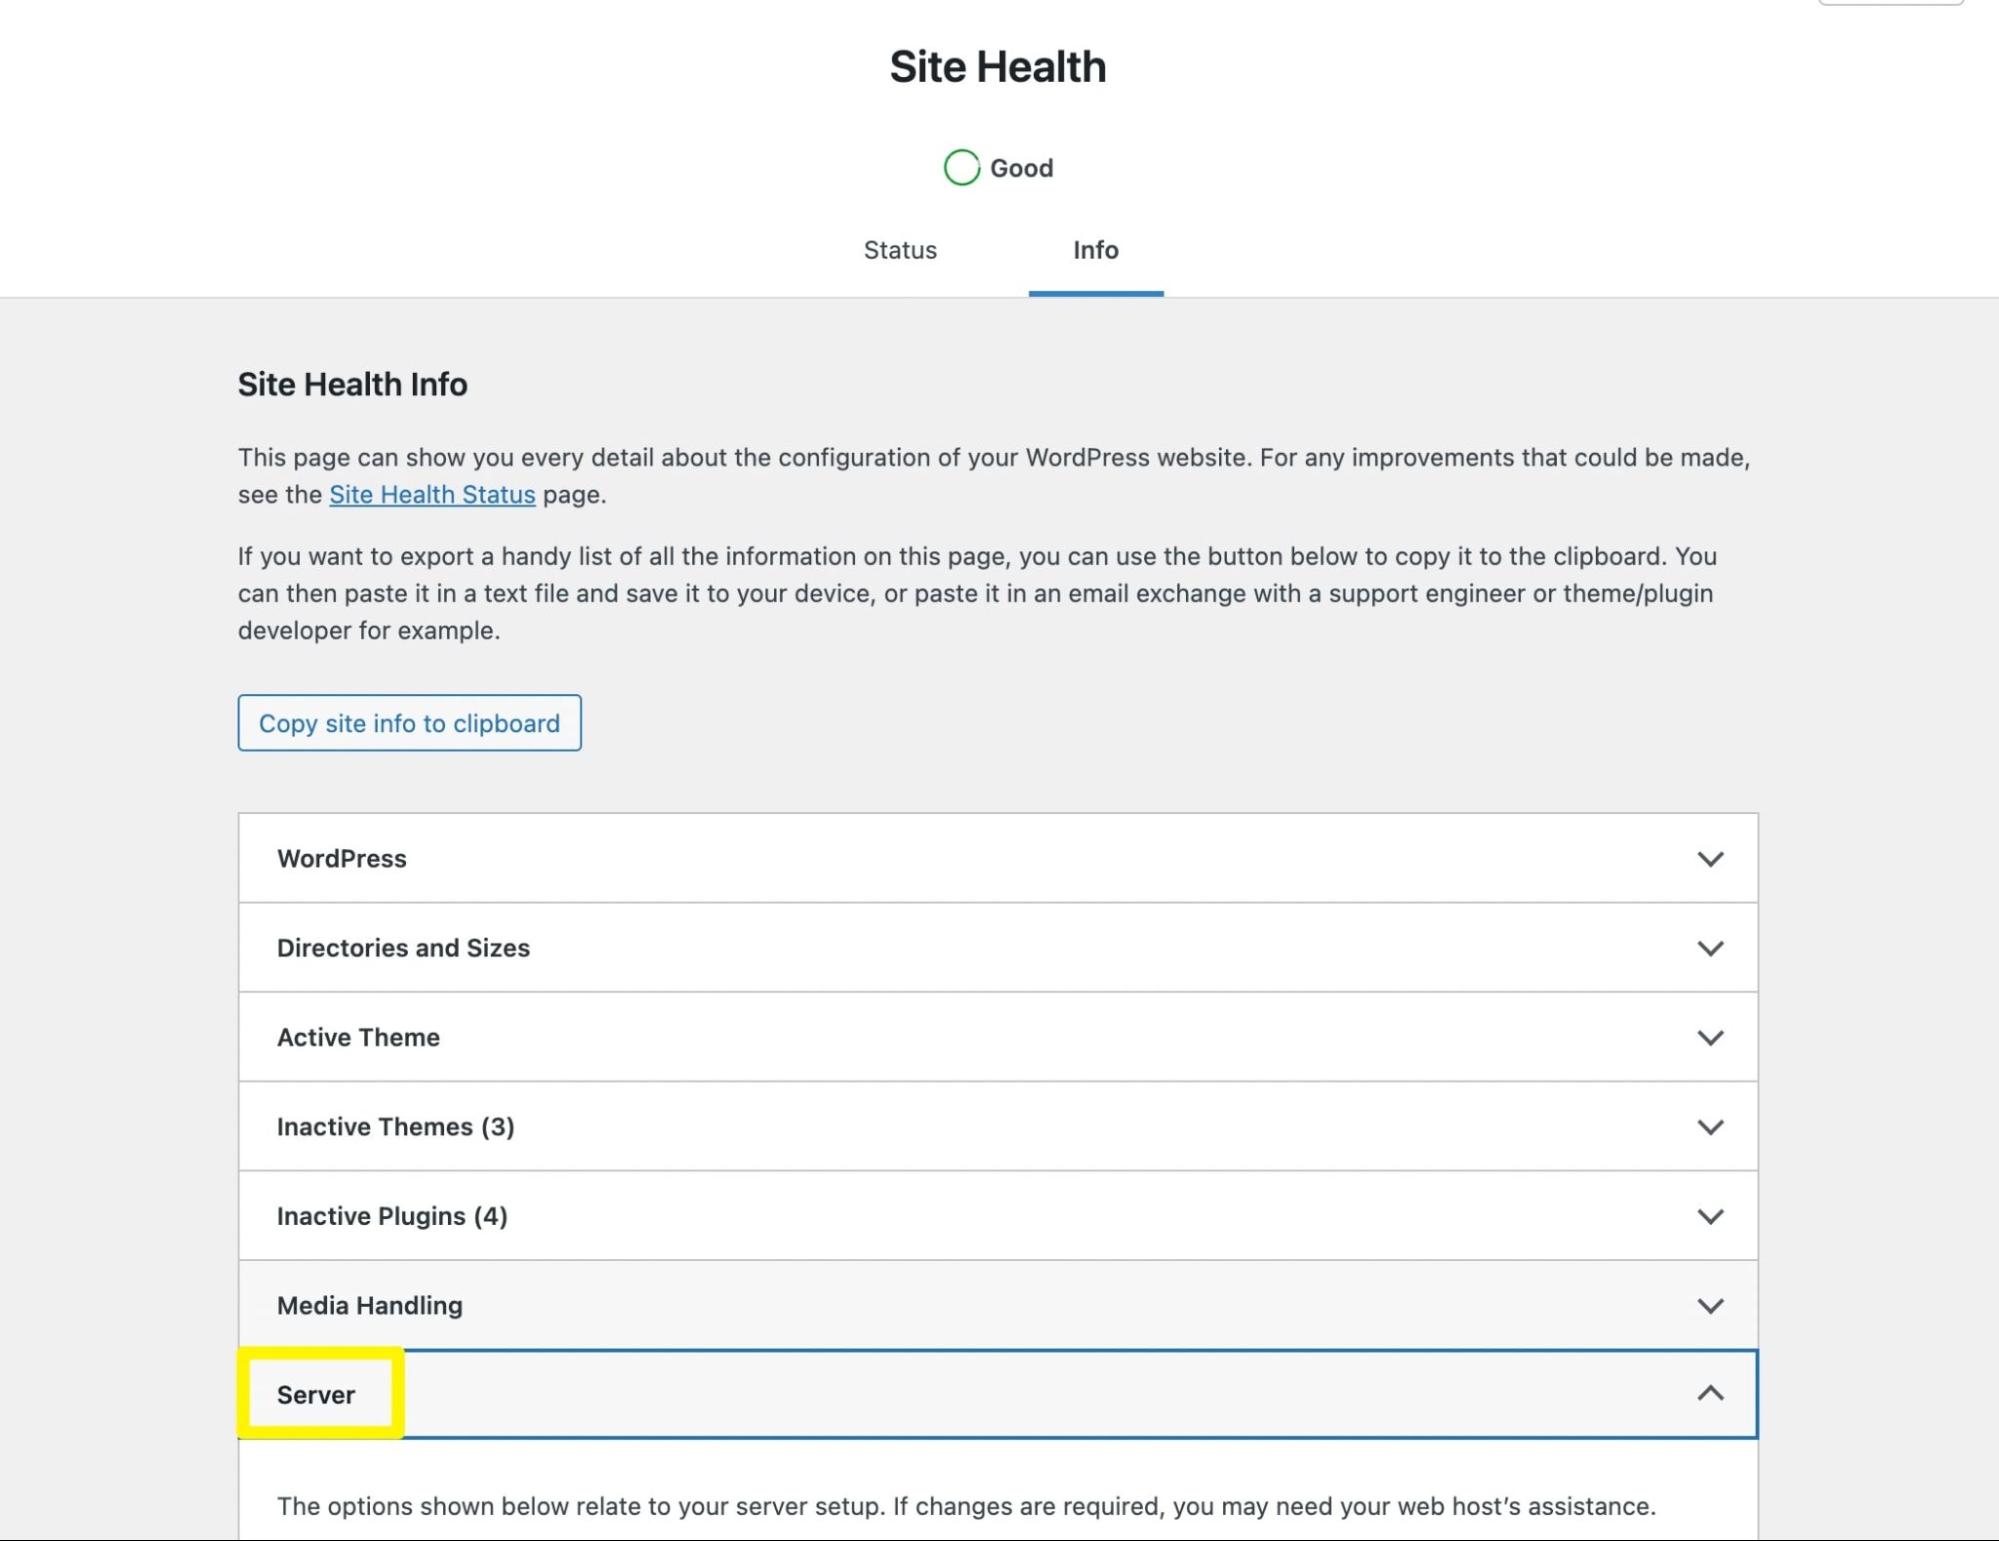
On the Site Health page, click on Info. Then find the Server section:
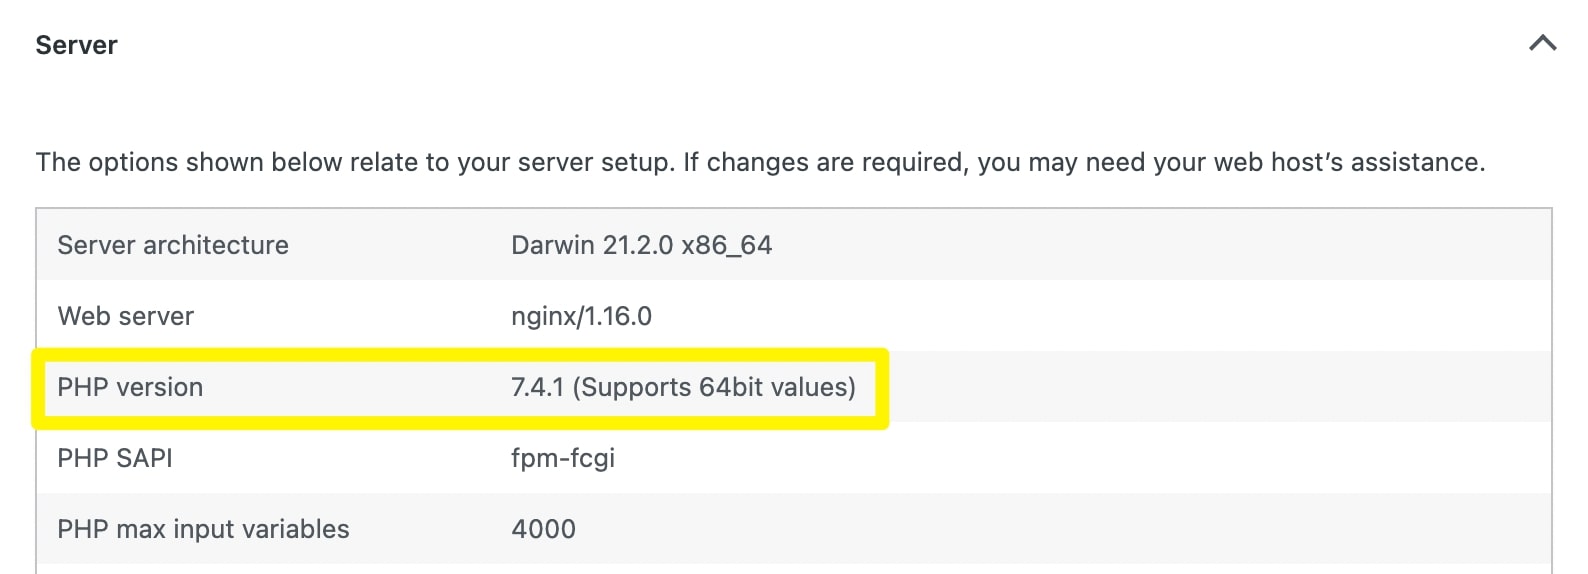
Here, you should be able to see your current PHP version:
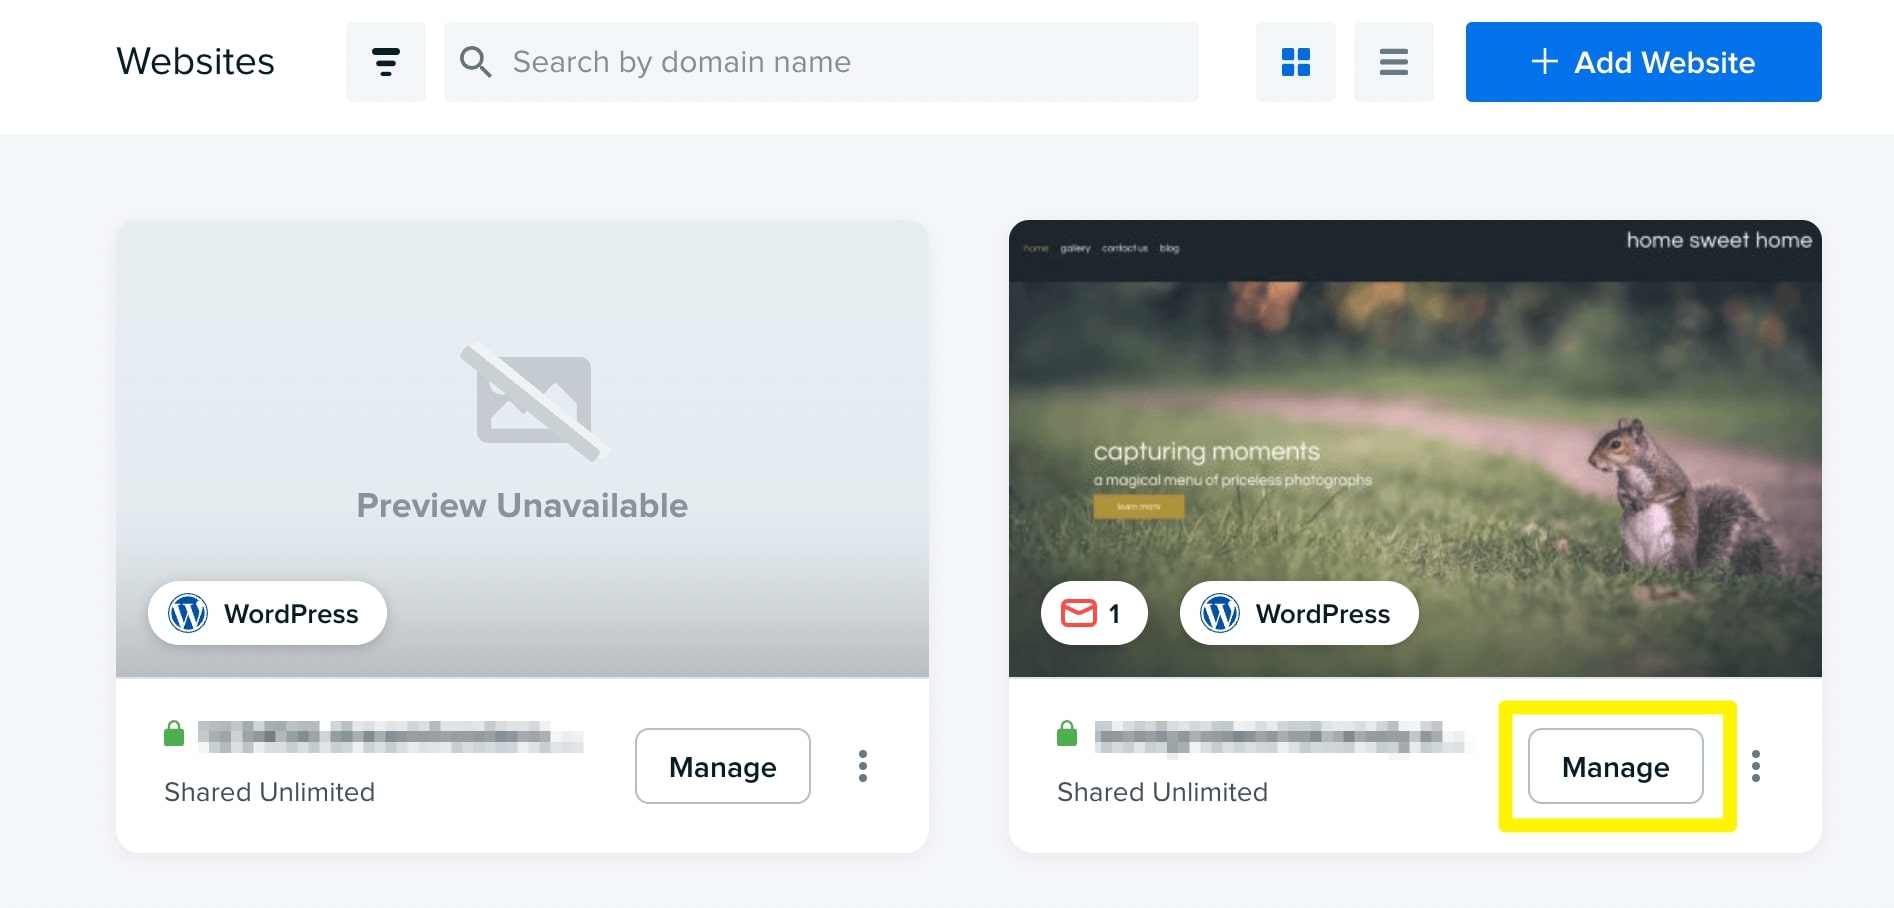
Another simple method for checking your PHP version is using your web host’s control panel. For DreamHost websites, click on the Manage button next to your domain:
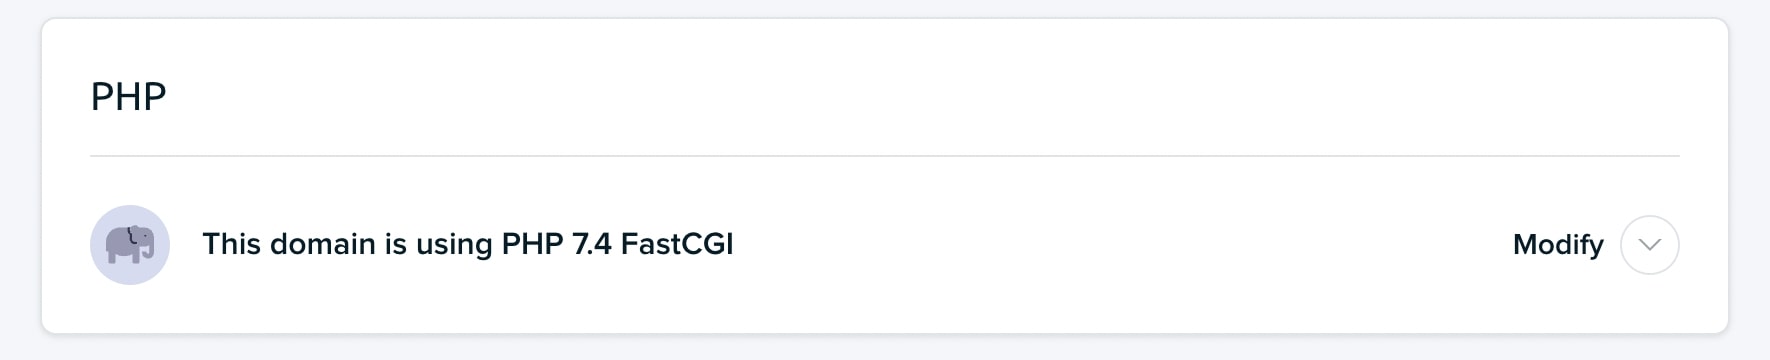
Then, find the section labeled PHP. This will list your site’s PHP version:
The latest PHP release is 8.1 (with PHP 8.2 on the way). If you have a version older than 8.0 — the version that the WordPress project suggests — you can proceed with the following steps.
How to Update Your PHP Version (In 4 Easy Steps)
Once you decide to update your version of PHP, we recommend taking a few precautions. Firstly, consider backing up your website. If anything goes wrong, you can roll back your version of PHP and then revert your site to the backed-up version.
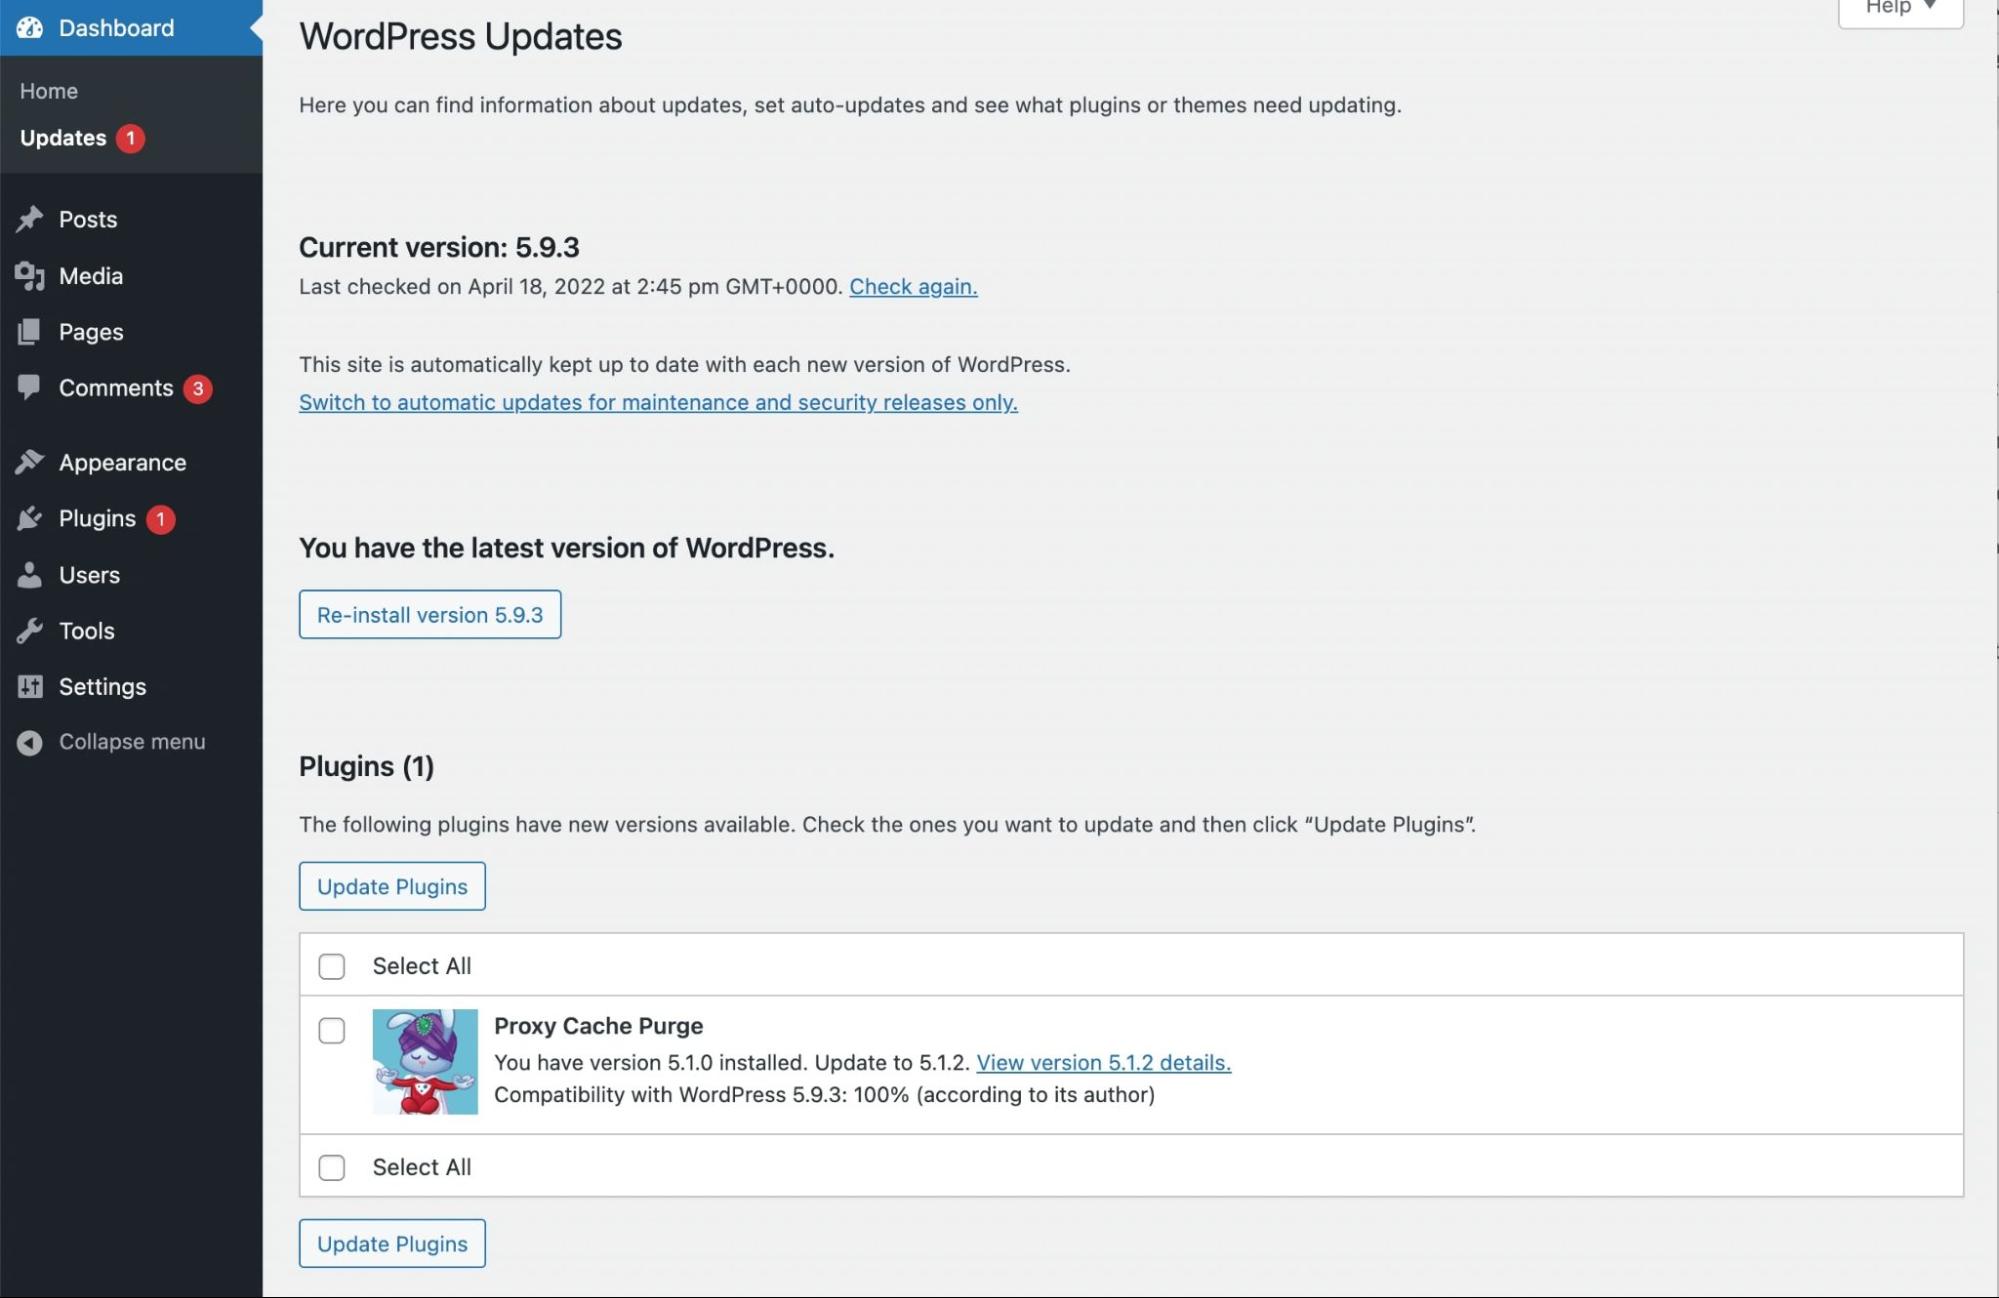
Next, make sure your website is fully up to date. In your dashboard, go to the Updates page and install the latest versions of WordPress, themes, and plugins:
After taking these preventative steps, you can start manually updating your PHP version. As a simpler alternative, you can also contact your hosting provider. The host can typically handle this process for you.
Step 1: Create a Staging Site
Updating your PHP version can cause software conflicts on your website. Therefore, it’s wise to test the update in a staging environment. This creates a separate, safe environment to implement changes rather than breaking your live site.
Depending on your hosting provider, you can create a staging site through your control panel. For this tutorial, we’ll be using the DreamHost panel.
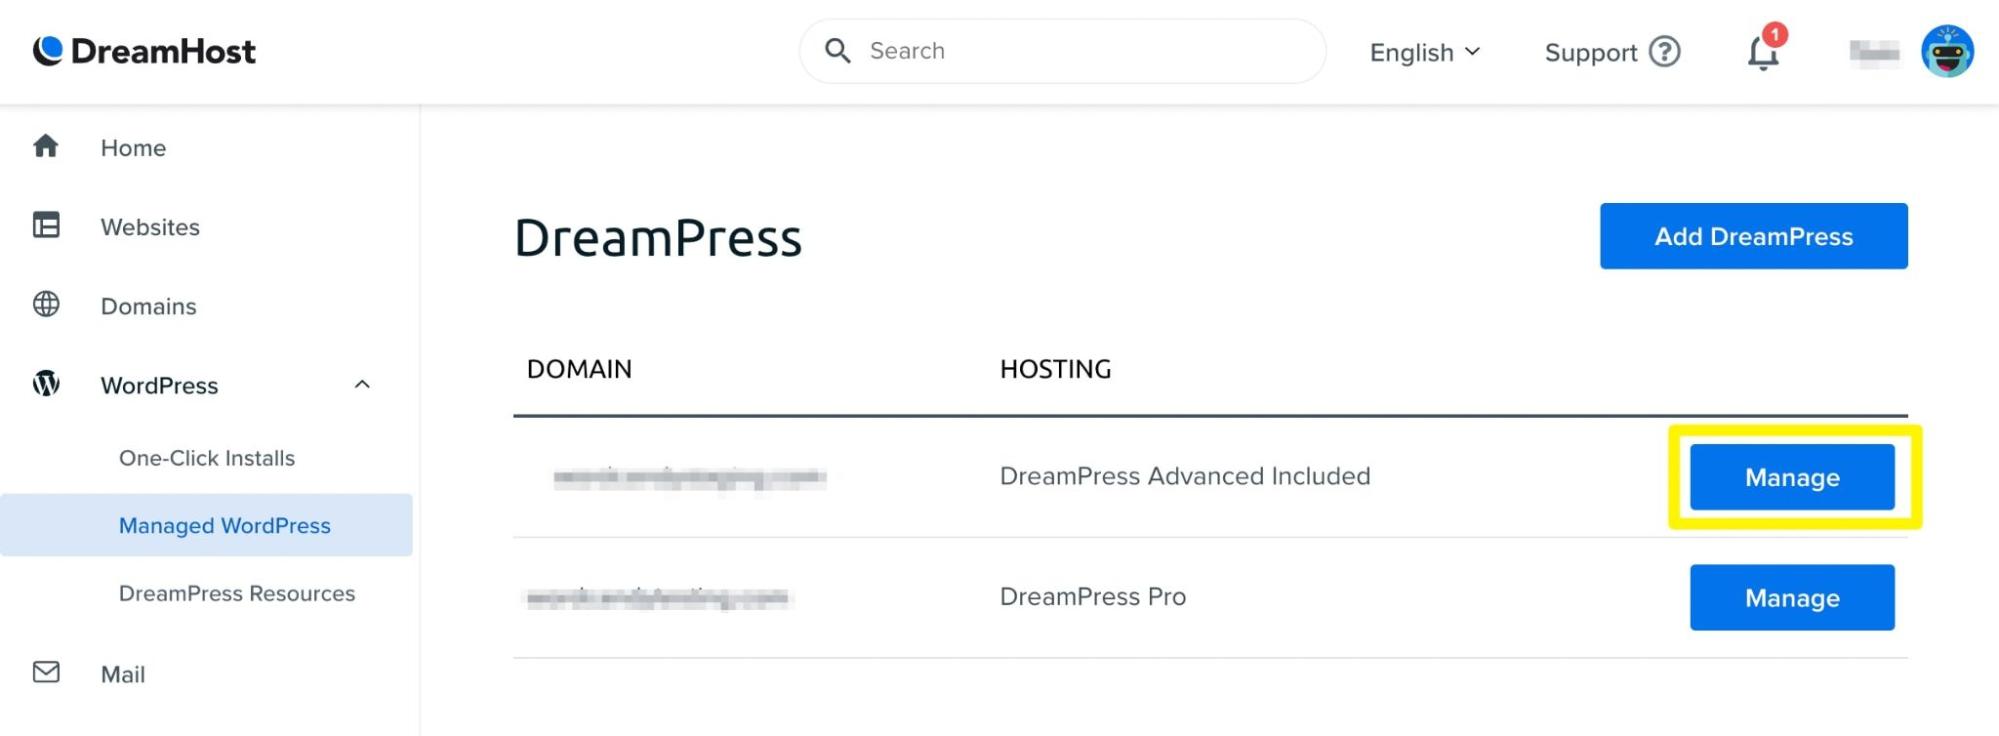
If you have a managed DreamHost plan, you can set up your staging site in minutes. Simply open your control panel and navigate to WordPress > Managed WordPress > Manage:
 On the next page, go to Staging. Then, click on Create Staging Site:
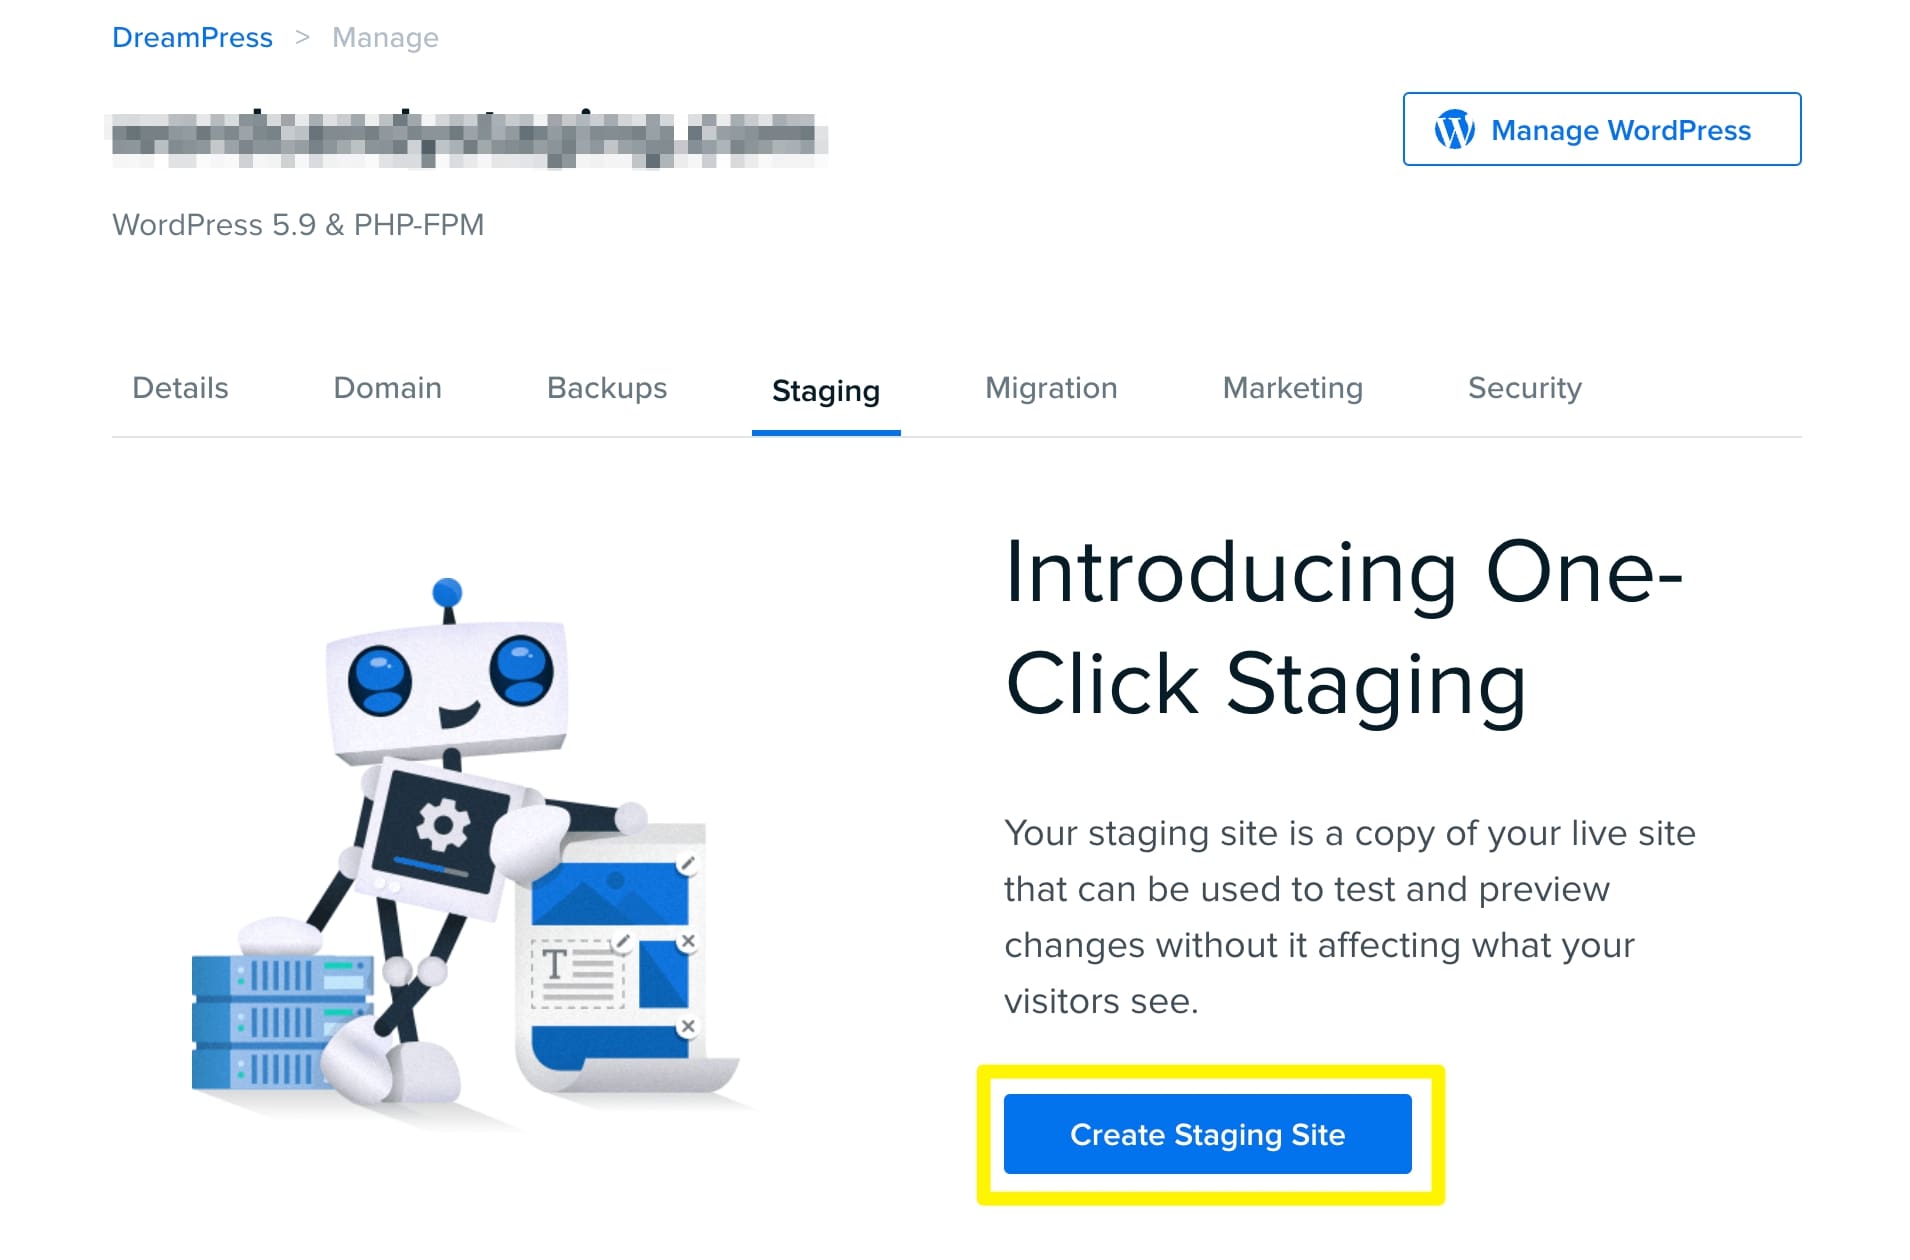
This will set up your staging site on an automatically generated subdomain. After this, you can update your PHP version without changing your live site.
Step 2: Change Your PHP Version
No matter your hosting provider, you can usually change your website’s PHP version through your control panel. This process will look different based on your host, but you’ll want to look for a MultiPHP Manager or PHP Selector.
To edit your DreamHost staging site, you can simply scroll down to the Configure PHP section. This section will list your current PHP version and the most recent update option:
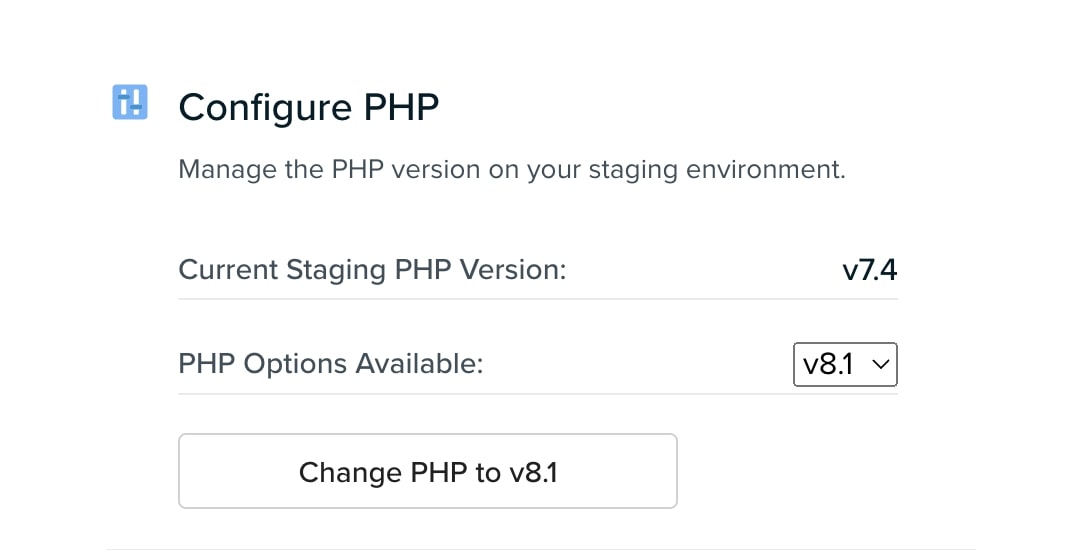
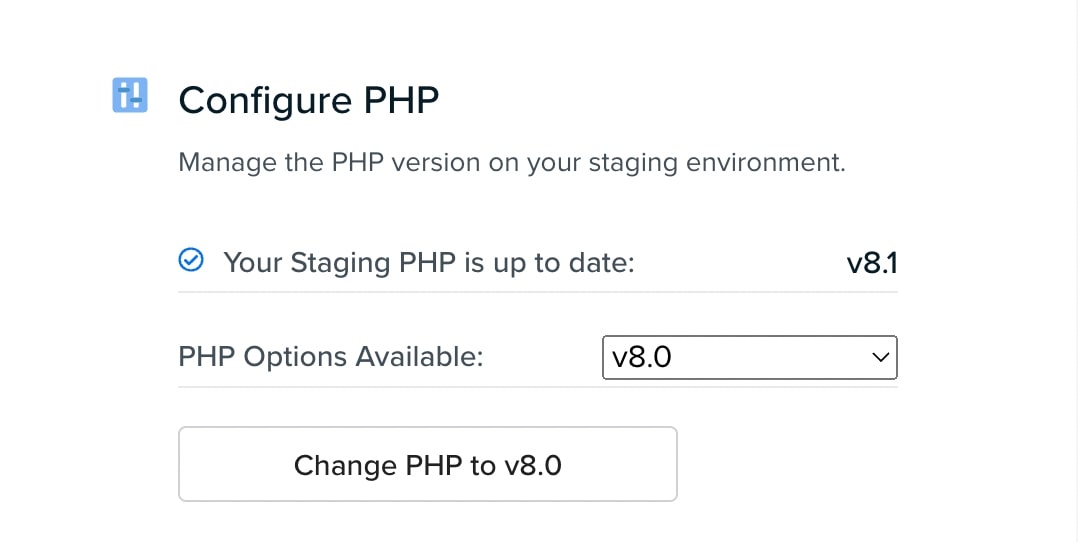
To update PHP, click on Change PHP to v8.1. If successful, this section will indicate that your site is up to date:
Although we strongly encourage you to test PHP version changes in a staging environment, you can modify your PHP version on your live website. To do this, go to Manage Websites in your DreamHost Panel. Then, scroll down to PHP and click on the arrow to Modify:

Lastly, select the new version you want to run on your website. Click on Change PHP Version to finish the process.
Step 3: Look for Conflicts
After updating your PHP version, we recommend reviewing your plugins and themes for conflicts. Upgrading PHP may cause common problems such as the White Screen of Death or 500 internal server errors.
Whether you updated a staging environment or your live site, visit the front end to see if everything is functioning correctly. If you notice any errors after browsing the website, you’ll need to begin troubleshooting
One common reason for WordPress errors is a plugin conflict. When issues arise, try deactivating all of your plugins using the Bulk Actions on your Plugins page:
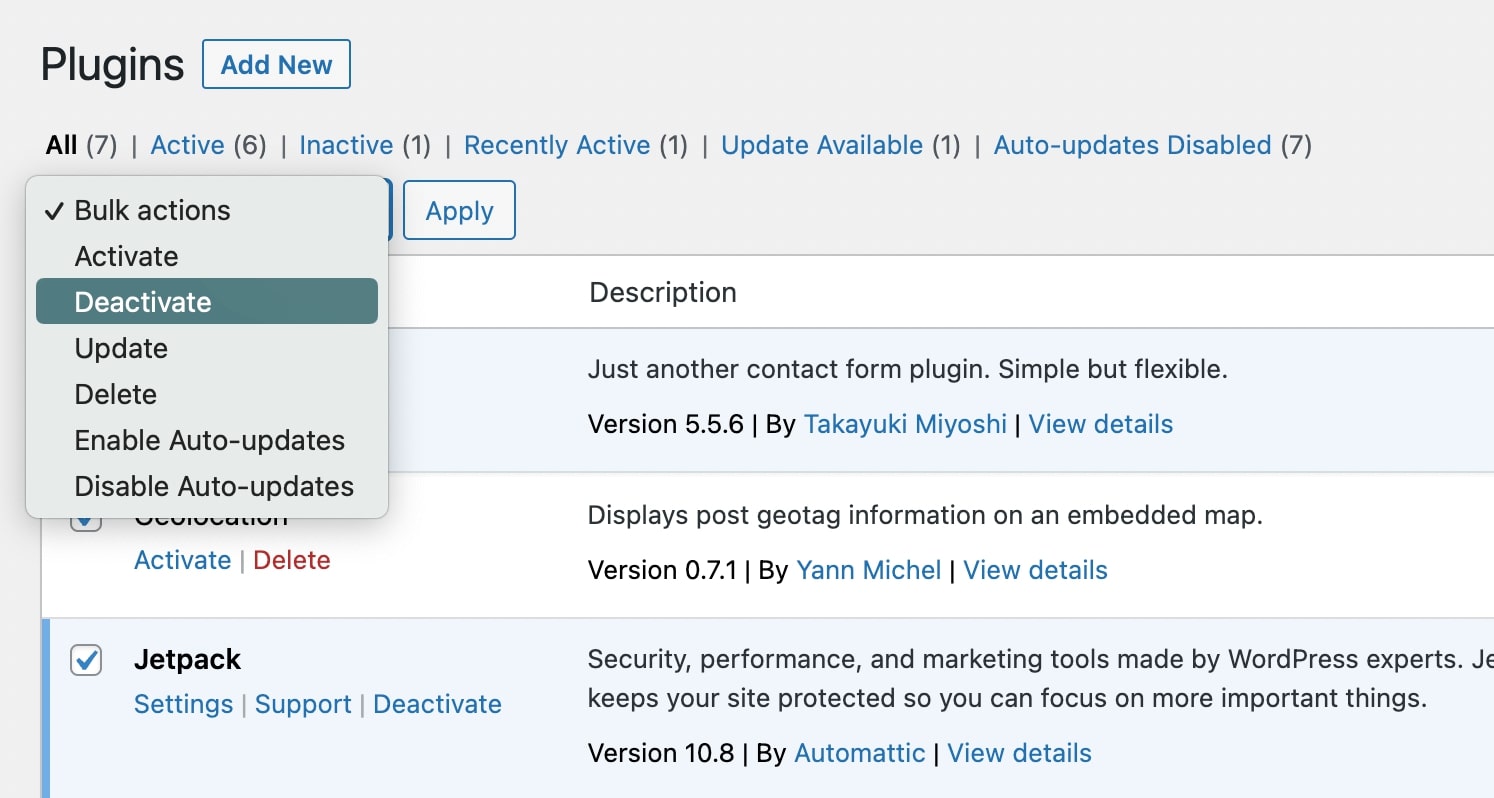
To target the conflicting plugin, reactivate each plugin one by one. Then, you can download a similar plugin or delete it if it’s unnecessary.
If you face additional problems like exceeded maximum execution time or maintenance mode errors, you might need to edit your wp-config.php file. This process could require more extensive troubleshooting, such as increasing your PHP memory limit.
Related: How to Fix the 503 Error in WordPress
Step 4: Publish Changes to Your Live Site
If you implemented a new PHP version on a staging site, it’s time to publish this change on your live website. Usually, you can do this in your host’s control panel.
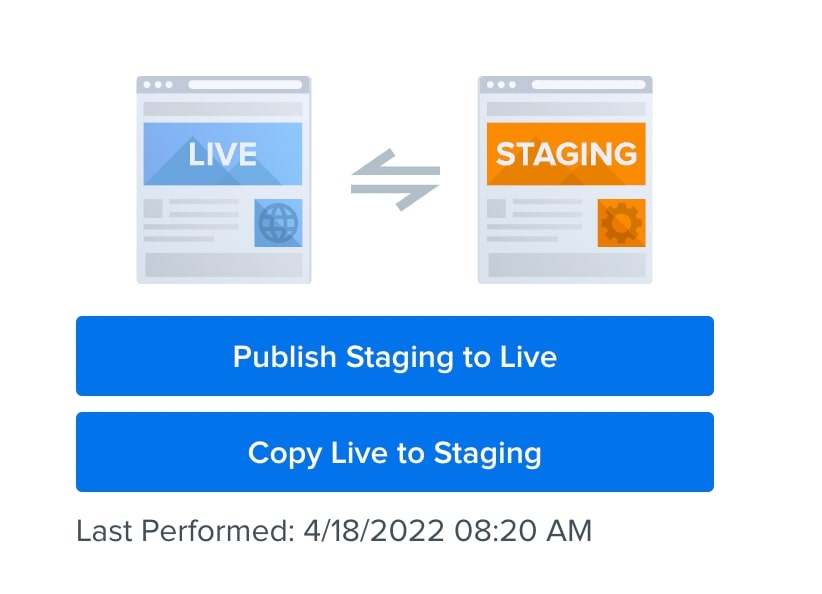
For example, DreamHost provides a simple one-click transfer of your staging data to your website. Once you’re sure you’ve targeted any potential conflicts, you can click on Publish Staging to Live:
This will successfully update your website’s PHP version. Since you used a staging site, you won’t have to worry about unexpected errors!
Ready for an Upgrade?
You might be hesitant to update your PHP version because you’re worried about breaking your site. However, PHP updates ultimately improve the security and performance of your website. You can easily avoid any conflicts by testing changes before making them live.
To review, here are the four steps you can take to update the PHP version of your website:
- Create a staging site.
- Change your PHP version.
- Look for conflicts.
- Publish changes to your live site.
Although you can manually update your PHP version, you might want to avoid doing this for every new development. Here at DreamHost, our Website Maintenance plans now include automatic PHP updates! This way, you can sit back, relax, and leave this process to us.
Let us handle the backend — we’ll manage and monitor your website so it’s safe, secure, and always up.Website Management Made Easy