How to Start a Blog (A Complete Beginner’s Guide)

It’s no secret that blogs have become a ubiquitous part of the online landscape. Just about everyone — from your next-door neighbor to the majority of Fortune 500 companies — has one.
And for a good reason. Blogs are a great way to build an audience, add value, create loyalty, and even earn a little money.
However, while starting a blog is easier than ever, creating content that draws traffic requires both planning and effort.
In most cases, this investment is well worth it. A blog can be an extension of an existing marketing strategy and a lucrative method for making money online. Even if you don’t monetize your blog, it can be a creative outlet and professionally useful for individuals and businesses.
In this comprehensive beginner’s guide to blogging, we’re going to take you through all the steps required to create a successful blog using WordPress.
We’ll cover everything from installing your site, to writing your first post and sharing it with others. Then, we’ll share 20 essential insider tips from blogging experts to help get you on the right foot. There’s a lot of ground to cover, so let’s get started!
The Benefits of Blogging
Have something to say? Perhaps you have a cause you want to discuss with others or a passion you can’t wait to share, like health and fitness.
Or you may just want an outlet to vent your worries, which can help clear your mind and promote progress in your everyday life.
A blog can be an excellent opportunity to express yourself creatively. For example, you publish your writing and gather feedback, which then motivates you to continue writing and grow your audience! Some bloggers have even turned their blogging into careers as published writers.
As mentioned earlier, blogging is not only for personal or creative use. You probably won’t be surprised to hear that many businesses have their own company blogs. Big international corporations like Google, Facebook, and Starbucks, as well as smaller businesses, use blogs to grow their audiences, post updates about their services, and provide value to their readers.
Of course, we’re clearly fans of blogging, but that doesn’t mean it’s free from potential problems and difficulties. For one, your blog requires a considerable investment of time and effort to be successful. There are also plenty of common blogging mistakes you’ll want to avoid, such as having an irregular posting schedule, using a site with long loading times, and, most importantly, writing sub-par content.
Luckily, these are almost all issues you can avoid — If you take the time to plan your content, create a well-performing site, and work on improving your writing, you’ll be well-equipped to run a blog that people will genuinely enjoy reading.
Before Getting Started
Before you create your blog, there are a few things you’ll want to do — Careful research and planning can lead to a much smoother process. Let’s take a look at some of the factors to consider before getting started.
Your Blog Niche
First and foremost, you’ll need to decide what your blog should be about. You probably already have a good idea of what you want to write about, but it’s important to determine not only what subjects you’ll tackle, but also how and for whom. This planning will help define your blog’s identity and make it easier for you to tailor content to your intended or target audience.
A great starting point is to consider your own interests. What kind of topics are you passionate about? What do you feel you could write about insightfully? Perhaps you’re an artist looking to start a photography blog. Since there are plenty of blogs on this subject, you’ll need to consider how your blog might differ. This includes deciding what your blog’s focus will be (for example, portrait photography) and defining your target audience (professional photographers vs. beginners).
Doing some market research at this stage will be helpful, as it can help you find a niche that might be underserved. For example, you might notice there are only a handful of blogs devoted to astrophotography or using a specific type of camera. These are both niches you could set out to fill. As a result, your blog will have a tighter focus and a stronger audience appeal.
Your Blog Name
Naming your blog isn’t a task to be taken lightly. After all, a name can help to brand your blog and make it more memorable.
Most blog names can be separated into two categories:
- Keyword-based: These are names that contain relevant keywords to describe the blog’s purpose or theme. Some examples include British Beauty Blogger and Car and Driver.
- Brand-based: These blog names focus on a brand and are usually shorter and more memorable. A few examples are Kotaku and BMWBLOG.
If you feel stuck and need inspiration, you can use an online name generator. These provide potential names based on a word or phrase. One of our favorite tools is Blog Name Generator:
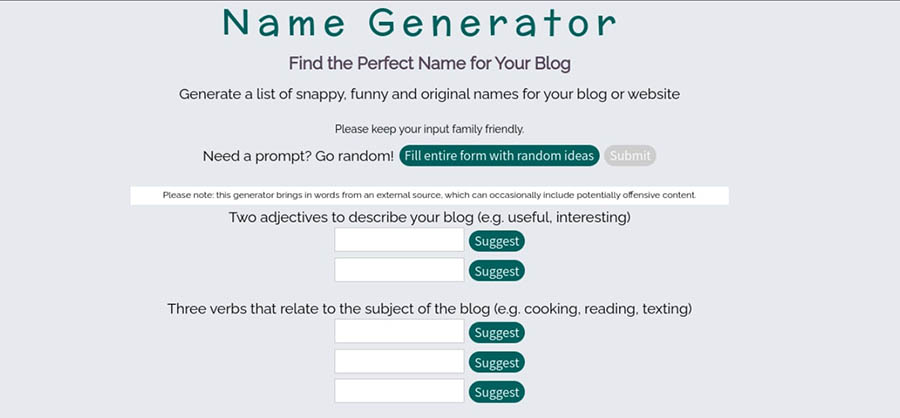
This site asks you to enter some information related to your blog, including its tone and subject matter. It then creates a series of names that you can use for inspiration.
For example, here are some of the results we got for a “funny” and “informative” blog about “texting, traveling, and painting” (we set the author as Elsa Cox from New York):
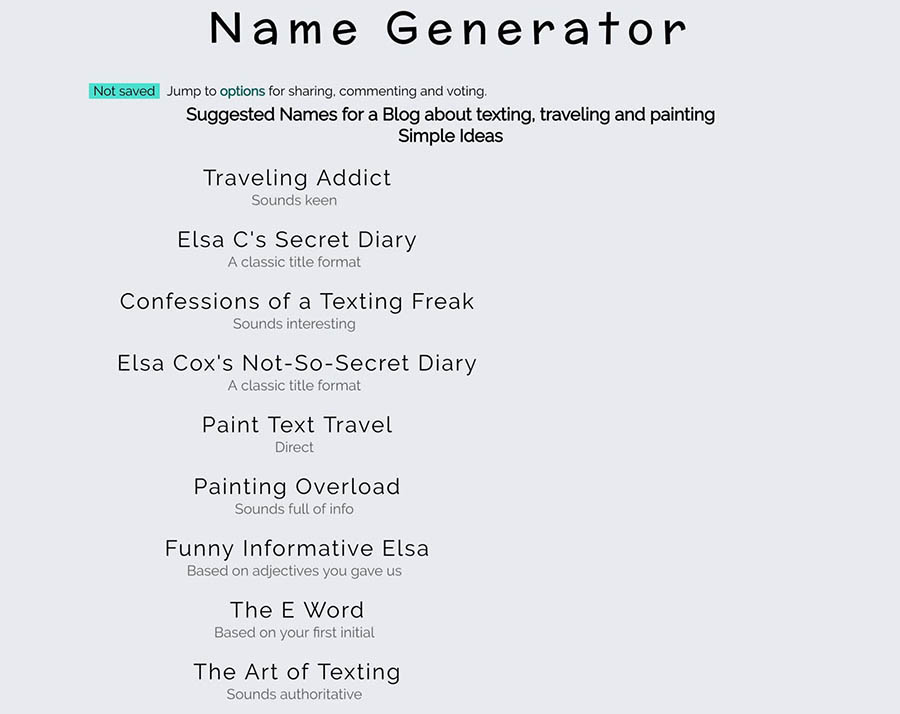
You could select one of these options, but more likely, you’ll use them as inspiration to come up with something unique. Either way, it’s essential that you search for your chosen blog name first to make sure that you don’t accidentally infringe on someone else’s brand.
Once these basic details are ironed out, you’re ready to get to the fun part: creating your blog.
How to Start a Blog in 7 Easy Steps
In this tutorial, we’re going to take you through the entire process of setting up a blog with a step-by-step guide. Let’s get this blog on the road!
Step 1: Choose a Blogging Platform, Web Hosting, and Domain Name
First, you’ll need to choose a platform to build your blog on. You’ll also need to purchase a hosting plan and register a domain name. These tasks are all somewhat related and can usually be executed on one platform, such as DreamHost.
Pick a Blogging Platform
Which platform will you use to build your blog? As we mentioned earlier, there are numerous platforms available, including dedicated blogging platforms, such as Tumblr or Blogger.
We only recommend using those free blog solutions if you’re starting a personal blog since they have limited functionality and customization options. Using a free blogging platform can also come across as unprofessional if the blog is tied to a business.
Of course, we recommend that you use WordPress to create your blog.
What is WordPress?
WordPress is an open-source Content Management System (CMS). Since it is free and accessible, WordPress is used to power almost any type of website, from blogs to e-commerce businesses.
Read MoreNot only is this open-source platform easy to use, but it offers a lot more functionality. For example, WordPress lets you style your blog using themes and add new features via plugins. It also helps to make your blog more secure and perform better with minimal work required on your end.
As such, we’ll be using WordPress throughout the remainder of this article. If you’re unfamiliar with this Content Management System (CMS), we’ve written extensively about it over the years!
Here are a few articles to help you learn the ropes:
- What Is WordPress?
- The Essential Elements of a WordPress Site
- The Most Important WordPress Settings
- The Difference Between WordPress.com & WordPress.org (Self-Hosted WordPress)
Feel free to use these guides to learn more about the platform and how you can use it to your advantage.
Get Content Delivered Straight to Your Inbox
Subscribe to our blog and receive great content just like this delivered straight to your inbox.
Purchase Web Hosting and Register Your Domain
You may have noticed our use of the term ‘self-hosted’ in the list above. This is because WordPress doesn’t provide hosting for your blog; instead, it’s a CMS that you need to install on a server. Don’t worry — this is not as complex as it might sound.
What it means is that you will need to sign up for a web hosting plan to get your site online. This will require some research to ensure you pick a host and plan that’s right for you.
To help you out, let’s look at the main types of hosting that are available:
- Shared hosting is the least expensive option for new bloggers (DreamHost plans start at $2.59/mo) but can be limiting in terms of performance. On this type of plan, you share a server and its resources with multiple other sites. Shared hosting is best suited for new sites with lower traffic.
- Virtual Private Server (VPS) hosting is a version of shared hosting where each site has its own allocated resources. It’s slightly more costly but provides improved performance. As such, this kind of hosting is recommended if you want to focus on growing your blog.
- Dedicated hosting is the most expensive and powerful option. As the name suggests, you’ll get an entire server dedicated to your site alone. This is typically overkill for a blog, unless you want complete control over your server or your site draws unusually large volumes of traffic.
In addition, you should decide whether or not you want managed hosting. When you have a managed plan, your web host will take care of several technical tasks required to keep your site running smoothly.
Of course, you don’t want to get your hosting and domain from just anywhere. Choosing the right hosting plan is crucial, as this will play a key role in your site’s performance, security, and other vital factors. It’s also smart to look for hosting companies specializing in WordPress hosting specifically, as that means its services will be well-optimized for the platform.
DreamHost offers a number of top-notch WordPress hosting plans for you to choose from. These plans provide plenty of power for your site, along with tight security and fast performance. In addition, they come with handy features for WordPress users, such as pre-installed sites and automatic updates and backups. You also get access to reliable and knowledgeable support via multiple channels, and if you sign up for specific annual plans, you can even get a free domain!
Our shared hosting plans are ideal for a brand-new blog — They start at just a few dollars per month and provide plenty of resources even while your site is still on the small side. Then, when your blog begins to receive more traffic, you can upgrade to a more powerful option, such as WordPress-managed hosting.
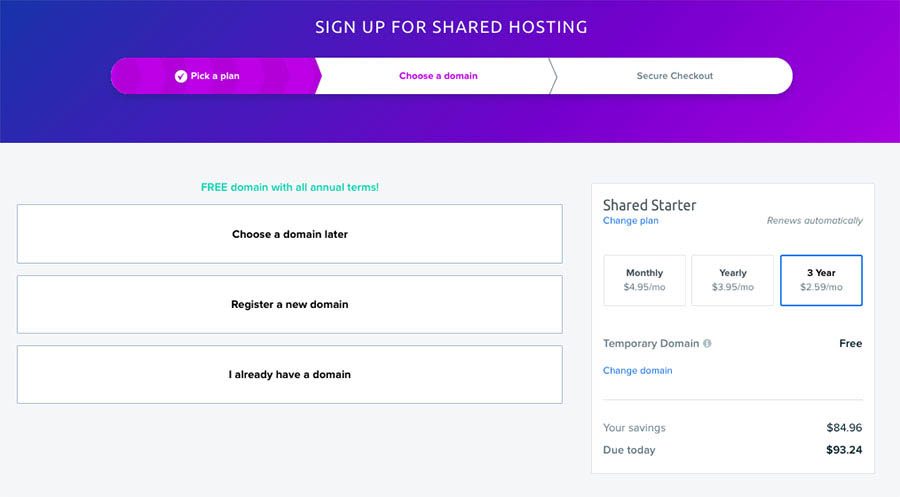
To purchase a shared hosting plan, select Sign Up Now on the plans page. Next, you’ll need to choose the billing term for your hosting account: monthly, annually, or every three years. The longer your term, the bigger your discount on hosting.
You’ll also be asked to select between DreamHost’s Starter Shared and Shared Unlimited packages:
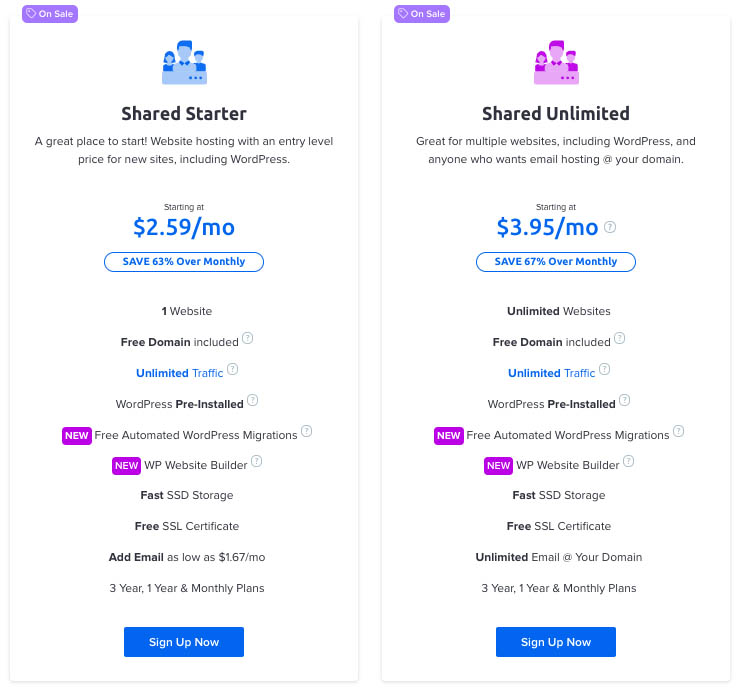
Starter Shared is the most cost-effective option, although you won’t get a professional email @yourdomain. Instead, for just a few dollars more each month, Shared Unlimited gives you everything you need to thrive online, including a specialized email address.
Register Your Domain Name
Next, you’ll be able to register a free domain (which is included with all annual terms) or enter a domain you already own.
Note: If you’re pressed for time or aren’t sure which Top-Level Domain (TLD) would be right for your site, you can easily add a domain at a later time:
Your domain name is the URL used to access your blog. When it comes to creating a domain name, there are several things you’ll want to consider. One of the basic steps involves choosing which TLD you want to use, such as .com or .org. You’ll also want to make the domain name memorable.
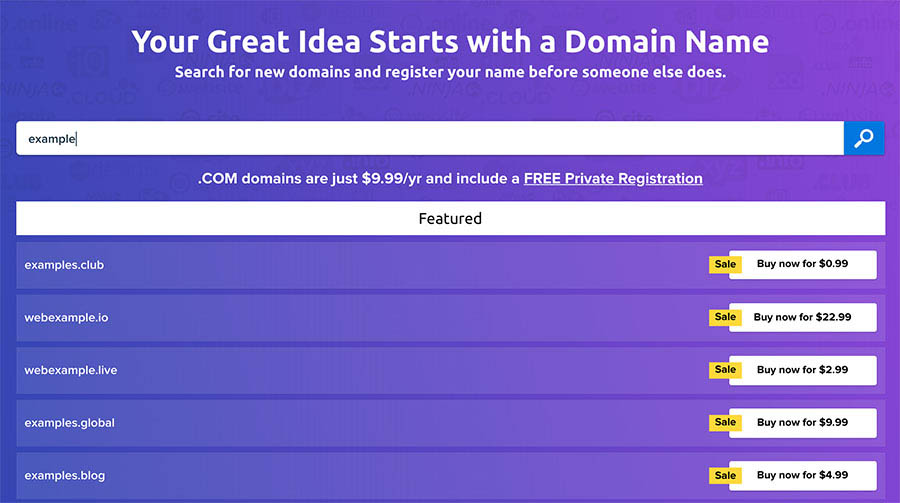
For this guide, we’ll assume you want to register a new domain. So, click on Register a new domain and type your proposed URL into the search box. DreamHost will pull up all the available domain names related to your search so you can select the ideal TLD for your site.
Remember to keep search engine best practices for domains in mind when making your decision:
We’re almost done with the setup! Next, you’ll add your billing info and review all the details about your hosting package. Make sure that the box next to Pre-Install WordPress is checked — This will get your site set up quickly and means you don’t have to worry about installing the CMS in the next step:
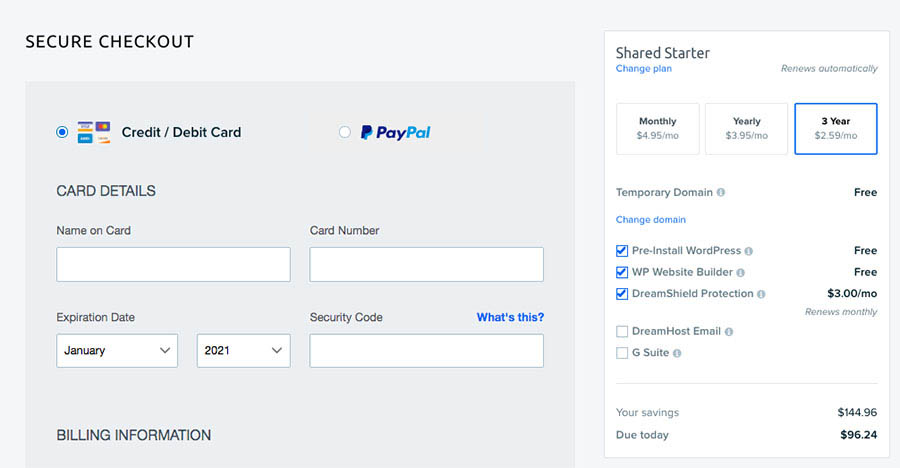
At this point, you can choose to add DreamShield, DreamHost’s in-house website security tool, to your hosting account. For $3 a month, DreamShield scans your site to identify malicious code, out-of-date software, and broken file permissions to help keep you safe online.
After you’ve made your account selections, and entered your payment information, click on Submit Order at the bottom of the screen.
It will take a couple of minutes for the installation to finish. In the meantime, you’ll be sent an email with additional instructions on configuring your new WordPress software, including a link to create your WordPress password. If you run into any hiccups or find yourself with more questions than answers, help is just a click away.
Advice for Choosing a Domain
The domain name that you choose for your blog is critical. It can affect your Search Engine Optimization (SEO) and determine how easily users can find and remember your URL.
There are a few tips to keep in mind when choosing your domain name. First, keep it short, sweet, and memorable. Of course, you’ll also want to ensure that it’s relevant to your niche.
We also recommend that you avoid using numbers or hyphens. Complicated domain names are not only harder to remember but can also lead to typos that take users to the wrong site.
Finally, if you find that the domain name you want for your blog is already taken, consider using a different extension. Domain extensions are what come after the dot in the URL address. Popular domain extensions include “.com”, “.co”, and “.org”. However, you could also use variations, such as “.name”, “.blog”, or “.online”.
If you already own a domain name but don’t have a live site attached to it, you should consider transferring it to your blog. For assistance, you can follow our guide on transferring a domain to DreamHost.
It’s worth noting that your domain registrar and hosting provider do not necessarily need to be the same. For example, you can register a domain name with DreamHost even if you host your site with a different provider, or you can use DreamHost hosting and a third-party domain registrar, like Namecheap.
To simplify the process, we recommend getting both from the same place. It can help streamline the domain registration and CMS configuration, plus you’ll also be able to manage your site and domain from the same account.
Step 1: Install WordPress
As we mentioned, we’ll show how to create a blog using WordPress. This platform is both user-friendly and intuitive, but it needs to be installed on your site before you can use it. If you checked the Pre-Install WordPress box during the sign-up process, you can move on to Step 2.
There are two main ways you can install WordPress:
- Manual installation: This requires that you to manually upload and configure the WordPress software on your site. While the process is infamously quick, we only recommend this approach if you’re more technically savvy.
- One-click installation: This is an option offered by many web hosts, which enables you to install WordPress on your site almost instantly. As such, you don’t have to worry about configuration or manually installing any files.
If you install WordPress manually, you’ll need to download the latest version of WordPress and use an FTP tool such as FileZilla to upload it to your site. A one-click installation tool can help simplify the process.
To install WordPress at DreamHost, log into your panel and use the sidebar to navigate to WordPress > One-Click Installs:
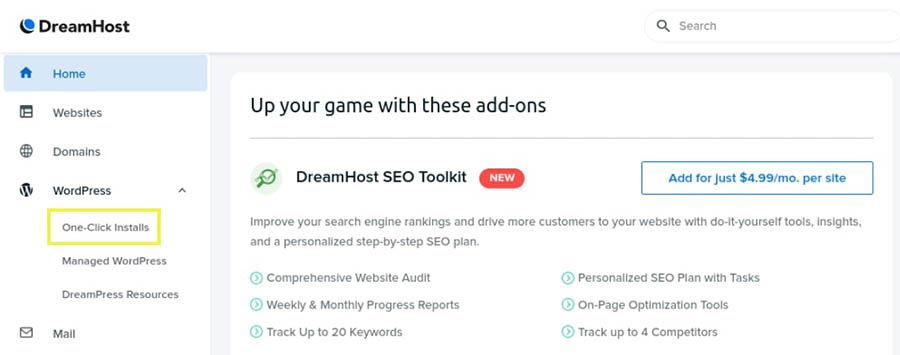
Here, you can see a WordPress one-click install option, which you can go ahead and select. This opens an overlay where you can configure your installation:

All you need to do here is select which domains you want to install WordPress on. You can also pick an existing database for your new site, but in most cases, you can just leave this set to Automatically Create Database.
The final option is Deluxe Install, which is selected by default. It provides many optional features beyond the basic WordPress installation and adds several useful tools, so we recommend that you leave this checked.
Then, you can start the installation process by clicking Install it for me now! This may take several minutes, and as soon as the installation is complete, you’ll receive an email containing the link and login information for your new WordPress site.
Step 2: Tweak Your Blog’s Appearance with a Theme
With WordPress up and running, it’s finally time to start putting together your blog! If you haven’t yet, now’s the time to decide how you want your blog to look. You can easily change the appearance of your site with a WordPress theme.
A theme works like a template you can install on your site, which determines its layout and overall design. Some themes also include additional functionality, and there are plenty of free and premium themes to choose from.
There’s a lot of ground to cover with themes, but for the time being, you only need to worry about finding the one that fits your blog’s intended style. Picking the right theme can be a struggle if you don’t know where to look, but an excellent place to start is the official WordPress Theme Directory:
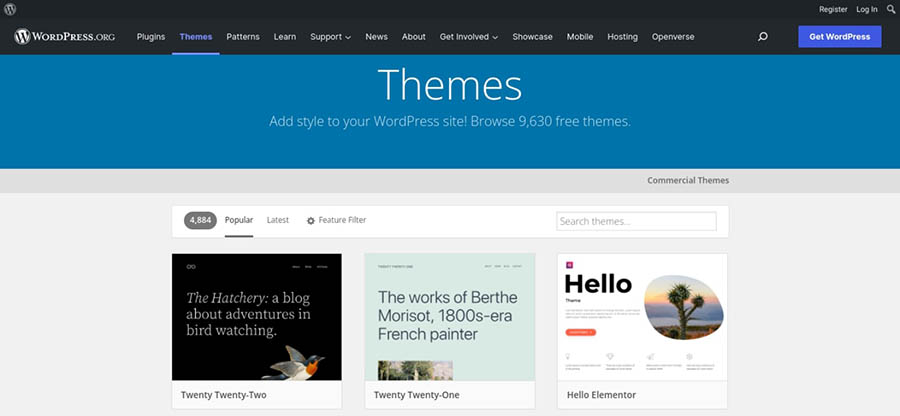
Here, you’ll find hundreds of free themes in several different categories. There are so many choices that you’ll probably want to use the Feature Filter to narrow down the options:
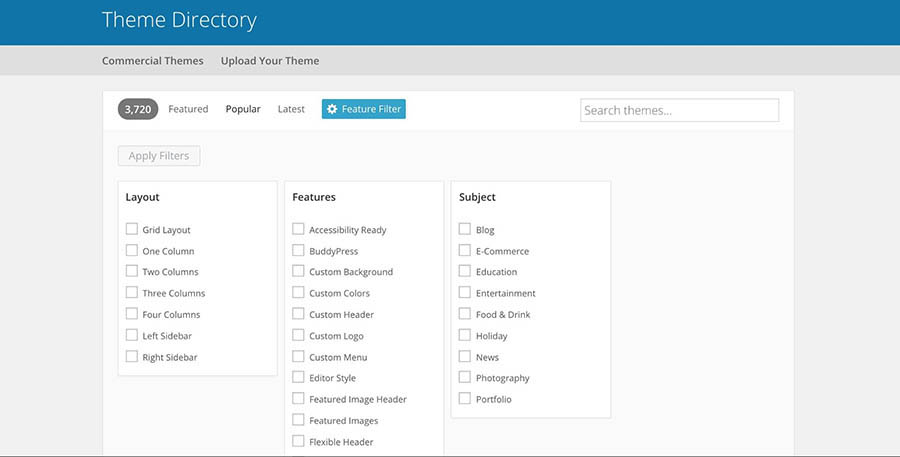
As you can see, there’s even a search filter called Blog. If you select this, you’ll be able to see all the themes created specifically with blogs in mind:

When you find a theme you want to use, you can download and then install it on your site. You can also do this through your WordPress dashboard by navigating to Appearance > Themes:
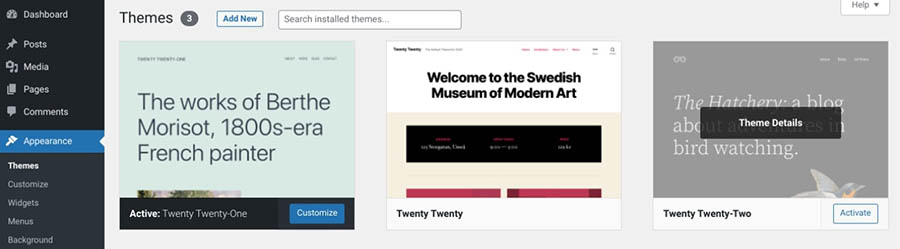
Here, you’ll see your currently installed themes. You can install new ones by clicking on Add New. This opens the Theme Directory again, letting you download and activate themes directly from this interface. Hover over your choice, and click on Install:
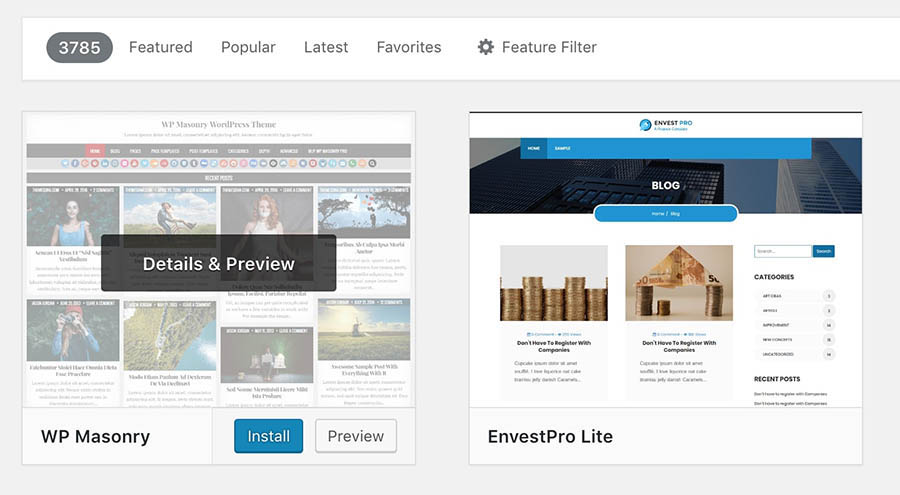
After the theme installs, you click Activate to set it as the current theme for your site.
Advice for Choosing a WordPress Blog Theme
If you’re having trouble deciding which theme to use, it may help to consider some important factors. First and foremost, your theme should be compatible with the most recent version of WordPress. Then, it is important to choose a theme that is responsive, meaning that it will adjust to fit any screen size.
Next, ensure that your theme includes all of the features and functionality you want for your blog. For example, besides being SEO-friendly, it’s also wise to look for themes that include social media integration to help you share your posts more easily.
It’s also helpful to find a theme that is easy to use and customize, especially if you’re new to WordPress amd to further improve the User Experience (UX), we recommend looking for themes with fast loading speeds and support for multiple languages.
Outdated themes (and plugins) can pose a security risk, so it’s essential to ensure the theme you pick is regularly updated and maintained by its developers.
Finally, it is important to consider your theme’s overall vibe and aesthetic. With these factors in mind, you should be able to find a WordPress blog theme that perfectly suits your needs.
Step 3: Customize Your Blog With Plugins
One of the reasons WordPress is so powerful is its built-in flexibility. You can add new functionality to your site by using plugins. In simple terms, plugins are add-ons that you install to provide your blog with new features.
The process for finding and using plugins is very similar to installing a theme — You simply need to download and install the plugin, at which point it becomes active on your site. You can find tons of free options in the WordPress Plugin Directory:
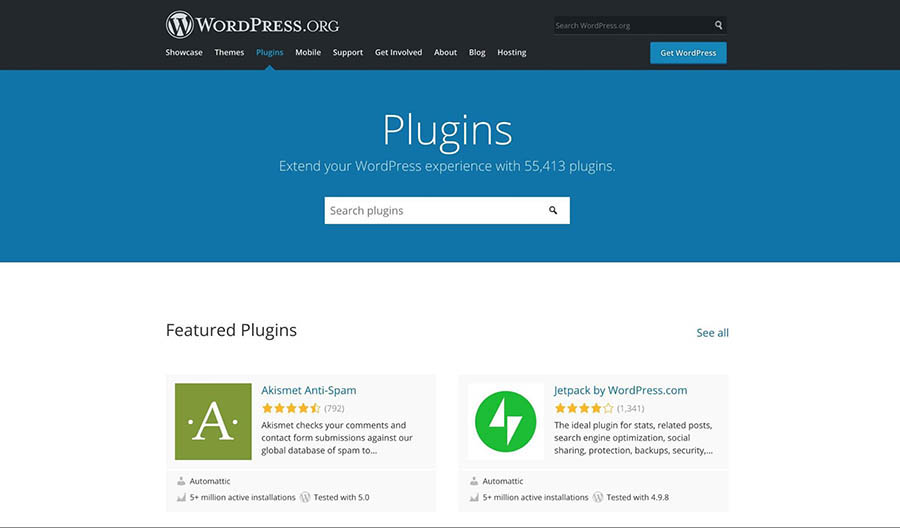
You can access this directory from your admin dashboard by going to Plugins > Add New:
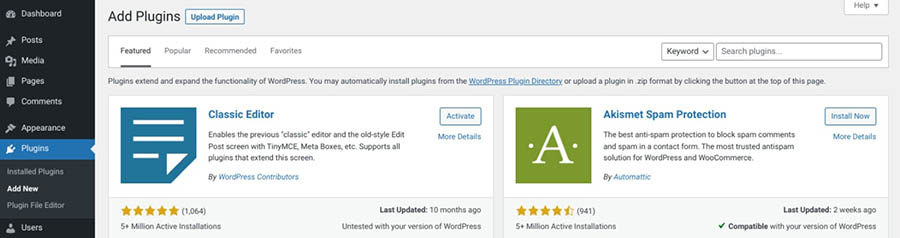
As before, all you need to add a plugin is to search for the one you want, click on Install, and then select Activate Plugin.
There are literally thousands of free and premium plugins at your disposal, many of which we’ve gone ahead and written about just for this occasion:
- Plugins That You Need to Know About
- Plugins to Keep Your WordPress Site Safe
- Plugins for Improving Your Workflow
- Plugins to Maximize Lead Generation
When you’re first starting, it’s best to stick to a few basic options. This can help keep you from getting confused or cluttering your site with unnecessary features.
With that in mind, let’s look at a few of the best plugins for blog owners!
Jetpack
You can think of Jetpack as several plugins in one, as it contains a lot of functionality in a single package:

It’s actually such a feature-heavy plugin that we don’t have room to discuss everything it offers in this article.
To quickly summarize, Jetpack gives options for improving your site’s security, optimizing its performance, sharing posts on social media, and much more. Best of all, Jetpack is totally free, although it offers premium plans that add even more features.
Akismet Anti-Spam
The next plugin deals with something that everyone on the internet deals with, but is especially pertinent for blogs: spam. To deter spambots from trying to take over your site, you want the best option for the job: Akismet Anti-Spam:
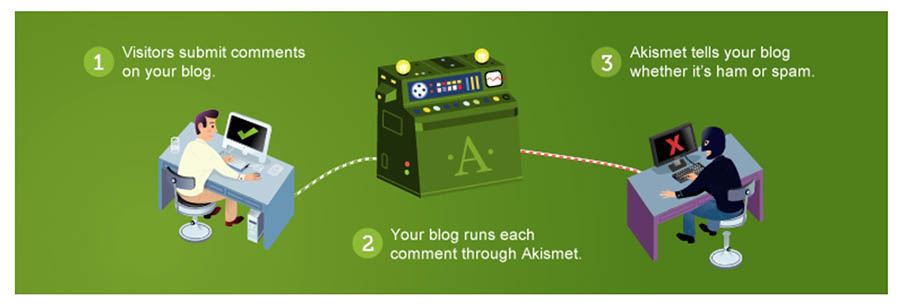
This plugin automatically detects and filters out spam from comments and contact form submissions. Akismet also lets you manually specify which comments are spam, which helps the plugin improve its detection abilities for the future.
Jetpack VaultPress
Next, let’s consider a plugin like Jetpack VaultPress:
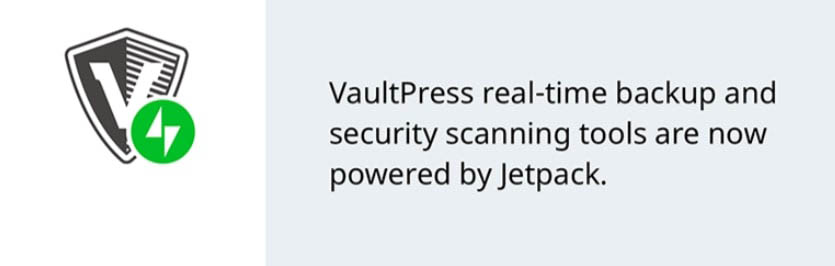
This lets you create real-time backups, which are saved copies of your site. This can be incredibly useful if something goes wrong with your blog and you can’t access your content. In those situations, you can revert your blog to a previous backup to avoid losing data.
And deal alert: Jetpack VaultPress is included for free with our DreamPress Plus and Pro plans.
Naturally, there are many more plugins that can help you out, but these should get your site started on the right foot!
Step 4: Write Your First Blog Post
Now it’s time to start thinking about content! It’s usually wise to have at least a few posts ready to go when your blog launches.
It’s time to start brainstorming. Or you may already have a few ideas! If you’re creating this blog for fun and creativity, you may have your own process to spark creativity. However, if you’re looking to satisfy that niche you picked earlier, remember to focus on topics related to it.
The best way to find those topics is to perform keyword research. You can use Google Keyword Planner for this, as it’s both comprehensive and free:
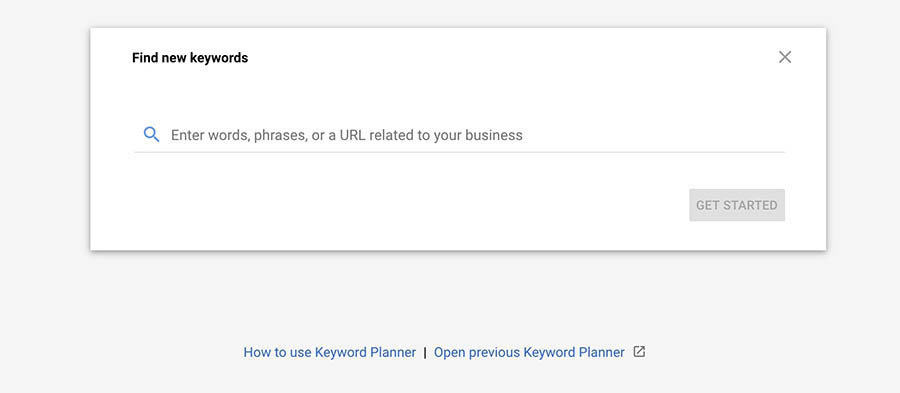
With this tool, you can search for keywords related to your blog to see what your audience is interested in. For example, if you enter the keyword “men’s fashion,” you’ll see that popular keywords include “stylish shirts for men” and “men’s summer clothes.”
You can then consider how to write blog posts that are optimized for these terms (something we’ll look more at later). Once you’ve found the right keywords, you can begin writing your first post!
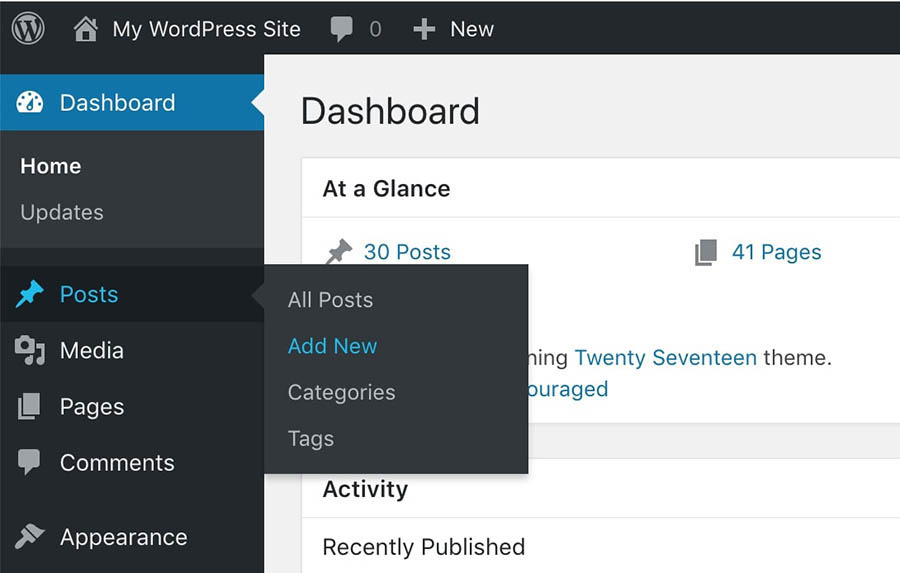
To get started, access your admin dashboard and click on Posts > Add New:
This opens the WordPress editor:

Here, you can start putting together your post. We’ve previously written a comprehensive guide to writing quality blog posts, but we’ll go through some of the basics here as well.
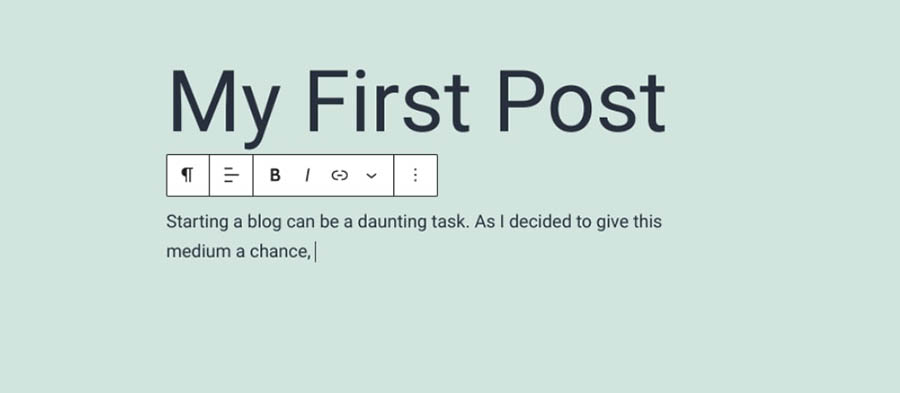
To begin with, you want to choose an attention-grabbing post title. The key to creating a snappy headline is to make it informative and specific. You’ll want to describe the article’s contents while still keeping it concise.
Next, you can start adding your body text by typing in the main paragraph block:
When you’re writing, you’ll find several options in the right-hand sidebar:
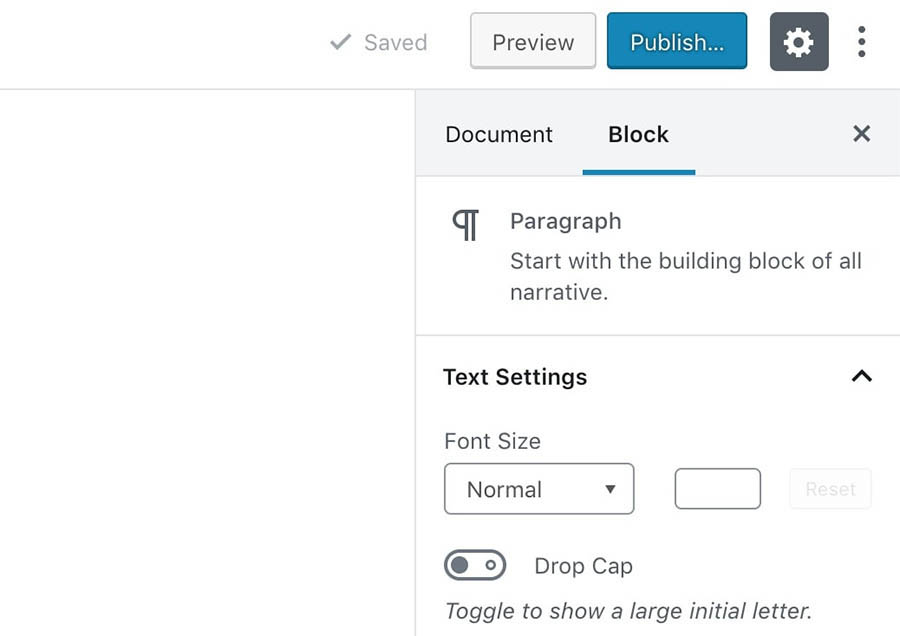
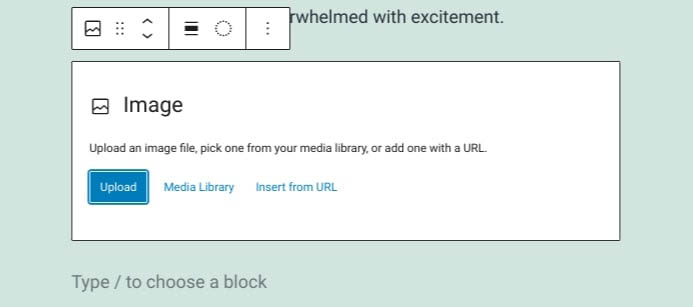
These settings will differ depending on the type of content you’re currently creating. You can add images and other media to your post by placing a dedicated block in the editor:
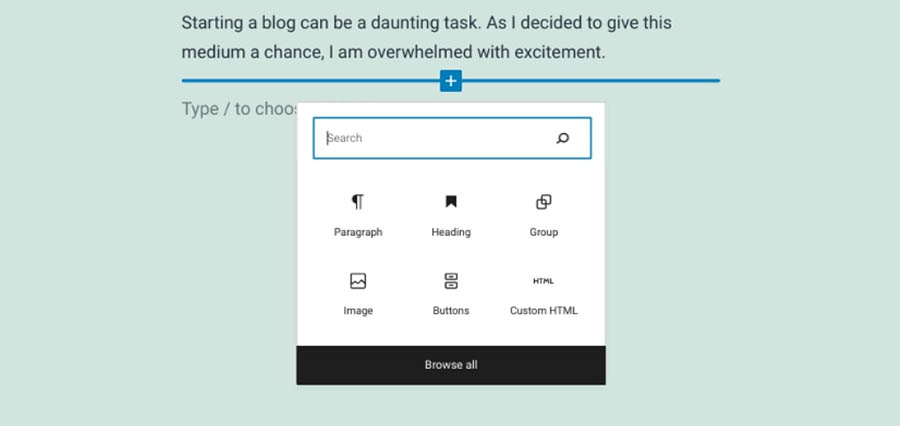
For example, selecting an Image block will let you upload a new image file or choose an existing one from your Media Library:
When you’ve completed your post, you can add the finishing touches. Consider assigning your post one or more Categories and Tags. These help you organize each post based on its type and topic.
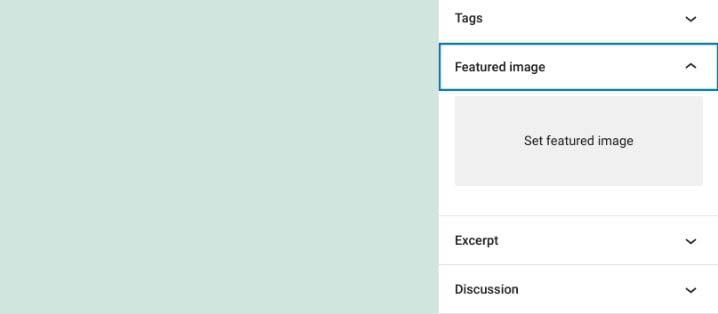
Finally, you can set a featured image for the post. The format of this image depends on your theme, but it’s usually featured on your blog’s homepage, and at the top of the post. Select your headline and use the Featured Image option in the sidebar to choose a file:
Congratulations! Your post is now ready, so go ahead and click on the Publish button in the top-right corner to make it live:
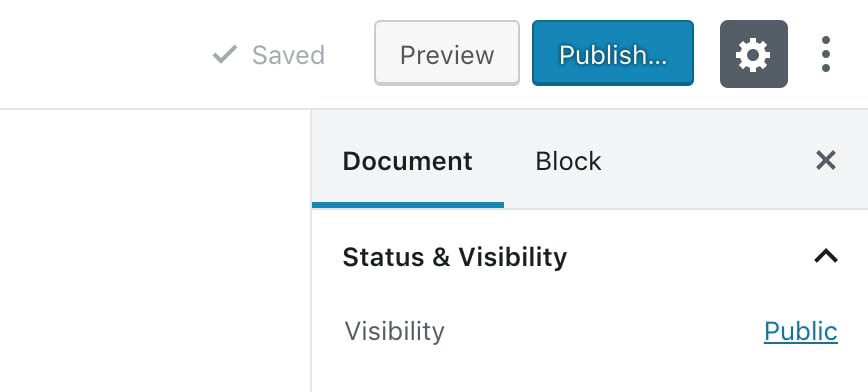
If you’d like to change how and when the post appears on your site, you can choose to delay its publication. You can also select the post visibility, which determines who can see it, or you can simply save it as a draft if you want to continue working on it later.
Advice for Writing Engaging Blog Posts
There are several ways to boost the success of your blog posts. As we mentioned earlier, it’s important to create engaging headlines and incorporate images, videos, and other media. These elements can help make your posts more interactive and interesting while breaking up long blocks of text.
You can use additional strategies to improve your posts’ readability — For example, consider incorporating bullet and number lists. People love lists! If you can structure your blog post as a list, it will make it much easier to digest. Plus, it’s another way to add visual interest to your post.
Choosing topics you’re passionate about is also a smart idea. Your readers will be able to tell when you’re genuinely interested in your niche, which can make them more engaged with your content.
Also, your readers will want to get to know you, so don’t be afraid to be personal in your blog posts. Share your thoughts and feelings on the topic, and let your personality shine through. This helps build trust and adds a human touch that will resonate with your audience.
Step 5: Optimize Your Posts for Search Engines
We’re not done yet — There are still a handful of measures you can take to help boost the success of your blog. Let’s explore ways you can optimize your posts for visitors and search engines.
Install an SEO Plugin
Earlier, we discussed the importance of keyword research when finding topic ideas. Keywords are phrases that people enter into search engines to find what they’re looking for. Optimizing your posts for specific keywords can increase the likelihood that they’ll appear when users search for them.
This is also known as Search Engine Optimization (SEO) and is vital for increasing traffic and visibility for your blog. SEO involves several tasks, including (but not limited to) increasing your site’s speed and getting backlinks from other sites.
When it comes to your blog, the most essential step is to optimize the posts themselves. There are several SEO tools that you can use to do this, but our recommendation is Yoast SEO:
Yoast SEO is a freemium plugin that adds a new section to your WordPress editor:
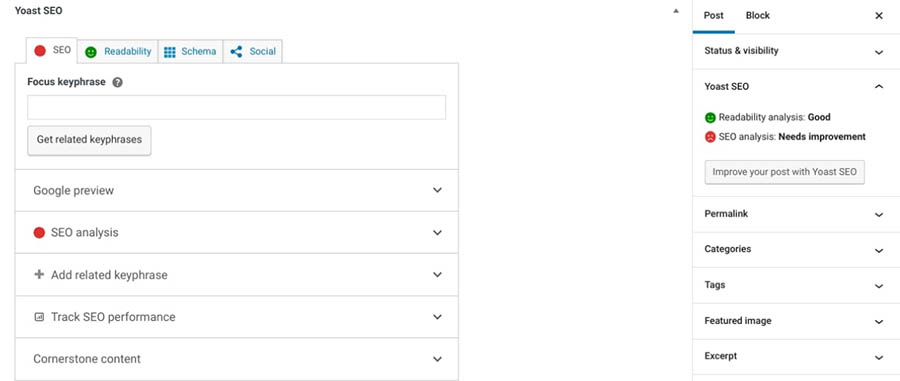
Alt text: Yoast SEO’s settings in the block editor.
Here, you can set a ‘keyphrase’ for your post, which is the keyword you want to optimize for. Once you’ve done that, Yoast will show you in real-time how well-optimized the post is, giving you specific advice on how to improve it:
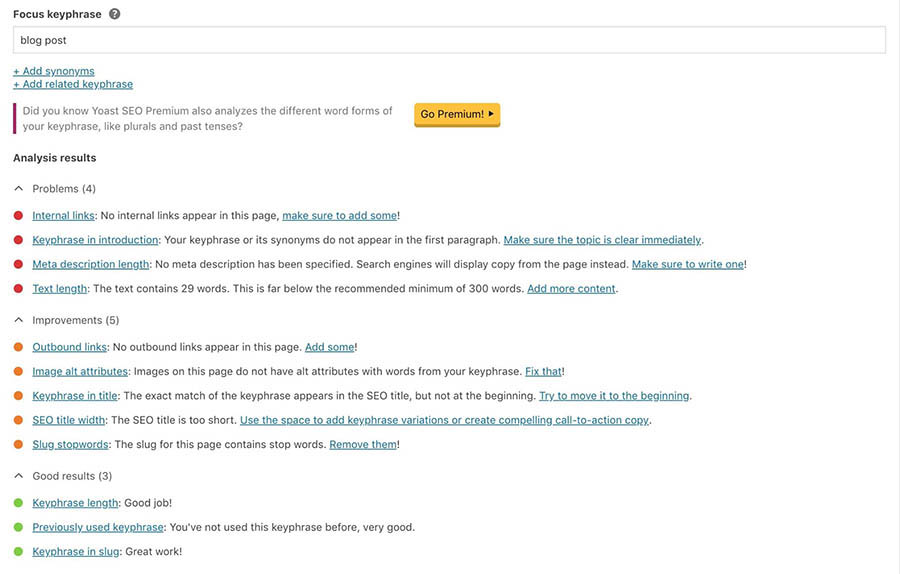
Yoast SEO also lets you add a meta description, which is a snippet of text that appears alongside the post in search results. By adding a description and following these guidelines, your posts are more likely to rank higher in relevant search results.
Set a Schedule (And Stick to It)
Google tends to favor sites that publish unique and relevant content on a consistent basis. It’s also important to publish posts to help boost readership.
To make sure that readers return to your blog, you need to publish content regularly. When you offer posts on a consistent schedule, your blog won’t go silent for long stretches of time, and your audience is more likely to return.
There’s no perfect publishing schedule. How often you publish will depend on your availability and your blog’s subject matter, but it’s a smart move to set a schedule for yourself and follow it.
The good news is that there are tools you can use to help you stick to your schedule. One such solution is the Editorial Calendar plugin:

This tool lets you create a calendar for your posts and even schedule drafts to be published at a specific time and date. You can easily track upcoming deadlines and follow your schedule without risk of slipping up.
Keep in mind that you can also change your posting schedule based on which days you get the most engagement. For instance, you can conduct research to determine the times that your target audience is most active, then structure your posting schedule accordingly.
When you first start out, it’s wise to keep a close eye on your analytics. The more frequently you publish new content, the easier it will be to track and monitor which posts perform the best, which will help you refine your content calendar and schedule.
Step 6: Create a Style Guide
Another helpful asset for any blogger is a style guide. As the name implies, this is a set of guidelines that determines how posts on your blog should be written and formatted. It helps you ensure that your content has a uniform tone and look, which in turn makes your blog appear more professional and authoritative:
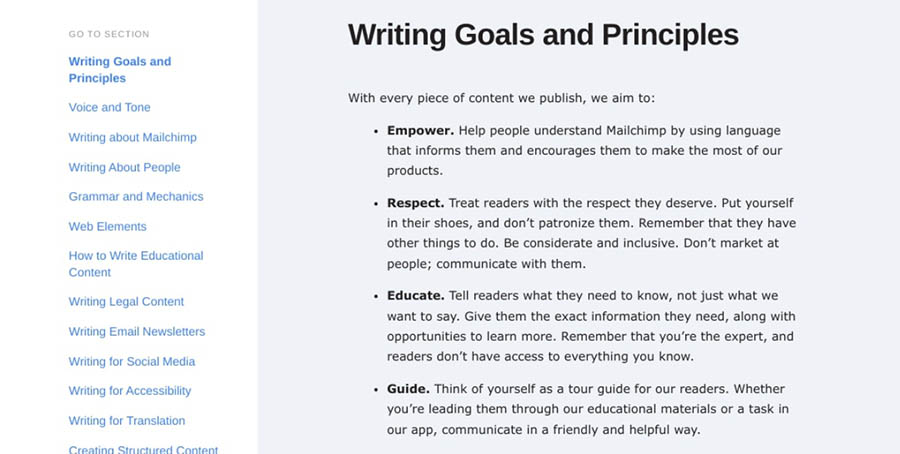
A style guide can help you stay consistent with branding and formatting across your blog posts. It can also be helpful should you ever decide to bring on additional writers — They can refer to your guide to ensure they follow the same practices.
Your style guide doesn’t need to be long or complicated, but there are a few crucial elements to consider, including:
- Voice and tone: Is your blog laid-back or serious? Is the writing casual or professional?
- Language and spelling: For example, do you use British or American English?
- Punctuation and formatting: Do you use en dashes or em dashes? When do you use single or double quotation marks?
You can answer a few key questions about your brand, then provide some examples of how you want your content to look. This isn’t just about grammar; your style guide should also answer other questions about your posts, including:
- What kinds of posts do you want to publish? Interviews, roundups, listicles, how-tos, etc.
- What format do you want your posts to be in? Long-form or short-form? Include images or not?
- How frequently do you want to publish new content (daily, weekly, biweekly, monthly, etc.)?
Once you’ve answered these questions, you can start creating your style guide. Here are a few examples of what you might include:
- Your blog’s mission statement
- An overview of your target audience
- A list of topics you want to write about
- The tone and style you want to use in your writing
- Guidelines for formatting your posts (e.g., headline style, image placement, etc.)
- Any specific branding elements you want to use, like a certain color scheme or font
You can use an online tool like Canva to help create your brand guide:
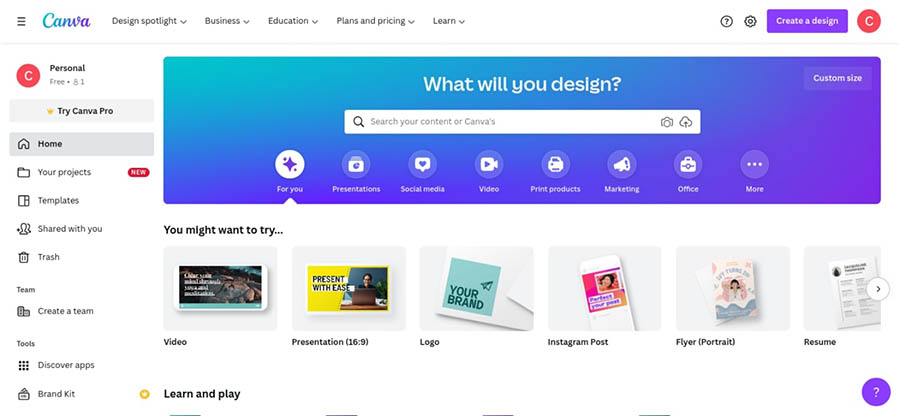
Canva is an online design tool that lets you choose from a variety of templates and customize the colors, fonts, and logo to match your brand. You can also use Canva to create other marketing materials like business cards and flyers.
Naturally, a style guide will evolve as your blog grows and changes. As such, it’s best to think of it as a constant work-in-progress rather than a static document.
Step 7: Market, Share, and Monetize Your Blog
Once you’ve published a few posts and settled into a groove of writing content, you might take some time to relax, but remember it’s going to be hard for people to read your posts if no one knows that your blog even exists.
This is why marketing your blog and posts is so critical. We’ve already discussed SEO, which is an important part of any online marketing strategy. Still, there are several other ways you can make sure you get more eyes on your new blog. Let’s take a look at some of them.
Market and Share Your Posts
You’ll want to start by sharing your posts on social media. This helps you gain more exposure while encouraging those in your network to share your content with their own followers.
It’s also smart to make your posts easy to share right from your website. One way to do this is by adding social media buttons to your posts, which you can do using the Jetpack plugin:
The plugin enables you to add social media sharing buttons to your posts and integrate with the most popular platforms. Jetpack also includes a feature that can automatically share your post on social media.
If there are relevant groups or forums that discuss topics related to your blog post, you can share your posts there as well. This can help you generate more traffic and engagement.
Another strategy is to share your blog posts through your email newsletter. Email marketing can be a great way to keep your audience updated on your latest posts while also driving more traffic to your site.
Consider partnering with other websites in your niche. If you have the opportunity to guest blog on another site, you can promote your blog posts there as well, which can help you reach a new audience.
Another option for marketing to consider is paid advertising. This can help you get your posts in front of more people and boost clicks and engagement. There are several options available, such as Google AdWords or Facebook Ads.
You’re likely wondering when you’ll see results. Well, there’s no easy answer to this question, since each blog is different! If you have a strong online presence, you might see lots of traffic right away.
In most cases, it will take time for your blog to gain momentum. If you perform SEO, share your posts, and regularly publish high-quality content, you should see a gradual increase in readers, showing that you’re on the right track. Keep a close eye on your site’s metrics with Google Analytics to see how well it’s performing.
Monetize Your Blog
Let’s consider the options you have when it comes to monetizing your blog. After all, you’ve put a lot of work (and tons of time) into creating your website, and you probably wouldn’t say no to making some money from your content. Let’s look at some effective ways to make money online.
You can start by selling products and services alongside your posts. For instance, you could write and sell an e-book or produce a course on a relevant topic.
Alternatively, selling premium or membership content can add value to your blog, and also help you generate more revenue from dedicated readers.
You could also get into affiliate marketing, which is a type of online marketing in where bloggers promote the products or services of another company in exchange for a commission on any sales made through affiliate links.
Affiliate marketing can help you generate income by promoting products or services that you already love. Additionally, it can provide a way for you to build relationships with other companies and connect with their audiences.
Or you can look into crowdfunding. When you ask your loyal readers to donate directly, it eliminates the need to market any external products.
There are a handful of donation plugins that you can use, such as GiveWP:
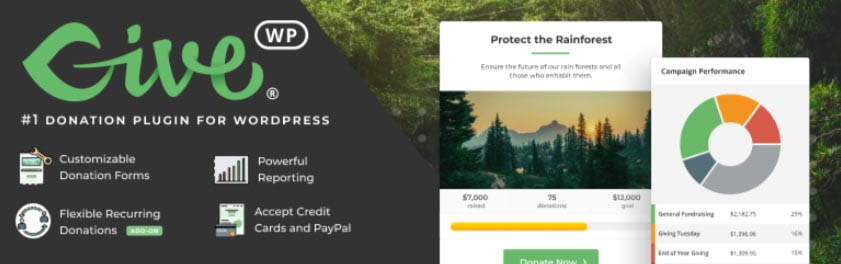
This free tool lets you easily add a donation button to your blog. You can use it to accept online payments and create customizable donation forms.
You can also place advertisements on your site through links and banners. A popular and easy solution for doing this is Google AdSense. This automatically generates ads suitable for your blog and audience, so you can focus entirely on creating great content.
20 Great Blogging Tips from the Experts
There are a lot of bloggers out there. In fact, influencers posting content (on a myriad of topics) are everywhere and seem to occupy every inch of internet real estate these days. These successful online entrepreneurs cover everything from travel tips to gardening how-tos. With glossy photos and witty copy, it seems they’ve got it figured out. They’re real bloggers, right?
So you might be wondering — is there even room for aspiring bloggers like you and me? Short answer? Yes!
Nearly 409 million people view more than 20 billion pages each month, according to WordPress. That’s a lot of opportunities.
Up to this point, we’ve shown you how to successfully plan for, start, and monetize a blog, providing practical tips along the way. However, when it comes to guidance, we know it’s also extremely useful to hear candid advice from your future peers — the people that inspire you.
That’s why we interviewed a handful of A-list bloggers to gather 20 expert tips to help take your blog content to the next level. Keep in mind, this advice is great for curious newbies as well as established bloggers looking to give their site a boost. Let’s dive in!
1. It’s About Time
Before you even think of pursuing a blog — with the intent to make money blogging or as a hobby — you have to be real with yourself. Know your capabilities as far as time and availability go.
“Successful blogging requires time, dedication, and some strategic planning,” says Brittany Watson Jepsen of powerhouse DIY craft blog, The House That Lars Built. “I wouldn’t plan on doing it if you don’t have sufficient time to devote to it.”
According to a survey of more than a thousand bloggers, a typical blog post takes nearly four hours to create. The same study reveals that many bloggers write outside of regular “work hours,” including on weekends and at night. Bloggers are always on; blogging is their lifestyle, and it requires quality time to produce success.
And writing blog posts is just the beginning; in addition to creating content, bloggers must optimize for search engines, make time for social media, market their content, network, and engage with readers.
Not being fully committed is what separates amateur bloggers from the pros.
“I think the main mistake I see in new bloggers is not being totally committed to what they’re doing,” says Jill Nystul, industry expert and creator of phenom blog One Good Thing by Jillee. “You can’t do anything halfway in the blogging industry and expect to be successful. I see a lot of people start blogs, post a few things over a couple of months, and then wonder why they aren’t getting any traffic. Commit to a topic and a posting schedule and show your readers that you are dedicated to providing great content consistently.”
2. Invest in Good Gear
When you decide to start a blog, use whatever tools you have to get the ball rolling. But when you are financially able, your blog will benefit from getting your hands on some professional equipment.
“The look of my blog definitely got a lot better when I invested in a real camera rather than using my phone, which I totally did in the early days of my blog,” Nystul says. “And you don’t have to spend a fortune. We still use a Canon Rebel, and it works great.”
A few other popular blogging tools: WordPress software, Adobe Suite, a web hosting package, email marketing software, and useful plugins. The more professional and put together your blog, the more trust you’ll earn from readers.
3. Your Mission (Should You Choose to Write It)
You’ve got a burning passion for blogging, yes? Well, before you get started, it’s wise to take a deep breath.
It’s crucial that you figure out a few things first, like what your blog is all about and what you want to do with it. Having a kick-butt blog is a good goal, but let’s dig deeper.
Ever heard of a mission statement? It’s commonly used by businesses to identify values, goals, and purpose — typically in a few easy-to-remember sentences, and it’s critical to the success of your blog.
“I wish I would have found my mission sooner,” Jepsen says. “But I started it in a time when bloggers weren’t making money, and I didn’t know that was a trajectory I could take, so I didn’t write it accordingly. If you’re looking to make money, you will write differently than someone who does it just for fun. Create a focused mission statement in order to know what your content should be and who your audience is.”
Let’s look at a few examples of mission statements.
- Amazon: “Our vision is to be earth’s most customer-centric company; to build a place where people can come to find and discover anything they might want to buy online.”
- IKEA: “Our vision is to create a better everyday life for the many people. Our business idea supports this vision by offering a wide range of well-designed, functional home furnishing products at prices so low that as many people as possible will be able to afford them.”
- Nike: “To bring inspiration and innovation to every athlete* in the world.”
Can you see how these concise statements guide how each business operates, shepherding big decisions to even the tiniest ones? It works the same way with your blog.
Take creating content, for example.
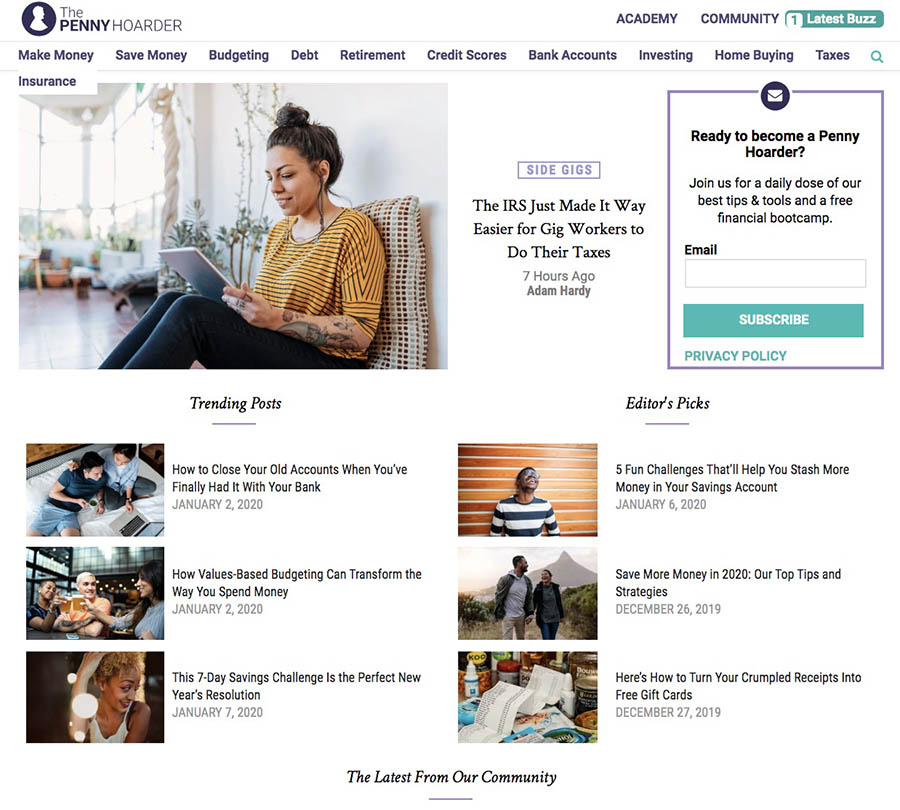
“Before we write a single post, we ask ourselves, ‘Does this help our readers make or save money?’” says Kathleen Garvin, editor and marketing strategist for finance blog The Penny Hoarder. “That’s key for us. We’re content creators, but we only want to publish a story if we think it’s truly helpful or interesting for our readers.”
Ideally, a well-crafted mission statement will inspire and steer — but not confine — your choices and provide a roadmap for content, structure, and voice. A few minutes of work for a valuable return.
Great! Now. Where to start? Begin by pondering the following questions:
- Why did you start blogging?
- Who is your target audience or blogging niche?
- What questions do you want to answer?
- What are you passionate about?
- In what way is your voice unique?
Next, try to organize these answers into a few short statements to summarize your goals. Try the Twitter approach — spelling out your purpose and goals in 280 characters or less.
- Keep it short and sweet, grammar-and-spell-checked, specific but jargon-free, realistic, and focused.
- Put it where you can see it — preferably in BIG, bold letters.
- Refer to it often and adjust as needed.
4. Just Get Started
Achieving top-tier blogging status can seem like a long shot, but every successful blogger starts somewhere.
“Write as often as you possibly can,” says Erin Loechner, design and lifestyle blogger at Design for Mankind. “This does not mean publish as often as you possibly can. Get in the habit, work on your craft. Discover your voice. It takes great practice and great patience. Do it anyway. Sit down in your chair and type it out. Edit later. Publish later. For now, just write.”
Begin with exercises to simply get you writing every day. This will help you form the habit that will make blogging easier.
For content ideas, try a brainstorming worksheet to collect your thoughts (you can do this on a device too).
5. You Get What You Go After
If you’ve been around the block, you know that blogging involves two crucial Cs: content and consistency. These skills may be the most vital keys to success. We already discussed the importance of creating. Now, let’s talk about consistency.
It’s been proven that marketers who prioritize blogging efforts are 13x more likely to see positive ROI. That’s a big deal. Consistency is an essential part of those efforts.
“A common mistake early bloggers make is not posting on a consistent schedule,” Garvin says. “Yes, it can be tough, especially in the beginning when you might not have much of a readership, but it’s important for SEO and to build a community. Producing quality content and consistently has been essential to our growth. Like they say, if content is king, consistency is queen!”
Brittany Watson Jepsen found consistency to be the key to success when creating her blog.
“I think one of the best things you can do as a blogger is to keep your content constant and consistent,” Jepsen says. “Even when I started out nine years ago, I worked on my blog every single day. That consistency kept people coming back because they didn’t have to wonder if there was content. There was! The next best thing to focus on the main message I was trying to convey. It took me a while to figure out the main thing I wanted to focus on, but once I did, that’s when the traffic started to roll in. Once I focused on crafts and DIY making, I became known for that, and people started to see me as a trusted voice.”
If you want to be the authority, the go-to on a particular topic, your readership needs to trust that your blog will have the content they need. Your quality content, consistently posted, will draw a following. The two Cs really are inseparably connected.
“There are a lot of more detailed keys to blogging success like photography, SEO, social media tips and tricks, etc., but the number one thing I always tell bloggers is that content is king,” Nystul says. “That can mean different things depending on the topic of your blog, but readers will always respond to quality content. My team uses CoSchedule for our editorial calendar, and we love it. It helps keep us super organized and on the same page even when we all work remotely. A couple of other things we love are Slack for messaging and Wunderlist for making to-do lists.”
There are a plethora of useful tools available online for planning posts and establishing a schedule.
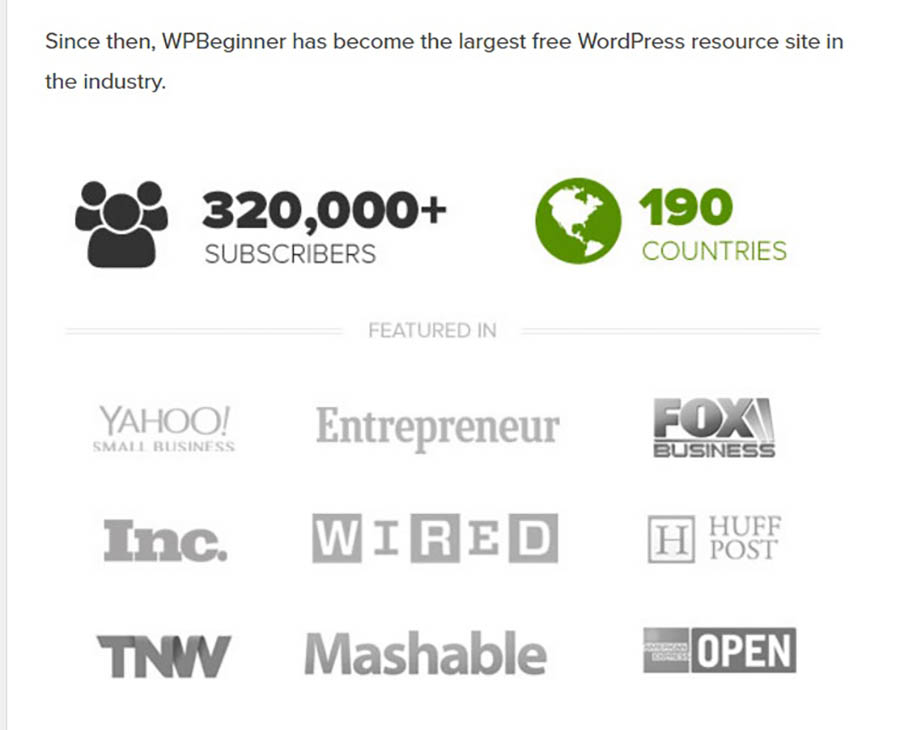
“An important key is to have a plan for what you are wanting to post rather than sitting down and writing every time,” says Syed Balkhi, founder of tech-help site WPBeginner. “Tools like Asana or the WordPress plugin Edit Flow are great for planning out blog posts in advance.”

As we discussed earlier in our tutorial, if you want to nail down a consistent blogging schedule, try an online calendar or a variety of template worksheets available.
6. Be Your Own Reader
When you want to have a successful blog, you really should put yourself in a new pair of shoes — the shoes of your reader, that is. While you are blogging to share a passion, you’ve got to stay focused on your blog visitors and how your content can appeal to their needs and answer their questions.
The team at The Penny Hoarder made their content more functional for readers by breaking down complex and jargon-heavy financial information into applicable, readable packages.
“When people think of personal finance, they usually expect the content to be dry or boring,” Garvin says. “So we do our best to make it accessible and fun. We write in a friendly, conversational manner, and try to showcase that tone across all media. With that said, we take our readers’ trust seriously.”
Sure, while you’re typing away at your keyboard, it’s easy to forget that someone is on the other side, but keeping your reader in mind will help you create attractive, useful content that draws a crowd.
7. Think (Twice) Before You Hit Publish
As tempting as it may be, resist the urge to hastily click “Submit” the instant you finish a blog post.
“Once the blog posts are planned out,” Balkhi of WP Beginner says, “a common mistake is not going back through to take a look at some of the finer points of the blog post to ensure it reads well for your visitors as well as search engines.”
Prep your post for publishing by working through a checklist (or a WP plugin) to help you optimize the content — a tool like Naytev works well — and make it appealing to search engines and readers.
Also, take time to make sure you’re citing sources correctly and that you haven’t overlooked glaring grammar mistakes (don’t make the off-putting their/they’re/there error). This extra time is a worthwhile investment.
8. Talk About Yourself
It may seem like a small silly thing, but talking about yourself on your blog is important — Don’t neglect your blog’s About Me page.
This page is crucial for helping readers to get to know you, your purpose, and what they can expect to find on your site.
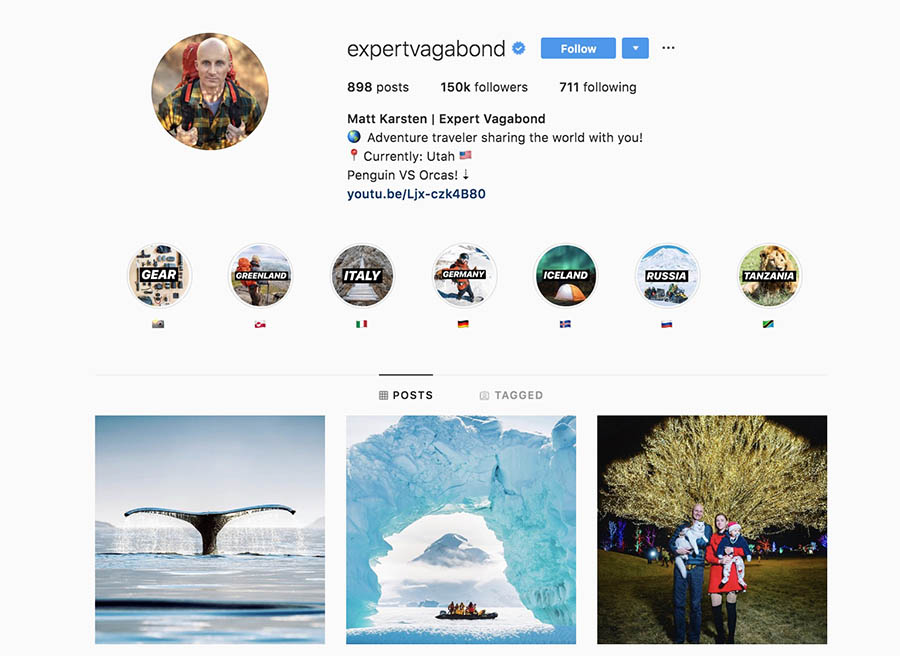
“This is one of the most highly trafficked pages on any blog because it tells people who you are, gives your background, and explains why someone should follow you,” writes Matthew Karsten, travel blogger at The Expert Vagabond. “Keep it fun and personable. Let your readers know who you are!”
Instead of listing random facts about yourself, have a purposeful statement that answers the following questions.
Who Is Your Audience?
Let’s look at Karsten’s blog, Expert Vagabond. On his About Me page, he writes:
“It’s a place for people like you who are looking for daily inspiration and motivation to live a life full of adventure.”

For whom? Check. Karsten clearly identifies the intended audience of his blog.
What Value Are You Offering to Readers?
Look at The Penny Hoarder’s manifesto:
“[The Penny Hoarder’s] purpose is to help people take control of their personal finances and make smart money decisions by sharing actionable articles and resources on how to earn, save, and manage money.”
Bam. Garvin and her team have quickly shared what they’re offering to those who visit the site.
What Credibility Does Your Blog Have?
You could share sites your blog has been featured on, like on WPBeginner’s About Me page, or you can share reader testimonials. Answer for your audience why your content can be trusted.
Why Are You Passionate About What You Do?
While it’s better not to be haphazard about the info you share, you should let readers connect with you by offering a snapshot of yourself and, specifically, how your blog grew out of your passion. After all, your readers’ connection to you is likely what will draw them back for more.
Take Jepsen’s About Me page, for example. A little of her bio:
“Brittany Watson Jepsen here. I grew up teething on the seaweed of Southern California though I preferred reading and creating in the great indoors. My mom’s favorite quote was ‘a creative mess is better than tidy idleness,’ and so my childhood was spent creating artwork, music, and yes, lots of messes.”
See? Well-written, purposeful statements connect Jepsen to her readers and them to the blog’s purpose.
What Is Your Call to Action?
Don’t let your readers browse your About Me page and click away with an “Oh, that’s nice.” Instead, encourage them to visit more of your blog pages by providing links to more content, whether that’s additional blog posts or some social media handles. After all, more clicks equal more traffic.
And if it wasn’t already obvious, make sure your About Me page is accessible and easy to navigate.
9. Give Your Blog a Facelift
Ever happened upon a website that seems like it never left the dial-up, over-animated era of the early internet? Well, we have. Shudder.

Even if your site isn’t outfitted with rainbow colors and crowded layouts, its design could be unintentionally frustrating readers. A smart design sets your reader up for a pleasant experience that will entice them to visit again. Never neglect a user-friendly design.
“A good site design is like settling in to write at a clean, beautiful-to-you desk,” Loechner says. “It is surprisingly important for you and for those who might be visiting such a desk. Pay attention to it; design needn’t be complicated.”
Be flexible and willing to alter your blog design based on what works best for your readers.
“Keep learning and always be willing to adapt,” Garvin says. “For instance, we recently got rid of display ads on our site because it negatively affected our user experience. It can be scary to remove a revenue source and pivot, but it’s necessary for continued growth. Don’t be afraid of change, but do find out what works best for you and your readers.”
To test your user experience, have a friend or outsider look at your blog and consider a few questions:
- Is it dated, confusing, or “broken” or attractive, functional, and engaging?
- Is there clutter?
- Does the site load quickly?
- Would a first-time visitor immediately know what it is about and how to navigate it?
Utilize topic-specific themes on WordPress for tried-and-true designs, consult experts, or outsource to a designer (we can help with that!) to ensure your design is aesthetically pleasing. Trust us — no one wants spinning graphics or animated mouse icons. No one.
10. Think Mobile
Here’s a pretty startling statistic: 80% of internet users own a smartphone.
That means, chances are good that readers are accessing your blog on a mobile device, likely while they’re commuting to work, sitting in a waiting room, or logging miles on the treadmill. So along with establishing a beautiful design, you’ve also got to optimize for mobile users.
“Blogs are widely read on the go, so consider a simple and minimal design that looks just as great on your phone as it does in the cubicle,” Loechner says.
Often, this means choosing a responsive template, but you can also utilize plugins to optimize a WordPress theme. You should also consider the following:
- If using a pop-up opt-in form or ad, are mobile users able to navigate around it?
- Are outbound links mobile-friendly?
- If using video, does the player work? Some devices don’t allow Flash.
- Is your comment platform mobile-friendly?
- Are slideshows functional?
- Can users read infographics?
And really, the only sure way you have to analyze your site for effectiveness across devices is to test it. One easy way to do this is using Google’s Mobile-Friendly Test:
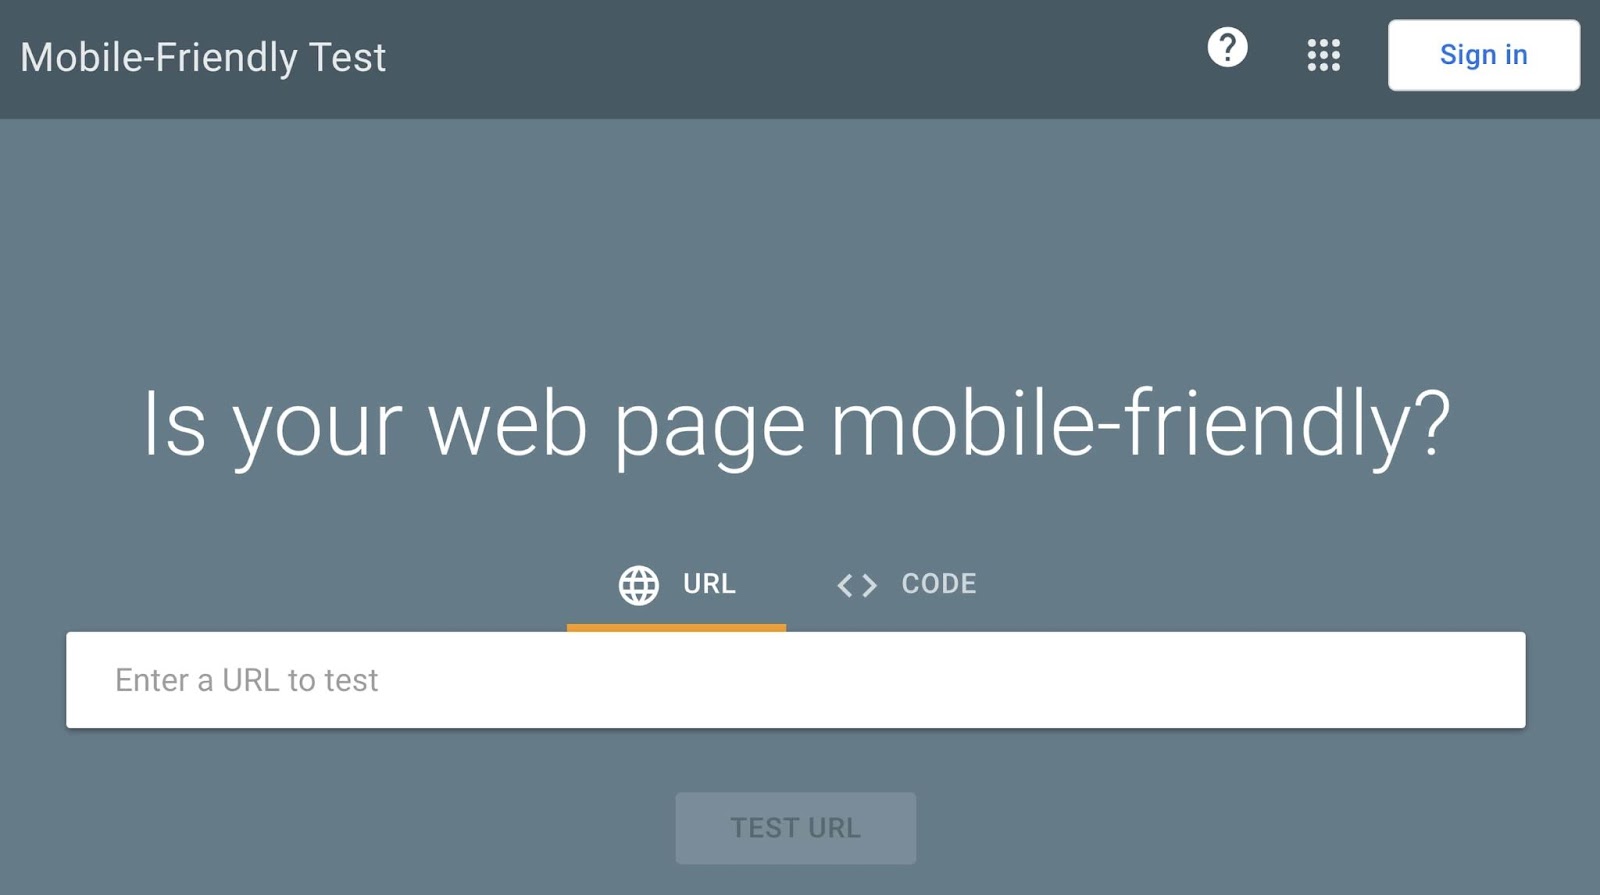
Simply enter in your website’s URL and click the button for results.
11. You’ve Got Mail
You’re probably used to sending most of your inbox to the trash bin, so you might not think email plays a significant role in blogging success. Think again.
“One mistake we’ve talked about is neglecting our email list,” says Garvin. “In the beginning of The Penny Hoarder, Kyle used to write a regular, personal email to readers; it was one of his best traffic sources, and he had an open rate of over 50%! However, as the site started taking off and he was pulled in different directions as CEO, we dropped the personalization in favor of a simpler format. We turned things around this year: We’ve started offering a ‘weekender’ roundup email, a daily newsletter, and several other targeted ones. So start an email list early, and keep working to improve it for your readers.”
Think about this: a survey reported that most of us spend more than five hours checking our email each day. FIVE! Why not capitalize on the habit? It’s easy to monitor your success with email marketing, and it can help you establish a lasting relationship with readers.
12. Accept the Daily Grind
You’ve heard that the biggest part of success comes from showing up, right? Ask anyone at the top of their field — Michael Jordan, Martha Stewart, or Yo-Yo Ma — and we’re pretty sure they’d be the first to say that their success amounts to hours, days, and years of putting in hard work. Well, that’s true in blogging too.
“Determination is an essential quality to have as a blogger,” Balkhi says. “There are no overnight successes with blogs, but when you write about what you are passionate about, they can be great successes.”
Remember Malcolm Gladwell’s 10,000 hours principle? Just like playing the piano, painting, or running sprints, honing your blogging skills requires lots of work.
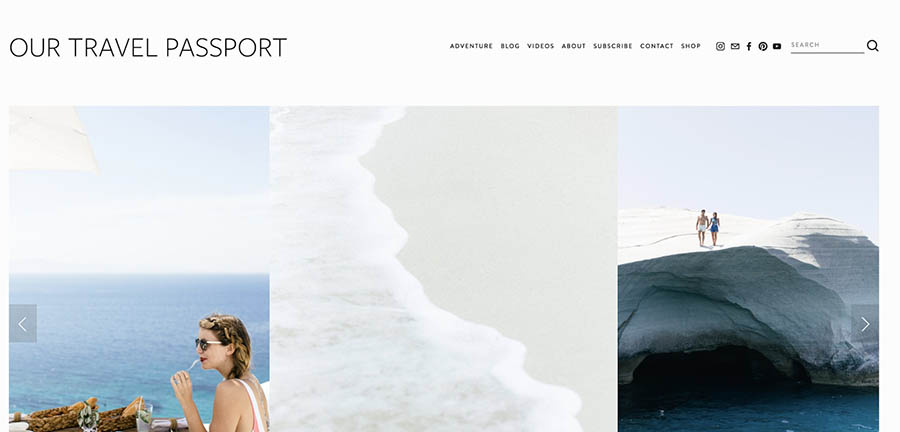
“Our keys to blogging success are practice, practice, practice,” say Ryan and Sam Looney of travel blog Our Travel Passport. “Seriously, it’s just about putting in the time to learn your skill and becoming an expert at what you do. We think it’s important to remember that the industry is always changing and content is king. Be original, and adaptable, and authentic. Don’t use bots. Focus on what makes you unique and tell your story in a way that people can relate to what you have to say.”
Try a goal chart to keep you motivated when the going gets rough (blogger’s block is real). And of course, keep your mission statement close by. Sometimes all it takes is to remember why you started in the first place.
“I think the main quality that is essential for bloggers is passion,” Nystul says. “Blogging is not an easy business, and when the going gets tough, passion is the thing that keeps you motivated and working hard.”
13. Have a Strategy
Say you’ve got great content and a snazzy site. How do you get people to see it? If you have social media platforms, then you have multiple channels to market your content.
“Our social media, video, and PR teams work to amplify our content, engage our readers, and raise our profile,” Garvin says. “All of these things contribute significantly when growing our community.”
The Penny Hoarder team is right. According to consumers, the three characteristics of an effective social media strategy are:
- The brand shares new content.
- The brand’s content is relevant.
- The brand engages with followers.
That said, social media is the most effective digital marketing tactic for customer retention after email; choosing the right social platforms is essential to get your content in front of readers.
If you intend to manage your social media marketing on your own, then utilize tools like HootSuite or NUVI to manage and monitor on one dashboard. And there’s no shame in admitting that assembling a social team or hiring an agency to help distribute the content online could be best for your blog. You can only bootstrap so much, right?
14. Engage With Others
In the blogging game, it’s not you against the world — In other words, it’s not you against every other food/travel/tech blog in your field. Running a successful blog should be a collaborative, community effort that’s personally validating (as opposed to competitive). Go, team!
Good engagement starts with your content. (Need a refresher? Return to tips No. 4 and 5.)
The Looneys recommend staying engaged by posting regularly. “Whether that means posting blog posts once a week or on Instagram every day, it’s important to keep your community involved in what’s going on and what you have to share.”
15. Go Easy with Analytics
Numbers say a lot. For instance, a game score tells us who’s on the winning side — and who’s not. The nutritional information in a meal tells us whether or not we can justify dessert.
Numbers are important. But they aren’t everything.
We know it’s tempting, but clicking the refresh button every 10 seconds on your website’s analytics page fuels an unhealthy obsession that won’t help your success as a blogger (or your blood pressure). Instead, focus on your content, prepare for fluctuations in the stats, and breathe.
“Forget stats,” Loechner says. “People are not numbers. Readers are not stats. They are humans in all of their lovely complexities. Do not fret yourself over bounce rates and conversion metrics. There are plenty of other things to fret over, after all.” Keep an eye on a few metrics for goal purposes, but don’t obsess — numbers change.
16. Understand Revenue Sources
The ideal for most people is that their blog becomes a valid source of income. This won’t happen right away, so don’t panic (see No. 11). But, you should understand the different ways you can make money online, so you can decide how — and if — you want to incorporate those methods into your blog.
Consider using affiliate programs to earn a kickback for the products you promote on your site or running display ads with Google AdSense. These revenue streams increase as traffic increases, so if you want to make money by blogging, your first priority should be getting eyes on your content.
“The more traffic your blog receives, the more money you can make with it,” Karsten says. “But it takes time to build an audience and grow traffic. Don’t focus on making money right away. Focus on building your audience.”
17. Combat Internet Trolls
It seems like anyone who dares to send their work out into the web is, sadly, bound to face the ceaseless negativity of cyberbullies.
You don’t have to grin and bear it, though. Be intentional when you choose how to combat the mean-spiritedness you might encounter (no boxing gloves required).
“For better or worse, I can be really emotionally affected by how people perceive or respond to my blog,” says Lindsay Ostrom, creator of viral food blog Pinch of Yum. “I wish I had that toughness factor, but what I have is more like Sensitivity with a capital S. So I set rules for myself when it comes to reading and processing my social media content and blog comments. Bottom line: be selective about what voices you let speak into your life.”
Whether you decide to refrain from reading blog comments before noon or you post a motivational message above your computer as a reminder of your potential, know that it’s your blog. Take control and set your own rules.
18. Don’t Be a Copycat
Imitation may be the highest form of flattery, but in the blogosphere, it’s just plain ol’ copying, and it’s not going to do anything for your online rep. Readers can see right through it. With the inundation of blogs and content creators, it can be H-A-R-D to produce new, fresh, and original content. But for a quality blog, a loyal following, and a distinguished brand, it’s more than essential to think outside the box.
“It’s important to remember that you need to create your own original content,” the Looneys say. “A lot of people go to the same places and pose in the exact same way as big travel bloggers. That’s not creative or original. That’s copying someone else’s work, which doesn’t tell anything about you or your story.”
Build a blog that allows people to get to know you — and what you’re passionate about, not just posting a CTRL + C reproduction of similar work produced in your field or industry. Be aware of the exhausted been-there-done-that content. Followers will reward the extra effort you take to put your own touch on what you produce.
19. Find a Cheerleader
With all the hard work, long days, and (probably) blood, sweat, and tears that go into creating a successful blog, you really need someone in your corner — an encouraging mentor, colleague, or friend, who will wave that foam finger when the going gets rough.
“Having a single person — literally just one, although more friends equal more party — to talk with when things are spinning into that downward spiral is so important to your ability to bounce back,” Ostrom says. “I guess that’s just true in life, right? And it’s especially true for me in blogging. Find someone who really understands and can relate in some tiny way or another why it’s frustrating when people scrape your content, or what it feels like to deal with that rude comment, or how challenging Facebook’s news feed changes have been lately. It is one thing to talk about this stuff, but it’s another thing to talk about it with someone who really understands blogging.”
Who is this person for you? Finding that supportive someone will help you to overcome any blogging mistakes and celebrate your blogging successes.
20. Lower Your Expectations
Yeah, we know how that sounds. But let us explain.
When getting started, “It’s important to not go into it with high expectations of becoming the next big blogger,” says pro blogger Julia Berolzheimer. “That pressure alone could ruin the whole experience for you. Starting a blog should be fun, and you should do it because you’re passionate about a topic(s)!”
Blog because you love it. Of course, we know you have the potential to make it to the big leagues of blogging, but that name-in-lights mentality shouldn’t be the end-all, be-all of your efforts. Early on, establish your “why” and remain rooted in it. Not only will it help sustain your motivation through the hard moments, but it will keep your passion ignited.
Once you’re sure of your “why,” GET GOING. “Ask yourself, why am I creating this?” Berolzheimer says. “If you can answer that question, then just start! I live by this quote: ‘Doubt kills more dreams than failure ever will.’”
Start a WordPress Blog Today
If you have an idea for a blog and you’ve been toying with starting one, now’s the time to do it. WordPress makes it easy to create a blog, at least from a technical standpoint. You can use the CMS to build pages and create blog posts without needing to write any code. Moreover, themes enable you to customize your blog to look exactly like you imagined it.
The real challenge in starting a blog lies in choosing the right niche and publishing content regularly. If you do that while keeping SEO fundamentals in mind and marketing your blog, you’ll find an audience, and with time, you’ll be able to monetize it. And, if you take some advice from veteran bloggers, your chances at success grow even further!
If you want to start a WordPress blog, we recommend you check out our shared WordPress hosting plans. They’re affordable options for first-time bloggers and if you want something more powerful, take a look at DreamPress, our managed WordPress hosting service.
Power Your Blog with DreamPress
DreamPress Plus and Pro users get access to Jetpack Professional (and 200+ premium themes) at no added cost!
